
You arrive at a new building with the right camera, a wide lens, and a clear brief. The glass looks impressive in person, but the first frame feels cramped. The verticals lean, windows are blown out, the lobby is dark, and the afternoon reflection has turned the facade into a patchwork of sky and traffic. A quick adjustment rarely fixes all of that.
Professional architectural photography starts before the shutter. You need to understand how the building sits in its surroundings, where the sun will fall, how people use the space, and what the client needs to publish. This architectural photography how-to guide follows that working process, from scouting and camera setup to perspective control, exposure, editing, and delivery.
Why Architectural Photography Demands a Different Approach
A client may approve a building in person, then reject the photographs because the images misrepresent its scale, materials, or use. Architecture reveals technical errors quickly. A leaning wall, uneven horizon, clipped window, or uncontrolled reflection can alter the viewer's reading of the entire structure.
The genre also has a documentary foundation. Museum records describe Joseph Nicéphore Niépce's first successful photograph in 1826 as a rooftop or building study, and connect photography with architecture from the 1820s and 1830s in the Tokyo Metropolitan Museum of Art's exhibition record. By the nineteenth century, improved exposure times made buildings practical subjects, and photography became a preferred way to record them.
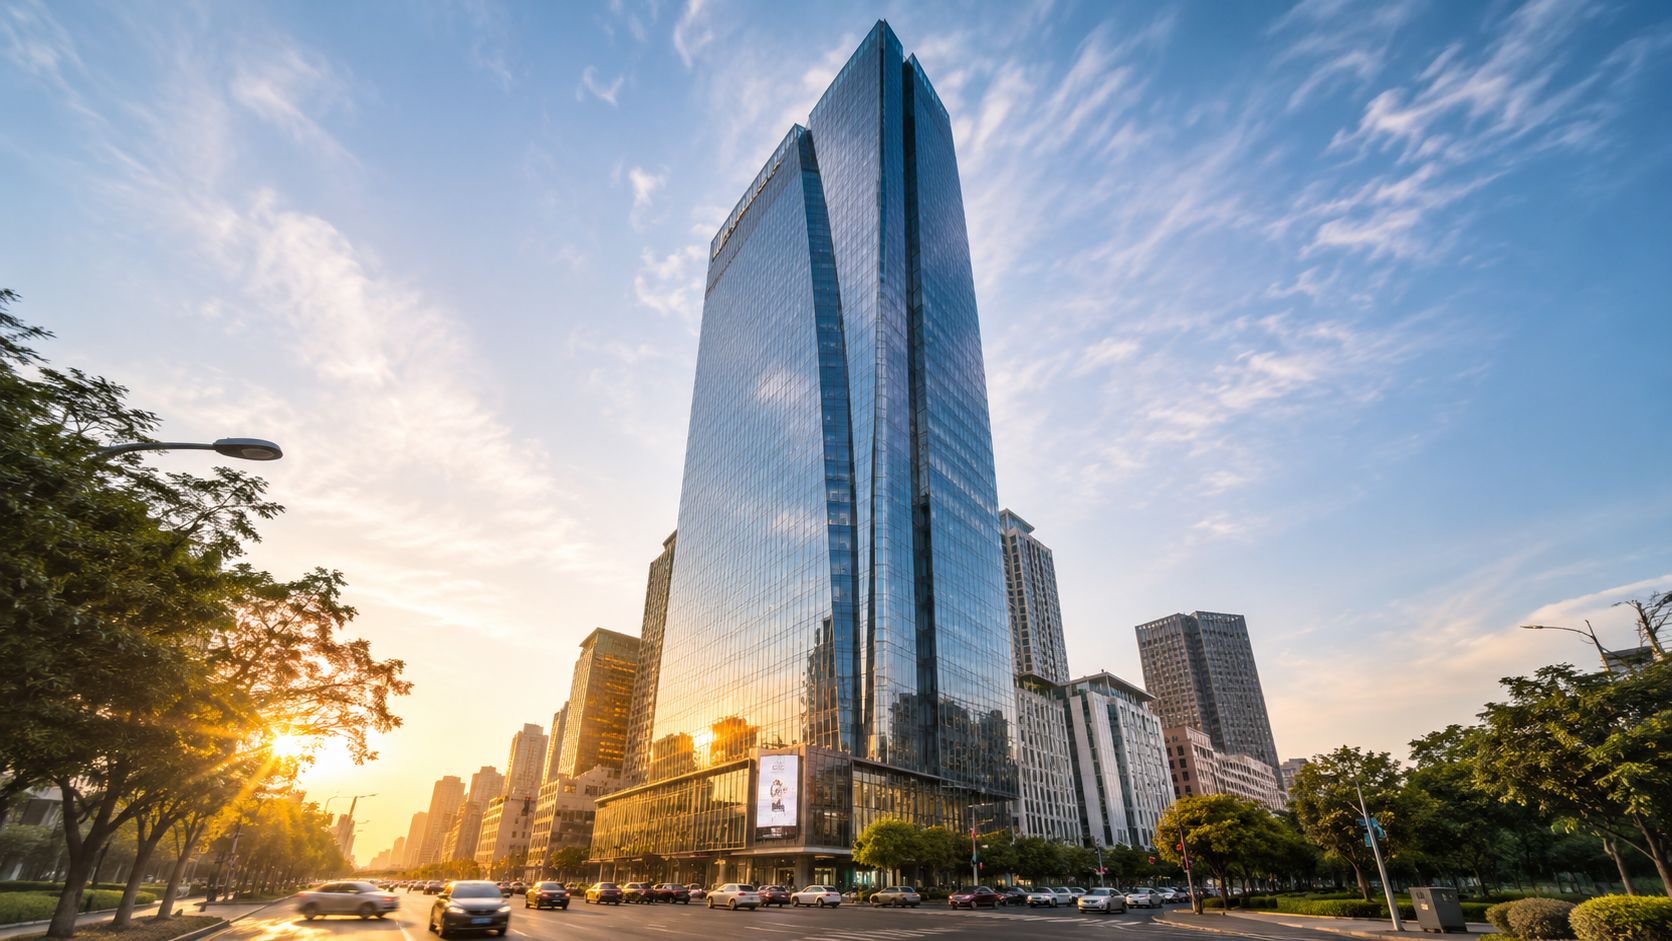
That history still defines the assignment. A strong architectural image must represent the building faithfully while giving the viewer a reason to keep looking. Those goals involve real trade-offs. A low viewpoint can give a tower authority, yet increase convergence. A fully corrected elevation can document the facade accurately, yet lose depth if the frame lacks foreground, shadow, or visual rhythm.
The building is the subject, not just the setting
Architectural photography differs from real estate photography, street photography, and natural environment work because the structure carries the story. Materials, circulation, proportion, daylight, and occupancy all contribute. The frame should show how a room functions and what it feels like to use, rather than presenting an attractive but disconnected interior.
The intended use determines the working method. An architect may require a publication opener and a record of design details. A developer may need marketing images that establish scale and context. A property manager may prioritize entrances, amenities, circulation, and spaces that help prospective occupants understand the building.
That brief affects every decision, from the time of day and viewpoint to whether people remain in the frame. Human activity can explain scale and purpose, but an uncontrolled crowd can obscure the design. Light that looks dramatic may also hide surface color or make window interiors unreadable.
Precision begins on site
A presentation on architectural photography emphasizes a level ground plane or horizon, an off-center primary aspect, leading lines, depth of field, and light used to describe form and texture in its discussion of documentary building photography. These choices address practical problems created by scale, geometry, reflections, and changing daylight. They also support a consistent workflow, from selecting a viewpoint to matching exterior and interior brightness.
Practical rule: Treat every frame as a decision about what the building needs the viewer to understand.
Professional results come from coordinating those decisions before delivery. Plan the sun path, match the light to the building's purpose, preserve enough technical flexibility for correction, and organize files so the final set serves the client's publication, marketing, or documentation needs.
Pre-Shoot Planning and Location Scouting
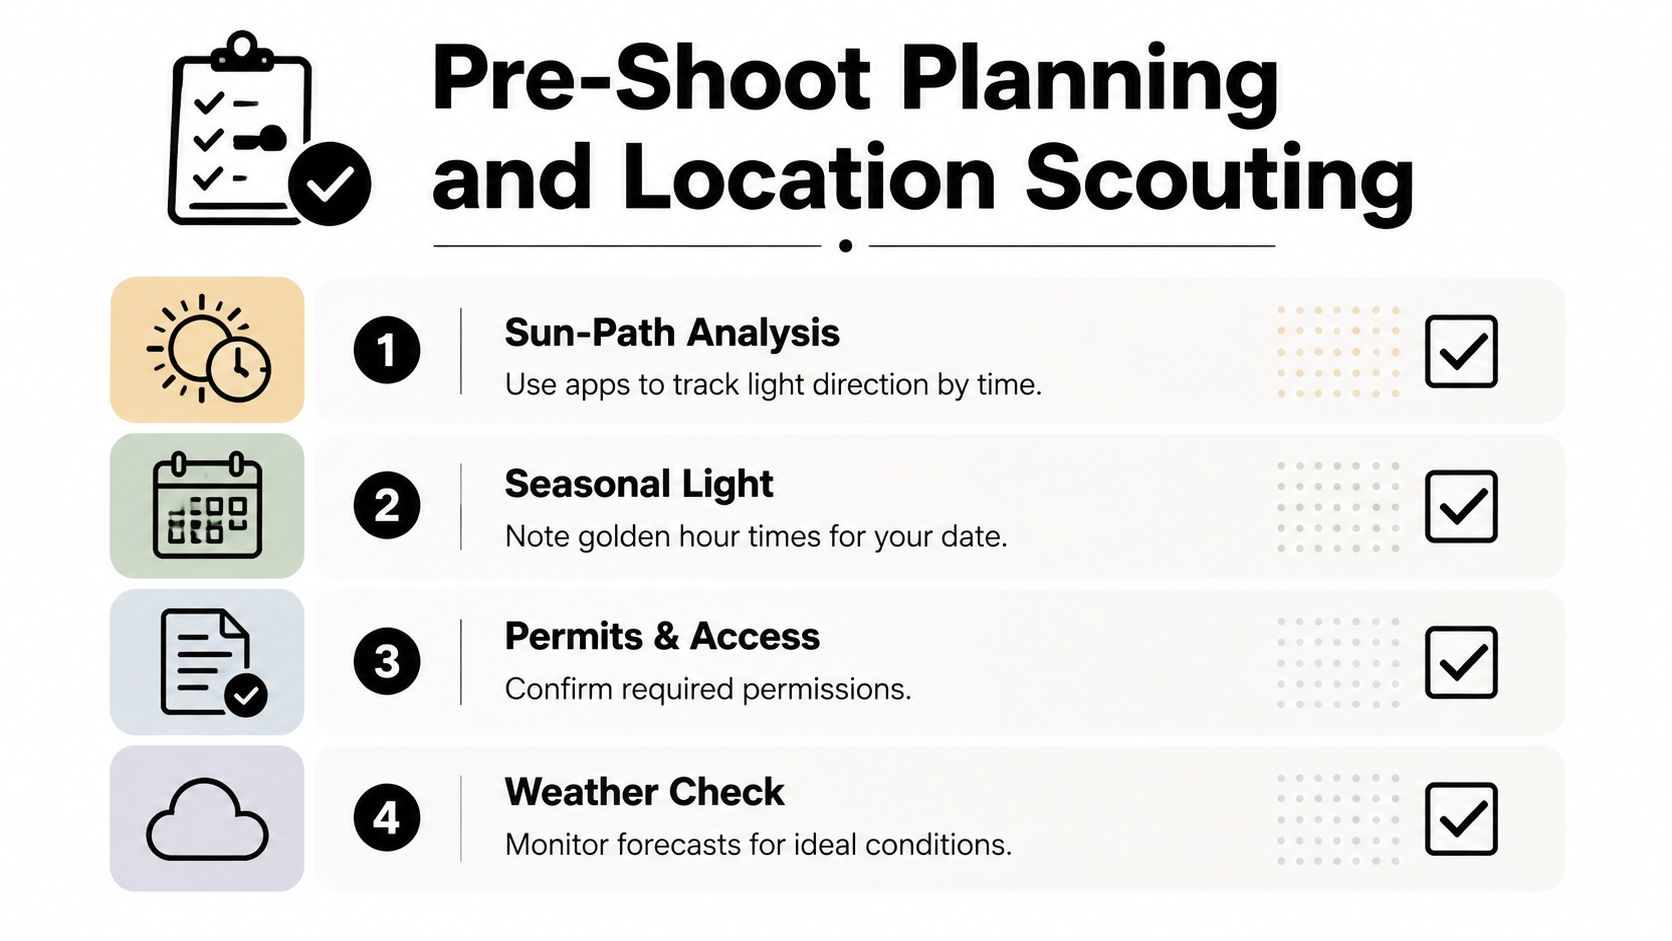
A successful shoot often gets decided during a short planning session, not during the most exciting moment on location. Start by asking what the images must accomplish. An architect may need design documentation and publication-ready hero frames. A developer may need broad marketing coverage. A property manager may prioritize usable interiors, amenities, entrances, and circulation.
Build the light plan first
Use a sun-path application or mapping tool to identify the direction of direct light at the times you're considering. Match that information to the building's elevations and the client's priorities. A west-facing glass facade may benefit from late-day illumination, while a north-facing courtyard could need a brighter overcast day to keep surfaces legible.
Seasonal changes matter as well. The sun's position, the length of shadows, foliage, and the relationship between interior brightness and exterior sky can all alter the visual result. Don't reduce the plan to “golden hour.” Decide whether the building needs hard side light for texture, soft illumination for material accuracy, blue hour for balanced windows, or overcast conditions for a quiet, even facade.
The natural-light planning guidance for architecture shoots specifically emphasizes sun-path data, floorplan matching, seasonal changes, weather buffers, reflections, permits, and low-light strategies. That makes the workflow operational rather than aspirational.
Scout for the problems you can't see online
A location scout should identify more than a good viewpoint. Walk the perimeter and interiors while checking:
- Obstructions: Note trees, parked vehicles, security barriers, neighboring construction, and temporary signage.
- Reflections: Look for glass angles that mirror bright sky, nearby buildings, or moving traffic.
- Access: Confirm keys, elevators, roof access, loading areas, restricted rooms, and the person who can open them.
- Foreground: Find paving, landscaping, stairs, furniture, or people that can create depth without competing with the building.
- Movement: Record when staff, visitors, vehicles, or deliveries will affect a frame.
A short scouting visit can also reveal whether the camera needs to be placed across a road, inside a neighboring property, or at a height that requires permission. This location-scouting resource is useful when you're turning visual observations into a practical site plan.
Organize the shot list by lighting scenario
Don't make a list that only says “front,” “side,” and “interior.” Group frames by the conditions they need:
- Exterior in directional daylight.
- Exterior in softer ambient light.
- Interior with controlled window brightness.
- Interior with visible occupants and activity.
- Twilight or low-light hero view.
- Detail frames for materials, fixtures, and connections.
Leave room for weather changes and access delays. Then send the client a concise version of the plan so everyone understands which frames are essential, which are optional, and when the space must be cleared or populated.
Before the shoot, review this practical walkthrough for additional context on architectural coverage:
A good plan doesn't eliminate improvisation. It protects the time you need to respond when the light, people, or building gives you an opportunity you couldn't predict.
Essential Gear and Camera Setup for Architecture
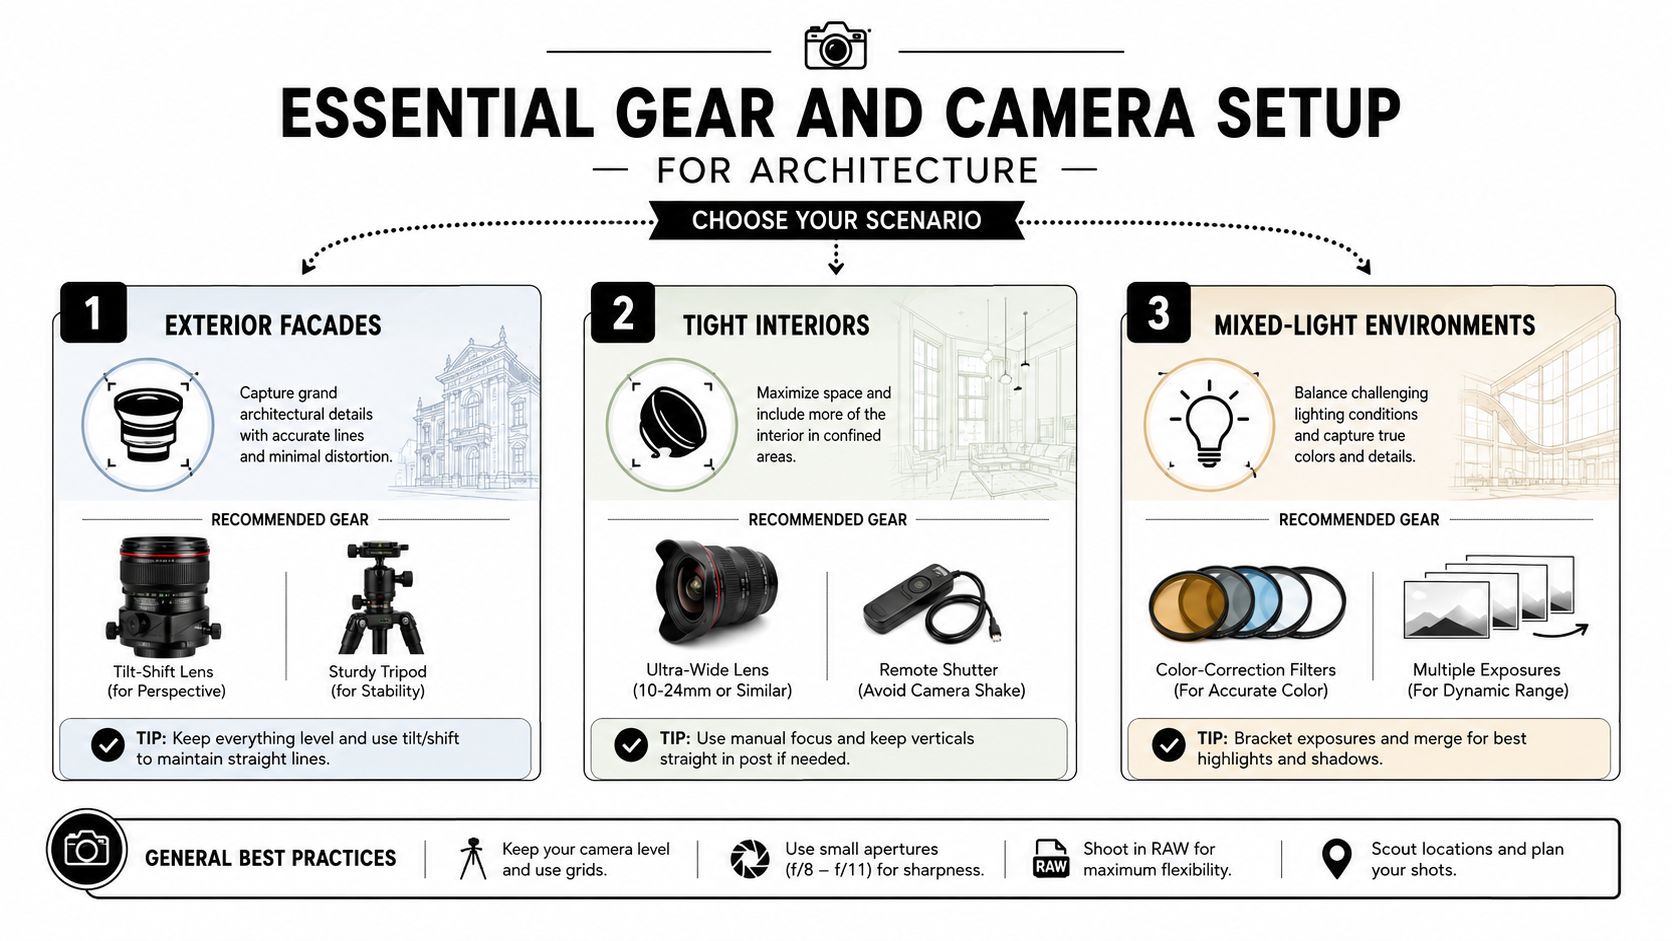
Gear selection should follow the building, not fashion. A camera with strong dynamic range helps in bright window scenes, but the lens, tripod, and working height often influence the final frame more than the body. Choose equipment according to the spatial problem in front of you.
For exteriors, a tilt-shift lens can correct vertical convergence optically while preserving a detailed file. For interiors, an ultra-wide lens may be necessary, but don't use the widest option automatically. Excessive width can make rooms feel distorted and reduce the apparent importance of the central design elements.
Match focal length to the room
A practical full-frame range for architectural work is 16–24mm, while common equivalents are 11–17mm on APS-C and 8–12mm on Micro Four Thirds, as outlined in this architectural photography lens guide. These ranges give you room to work in confined interiors and expansive exteriors, but focal length alone won't solve a poor viewpoint.
A moderate wide angle from a carefully chosen position often looks more credible than an ultra-wide frame taken from a corner. Move backward when you can. Raise or lower the camera only when that change supports the building's design rather than compensating for a rushed composition.
Lock down the camera
A sturdy tripod gives you repeatable framing, longer exposures, and clean alignment across bracketed frames. Add a remote release or use a timed shutter option to prevent movement. A bubble level can help, but rely on the live-view grid and the actual building lines as well.
A reliable baseline is:
- ISO 100–400: Keep sensitivity low when the camera is stable.
- Around f/11–f/16: Stop down when you need broad depth of field and crisp detail.
- Manual exposure: Prevent the meter from changing as bright windows or pale walls enter the frame.
- Manual white balance: Keep color consistent across a set, especially when mixing daylight and artificial sources.
- RAW capture: Preserve adjustment latitude for highlights, shadows, and color correction.
These settings aren't a substitute for judgment. Diffraction, moving people, wind, and available light may require a different aperture or shutter speed. The point is to begin from a controlled state rather than letting the camera make a series of unrelated decisions.
For larger assignments, tethering can help the photographer and client inspect alignment, reflections, and small distractions while the setup is still in place. Keep lens cloths, spare batteries, and a method for marking the tripod position in your working kit. Small interruptions become expensive when the light is changing.
Mastering Composition and Perspective Control
A technically straight facade can still feel flat. Start by deciding what the building needs to communicate, then place the camera so its massing, entrance, materials, and relationship to the site read clearly. Restrained foreground space can make a facade feel monumental. A visible path, street, or person can make the same building feel approachable and establish scale for the client's audience.
Keep the ground plane or horizon level for documentary frames, then vary the subject's position within the frame. Leading lines, depth of field, and available light can direct attention toward form and texture, but they work best when tied to the project brief rather than applied as a fixed grid. A formal building may call for symmetry and measured spacing. A lived-in public space may benefit from people, movement, and the routes visitors take.
Choose the viewpoint before correcting it
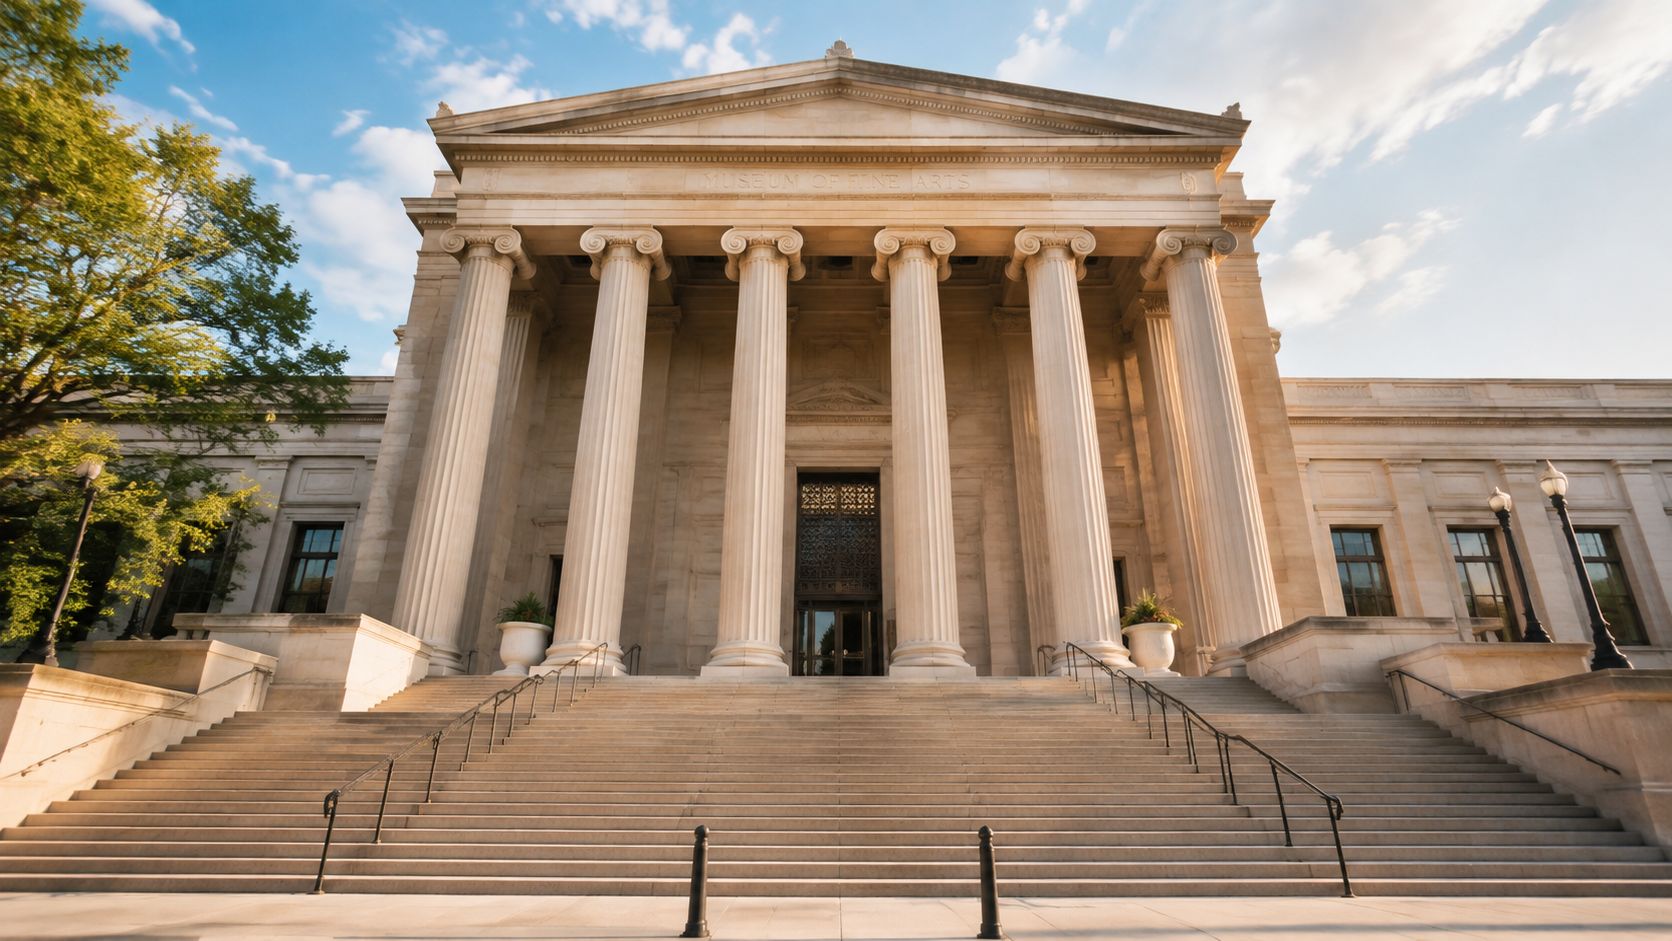
Tilting the camera upward makes vertical lines converge. A tilt-shift lens lets you shift upward while keeping the sensor parallel to the building. Software correction gives more flexibility with a standard wide lens, but it can reduce the usable frame and stretch the upper part of the structure. Optical correction usually preserves the original geometry more reliably.
Set the viewpoint before reaching for correction. Move one step back, lower the tripod, or cross the street if that lets you keep the sensor level. Excessive correction can crop rooflines and edges, or remove the natural tension that gives a structure its character.
- Lower camera: Adds presence and makes a structure feel taller, but foreground surfaces can dominate.
- Higher camera: Clarifies rooflines and site connections, but may reduce monumentality.
- Centered viewpoint: Supports formal documentation and symmetry.
- Off-axis viewpoint: Shows depth, connections, and changing planes.
- Closer position: Emphasizes material and scale, but puts more pressure on lens distortion.
Use lines and depth as narrative tools
Paving, stairs, ceiling joints, railings, corridors, and structural bays can lead the eye toward a doorway, central volume, or person. Check what those lines do at the edges of the frame. A foreground element should explain distance or circulation, not just occupy an empty corner.
Depth of field should match the story. A broad, sharp interior helps viewers understand the whole space. A tighter detail can isolate a material junction, fixture, or lighting feature. Build the shot list around a coherent sequence, combining an establishing view with supporting frames that show how the building is used.
Use this composition-planning resource to turn a design brief into deliberate camera positions, proportions, and supporting images. The final set should reflect the building's character, whether formal, intimate, industrial, or lived-in.
Exposure Techniques and Lighting Strategies
Light determines whether architecture looks dimensional or merely visible. Start with the available conditions, then add control only where the scene requires it. A sunlit exterior may need timing and reflection management, while an interior with bright windows may need a sequence of exposures rather than a stronger flash.
Golden hour can give a facade warm directional shape, but it isn't always the best choice. Hard light can reveal relief, louvers, and masonry while creating deep shadows. Overcast light can be better for subtle materials, pale surfaces, or a building whose form depends on even tonal separation. Blue hour can help balance a glowing interior with a darkening exterior, especially when the building's practical lights contribute to the design.
Bracket difficult interiors
High-contrast rooms are where exposure discipline matters most. Keep ISO and aperture fixed, then capture multiple frames separated by roughly two-thirds to one stop, including a window exposure, an interior exposure, and intermediate frames, following this bracketing workflow for architectural scenes. A tripod keeps those frames aligned, while manual white balance prevents the sequence from drifting in color.
Use the histogram and highlight warnings, but also inspect the windows and shadow areas at live view magnification. A frame that protects every highlight may leave the room lifeless. A frame that opens every shadow may create noisy or unnatural color. Bracketing gives you options, not permission to flatten the scene.
Add artificial light with restraint
Portable strobes, LED panels, or bounced light can shape a dark interior, but the goal is usually to support the existing illumination. Place light where it explains the room's function, not where it makes a surface bright. A hospitality space may need gentle lift in a seating area, while a polished commercial interior may need controlled highlights on a material or product.
Mixed color temperatures create another decision. Correct every source if the project requires neutral documentation, or preserve some warmth when the difference communicates atmosphere. Either way, record the lighting state so the same treatment can be applied across the set.
Exposure discipline: Fix the variables that should remain consistent, then change only the variable solving the problem.
Human-centered images require another layer of timing. Ask people to move naturally through the space, use longer shutter speeds when motion should remain visible, and make sure their presence clarifies scale or function. A person standing in an entrance can explain proportion. A person placed randomly in a quiet room can distract from the architecture.
Post-Processing Workflow for Architectural Images
Editing should complete the decisions made on location, not replace them. Start with the RAW files and establish a neutral, repeatable base. Apply lens profile corrections, inspect chromatic aberration, and confirm that the frame still represents the building's proportions before making a strong stylistic adjustment.
Perspective correction comes next. Align important verticals and horizontals, but watch the crop and the edges. If software correction removes too much of the composition or stretches the upper floors noticeably, return to the original frame and decide whether a less aggressive correction is more honest.
Blend for range, not spectacle
Bracketed exposures can preserve window detail and interior information when one frame can't hold both comfortably. Blend only the areas that need different exposure treatment. A subtle mask usually looks more convincing than a uniformly processed HDR effect that gives every surface the same brightness.
The post-production guidance for structural photography is relevant here because editing can address convergence and structural presentation, but it can't fully recover a composition that was poorly positioned. Good post-processing starts with a level camera, clean alignment, and exposures made for the final blend.
A practical editing order is:
- Select: Remove frames with movement, reflections, accidental intrusions, or focus problems.
- Correct: Apply lens profiles, white balance, exposure, and perspective adjustments.
- Blend: Combine bracketed frames with restrained masks where necessary.
- Clean: Remove temporary signs, small distractions, and construction elements only when the agreed usage allows it.
- Match: Apply a consistent color treatment across the full assignment.
- Inspect: Review edges, windows, repetitive patterns, and fine lines at full resolution.
Keep the set coherent
A client rarely needs one isolated hero frame. They need a visual system. Exterior images, interiors, details, and human-centered scenes should feel as if they belong to the same project, even when they were made under different conditions.
Avoid excessive clarity, artificial saturation, glowing windows, and shadow lifting that changes the atmosphere of the space. If the final image makes the building look cleaner, brighter, or more spacious than it can plausibly be, the edit has gone too far. Architectural photography earns trust through controlled interpretation.
Delivering Client-Ready Assets and Usage Considerations
Delivery is part of the assignment, not an administrative task after the creative work is finished. A client should be able to identify each file, understand what it's for, and use it without guessing which export is appropriate.
Create a clear folder structure for selects, web-ready files, print-ready files, and any agreed alternate crops. Use descriptive filenames that identify the project, view, and version. Keep the original RAW files and layered working files organized separately from the delivered assets.
Match files to real uses
A web image, printed brochure, social post, editorial spread, and large display may require different dimensions, sharpening, and color handling. Confirm the client's intended channels before export instead of creating arbitrary versions. Include a short delivery note that explains the file types, color profile, image orientation, and any restrictions.
Usage rights should be written into the agreement. Specify who can use the images, where they can appear, whether third parties can publish them, and how additional licensing or edits will be handled. Clear terms protect the photographer and help the client plan campaigns without uncertainty.
Deliver the building as a lived space
Recent architectural photography guidance points toward human-centric images, authentic visual storytelling, and integrated photo and video work rather than sterile perfection in its discussion of architectural trends for 2025. People can show scale, circulation, hospitality, and purpose, but commercial accuracy still matters. Don't add activity that misrepresents how the space operates.
Give the client a balanced set: clean documentation, atmospheric hero frames, material details, and selected images showing real use. Jimmy Clemmons Photographer offers commercial architectural imagery, location scouting, lighting design, on-set direction, and professional editing for built environments and brand content. That kind of end-to-end workflow keeps the visual narrative consistent from the first site visit through final delivery.
If your next project needs precise architectural documentation, human-centered storytelling, and a delivery set built around real publishing needs, visit Jimmy Clemmons Photographer to discuss the location, lighting plan, and final assets. Share the building, the brief, and the intended uses, and the studio can shape the shoot around the story the space needs to tell.