
You arrive at a striking mid-century modern home just as the light turns warm. The exterior is exceptional, but the usable camera position faces a busy road, the property rules prohibit tripods on the lawn, and every interior outlet appears to share a single circuit that may not support the lighting package. The location looked perfect online. On shoot day, it isn't workable.
That failure has little to do with composition. It comes from treating location scouting photography as a search for attractive views instead of a production-planning discipline. A commercial scout must establish whether the crew can enter, work, power equipment, control the frame, meet permit requirements, and capture the intended light within the available schedule. The photographs matter, but the notes behind them matter just as much.
Why Location Scouting Photography Is a Risk Management Tool
A beautiful location can fail in several ways before the first frame is made. The best architectural angle might be blocked by utility infrastructure, an interior may have no practical staging area, or the light that sells the concept may last only briefly. A client doesn't experience those discoveries as creative complications. They experience them as lost time, additional labor, or a missed image.
That's why experienced photographers use scouting to convert uncertainty into decisions. Each candidate site needs to answer practical questions before anyone commits production resources:
- Can the crew get in? Check entrances, loading paths, stairs, elevators, doorway widths, and restrictions on vehicle access.
- Can the crew work there? Verify space for tripods, modifiers, stands, talent, furniture movement, and client review.
- Can the site support the equipment? Locate outlets, identify shared circuits, and determine whether a generator or other power plan is necessary.
- Can the team legally and safely shoot? Confirm permits, releases, insurance requirements, hazards, emergency routes, and property rules.
- Can the intended frame exist at the intended time? Match sun direction, shadow behavior, weather exposure, and surrounding activity to the shot list.
Practical rule: A scout photograph should help someone make a production decision, not merely admire the property.
The economics explain why this discipline matters. A California Film Commission report on production economics notes that roughly 600 to 800 feature films are shot worldwide each year. It also describes major studio features averaging more than $64 million in budget, while independent films are often produced for under $10 million. Productions filming overnight on location may keep cast and crew in place for two to six weeks or longer, with shoots outside the Los Angeles region often spending more than $50,000 per day.
Architectural and commercial assignments operate at different scales, but the underlying principle is the same. A scouting image can influence whether a site supports the production footprint, whether travel and permitting make sense, and whether the requested visual treatment is achievable without forcing the crew into improvisation. The scout protects the image by protecting the plan.
What the photographs need to reveal
A useful scout includes wide views, reverse angles, details, access routes, holding areas, parking conditions, and problem zones. It should show what sits outside the hero composition. A polished façade may hide a narrow approach, a noisy mechanical system, or a background that becomes unacceptable once the camera is placed at the required height.
The strongest location scouting photography produces a comparable record across every candidate site. When the client reviews locations, they should be able to compare light, access, constraints, and alternatives rather than sort through an unstructured photo dump.
Digital Pre-Scout Research Before You Visit
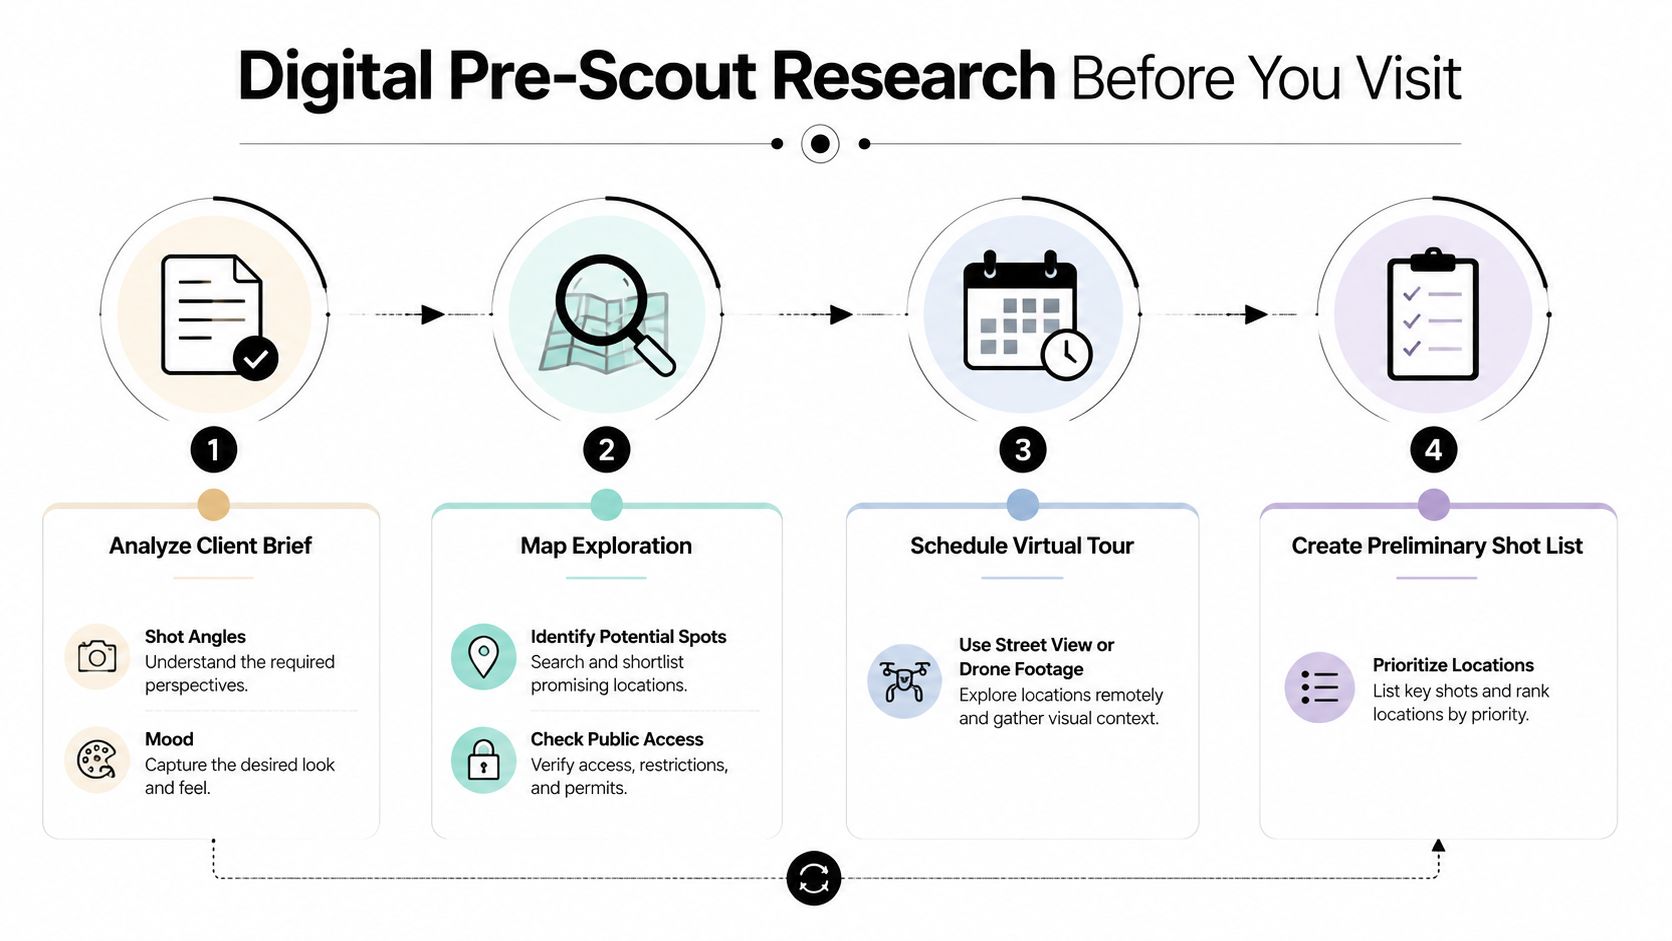
The physical visit starts with the client brief, not with the car ride. Extract the essentials first: required views, reference images, desired mood, interior or exterior priorities, talent needs, likely crew size, equipment expectations, and preferred time of day. A dramatic exterior request may depend on an unobstructed horizon, while an interior campaign may depend more on ceiling height, window orientation, and room-to-room movement.
Next, study the surrounding context through satellite imagery and street-level sources such as Google Earth and Mapillary. Look beyond the property line. Neighboring façades, overhead wires, parking restrictions, traffic flow, construction activity, signage, and public sightlines can all enter the frame or affect the crew's ability to operate.
Scout the address, not just the building. The surrounding block often determines whether the building can be photographed cleanly.
Build a preliminary site assessment
Sun-path tools such as PhotoPills and Sun Surveyor help test the proposed schedule before the visit. Use them to estimate the direction of sunlight on each façade, identify likely backlighting, and flag areas that may fall into deep shadow. Treat the prediction as a starting point, not a guarantee. Trees grow, nearby structures alter reflected light, and online imagery may not reflect current conditions.
A practical digital file should contain:
- Brief requirements, including the client's priority images and visual references.
- Map evidence, with candidate viewpoints, access routes, parking possibilities, and surrounding obstructions.
- Light assumptions, including the intended time window and any façades requiring physical verification.
- Permit questions, directed to the relevant municipal film office, property manager, owner, or building representative.
- A targeted visit list, so the on-site scout tests specific uncertainties rather than wandering through attractive spaces.
The virtual location scouting workflow can help organize this early reconnaissance when a physical visit isn't immediately practical.
Know where digital research breaks down
Street-view imagery can be old. Seasonal foliage may conceal an opening that appears clear in another season, or obscure a façade that looked usable in archived imagery. A map can suggest public access while a gate, security desk, private drive, or active tenant policy prevents the crew from using it.
Don't mark a location “approved” because it looks convincing on a screen. Mark it provisional, list the assumptions behind that judgment, and use the physical scout to test each one.
On-Site Evaluation of Light and Composition
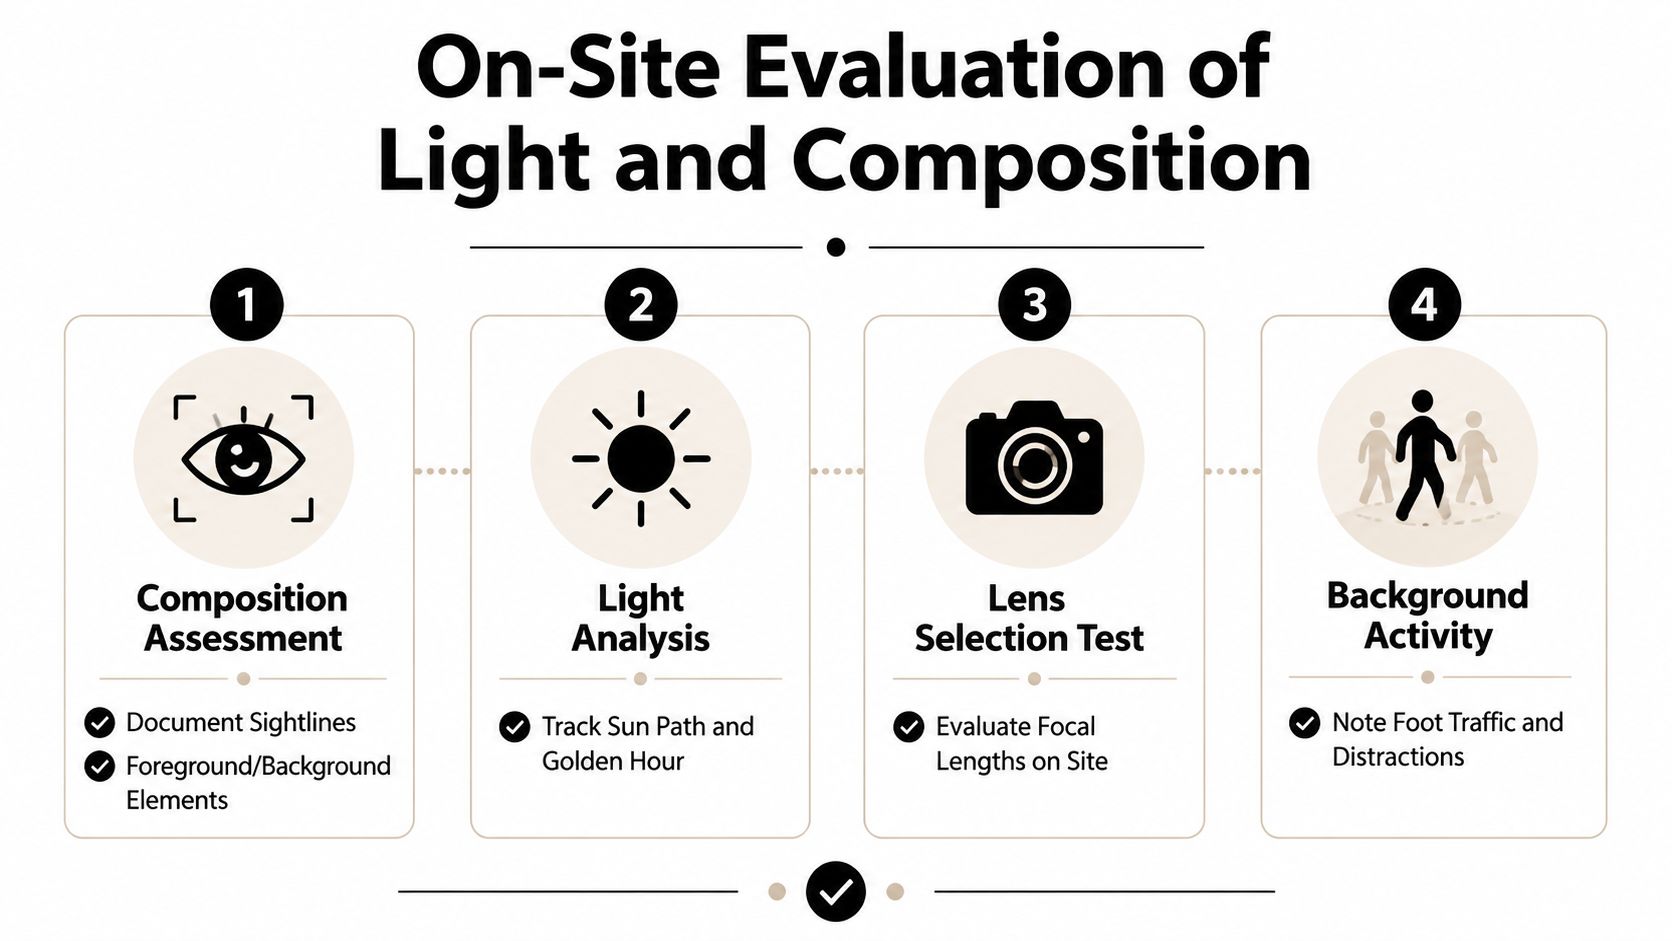
The on-site visit should produce evidence that a client and crew can act on. I treat each location as four overlapping evaluations: composition, light behavior, infrastructure, and access. A location earns a recommendation only when all four support the assignment.
Composition comes before aesthetics
Start with the requested image, then work outward. Photograph the primary sightline, reverse angle, adjacent views, foreground, background, and anything that cannot be moved. Utility poles, signs, parked vehicles, landscaping, railings, and neighboring structures need documentation even when they aren't visible in the first attractive frame.
Test likely focal lengths from the actual camera position. A wide view may include unwanted context, while a longer lens may require more distance than the property allows. Mark camera height, direction, and approximate subject position in the notes. If the composition depends on moving furniture, trimming vegetation, opening a gate, or removing signage, record that dependency as a condition rather than assuming it will happen.
Observe light as a timeline
One visit gives you a moment. The production needs a pattern. Compare the sun-path prediction with observed direction, shadow length, interior daylight quality, and the way light wraps around architectural surfaces. Note where nearby walls or pavement create useful bounce, and identify windows that become harsh, flat, or unusable as the sun moves.
A light meter or camera exposure reading can support the observation, but the written note is equally important. Record the time, direction, weather, and whether the scene is naturally balanced or likely to require negative fill, diffusion, strobes, or practical-light control. The guide to choosing the best light for a site shoot offers a useful reference for turning those observations into lighting decisions.
Infrastructure and movement affect the frame
Locate the areas where stands, grip, cases, talent, and client space will live. Check for HVAC noise, nearby activity, reflective surfaces, and tight corners that could restrict a lighting position. If video is involved, ambient sound deserves the same attention as visual clutter.
For every finding, make a reference image and annotate it with direction, time, location, and a concise implication. GPS-tagged images are useful when several buildings or exterior zones look similar. The purpose isn't to create a beautiful gallery. It's to create a record that lets the production team understand the site without repeating the visit.
A short visual demonstration can reinforce how the camera position, light direction, and surrounding conditions interact:
Infrastructure and Access Logistics Checklist
A location isn't production-ready until the crew can reach it, operate in it, and leave it safely. Logistics notes should be concrete enough that a producer can make decisions without calling you for clarification.
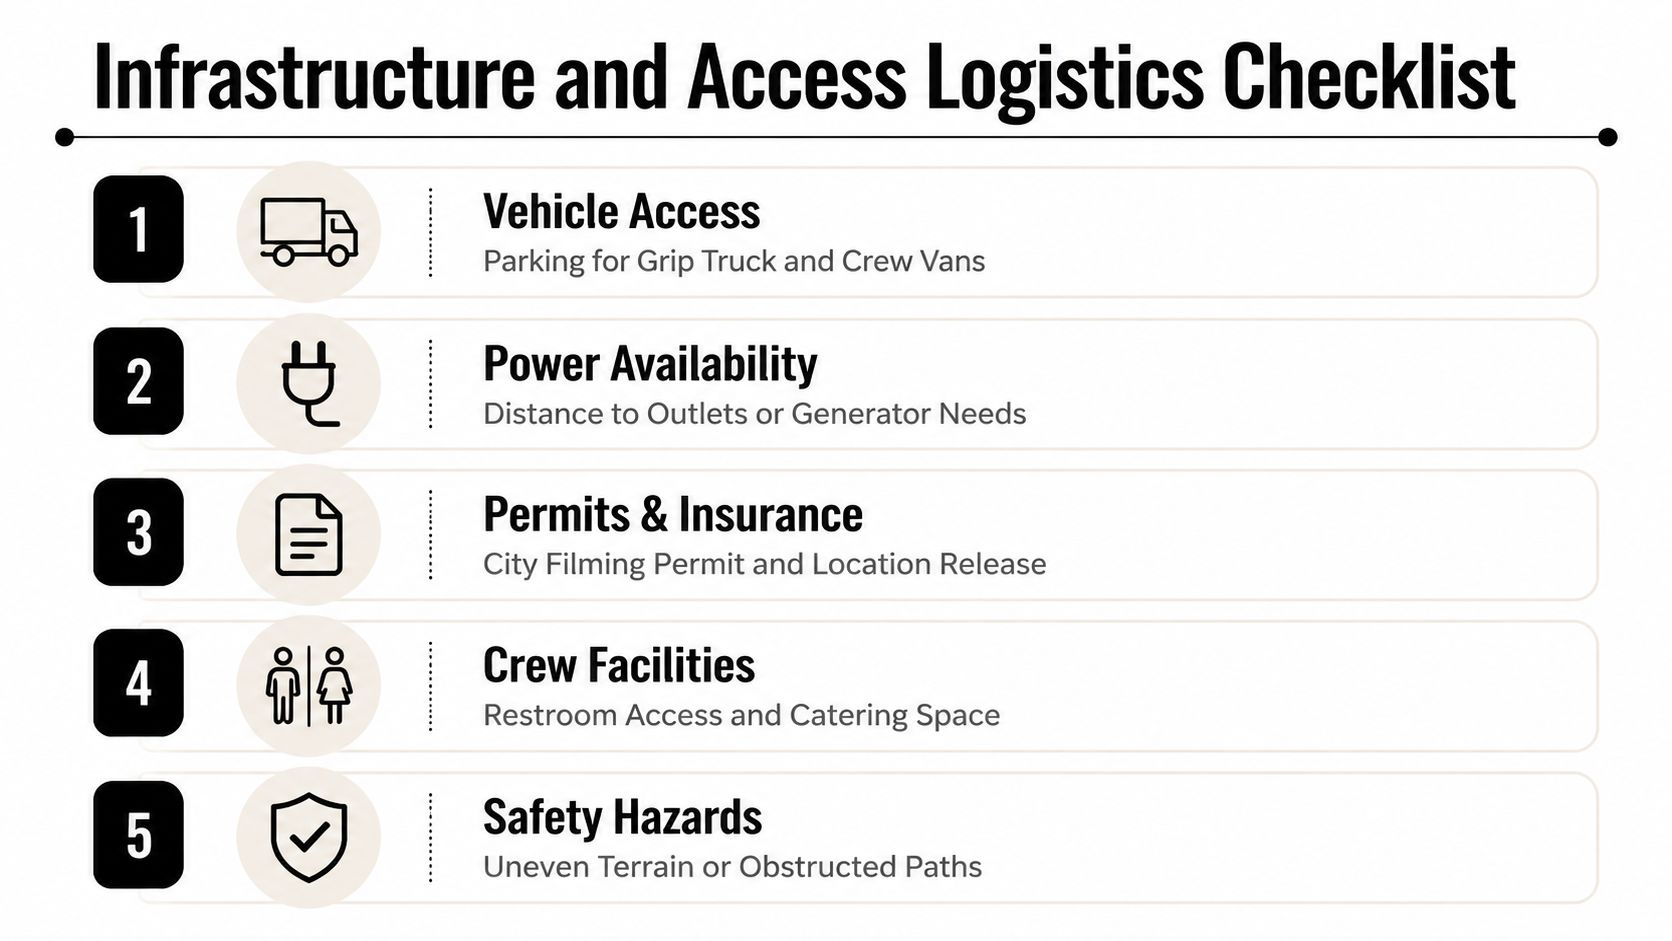
Begin with power. Photograph outlet locations, ask which circuits serve them, and identify anything already drawing significant load. Don't assume outlets in separate rooms are electrically independent. If the lighting plan exceeds what the site can support, document the practical alternatives, such as a generator, a different fixture package, or a revised shooting approach.
Verify the route from vehicle to camera
Walk the complete equipment path. Measure or confirm doorway widths, stair clearances, elevator dimensions, loading dock conditions, and the distance from parking to the working area. A building may permit access but still create an inefficient move through narrow corridors or a freight elevator with restrictive operating rules.
Record these points:
- Vehicle access: Note where crew vans or grip vehicles can park, whether loading is temporary, and how far cases must travel.
- Equipment movement: Check ramps, stairs, elevators, thresholds, floor protection requirements, and door hardware.
- Working footprint: Identify where stands, cases, carts, client monitors, and talent can wait without blocking circulation.
- Facilities: Confirm restroom access, catering space, changing areas, and reliable communication points.
- Noise conditions: Flag HVAC, generators, traffic, elevators, active tenants, and other sounds that could disrupt video or client review.
A location can have excellent access for people and terrible access for equipment. Test the second route, not just the first.
Close the legal and safety gaps
Permit requirements vary by municipality and property type. Contact the relevant film office, property manager, owner, or representative, and confirm whether the assignment needs a municipal permit, private property release, certificate of insurance, security support, or restrictions on commercial activity. Keep written confirmation with the scout report.
Safety documentation should include uneven terrain, wet surfaces, exposed edges, overhead obstructions, restricted areas, emergency exits, and any route that becomes hazardous when cases and cables are present. A useful report doesn't merely say “safe” or “unsafe.” It identifies the hazard, the affected setup, and the mitigation required.
The 2026 film production cost report states that average location scouting for a major film in 2023 was $50,000, and that 10% of films spent more than $200,000 on scouting. Its tiered analysis estimates scouting activity at $1,000 to $5,000 for indie projects, $5,000 to $25,000 for mid-range productions, and $25,000 to $150,000 or more for blockbuster projects. Those figures illustrate why even a modest commercial scout can carry serious planning value. The early check is less expensive than discovering an access or permit failure after the crew has arrived.
Translating Scout Data Into a Realistic Shot List
Scout data earns its value when it changes the schedule. A shot list should connect each image to its light window, camera position, equipment needs, access requirements, and fallback option. If those details aren't visible in the document, the list is probably still a creative wish list rather than a production plan.
Start with the hero frames. Assign each one to the light condition that supports it, then add the dependencies. An exterior may require a clear approach and controlled background, while an interior may require furniture movement, window treatment, supplemental lighting, or quiet conditions. Put those dependencies beside the frame, not in a separate file where they can be overlooked.
Use the site to determine sequence
Sequence shots by geography and setup, not just by client priority. Group images that share a camera position or lighting arrangement, then schedule the most time-sensitive views inside their viable light windows. This reduces unnecessary equipment moves and limits fatigue for the crew.
A practical shot-list entry might include:
- Frame identification: Exterior hero, interior overview, detail, or alternate angle.
- Camera position: Room, elevation, direction, and approximate height.
- Lens and composition: Tested focal-length range, required clearance, and exclusions.
- Light condition: Sun direction, shadow behavior, window quality, and supplemental-light needs.
- Production dependency: Furniture move, access approval, power requirement, traffic control, or client decision.
- Fallback: A nearby angle, a different room, a detail frame, or another approved location.
The professional photography shot-list guide can support the transition from visual intention to an actionable production document.
Make flexibility deliberate
Not every frame deserves the same protection. Reserve the strongest schedule commitments for images that depend on a narrow light condition or a specific access arrangement. Keep flexible images available for periods when weather changes, a tenant occupies a room, or a permit condition alters the plan.
Build buffers around complex setups, especially those involving large lighting packages or furniture changes. Then tell the client what can move if the day slips. A contingency isn't an apology for imperfect planning. It's a pre-approved decision that prevents the crew from debating alternatives while the usable light disappears.
Schedule the risk first. The shot that can't be recreated later belongs ahead of the shot that works under several conditions.
A realistic shot list also makes approvals easier. Clients can see why a frame has a particular time slot, why a requested angle may require extra logistics, and which alternate image protects the assignment if the first choice becomes unavailable.
Post-Scout Deliverables and Client Handoff
The scout isn't finished when the camera is packed. It's finished when the client, producer, and crew can use the information without guessing. Deliverables should make the location legible to people who weren't on the visit.
Organize photographs into labeled groups rather than one chronological folder. Separate wide establishing views, detail frames, reverse angles, light studies, access routes, infrastructure, and problem areas. Use filenames or captions that identify the location zone, direction, approximate time, and relevant constraint. Metadata can help, but a concise caption often communicates the production implication faster.
Assemble a decision-ready report
A useful site report contains the facts that affect approval and execution:
- Location summary: What the site supports and where it falls short.
- Access record: Arrival route, parking, loading, stairs, elevators, and equipment path.
- Power notes: Outlet positions, known limitations, and proposed alternatives.
- Permit status: Contacts, releases, insurance requirements, restrictions, and unresolved questions.
- Light findings: Viable windows, shadow concerns, interior daylight behavior, and weather sensitivity.
- Safety observations: Hazards, emergency access, floor protection, and restricted zones.
- Backup options: Alternate angles, rooms, nearby sites, or revised visual treatments.
Avoid burying red flags at the end. Put each issue beside the affected frame and state the consequence. “Background traffic may enter the exterior composition” is more useful than “busy surroundings.” “Tripod position requires owner approval because the lawn is restricted” gives the producer a clear action.
Give every setup a recommendation
Classify planned images as go, go with conditions, or no-go. The middle category is essential. It can include a frame that works only after furniture is removed, a shot that requires a permit confirmation, or an exterior that depends on weather and needs a secondary angle.
During the client review, show the recommended sequence and explain the trade-offs plainly. Confirm which constraints the client accepts, which budget adjustments are authorized, and which fallback images should be approved before production begins. A written decision prevents the crew from treating an unresolved preference as a guaranteed deliverable.
The best handoff creates shared expectations. The client understands what the location can deliver, the producer knows what must be arranged, and the photographer arrives with a plan that reflects the actual site rather than the online version of it.
Jimmy Clemmons Photographer provides architectural and commercial location scouting, lighting design, on-set direction, and polished editing for projects where the space and schedule both matter. Visit Jimmy Clemmons Photographer to discuss a site assessment or production plan built around your client's required images, access conditions, and available light.