
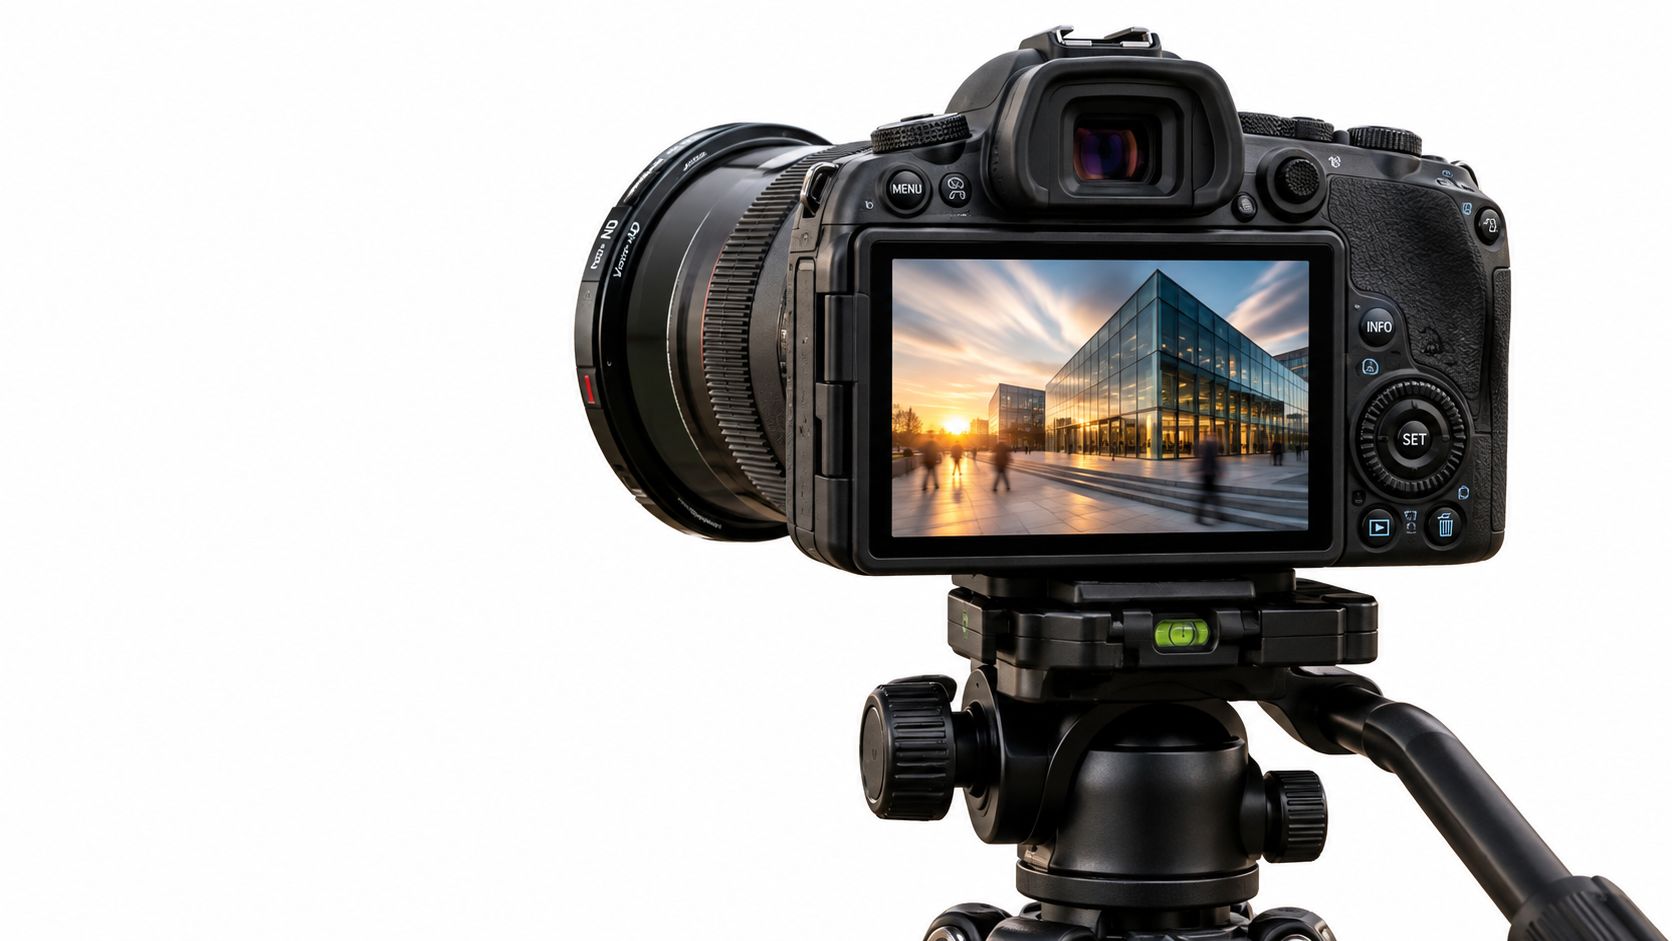
The sun is high over a finished building, the glass is catching every bright reflection, and the sidewalk refuses to stay empty. Pedestrians cross the entrance, traffic cuts through the foreground, and the exposure you need for a clean architectural frame would normally leave the scene frozen and crowded. On set, a neutral density filter stops being a waterfall accessory and becomes a composition tool.
Introduction to Neutral Density Filters in Architectural Photography
On an Atlanta exterior, the façade is sharp, but pedestrians and traffic compete with its geometry. A neutral density filter reduces the light entering the lens, giving you time to soften that movement while preserving the building's lines, materials, and color. Neutral density filters can enable slower shutter speeds or wider apertures in bright daylight, which makes them useful for architecture, interiors, and people in spaces, not only for flowing water.
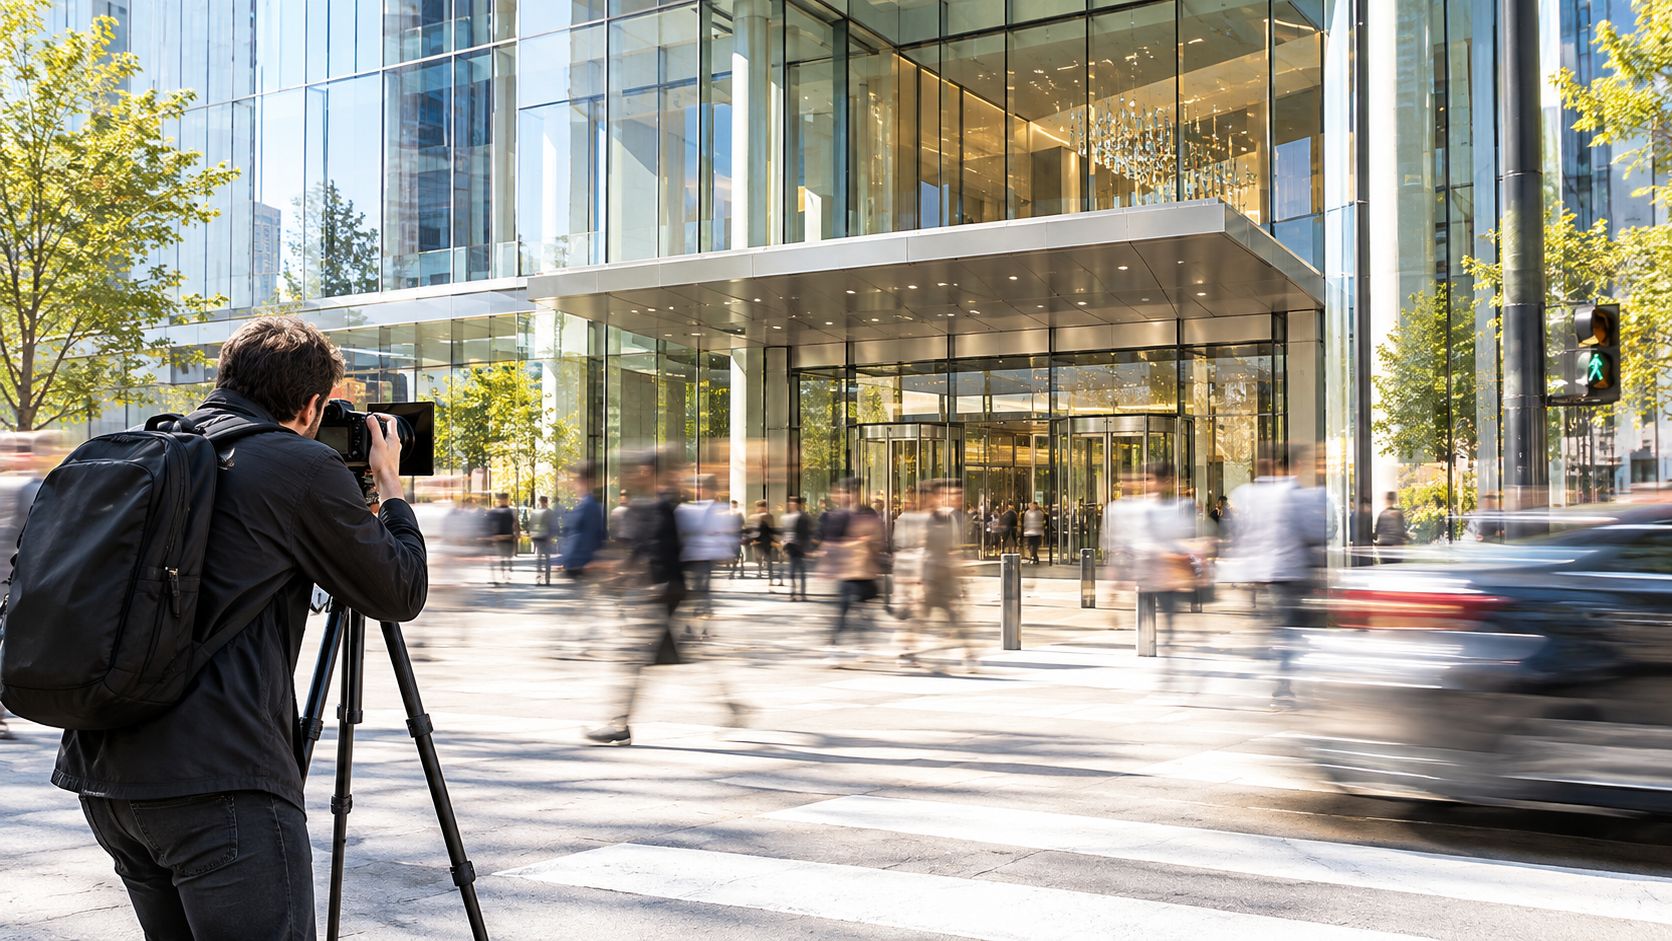
An ND filter works like a controlled dimmer in front of the lens. It cuts the amount of light reaching the sensor without intentionally changing the scene's color balance. That extra control can turn a crowded street into a quieter trace, allowing the architecture to carry the image while the city remains present around it.
The result depends on the exposure you choose. A sufficiently strong filter can extend the shutter speed until moving people and vehicles blur or disappear during the exposure. The filter does not remove activity from the location. It changes how the camera records that activity.
Why architectural photographers reach for ND
The most useful neutral density filter uses begin with a compositional question: what should stay still, and what can move? Buildings usually need stable geometry, clean verticals, and readable surface detail. People, cars, flags, and passing shadows may support that structure or distract from it. A longer exposure lets you make that choice deliberately.
An ND filter also helps when daylight is too bright for the aperture your composition requires. A wide aperture can separate a branded portrait from a building, soften the background behind an entrance detail, or give an exterior frame a more selective focus. In an interior, the same filter may help maintain a chosen aperture when strong daylight enters through windows. Because it reduces light across the entire frame, check whether the darker areas still hold enough detail.
A tool for design-forward images
Photographic filters have long been used to manage difficult light. Filtering developed from early color-separation work in 1861, became more practical for broader commercial photography in the mid-1880s, and graduated neutral density filters were used in the early twentieth century to darken bright skies. Graduated ND filters later became common for high-contrast scenes involving skies, reflective glass, and window glare.
For architectural photography, the principle is direct: reduce light to gain control over time, aperture, and visual emphasis. Used carefully, an ND filter supports clean, design-forward images of buildings, interiors, and people without vignetting or unwanted color casts.
How Neutral Density Filters Control Light Without Altering Color
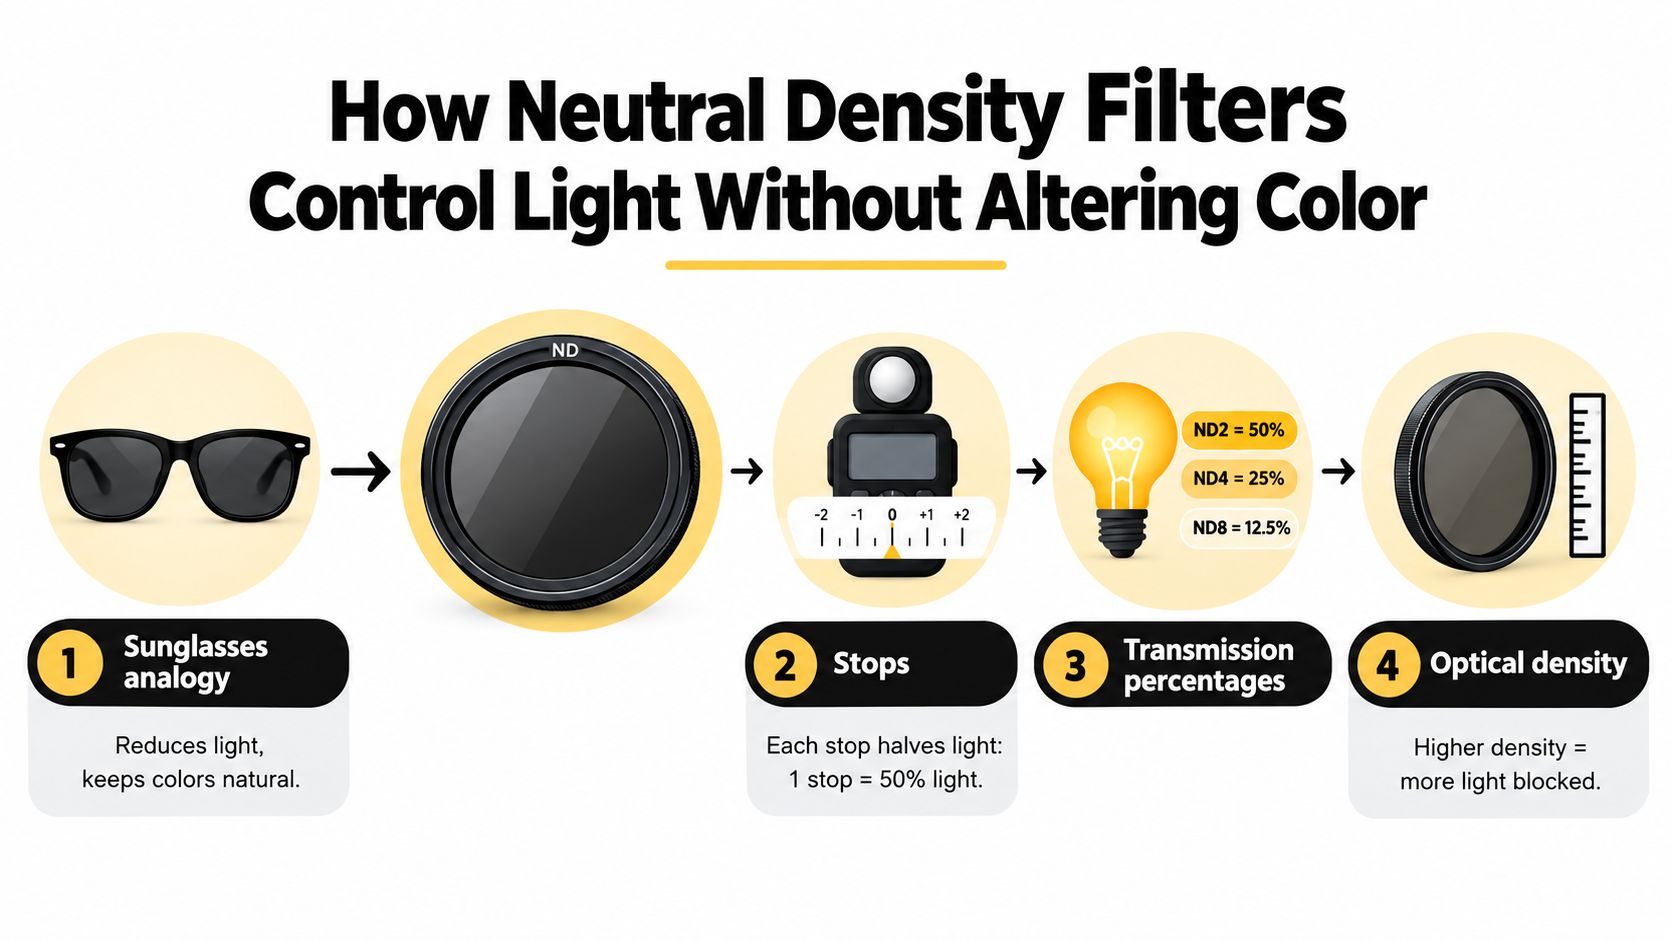
Think of an ND filter as sunglasses for the lens. Sunglasses make a bright day more comfortable without turning the world into a different color. A neutral density filter follows the same basic idea, except the camera records the reduced light as a change in exposure rather than as a darker view for your eyes.
The word neutral matters. A properly made ND filter is designed to reduce light without intentionally shifting the color balance. That lets you choose a slower shutter speed or a wider aperture while preserving the appearance of concrete, stone, painted surfaces, foliage, and skin tones.
Stops are the working language
An ND filter's strength is commonly described in stops. Each stop halves the light reaching the sensor, so every added stop requires a corresponding doubling of shutter time if the aperture and ISO stay unchanged. This stop-by-stop exposure relationship is the foundation of ND filter calculations.
Core principle: Every additional stop cuts the light in half, so the shutter speed must double to preserve the same exposure.
Suppose your unfiltered meter reading is 1/125 second. Add one stop and the equivalent shutter speed becomes 1/60 second. Continue doubling through ten stops and the exposure reaches about 8 seconds. That conversion is why a strong ND filter can transform a bright exterior from a snapshot into a long architectural exposure.
Optical density makes selection more precise
Manufacturers also describe filters by optical density. The value gives you a more exact way to identify the amount of light reduction:
- ND0.3 means 1 stop and 50% transmission.
- ND0.9 means 3 stops and 12.5% transmission.
- ND1.8 means 6 stops and about 1.6% transmission.
- ND3.0 means 10 stops and 0.1% transmission.
These mappings are summarized in this optical-density and transmission guide. You don't need to memorize every value, but understanding the pattern helps you select a filter by the effect you want rather than by a vague label such as “strong” or “light.”
Why exposure compensation isn't the same
Exposure compensation tells the camera to make the recorded image brighter or darker. It doesn't physically create more time for movement, and it doesn't give you the same control over aperture in bright conditions. An ND filter changes the amount of light before it reaches the sensor, which preserves the creative relationship between shutter speed, aperture, and ISO.
For architecture, that distinction matters. If you want moving pedestrians to soften, you need time. If you want a wide aperture in full sun, you need to remove light before the exposure begins. The filter gives you that space.
Choosing the Right ND Filter Type for Your Shoot
A bright glass façade, a shaded entry, and people moving through the frame can demand different kinds of light control. Filter selection should follow the composition and the pace of the shoot, not the product page. Fixed, variable, graduated, and IRND filters all reduce light, but each addresses a different problem on an architectural set.
The practical comparison
| Filter Type | Best Architectural Use | Key Advantage | Potential Drawback |
|---|---|---|---|
| Fixed-strength ND | Repeatable exterior long exposures and controlled daylight aperture | Predictable exposure reduction and consistent optical behavior | You may need several strengths for changing light |
| Variable ND | Fast adjustments during changing exterior conditions or video work | One filter covers a range of light reduction | Uneven darkening or color shifts can appear at stronger settings |
| Graduated ND | Bright skies, reflective façades, and windows above darker foregrounds | Balances part of the frame while leaving the lower area less affected | The transition must align with the architecture, horizon, or frame design |
| IR-cut or IRND | Long exposures where color fidelity is critical | Helps control infrared contamination alongside visible light | Specialized glass can add cost and workflow considerations |
A fixed-strength ND suits a stable lighting setup and an assignment that needs repeatable files. Its density is known, and there is no variable ring to turn accidentally while you refine vertical lines or align a façade. For a clean, design-forward exterior, that predictability can matter more than having one filter cover every condition.
A variable ND fits a moving set. Density can change as the sun crosses the building or as you shift from an exterior to a people-in-space frame. Before committing to one, study a detailed variable neutral density filter review that examines edge darkening, color consistency, and performance at stronger settings. A variable filter saves changes of hardware, but it asks for careful inspection through the full adjustment range.
Matching the filter to the composition
A graduated ND helps when the top of the frame is much brighter than the lower portion. That situation appears with a glass façade beneath open sky and in an interior aimed toward bright windows. The transition line needs to follow the design of the scene. A soft transition is often easier to place across complex rooflines, trees, or irregular structures, while a hard transition can work when the architectural division is clear.
Filter shape also affects composition. Ultra-thin frames and magnetic systems reduce handling, particularly with wide-angle lenses, and may help limit vignetting. Every ring, adapter, or stacked filter still occupies space at the front of the lens. Check the complete setup on the lens you will use, including the corners, rather than assuming the same frame behaves identically across your kit.
When IRND deserves attention
Long exposures at high density can expose a weakness in ordinary ND glass. If the glass passes infrared unevenly, foliage, dark cladding, and deep shadows may shift toward red, magenta, or blue. Recent buying guidance distinguishes IR-cut and IRND filters from ordinary ND glass for this reason.
Choose IR-cut or IRND when the scene contains dark materials, trees, or demanding long exposures and color fidelity must remain consistent. For architectural work, the strongest filter is not automatically the best one. The useful choice reduces the required light while preserving clean corners and avoiding a correction problem in every frame.
Essential Camera Settings and Exposure Techniques With ND Filters
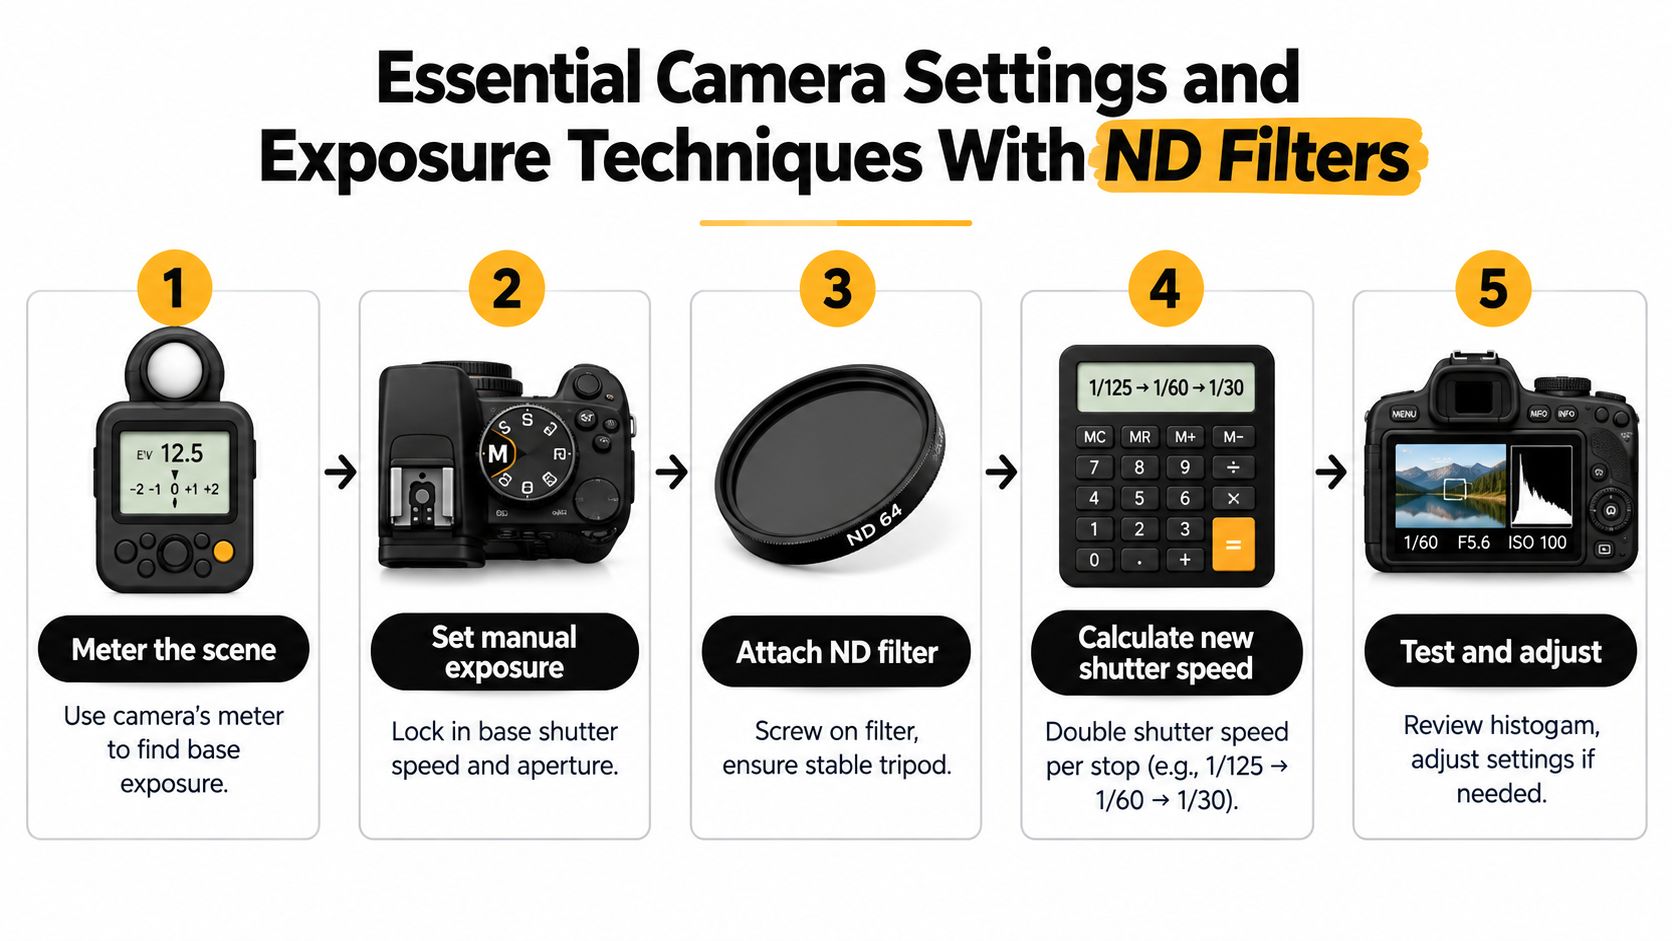
A reliable ND workflow begins before the filter goes on. Compose the building, level the camera, focus, and meter the scene without the filter first. Once you know the base exposure, you can calculate the filtered exposure instead of trying to make the camera guess through dark glass.
Build the exposure in the right order
Compose and stabilize. Put the camera on a solid tripod, confirm that the verticals are controlled, and check the corners for anything unwanted. A tripod is especially important when the shutter becomes too slow for handholding or when you need several aligned frames. This guide to tripods for architectural photography covers the stability considerations that matter on location.
Meter without the filter. Set the aperture for the depth of field and the ISO for the image quality you need. Record the shutter speed that gives you the base exposure.
Lock manual exposure. Manual mode keeps the camera from changing the exposure after the filter is attached. Focus before mounting the filter, then switch autofocus off if the darkened view causes the lens to hunt.
Attach the ND carefully. Check that the filter is seated evenly and that the holder or magnetic ring hasn't shifted the composition. Use a shutter release, timer, or remote trigger to reduce vibration.
Calculate by doubling
The arithmetic is simple. Each stop doubles the shutter time:
- A 3-stop filter changes a 1-second exposure into 8 seconds.
- A 10-stop filter changes 1/125 second into about 8 seconds.
Those examples follow the stop calculations documented in this ND exposure guide. If the calculated time falls between the camera's standard settings, choose the nearest value and refine it after reviewing the result.
Practical rule: Meter first, calculate second, then let the histogram settle the argument.
Protect sharpness while creating movement
A long exposure is only useful if the building stays sharp. Extend the tripod legs as little as possible, keep the center column low, and avoid touching the camera during the exposure. Wind can affect a lightweight setup, especially near tall façades where air moves around corners.
Aperture still controls depth of field, while shutter speed controls the way moving elements render. If the exterior is already sharp enough at your chosen aperture, use the ND to add time rather than stopping down without a compositional reason. For video, daylight ND use can also help maintain a consistent shutter approach while preserving the chosen aperture.
Practical Neutral Density Filter Uses Across Architecture Interiors and People
On an architectural shoot, the best ND image usually starts with a design problem. The scene may have too much daylight, too much movement, or too little separation between a person and the building behind them. The filter stays in the background. It solves a visual constraint without adding vignetting or an obvious color shift.
Clearing an active exterior
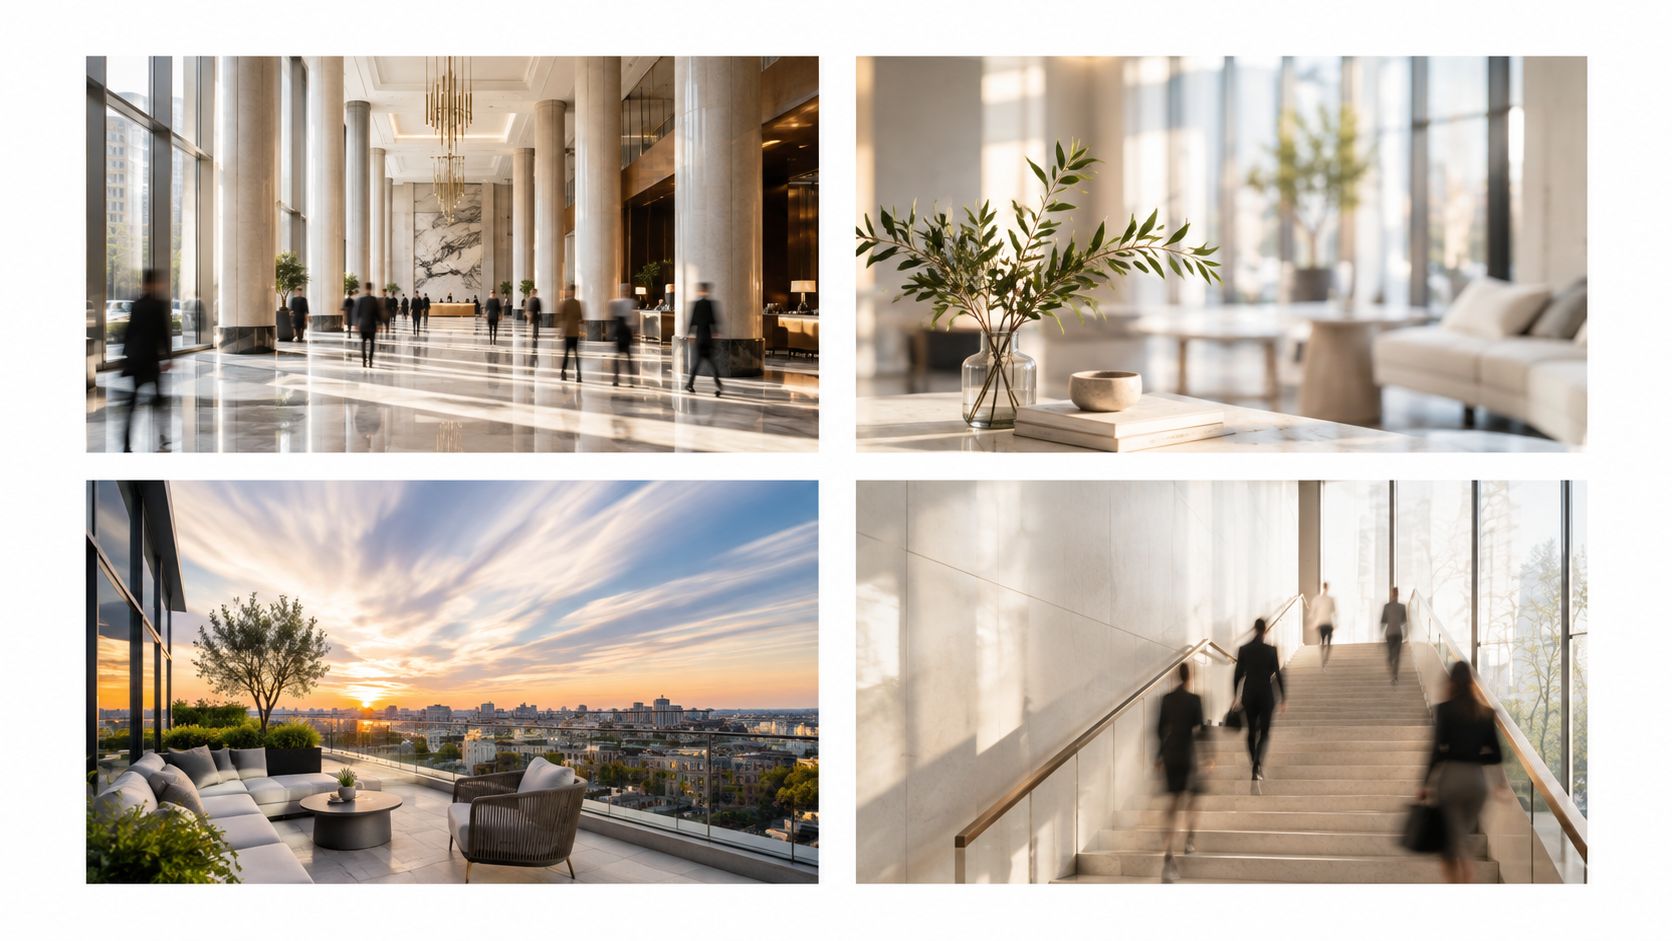
A building entrance can look precise before opening and crowded once the street becomes active. With the camera fixed on a tripod, a longer exposure can soften pedestrians and traffic while the structure remains steady. A 10-stop filter is often chosen when daylight needs to be extended enough for moving people and cars to become far less visible in the frame. The goal is a clean elevation, not a waterfall cliché.
Composition still requires patience. Watch for gaps in traffic, shadows crossing the façade, and people who pause near the lens. The filter reduces movement's visual weight, but it cannot correct a shifted tripod or a reflection that stays fixed in the glass.
Holding a wide aperture outside
A project lead may need a portrait beside the entrance, with the building falling softly behind them. Bright daylight can make that aperture impossible if the camera reaches its fastest usable shutter speed. An ND filter removes light, giving you room to retain the selected aperture and separate the person from the architecture.
Depth of field should clarify the relationship, not erase it. Keep enough façade, material, and structural detail to show where the portrait belongs. The building remains part of the story while the person becomes the visual anchor.
Managing daylight in interiors
A lobby with a window wall often presents two exposures at once: tactile interior materials and a bright exterior beyond the glass. ND can help maintain a deliberate shutter and aperture combination, but it darkens the entire frame. It cannot replace lighting design or careful exposure blending.
A graduated filter may fit better when brightness is concentrated in one area. Place its transition along a natural architectural boundary, such as a window line or ceiling edge, then inspect glass, polished stone, and metal for unwanted reflections.
A shorter exposure can preserve detail in a moving crowd. A longer one can turn the same staircase into a quieter graphic pattern, with people becoming soft traces rather than dominant subjects. For digitally created motion treatment after capture, motion blur AI video offers related moving-image concepts. An optical ND filter remains the direct in-camera method for still photography.
Keeping people connected to place
Outdoor team portraits bring a different constraint. You may want shallow depth of field, softly rendered architecture, and natural light on faces, yet the brightness can force a shutter speed that limits your aperture choice. A moderate fixed ND gives you more control without overpowering the location with artificial blur.
The same approach suits hospitality terraces, workplace courtyards, and campus spaces. The filter supports the story by keeping people recognizable while the environment carries atmosphere. A clean, design-forward frame should feel calm and intentional, not visibly filtered.
Avoiding Common Pitfalls and Color Casts in Long Exposure Work
A long exposure can reveal problems that remain hidden in ordinary daylight photography. The filter's printed density is only part of the picture. Its more important job is transmitting the wavelengths reaching the sensor evenly, so the exposure stays visually neutral.
Watch for infrared contamination
Standard ND glass may transmit infrared unevenly, especially at stronger densities and during longer exposures. That imbalance can produce red, magenta, or blue shifts in foliage and dark surfaces. IR-cut or IRND designs can reduce this risk, as noted earlier.
The issue becomes especially visible in architectural photography. Dark window frames, trees, charcoal cladding, and shadowed pavement may cover much of the composition. A color cast on a small waterfall is inconvenient. A cast across an entire building elevation can turn a clean, design-forward image into a lengthy correction job.
Check the image, not just the label
Test the filter before an important assignment. Use a static subject that includes neutral surfaces, foliage, glass, and deep shadow, then compare an unfiltered frame with a filtered frame under similar light. This test shows whether the glass supports the camera's color response in conditions close to the planned shoot.
Check these areas:
- Color neutrality: Inspect concrete, white interiors, and skin tones for magenta, blue, or red contamination.
- Corner performance: Look for darkening with wide lenses, ultra-thin adapters, or stacked rings. Vignetting can make an architectural frame feel cramped.
- Detail retention: Zoom into façade edges and window frames to find softness or flare.
- Movement rendering: Confirm that pedestrians and traffic blur by the intended amount.
- Handling speed: Practice mounting, removing, and rotating the system before arriving on site.
Reduce workflow friction
Magnetic systems can speed up filter changes when the rings align cleanly and hold securely. Keep the glass free of fingerprints, make sure the lens hood does not interfere, and review the frame after each change. A loose or poorly aligned filter can waste time and introduce unwanted edge darkening.
If a cast appears, first determine whether it comes from the filter, mixed lighting, or reflective glass. A practical color correction guide for photography can help separate capture problems from post-processing decisions. For critical architectural work, color-neutral IRND glass usually creates a cleaner starting point than correcting inconsistent color across a full sequence. The result should preserve the quiet geometry of the building, the texture of the interior, and the natural relationship between people and place.
Bringing It All Together for Intentional Architectural Imagery
The best ND workflow is repeatable, but it still begins with an editorial decision. Scout the light, identify what should remain sharp, and decide whether movement should disappear, soften, or remain visible. Then choose the filter density that supports that intention rather than selecting the darkest filter by default.
A practical field sequence looks like this:
- Frame the architecture first. Check verticals, reflections, background clutter, and the relationship between people and space.
- Choose the visual effect. Decide whether you need crowd removal, a wide daylight aperture, controlled window brightness, or motion texture.
- Meter without the filter. Set the base aperture, ISO, and shutter speed.
- Calculate the new exposure. Double shutter time for every added stop.
- Stabilize and capture. Use a tripod, trigger the camera without touching it, and review the histogram.
- Inspect quality. Check color, sharpness, corners, reflections, and the way movement rendered.
A neutral density filter should make the image feel more intentional, not more processed. Used with restraint, it helps an exterior feel orderly, an interior feel balanced, and a portrait feel connected to its setting. That's value of these neutral density filter uses: they turn excess light into compositional freedom.
Jimmy Clemmons Photographer offers Atlanta architectural photography, interior imagery, branded portraits, location scouting, lighting design, and professional editing for design-led visual stories. If you need buildings, spaces, or people-in-place photographed with precise light control and a polished editorial finish, visit Jimmy Clemmons Photographer to discuss your assignment.