
A tripod for architectural photography isn't chosen by finding the largest load rating and calling the job done. That advice works for casual outdoor work, but architecture demands something more exact: a camera height that preserves perspective, a platform that settles quickly, and a head that lets you repeat the same composition without nudging the frame every time.
The sharpest file still fails if the verticals converge, the camera height changes between rooms, or a long exposure records vibration from a flexible center column. The useful question is not whether a tripod can carry your camera. It's whether the complete support system can hold a level, repeatable viewpoint under the conditions where you work.
Why Most Tripod Advice Fails Architectural Photographers
“Buy a sturdy tripod” is incomplete advice. A tripod can carry a camera comfortably and still perform poorly at the height, angle, and exposure an architectural assignment requires. Load capacity is a static specification, while architectural sharpness depends on what happens after you touch the camera, adjust the head, walk across a floor, or work in wind.
The professional target is consistent geometry, not merely an absence of obvious blur. Architects, interior designers, developers, and property teams often need a sequence of images that shares a controlled viewpoint. If the camera sits at a different height in every room, or if the center column is raised for one composition and lowered for the next, perspective relationships change. That creates extra correction work and makes a set feel visually inconsistent.
True height is the specification that matters
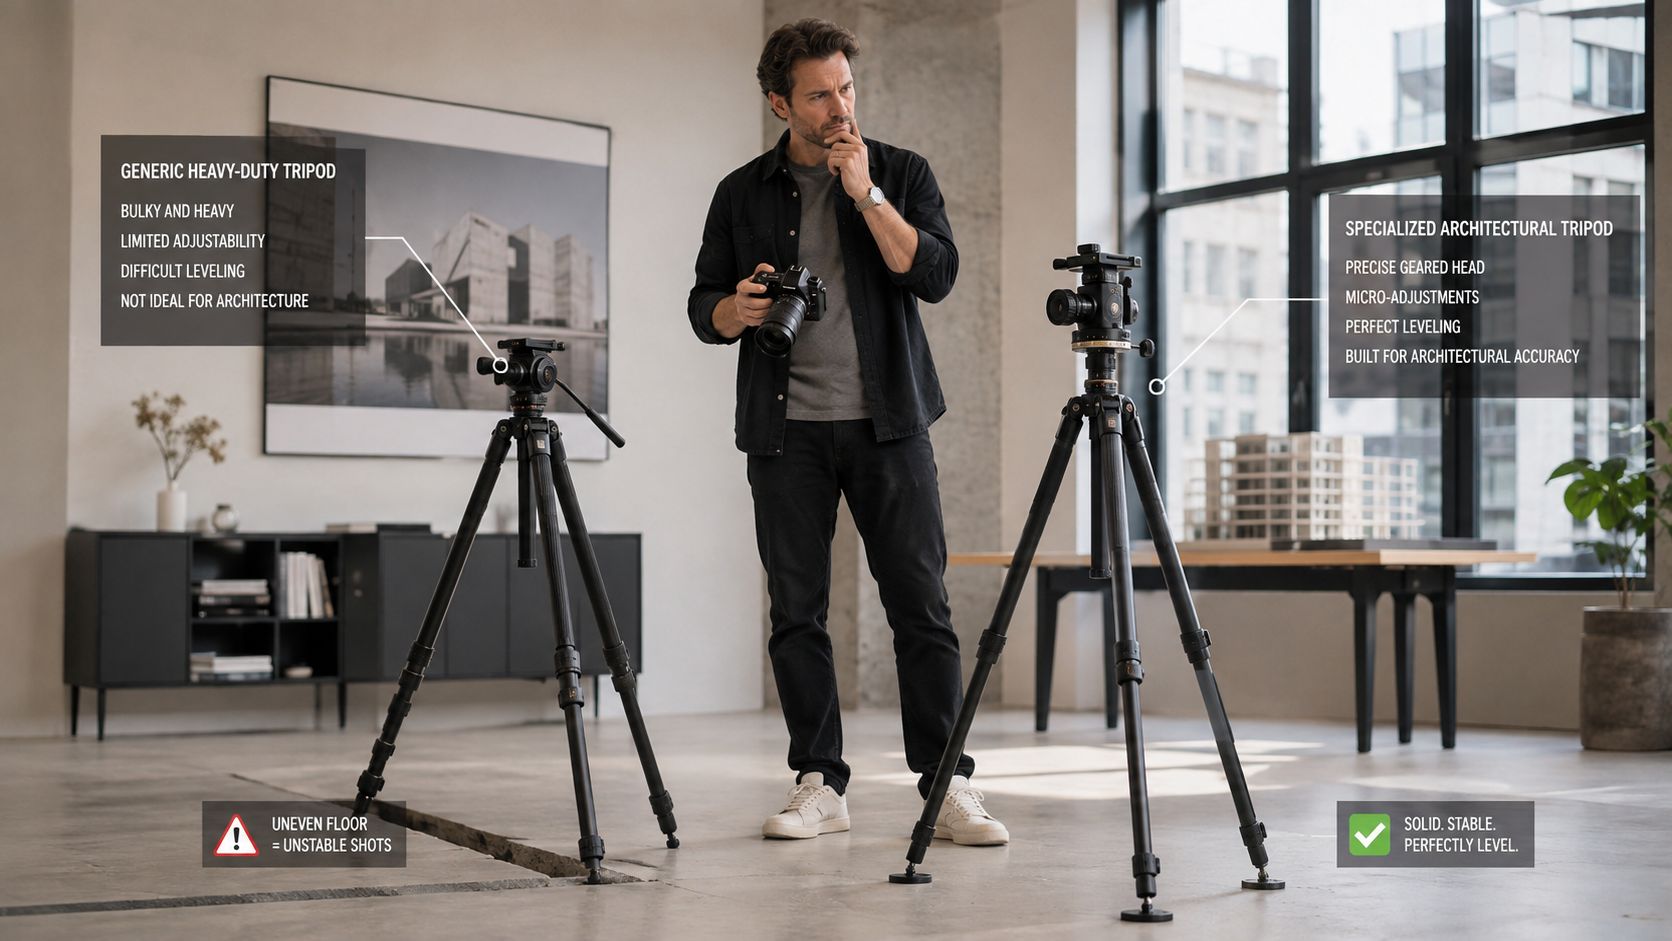
True height means the camera eye level you can reach with the center column fully retracted. This is a more useful benchmark than the maximum height printed on a product page because a raised center column behaves like a lever above the tripod shoulder. It may give you the composition, but it can make the setup more vulnerable to movement.
For architecture, standing eye-line is often the natural starting point. A tripod that reaches that position on its legs alone gives you a stable baseline and makes height repeatable across a project. A shorter tripod may be excellent for travel yet force compromises in interiors, while an unusually tall model may be cumbersome to transport and unnecessary for ordinary room views.
Practical rule: Measure the camera's actual optical center at working height, not just the tripod's advertised maximum.
The category itself continues to attract investment. A 2025 estimate places the global camera tripod market at about $1.4 billion and projects $2.0 billion by 2034, according to market research on the camera tripod category. That growth doesn't make every model suitable for architectural work. It does show why buyers need a use-case framework rather than another generic recommendation.
Before choosing legs, define the deliverable. A single exterior hero frame, a bracketed hotel interior, and a stitched construction record may all require different balances of height, damping, head precision, and portability. For broader preparation and location planning, the guidance on photographing architecture and interiors is a useful companion to the gear decision.
The Technical Case for Tripod Use in Architectural Work
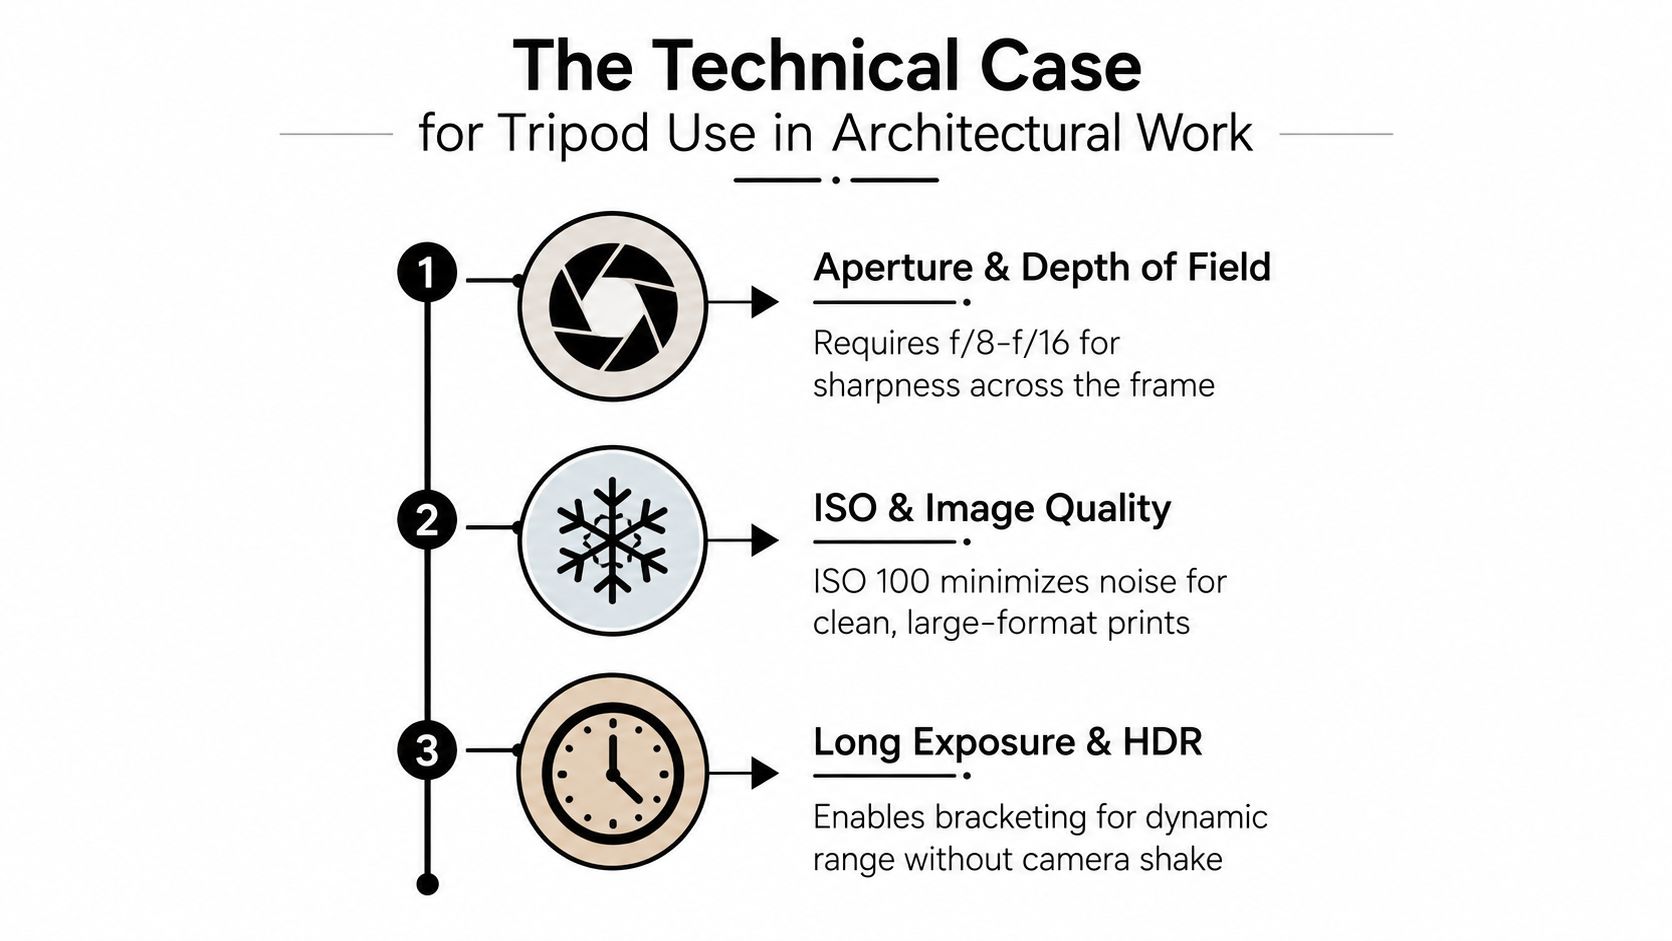
Architectural photography usually asks the camera to do several demanding things at once. You want enough depth of field to keep near and distant elements legible, low ISO for clean files, and carefully controlled perspective. Those choices often reduce shutter speed, particularly in interiors, at twilight, or when the available light is uneven.
Small apertures and low ISO settings are established parts of the architectural exposure strategy, and technical guidance describes the genre as “almost synonymous with low shutter speeds.” A tripod lets you hold the composition while the exposure runs long enough to preserve the desired aperture and sensitivity. The support isn't replacing good technique. It makes that technique practical.
Exposure control and geometric control work together
A stable camera also supports bracketing, where multiple exposures are captured from one unchanged viewpoint and combined or selected later. If the camera moves between frames, edges, fixtures, and architectural details may no longer align cleanly. The same principle applies to stitched frames and composite lighting. A rigid support reduces the variables you have to solve in post-production.
Leveling matters just as much. Even a small upward tilt can cause a building's vertical lines to converge. You can correct perspective later, but correction may alter framing, reduce usable pixels near the edges, and change the relationship between the building and its surroundings. Keeping the camera level at capture protects the original composition.
A tilt-shift or perspective-control lens helps by moving the lens relative to the image plane, allowing you to include more of a tall structure without pointing the camera upward. That movement only becomes useful when the camera is securely mounted and precisely aligned. The history of this approach reaches back well before digital cameras.
Camera movements have always needed a stable base
Daguerre's 1838 Paris street view is widely treated as an early landmark in city and architectural imaging. By the 1850s, rooftop and terrace viewpoints had become popular for cityscape and architectural photographs. Large-format view cameras later made camera movements central to architectural practice, while perspective-control optics brought some of that capability to more compact systems.
One industry account identifies the Nippon Kogaku PC-Nikkor 35mm f/3.5, introduced in 1962, as an early shift-capable lens milestone, while modern tilt-shift lenses emerged in the early 1990s, as described in this history of tilt-shift lenses for architectural photography. The equipment changed, but the requirement remained the same. Photographers needed controlled movement, a level camera, and a stable platform that could hold the arrangement repeatedly.
Evaluating Tripod Stability Beyond Load Ratings
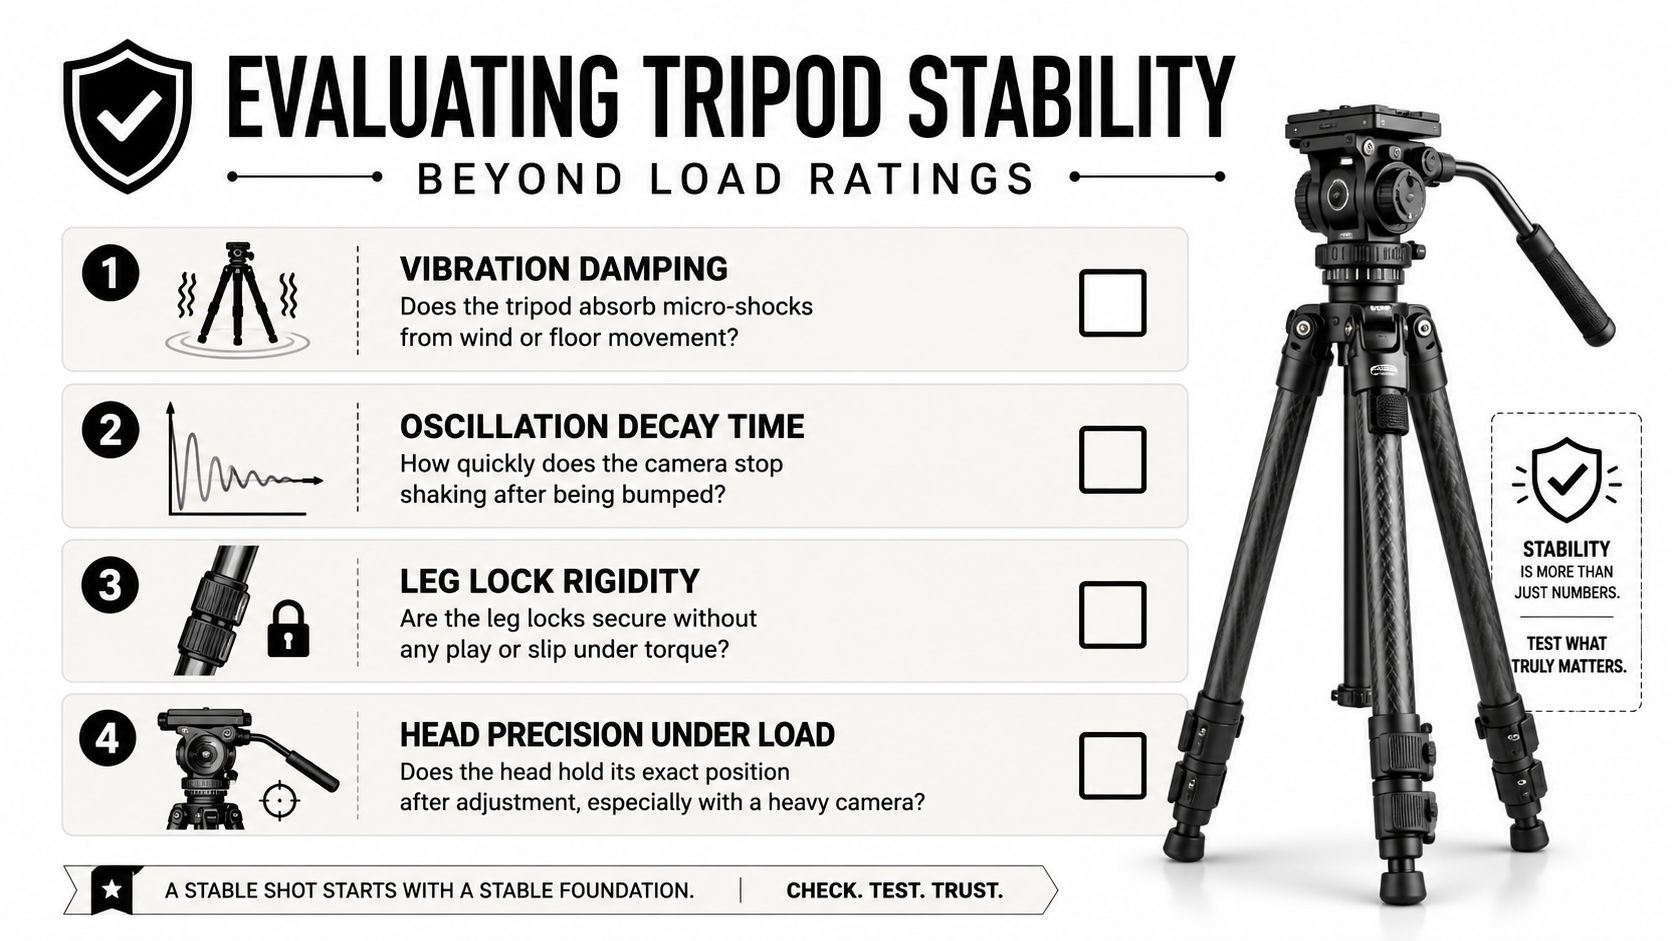
A tripod's load rating tells you how much static weight the manufacturer expects it to support. It doesn't tell you how quickly the camera settles after a disturbance, how much the legs twist under torque, or how the system behaves with a long lens, a large camera, or a raised center column.
For architecture, vibration damping and oscillation decay time are more revealing. A lighter camera mounted on a stiff, well-damped tripod can outperform a heavier camera mounted on a flexible support. The effective capacity of the system is also limited by its weaker component, whether that's the legs, the locks, the platform, or the head.
Test the tripod at the height you use
A support that feels solid at low height may become noticeably less stable when every leg section is extended. Before buying, set the tripod up at the intended working height, mount the camera and lens, and observe what happens after a light tap on the camera or head. You're looking for the time it takes for the image in live view to stop moving, not just whether the tripod feels heavy in your hands.
The practical setup sequence is straightforward:
- Extend the thickest leg sections first. Larger upper sections generally provide a stiffer foundation than relying on the narrowest lower tubes.
- Keep the center column down. Raise it only when the composition requires it, because the extra extension can introduce vibration and reduce effective stability.
- Check every leg lock. Any play, slip, or uneven resistance can undermine the entire system, even if the tripod's headline capacity looks generous.
- Test the head separately. A rigid set of legs cannot compensate for a head that creeps after you release the controls.
- Use the ground intelligently. Soft soil, suspended floors, bridges, and busy pavements transmit different kinds of movement.
A useful evaluation shouldn't end at the shop floor. Test the setup with the camera's live view magnified, then make a small adjustment and wait for the movement to settle. That reveals more about working behavior than a product comparison based only on carrying capacity.
What works on set: A tripod that settles quickly lets you compose, adjust, and capture without guessing whether the last touch is still visible in the exposure.
Guidance from tripod stability testing and dynamic behavior supports this emphasis on damping, leg extension, center-column behavior, and oscillation rather than static ratings. For high-resolution architectural files, those small mechanical differences become visible as softness in fine lines, window mullions, railings, and material edges.
Geared Heads vs Ball Heads for Architectural Precision
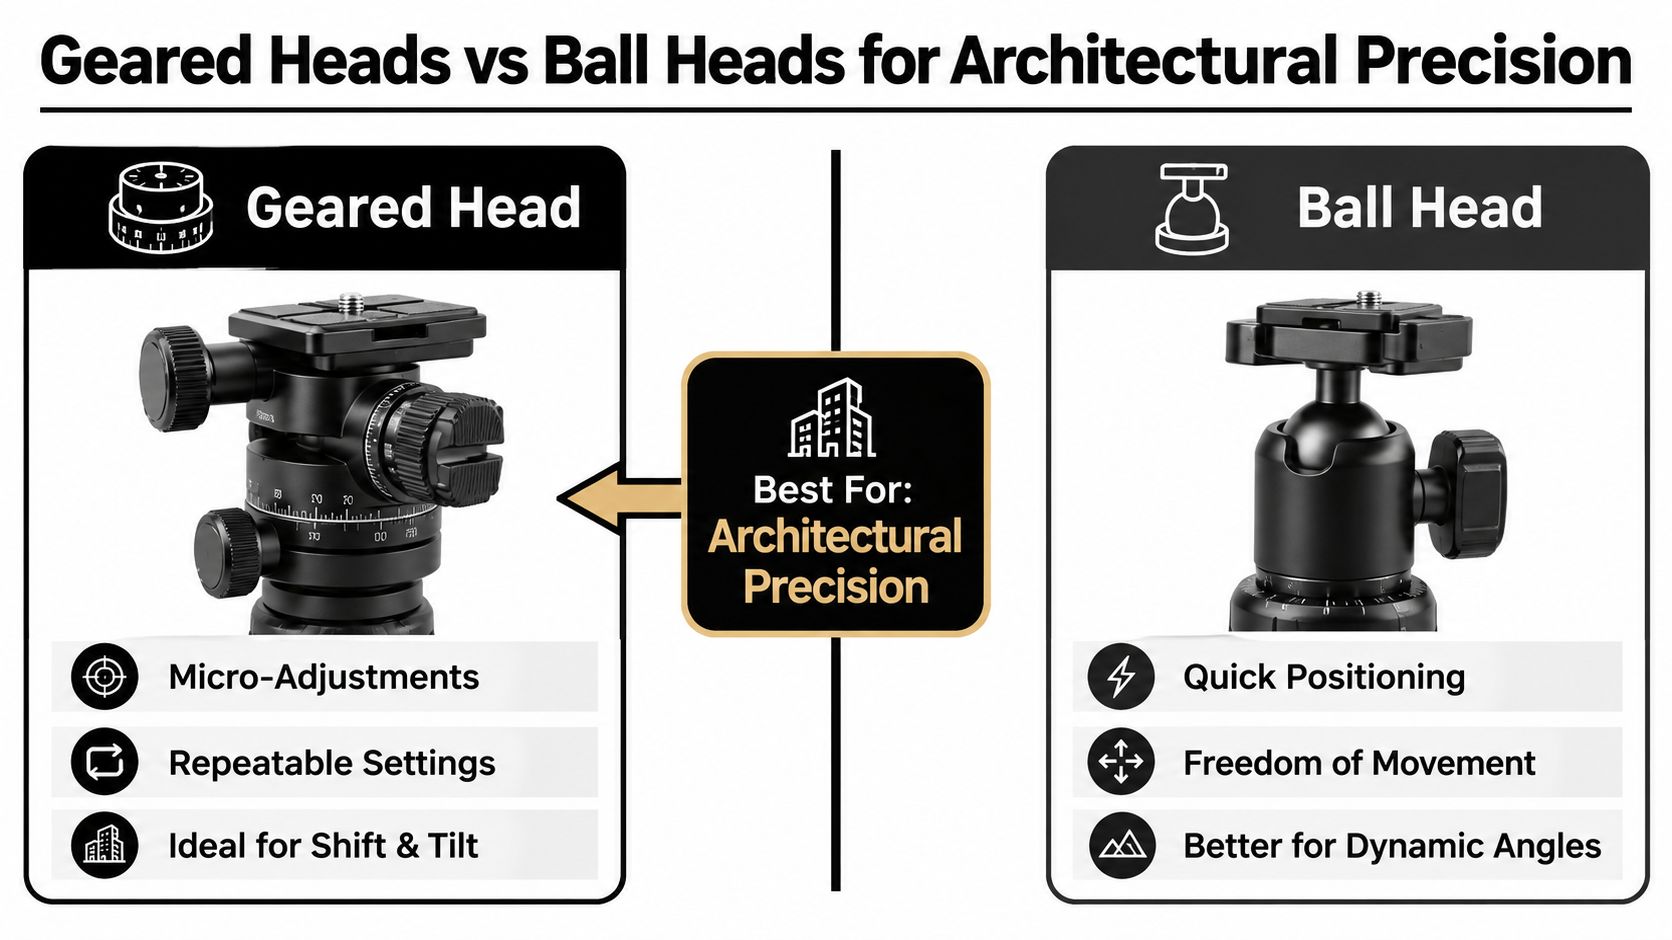
A geared head and a ball head solve different problems. The geared head is built for controlled, incremental movement. The ball head is built for rapid repositioning. Neither is universally superior, but one can become a serious bottleneck when the assignment demands repeatable geometry.
Where geared heads earn their place
A geared head lets you make small changes to pitch, yaw, and leveling without releasing the entire camera. That matters when the camera is almost right but one vertical needs a minor correction, or when a shift lens requires the frame to be adjusted while the camera remains level. It also helps preserve a composition while you make controlled refinements.
For a multi-room interior, this precision reduces the temptation to grab the tripod and move it every time the frame needs a minor change. It can also make bracketed sequences more consistent because the camera is less likely to jump when you adjust the framing.
The trade-off is speed. A geared head is slower when you need to swing rapidly from one orientation to another, and its controls add weight and complexity. If you're documenting changing activity, working in a tight time window, or moving continuously between locations, that friction can matter.
Where ball heads remain useful
A ball head is fast. Loosen one main control, position the camera, and lock it. That freedom suits dynamic angles, quick exterior scouting, and photographers who value a compact kit above micro-adjustment. A quality ball head can also work well when the camera is already close to level and the composition doesn't demand repeated fine corrections.
The problem appears when the camera needs to move by a very small amount. Releasing the ball can shift the horizon, alter the verticals, or make the camera settle differently after tightening. That isn't a defect in the design. It's the consequence of choosing speed and freedom over isolated-axis precision.
A useful rule is simple:
| Working requirement | Better starting point |
|---|---|
| Precise leveling and shift work | Geared head |
| Fast repositioning and compact travel | Ball head |
| Bracketed interiors from a fixed viewpoint | Geared head |
| Rapid location changes and informal angles | Ball head |
The head must also match the rest of the system. Mirrorless cameras and high-resolution sensors make live-view alignment easy, but they also reveal tiny errors. Tethered capture adds another reason to keep the camera position stable. For additional perspective-control considerations, see this guide to lens distortion correction.
Real-World Setup Scenarios for Interiors and Exteriors
The best tripod for architectural photography changes with the location. A heavy, damping-rich system can be the right choice on a windy exterior and the wrong choice for a commercial interior where you must move between rooms without delaying the crew.
Exterior work in wind and changing light
Start by setting the tripod at true height, with the center column retracted. If the composition requires more elevation than the legs can provide, reconsider the viewpoint before extending the column automatically. A lower camera may produce cleaner verticals and a more grounded relationship with the building anyway.
In wind, widen the leg angle to lower the platform and increase the footprint. A hanging camera bag can lower the center of gravity, provided it doesn't swing freely and transmit movement back into the tripod. Guidance on true-height tripod selection for architectural work states that center-column lift can reduce effective stability by 30-40%, recommends an oscillation decay time under 1.8 seconds at architectural shooting heights, and says a hanging bag can increase stability-per-ounce by up to 33% when used to stabilize the system. These are useful benchmarks, not substitutes for testing the actual camera and lens combination.
Tight interiors and reflective surfaces
In a small room, three fully extended legs may be more awkward than helpful. Use the shortest practical footprint, keep the legs clear of walkways, and place the camera where the composition works before fine-tuning the head. A geared head is especially valuable when furniture, walls, and ceiling lines leave little room for repeated repositioning.
Mixed lighting often makes bracketing or composite exposure worthwhile. Lock the tripod before the first frame, then avoid touching the legs while changing exposure or lighting. If assistants or clients are moving through the space, give the setup a clear perimeter and mark the leg positions when a sequence must be repeated.
Uneven urban sites and fast production days
Urban exteriors reward a portable tripod, but portability shouldn't mean accepting a column that must always be raised. Uneven ground makes independent leg adjustment more important than a simple maximum-height figure. Set each leg deliberately, confirm the platform is level, and check the composition again after tightening the head.
The tripod is only one part of a successful location workflow. Site access, parking, permissions, light direction, and obstructions all affect how much time you have to refine the viewpoint. A practical project-site preparation guide helps reduce those avoidable delays.
Connecting Tripod Choice to Architectural Photography Goals
A tripod decision should begin with the image the client needs, not the camera already in your bag. Architectural photography communicates space, proportion, material, circulation, and context. The support system should protect those qualities from capture through delivery.
Consistent geometry is the first goal. A level camera and controlled height keep verticals, horizontals, and room relationships credible. This matters in a single hero image, but it matters even more across a set where viewers compare rooms, elevations, or stages of a project.
Repeatable viewpoints are the second. Marking a tripod position and recording the camera height can make a reshoot far easier. That becomes valuable when construction changes, weather interrupts an exterior, or a client requests a new exposure after the original setup has been packed away.
A tripod earns its place when it makes the next frame easier to match, not merely when it prevents the current frame from shaking.
The post-production test
Every perspective correction is a creative and technical trade-off. Software can straighten converging lines and compensate for lens distortion, but aggressive correction may change the crop and remove pixels from the original edges. A well-leveled capture preserves more options.
High-resolution sensors and tethered live-view workflows expose small errors quickly. A frame that looked acceptable on the camera screen may show a leaning door frame, drifting horizon, or inconsistent ceiling line when reviewed at working size. The more detailed the deliverable, the more useful a stable, precise support becomes.
For architects and designers, this is about accuracy rather than equipment theater. For real-estate teams, it supports a coherent property set. For hospitality and corporate environments, it helps the photographer work efficiently while keeping rooms visually related. The right tripod won't create a composition, but it can prevent mechanical compromises from weakening one.
Decision Framework for Different Budgets and Use Cases
Choose the support in this order: true height, dynamic stability, head precision, then portability. A tripod that reaches the working camera position without center-column lift is a stronger starting point than a lighter model that looks impressive on a specification sheet but forces extension on every assignment.
Budget affects the compromises, but it doesn't change the evaluation method. At a modest budget, prioritize rigid leg locks, a usable working height, a retractable center column, and a head that doesn't creep. A ball head may be the practical choice if speed matters more than micro-adjustment, but test how easily it returns to level.
For regular commercial work, put more of the budget into damping and the head. A geared head can save time during precise interior compositions, while a stiff carbon or aluminum support can make a meaningful difference on long exposures and high-resolution files. The best middle-ground kit is often the one you can carry to every room yet still use at true height.
At the high end, buy for the difficult assignment rather than the impressive capacity. A heavier system makes sense when wind, extended exposures, large camera combinations, or complex composites dominate the work. It makes less sense when the photographer must walk between many locations and setup speed determines how many usable viewpoints can be captured.
Market estimates place the camera-tripod category at roughly 4% to 5% CAGR through the early 2030s, a projection discussed in recent camera-tripod market analysis. That continuing replacement and upgrade demand makes compatibility worth considering. Choose legs and a head that can remain useful as your camera, lens, tethering, and lighting workflow develop.
| Use case | Priority features | Budget tier | Recommended head type |
|---|---|---|---|
| Single exterior and frequent walking | True height, low carry burden, fast locks | Entry to mid-range | Ball head |
| Commercial interiors | Damping, level platform, repeatable adjustments | Mid-range | Geared head |
| Hospitality and multi-room sets | True height, precise head, stable leg locks | Mid-range to high-end | Geared head |
| Windy exteriors and long exposures | Stiff legs, low center of gravity, fast settling | High-end | Geared head or highly rigid ball head |
| Construction documentation | Repeatable height, durable locks, efficient setup | Entry to mid-range | Ball head for speed, geared head for fixed viewpoints |
Before buying, mount your camera and lens, raise the tripod to the height you use, and watch the live-view image after a small disturbance. If the system settles quickly, holds its level, and reaches the composition without relying on the center column, it's solving the problems that architectural assignments create.
A professional architectural shoot needs more than a camera and a sturdy support. Jimmy Clemmons Photographer brings precise composition, controlled lighting, location planning, and polished editing to architectural, commercial, and built-environment assignments. Visit Jimmy Clemmons Photographer to discuss a photography brief that demands straight verticals, repeatable viewpoints, and images ready for publication or marketing use.