
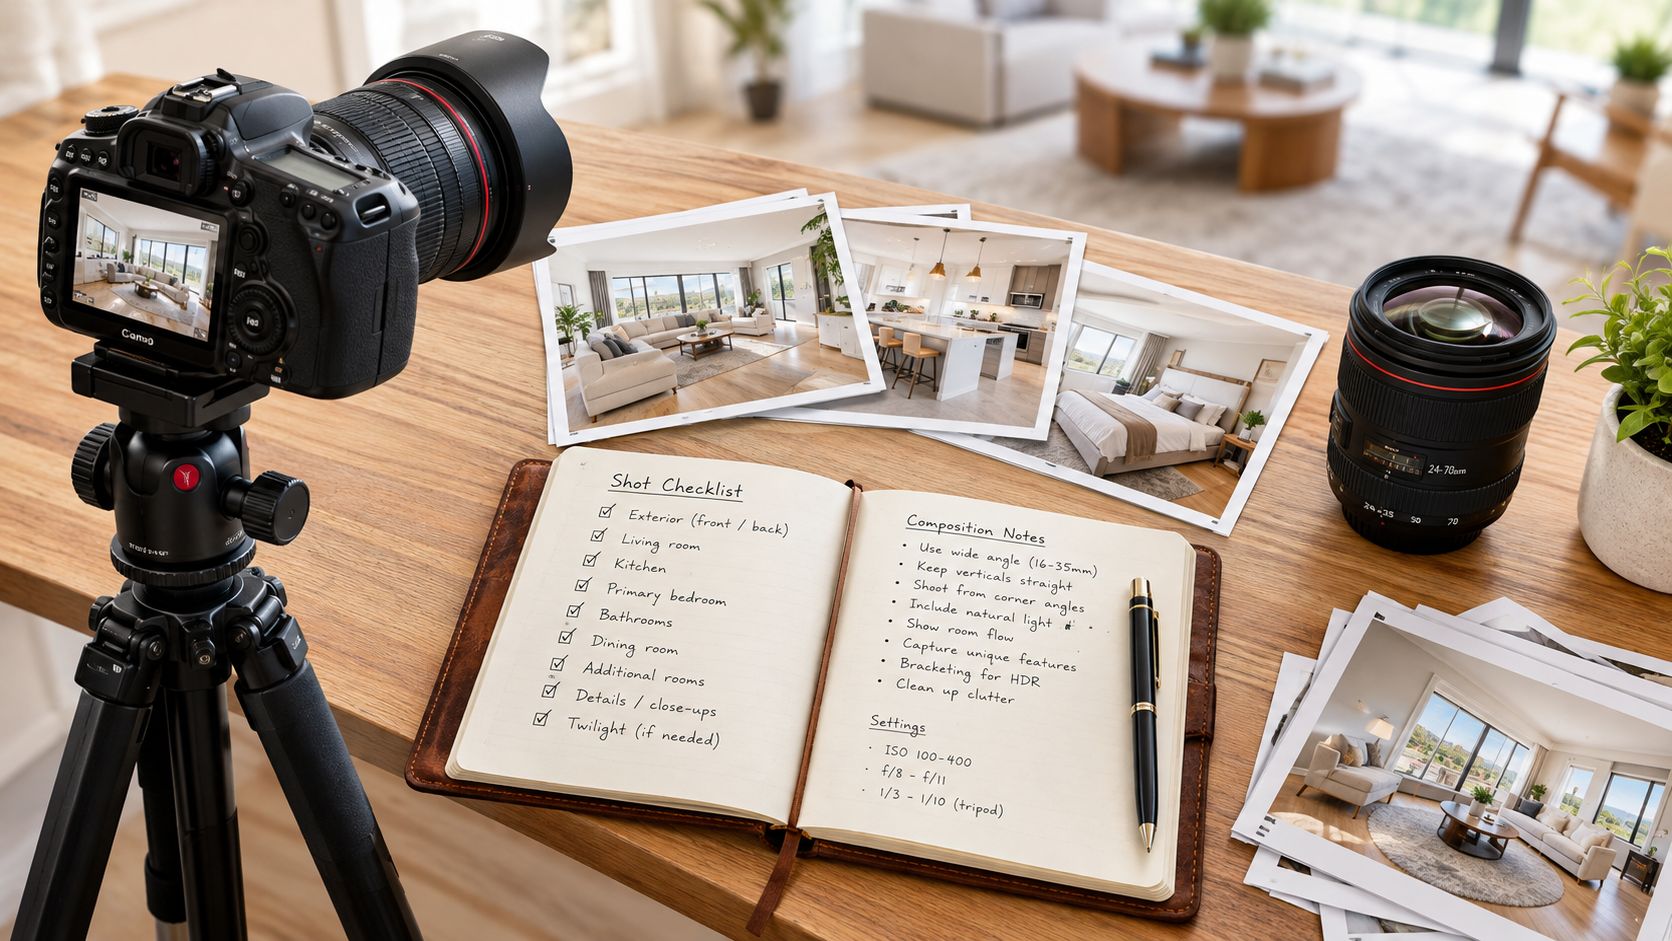
You've just opened the front door, tripod in one hand, camera bag in the other, and the property isn't quite ready. Blinds are uneven, the kitchen counter still needs clearing, and the light outside won't wait for you to improvise. A deliberate real estate photography shot list turns that scramble into a sequence. You establish the setting, document how the rooms flow, isolate details that signal value, then finish with amenity and lifestyle frames that help prospects remember the place.
That's how buyers encounter the work. In the 2024 Profile of Home Buyers and Sellers summary, 43% of buyers began by looking for properties online, 41% rated photographs very useful, buyers typically viewed seven homes, and two were viewed online only. Your gallery often has to answer questions about layout, scale, light, and condition before anyone books a visit.
Build the Visual Progression
Walk the property before raising the camera. Note the strongest exterior angle, the room sequence, window glare, awkward reflections, and the details worth slowing down for. Decide what must be reset, what can stay, and which frames depend on fading daylight. These 10 staging tips for better photos help with preparation, but the shot list itself is your editorial system. It connects composition, lens choice, lighting, sequencing, and delivery, so you don't return home with thirty attractive frames that still fail to explain the property.
1. Hero Exterior at Twilight (Blue Hour)
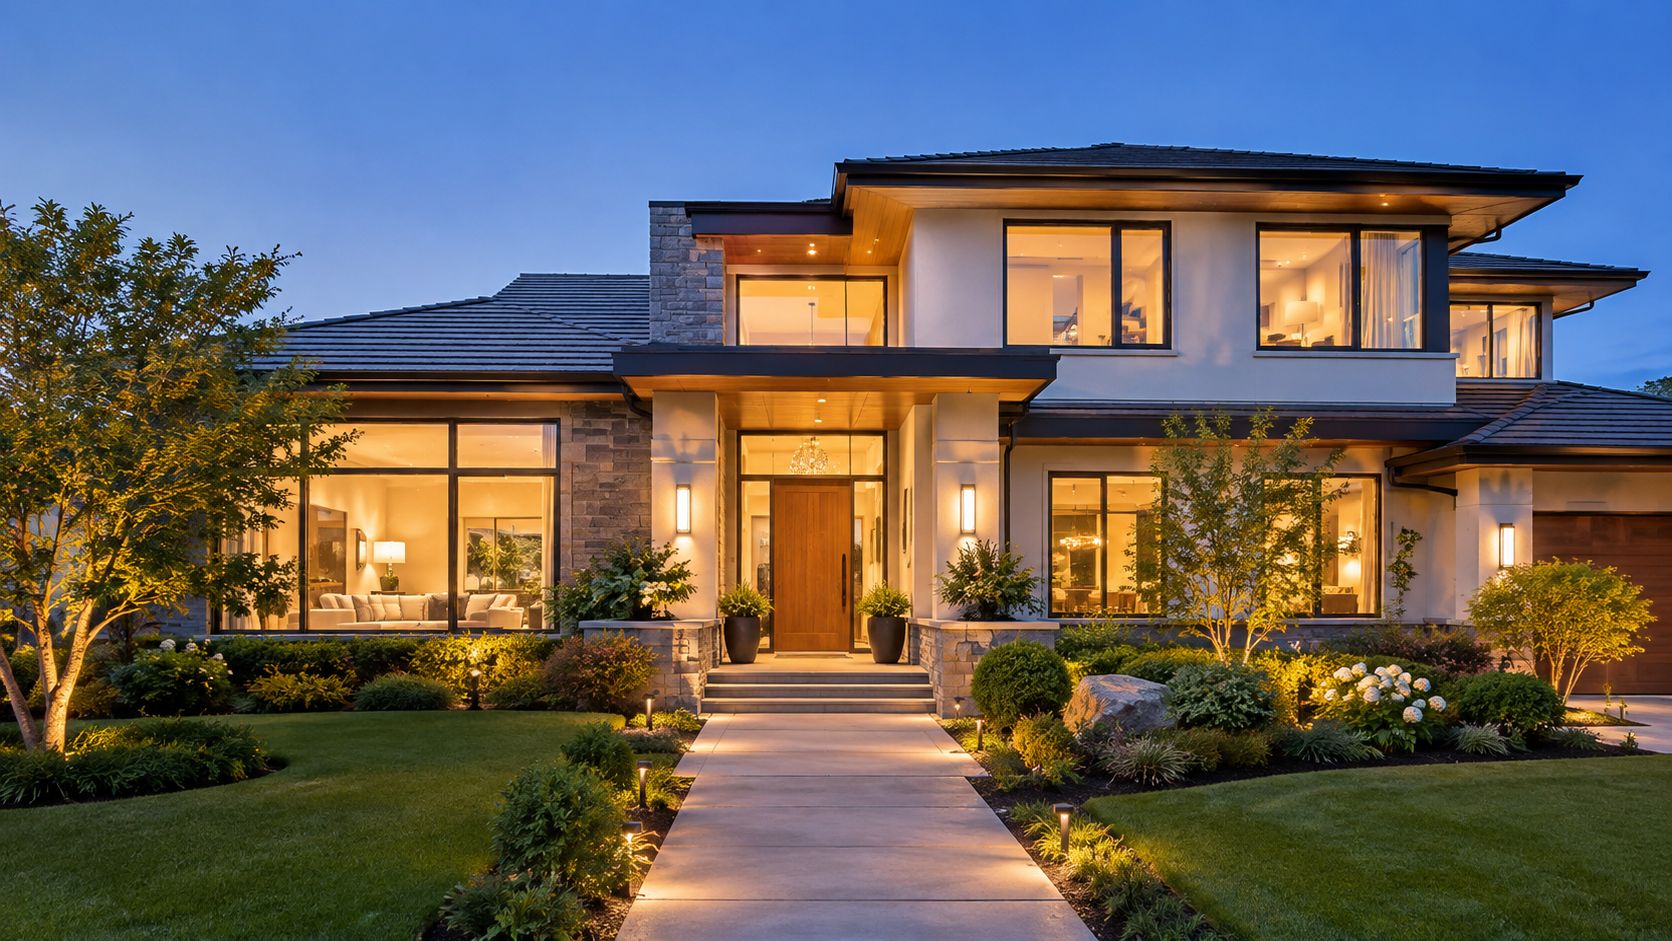
The twilight exterior earns the opening position when architecture, windows, and exterior lighting can work together. Shoot roughly 20 to 40 minutes after sunset, when the sky still holds blue and interior light starts to glow. That balance gives a polished first impression for a listing, leasing brochure, or portfolio cover without making the building look artificially lit.
One industry analysis reports that the first listing image receives 20 times more views than other images, so this frame can't be treated as a decorative extra. It's the hook. A hypothetical mid-rise office with a lit lobby can communicate arrival and activity at once. A single-family home at dusk, with pathway and porch lights on, can feel occupied and welcoming before the viewer sees a single room.
Working the Blue Hour Window
- Arrive early: Give yourself 60 to 90 minutes to scout sightlines, set the tripod, and test exposures before the sky changes.
- Turn everything on: Walk through and switch on interior, pathway, accent, and outdoor fixtures, then check for burned-out bulbs.
- Bracket the frame: Capture three to five exposures so sky, facade, and windows can be blended cleanly later.
- Protect color balance: Keep blue ambient light and warm interior light in conversation rather than neutralizing one into dullness.
The deeper reasoning behind the timing and value of blue hour for luxury projects comes down to control. You're choosing the brief moment when the building explains itself emotionally and architecturally in the same frame. Surface condition matters too, since dusk light grazes siding and trim, and maintained exterior coatings for homes read more cleanly under that low, directional light.
2. Street-Level Curb Appeal Exterior
Stand where a visitor stands. The curb appeal frame should show approach, entrance, landscaping, materials, and enough street context to explain how the building sits on its site. A slight angle usually works better than a flat elevation because it reveals depth, a side wall, and the route to the door.
This image also carries historical weight. The history of listing photography from one image to expanded galleries notes that an early public property website launched in 1996 with only one photograph per page, and gallery capacity later grew from six images to 15 at a maximum width of 400 pixels. You aren't shooting a lone hero anymore. You're building a coordinated narrative, and this frame provides orientation.
Make the Approach Legible
Shoot early in the morning or under soft overcast light when harsh shadows would otherwise cut across the facade. Clear vehicles, hoses, bins, and temporary items before you compose. Include a walkway, steps, or doorway to give the viewer human scale. If you're photographing from a sidewalk or shared drive, confirm access and local rules first.
Field check: If a stranger couldn't find the front door from your exterior frame, the composition isn't finished.
A hypothetical campus residence hall photographed from the sidewalk can show its entrance, tree canopy, and relationship to the quad in one view. A townhome development shot along the block shows rhythm and repetition, while still identifying the subject unit. Paint condition and trim contrast become especially visible at this distance, which is why the practical dos and don'ts for house painting matter before photo day. Don't hide material character. Record it cleanly, with verticals straight and distractions removed.
3. Wide-Angle Great Room or Living Space
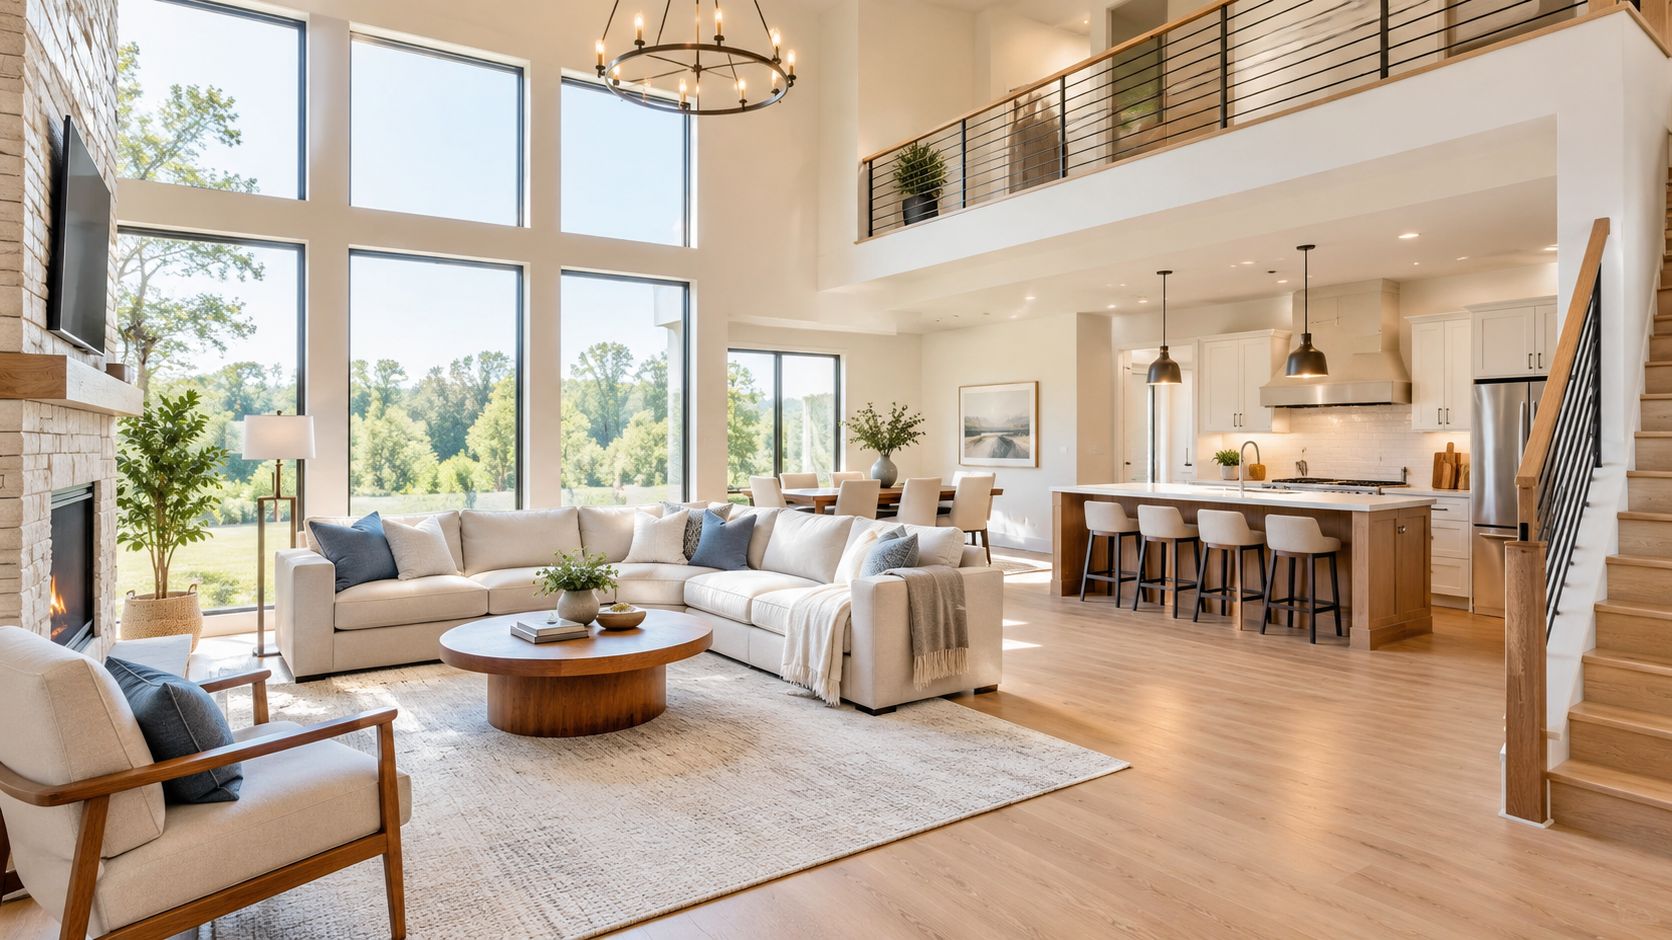
The great room frame has to explain more than square footage. It should show ceiling height, seating, window light, and the connection to the kitchen, dining area, or entry. That's why a corner or doorway position works so well. You capture multiple walls, preserve depth, and let circulation appear naturally instead of forcing the room into a flat stage set.
Photographs carry particular weight in online evaluation. Reporting on the 2025 buyer and seller profile notes that 81% of buyers who used the internet rated listing photographs as very useful, ahead of detailed property information at 77% and floor plans at 57%. The wide living space image is where many viewers decide whether the floor plan feels coherent.
Composition Without Distortion
Set the camera roughly 4 to 5 feet high, level it, and correct perspective so door frames and wall edges stay parallel. A rectilinear wide-angle lens gives breadth without the stretched corners of extreme distortion. Turn on the lights, close unnecessary doors, and remove anything that doesn't help the room read as comfortable and usable.
For context on the discipline behind professional real estate photography, think of this frame as spatial reporting. A hypothetical hotel lounge photographed from one corner can show separate seating zones and the route back to reception. An open-plan family room may need bracketed exposures or balanced flash to retain the view through bright windows while keeping shadow detail in upholstery and flooring. Don't shoot from the center of the room. You'll lose depth, flatten furniture relationships, and make the space feel smaller than it is.
4. Kitchen Detail and Overview
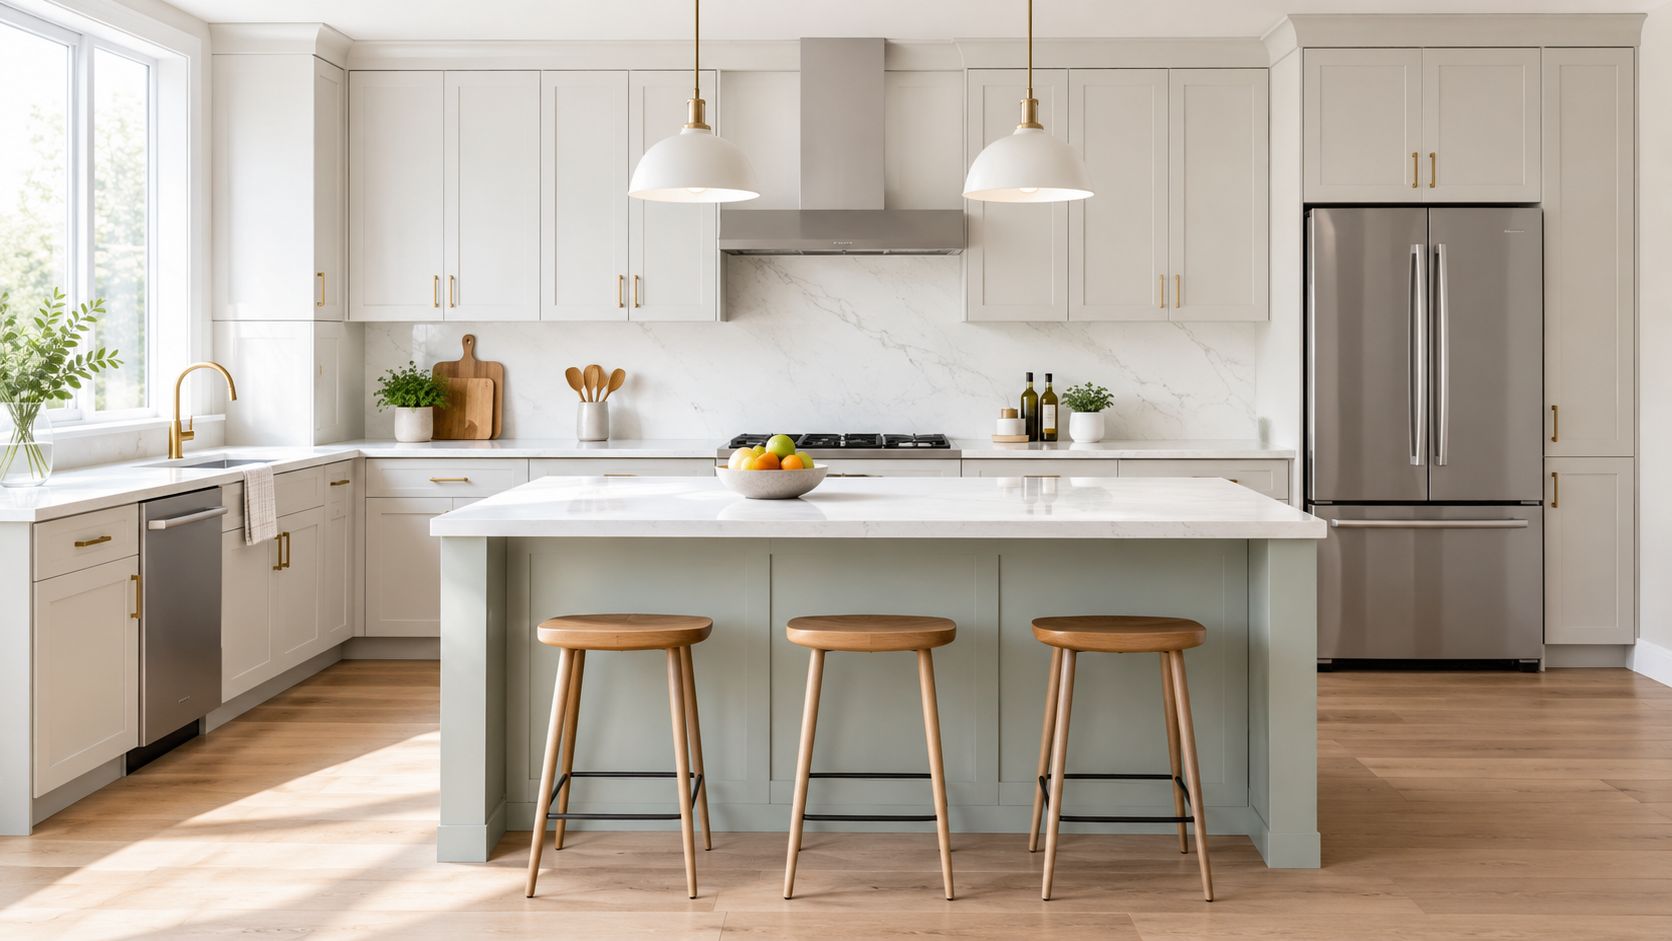
Start wide, then slow down. The kitchen overview should reveal layout, work surfaces, cabinetry, appliances, and how people move between cooking and gathering zones. Once that information is secure, make detail frames of the island edge, backsplash, hardware, fixtures, pendant lighting, and material transitions.
Those details prevent the gallery from becoming a stack of similar wide angles. A useful planning benchmark is approximately 22 to 27 final images for a standard residential listing, with that analysis reporting stronger engagement than galleries with fewer than nine or more than 35 images. Treat that as a guide, not a quota. Every additional kitchen frame should answer a different question about function, storage, finish, or craftsmanship.
Overview First, Texture Second
Clear the counters completely, then return only two or three styled items. A cutting board, bowl, or small plant can suggest use without turning the room into a product display. Wipe reflective surfaces immediately before each frame, because fingerprints on appliances and stone become obvious under window light.
- Hold white balance: Correct color casts from under-cabinet lighting so cabinetry doesn't shift between frames.
- Change focal length: Use a longer lens for details to compress materials and isolate texture.
- Show proportion twice: Photograph the island from two angles when it anchors circulation or seating.
A hypothetical restaurant prep kitchen needs equipment layout and durable finishes to read clearly for hospitality marketing. A residential kitchen benefits from an overview plus details of the island, backsplash, and pendants. The trade-off is time. Detail work is worth it when finishes support the asking position, but it shouldn't crowd out the overview that proves the room works.
5. Primary Bedroom and Suite Views
A primary bedroom should feel quiet before it feels spacious. Photograph the bed as the anchor, show window light, and make the route to the closet or ensuite understandable. Viewers are picturing privacy and routine here, not just counting walls.
The audience for that judgment is broad. The generational trends report on listing photo usefulness reported figures of 83%, 83%, 86%, 83%, 79%, 73%, and 66% across its listed generational groups. Even the lowest figure represents a majority. You can't assume one age group wants only atmosphere while another wants only documentation. The suite sequence needs both.
Build a Suite Sequence
Make the bed with crisp, neutral textiles and smooth wrinkles from the camera side first. Balance the nightstands with lamps or simple decor so the composition doesn't tilt visually toward one side. Open curtains fully, switch on bedside lamps, and remove personal photographs, medications, charging cords, and clutter from every surface.
A bedroom photograph succeeds when the viewer can imagine waking up there without noticing the styling decisions that made it possible.
Shoot the main view from the doorway or a corner that includes the bed and windows. Then make a secondary angle toward the walk-in closet, sitting area, or ensuite entry. That second frame often matters more than another nearly identical bed view because it explains how the suite functions.
A hypothetical boutique hotel suite can lead with the bed, then reveal a seating area and bath entry. A new townhome primary suite can move from bedroom to closet to ensuite in a clear progression. Keep camera height consistent with the other interiors. Consistency helps viewers compare rooms without feeling that the perspective keeps changing on them.
6. Bathroom Detail and Overview
Bathrooms punish careless framing. They're small, reflective, and full of mixed light, so a single rushed wide shot can distort the vanity, catch your reflection, and still miss the shower. Work deliberately. Secure an overview from the doorway, then use detail frames to show tile, stone, fixtures, and hardware at a believable scale.
Fast online screening makes that care practical as well as aesthetic. Coverage of a 2025 staging report notes that buyers with an expectation about viewing homes planned to screen a median of 20 listings virtually but tour only eight in person, while 88% of sellers' agents considered listing photographs more important or much more important to clients. A clean, precise bathroom set helps a property survive that first cut.
Control Reflection and Contrast
Position the camera so mirrors reveal the room, not the photographer. Flag stray light or adjust your angle before relying on editing. Close the toilet lid, clear counters, and leave only a folded towel, a plant, or one coordinated accessory. Check grout, glass, and polished surfaces at close range because the lens will find water spots you missed from the doorway.
Use a tripod and bracketed exposures when bright vanity fixtures sit against darker tile. Then step closer for the vanity surface, shower niche, faucet, or tile pattern. Shallow depth can work for a detail, but the overview should remain sharp enough to communicate condition.
A hypothetical university residence bathroom may need an overview plus two details for a housing brochure. A hospitality guest bath can be photographed from the doorway to connect vanity, shower, and tile rhythm in one sequence. Don't over-brighten the edit. Bathrooms should feel clean and luminous, not clinically bleached.
7. Aerial and Drone Overview
Some properties can't be understood from the ground. An aerial overview shows footprint, roof forms, parking, site circulation, landscaping, and the relationship between buildings. For a campus, multifamily project, or mixed-use development, that context can be as persuasive as any interior.
Use the view responsibly. The 2025 REALTORS Technology Survey on drone photography use reports that drone photography or video was used by 75% of surveyed REALTORS®. Popularity doesn't make every aerial informative. A high frame can overemphasize parking or neighboring density while obscuring pedestrian access. Pair aerials with street-level images so viewers understand both organization and arrival.
The short aerial sequence below shows how changing height and angle can shift the story from site documentation to dimensional context.
Plan the Flight Like a Shoot
In the United States, commercial drone work generally requires FAA Part 107 certification and compliance with local airspace rules. Confirm restrictions, property permission, wind, batteries, and visual line of sight before launch. Early morning and late afternoon produce longer shadows that reveal form and texture across roofs and terrain.
Plan nadir, or straight-down, frames for site-plan clarity and oblique angles for depth. A hypothetical college campus can show quad, building placement, and parking access from one high-angle sequence. A hypothetical mixed-use development can use a sweeping oblique to present the full site to investors. For examples of how high-angle context supports property storytelling, see this collection of Atlanta aerial photos. The best aerial still has a job. If it only proves the drone could fly, leave it out.
8. Outdoor Living and Amenity Spaces
Outdoor living frames show what happens after someone moves in, checks in, or arrives for work. Patios, courtyards, pools, gardens, rooftop terraces, and shared amenities explain lifestyle and operational value. They also connect interior and exterior, which is why a view from inside looking out belongs on the list alongside the view from the amenity itself.
Delivery requirements should shape how many of these frames you make. A guide to MLS photo dimensions, formats, and upload caps gives examples including a 1,024 by 768 pixel minimum for one system, a 48-photo cap for another, and a 40-photo cap for another. Requirements vary, so confirm the target system before you shoot a dozen nearly identical terrace angles that will never be uploaded.
Stage Use, Not Clutter
Schedule amenities when planting looks healthy and seasonal furniture is in place. Arrange two or three pieces to suggest conversation or dining without filling every surface. Remove hoses, bins, pool equipment, and temporary signage. If people normally animate the space, consider whether an empty frame is cleaner or whether a carefully directed user would clarify scale and purpose.
- Shoot through the threshold: Frame from the living room or clubroom outward to show connection.
- Lower the camera near water: A low angle across a pool creates reflection and depth.
- Return at dusk when lighting matters: Path lights, fire features, and interior spill can define evening use.
A hypothetical residential courtyard in soft morning light can show planting, seating, and direct access from the living room. A hypothetical hotel rooftop at dusk can combine lounge furniture, lighting, and skyline. Don't treat amenities as filler after the rooms are done. For developers and hospitality clients, they may be the images prospects compare first.
8-Point Real Estate Photography Shot List Comparison
| Shot Type | 🔄 Complexity & Resources | ⚡ Efficiency | 📊 Expected Outcome | ⭐ Ideal Use & Advantage | 💡 Key Consideration |
|---|---|---|---|---|---|
| Hero Exterior at Twilight (Blue Hour) | High: precise timing, coordinated lighting, tripod, exposure blending | Low: short shooting window and advance setup | Dramatic, warm exterior against a deep-blue sky | Listings, brochures, and portfolios; creates a polished first impression | Check sunset and weather; coordinate lights and bracket exposures |
| Street-Level Curb Appeal Exterior | Low: standard camera setup and basic site preparation | High: flexible scheduling, especially in soft daylight | Shows entrance, landscaping, scale, and neighborhood context | Listings and project documentation; communicates the property's setting | Clear visual clutter and avoid harsh midday light |
| Wide-Angle Great Room or Living Space | Medium–high: wide lens, careful lighting, and perspective correction | Medium: styling and exposure balancing take time | Conveys room size, layout, and flow in one image | Real estate, hospitality, and design portfolios; presents spatial connections | Avoid excessive wide-angle distortion and remove clutter |
| Kitchen Detail and Overview | Medium: styling, reflective-surface cleanup, and lighting control | Medium: requires both overview and detail shots | Shows kitchen layout, finishes, appliances, and craftsmanship | Listings, design marketing, and contractor portfolios; highlights high-value features | Clean reflective surfaces and manage mixed lighting |
| Primary Bedroom and Suite Views | Low–medium: staging, soft lighting, and optional secondary angles | High: relatively straightforward after room preparation | Presents comfort, privacy, and bedroom layout | Residential and hospitality marketing; helps viewers imagine daily use | Smooth bedding and remove personal items |
| Bathroom Detail and Overview | Medium–high: tight framing, reflection control, and even lighting | Medium–low: small spaces require careful setup | Shows cleanliness, fixtures, finishes, and material detail | Listings, hospitality, and renovation portfolios; highlights quality | Remove toiletries and watch for reflections and color casts |
| Aerial and Drone Overview | High: drone, qualified operator, flight planning, and regulatory checks | Medium: weather and airspace affect scheduling | Reveals site scale, layout, roof forms, and surroundings | Large developments, campuses, and construction documentation; provides a broad site view | Verify permissions, airspace rules, safety, and privacy requirements |
| Outdoor Living and Amenity Spaces | Medium: styling, landscape preparation, and suitable weather | Medium: seasonal and lighting conditions affect timing | Communicates lifestyle, amenities, and indoor–outdoor connection | Hospitality, residential, and development marketing; showcases usable outdoor space | Plan for peak landscaping and remove temporary clutter |
Turn the Checklist into a Consistent Workflow
A successful shot list is a production sequence, not a room inventory you tick off while backing through the property. Start by scouting. Walk the exterior first, note where the sun will fall, identify the strongest approach, and decide whether twilight justifies waiting or returning. Inside, trace the route a visitor would take. Entry, principal living space, kitchen, private rooms, bathrooms, supporting spaces, then amenities. That sequence gives the final gallery a logic viewers can follow without a floor plan open beside them.
Assign every frame a role before you shoot it. The hook stops the scroll. Orientation images establish setting and circulation. Proof frames document condition, storage, appliances, parking, access, or building systems. Differentiation comes from architecture, materials, views, and amenities that separate this property from comparable listings. Context frames connect the building to its street, site, or skyline. When two proposed images perform the same role from nearly the same position, keep the stronger idea and spend the saved time on lighting or a detail that adds information.
Keep Capture and Delivery Aligned
Technical consistency is what makes separate rooms feel like one property. Keep the camera level, maintain a repeatable height, and vary focal length with intention. Wide frames explain space, but longer-lens details keep the set from becoming visually repetitive. Bracket bright interiors so windows and shadows remain legible, then correct mixed color rather than letting each room drift toward a different white balance. Guidance on HDR exposure, delivery size, and image quality checks cites a minimum dimension around 1,024 pixels, typical listing limits of roughly 25 to 50 photos, and a practical master export of at least 2,000 pixels on the long edge. Deliver horizontal JPEGs in sRGB for portal use, and retain high-resolution originals for brochures, signage, editorial placement, and developer marketing.
Before export, review the full sequence at thumbnail size. Does the opening frame earn attention. Can you understand the floor plan. Are kitchens and bathrooms documented in both overview and detail. Do exterior and amenity images clarify access, scale, and use. Check vertical convergence, window halos, artificial-looking sky replacement, and any staging or object removal that could misrepresent the property. Document material digital changes where disclosure is required. Polish should clarify the space, not invent a different one.
Adapt the list to the asset and channel. A standard residence may need a concise gallery. A multifamily development needs repeated unit types, shared amenities, leasing spaces, parking, and circulation. Commercial property may require signage, loading, accessibility, tenant frontage, and building systems. Hospitality needs arrival, guest rooms, food and beverage spaces, meeting areas, and amenities sequenced as an experience. Social crops may call for vertical compositions, while investor materials may need site context and operational proof. Plan those derivatives during capture, not after the files are delivered.
Production rule: One image for each meaningful buyer, tenant, guest, or investor question, and no redundant angle just to increase the count.
Close the shoot by comparing the property against the written list before you pack up. Confirm access limitations, missed rooms, weather compromises, and any frame that needs a different time of day. Rename and organize files so the client receives a coherent gallery, not a folder of disconnected views. The result should work as a listing presentation, leasing asset, editorial portfolio, project record, or campaign library. That's the difference between photographing rooms and producing a visual account of value.
If you're planning a listing, development launch, hospitality campaign, or architectural portfolio, Jimmy Clemmons Photographer can build the shot list around the property's audience, light, access, and final deliverables, then direct and edit the shoot as one coherent visual sequence. Start the conversation and plan your next assignment with Jimmy Clemmons Photographer.