
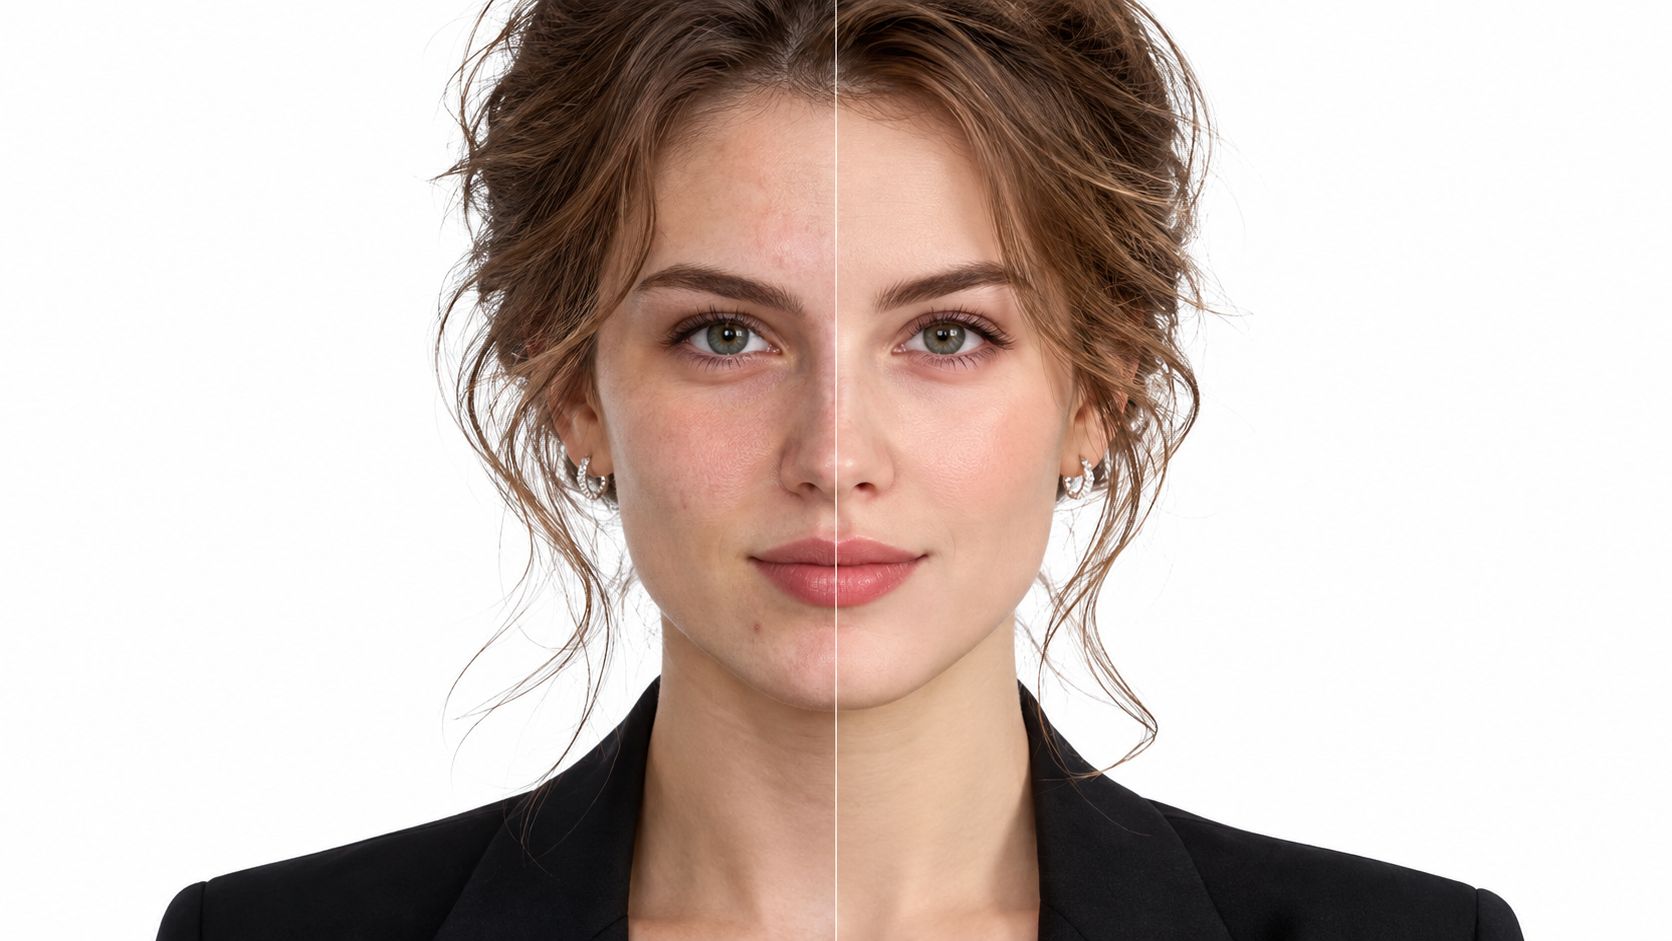
The most popular advice about portrait retouching is to choose the smoothest before-and-after example you can find. That's a poor buying rule. A polished face can still have the wrong skin color, erased character, or proportions that no longer resemble the person.
Portrait photo retouching services should be a controlled finishing step, not an open invitation to change someone's appearance. Choose the editing level, identity boundaries, delivery requirements, and privacy terms before choosing how much polish you want.
Retouching Levels Compared Side by Side
Read this comparison from top to bottom as an increase in editing scope, not an increase in quality. The right level is the least invasive one that solves the intended use.
Retouching levels by edits, use, cost and turnaround
| Level | Typical edits | Best for | Relative cost | Typical turnaround |
|---|---|---|---|---|
| Basic color correction | White balance, exposure, color cast, crop | Directory and professional-profile headshots | Low | Confirm the correction-only delivery window in writing |
| Light retouching | Spot removal, flyaway hair, stray reflections, minor blemishes | Corporate headshots and team pages | Low to moderate | Confirm after reviewing the selected files |
| Frequency separation | Even skin tone and color while keeping pores and lines | Executive and speaker portraits | Moderate | Schedule after assessing tonal unevenness and file detail |
| Beauty retouching | Skin smoothing, eye and teeth work, dodge and burn | Fashion, cosmetics and personal branding | Moderate to high | Allow a dedicated retouching and approval window |
| Editorial or composite | Background replacement, wardrobe changes, body reshaping | Magazine covers and advertising | High | Agree on milestones for composite approval and final finishing |
These are scope and cost tiers, not published price bands or guaranteed delivery times. A useful turnaround commitment comes after the editor has inspected the files and knows who will approve them.
What you gain as the scope increases
Basic correction is enough when the photograph already has flattering lighting and clean presentation. It corrects the capture without changing skin texture. Don't pay for detailed skin work that won't be visible in a small directory thumbnail.
Light retouching adds selective cleanup. A temporary blemish or isolated flyaway is a contained task; a reflection covering an eye isn't necessarily minor, because the editor may need to reconstruct missing detail.
Frequency separation addresses uneven color and tone while retaining texture. Beauty work goes further into controlled highlights, shadows, eyes, and teeth. Neither method automatically requires changing facial proportions.
Editorial work can change the scene itself. Replacing a background means matching edges, perspective, light direction, and reflected color, rather than cutting out the subject.
Buying rule: Purchase the correction your image needs, not the most elaborate technique on the service menu.
Compare the scope behind the quote
Editing level often changes the quote more sharply than image count alone. A single advertising portrait with reconstructed clothing can require more attention than a batch of straightforward headshots.
Request a written quote per level with the selected image count, delivery dimensions, review allowance, and deadline stated together. Separate essential corrections from optional changes so you can reduce cost without sacrificing the portrait's purpose.
What Each Retouching Step Changes in the File
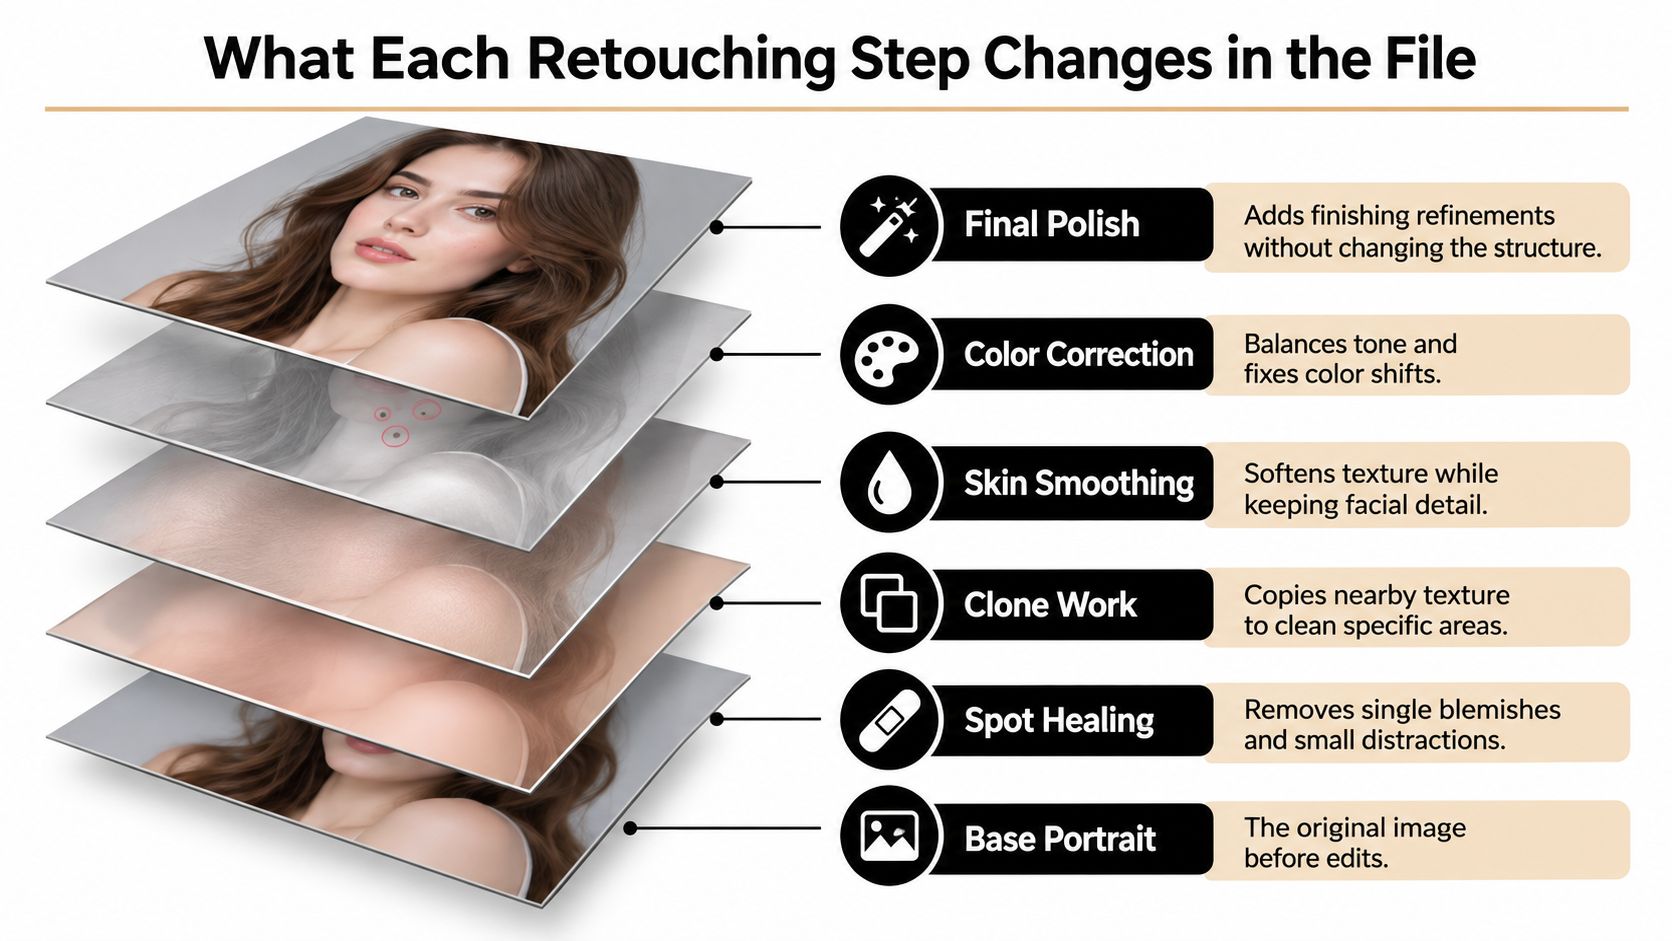
A retouched portrait should be a stack of separate jobs. The original remains intact while the editor handles cleanup, tone, texture, and finishing independently. That separation makes revisions practical instead of destructive.
Think of a lake: its water color and surface ripples describe different things. Frequency separation treats facial color like the water and fine texture like the ripples, allowing an editor to adjust uneven tone without flattening every surface detail.
This diagram shows the separate jobs within a layered portrait file.
Start with correction, then isolate distractions
The diagram groups editing functions rather than prescribing their execution order. In practice, establish a neutral color and exposure foundation before judging whether a patch of skin needs cleanup.
Spot healing replaces a small distraction using surrounding information. Clone work copies chosen texture from elsewhere, giving the editor more control near boundaries or repeating patterns. Neither tool can reliably recover an eye hidden behind a strong glasses reflection without suitable reference detail.
Separate cleanup layers also make it easier to distinguish a temporary blemish from a permanent feature. For a broader explanation of these interventions, the guide to what image retouching changes helps define the scope before work begins.
Separate texture from tone
In the documented frequency-separation example, the low-frequency layer uses a Gaussian Blur radius of 5 pixels, with the texture reconstruction using Scale 2, Offset 128, and Linear Light blending. Those settings describe that example, not a universal preset for every resolution or file type.
The low-frequency component carries broad color, shadows, and tonal transitions. The high-frequency component carries pores, hair, lines, and other fine detail.
- Uneven cheek color: Correct the tonal component without painting over pores.
- An isolated texture defect: Repair the detail component without spreading nearby color.
- A broad lighting transition: Adjust it gradually rather than blurring the entire face.
Beauty retouching also uses dodge and burn, selectively lightening and darkening areas to refine transitions. Done aggressively, it can imply a different facial structure even when no reshaping tool is used.
The advantage isn't the number of layers. It's the ability to hide, revise, or discard a specific intervention without rebuilding the portrait.
Identity-Safe and Identity-Altering Changes
A service label doesn't establish permission. An editor and client can both agree to standard retouching while imagining very different results, so the agreement needs concrete boundaries.
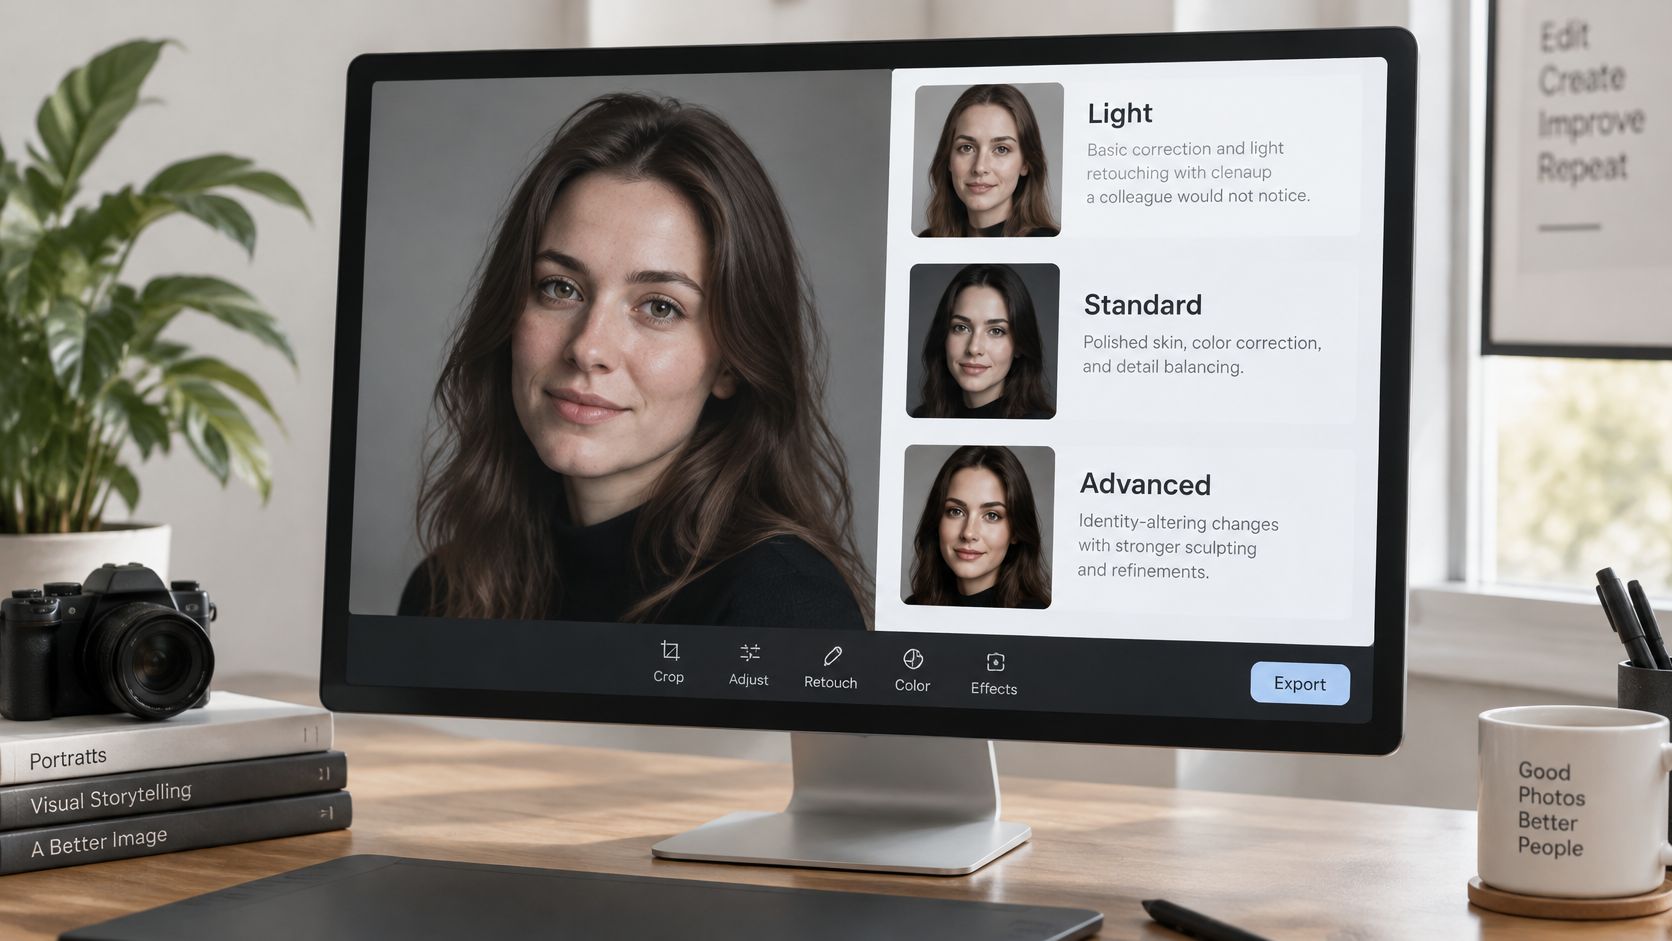
Use the editing interface as a reminder that every available adjustment is a choice, not a requirement.
Put the permission level in writing
Map the service levels to these approval tiers:
- Light: Basic correction and selective cleanup that a colleague wouldn't consciously notice.
- Standard: Frequency separation or restrained beauty work for uneven tone, temporary blemishes, and distracting flyaways.
- Editorial: Composite changes, wardrobe reconstruction, and stronger finishing, with written approval of the proposed changes before editing starts.
Across every tier, preserve wrinkles, freckles, scars, minor imperfections, and natural asymmetry unless the subject explicitly requests otherwise. A scar isn't interchangeable with a temporary spot, even though both can be removed.
Facial reshaping, altered eye size, jaw changes, and body modification need separate permission. So does light sculpting strong enough to make the face appear structurally different.
A photographer-survey report covering 363 photographers in Europe and the United States found that 78% wanted AI to handle no more than 70–80% of retouching, with respondents prioritizing natural results and preserved distinguishing features.
Premium retouching often means restraint and traceability, not maximum smoothness.
Our founder's belief is that great photography is crafted rather than caught. Applied to portraits, that means deliberate lighting and expression, followed by finishing that supports the person rather than replacing them.
The video below offers another visual reference for discussing the intended finish.
Approve likeness, not just polish
Require a side-by-side review against the original, with the subject or authorized brand team approving the result. Written comments should identify the feature and desired correction, not ask for more enhancement.
For team pages, choose light editing when the capture is already consistent. Choose standard when uneven lighting or complexion needs localized attention, but apply the same boundaries to everyone. Guidance on professional-profile portraits can help align the photograph's presentation with its professional use.
Delivery Specs That Protect Print Quality
| Output | Pixel dimensions | Resolution | Color profile |
|---|---|---|---|
| Web and social | Match the destination's required pixel dimensions and crop | Not print-critical | sRGB |
| Print 8 × 10 inches | 2,400 × 3,000 px, calculated from the print target below | 300 PPI | ICC profile for the output device |
| Print 20 × 24 inches | 6,000 × 7,200 px, or 43.2 MP | 300 PPI | ICC profile for the output device |
| Print 20 × 24 inches, lower-demand | 3,600 × 4,320 to 4,800 × 5,760 px | 180–240 PPI | ICC profile for the output device |
The print calculations use the image-resolution guide's 300-PPI high-quality print target and 180–240-PPI lower-demand range. These are output-planning targets, not a promise that any source file will produce an equally detailed print.
Calculate from the finished print
Multiply each print dimension in inches by the target pixels per inch. Applying that calculation to the larger portrait in the table produces the listed pixel dimensions; multiplying those dimensions gives its megapixel requirement.
PPI means image pixels per inch, not printer ink-dot density. Changing a resolution label without adding useful image information doesn't restore missing detail.
Crop matters too. If the layout trims the top and sides, the original needs enough usable pixels after that crop, not merely enough before it.
Approve color for the destination
For web delivery, specify an sRGB export with the profile embedded. For print, coordinate an ICC-managed workflow across the input, calibrated display, and output device.
Ask the print provider for the appropriate destination profile and production instructions. Don't convert blindly to an arbitrary print profile because the file is going to paper.
- Soft-proof the intended output: Inspect saturated colors, deep shadows, and skin transitions.
- Make output-specific adjustments: Keep print compensation separate from the neutral master.
- Approve a representative proof: Use it when skin color or campaign consistency is critical.
Request both a neutral master and the final graded version. A campaign treatment may suit today's brochure but make matching a future employee portrait unnecessarily difficult.
How a Retouching Job Moves From Raw File to Approval
A reliable job moves through named decisions. The editor should know which files are approved, what changes are authorized, and who can release the final image before detailed work begins.
From brief to editable master
Define the brief. Record the intended use, final crop, delivery dimensions, edit level, and included review rounds. Identify the approval owner so conflicting comments don't arrive from different departments.
Cull and select. Choose expression, posture, focus, and lighting before paying for detailed cleanup. Don't retouch several near-identical frames while postponing the actual selection decision.
Prepare the source. Supply the original raw file when available, or the highest-quality original image rather than a messaging-app copy. For a Mac-based handoff, this guide to photo format choices for Mac workflows provides useful context for deciding what to send and what to retain.
Establish neutral correction. Adjust white balance and base exposure, then preserve that neutral foundation separately from the creative look. This is also the point to flag capture problems that editing cannot cleanly solve.
Apply targeted color adjustments. The skin-tone correction guide recommends correcting white balance before targeted Selective Color or Color Mixer adjustments in red, yellow, and, when needed for darker skin tones, blue channels. Mask the intervention to the relevant area so clothing and background colors don't change unintentionally.
Retouch on separate layers. Keep localized cleanup reversible. The non-destructive editing documentation describes separate-layer healing and cloning workflows, including sampling controls that prevent corrections from being baked into the source.
From technical check to release
Inspect detail and presentation. Check at actual-pixel view and final delivery size. A correction can look tidy close up yet produce an uneven complexion when the portrait is reduced.
Collect consolidated feedback. Send the proof with a clear original comparison and collect a single authorized response. Distinguish a correction to agreed work from a newly requested composite or appearance change.
Export and archive. Verify file names, dimensions, profile, crop, and delivery format. Store or delete the working master according to the agreed retention terms.
Schedule safeguard: Reserve the client's review window when reserving the editing window.
An illustrative schedule might allocate one day to briefing and selection, one to three days to retouching, and one to two days to review. That's a planning example, not a published industry turnaround or a studio commitment.
A late selection or delayed response can move delivery. A rush fee may buy priority, but it can't substitute for an unavailable approver. When commissioning professional photo editing services, request separate dates for proof delivery, feedback, and final release.
Common Problems and How to Fix Them
Start with the symptom the client names. “Something looks wrong” isn't enough to justify another smoothing pass, and adding sharpening won't repair a poorly constructed edge.
Retouching symptoms, causes and fixes
| Symptom | Likely cause | Fix |
|---|---|---|
| Skin looks waxy or plastic | Texture layer over-blurred or smoothing applied to the whole face | Lower the offending retouch layer's opacity and restore pores on the high-frequency layer |
| Skin color shifts between images | Correction applied to the full frame under mixed light | Set neutral white balance first, then apply masked Selective Color |
| Halos around hair or shoulders | Heavy healing or sharpening at edges | Redo the edge with a smaller brush and inspect at actual-pixel view |
| Subject no longer looks like themselves | Reshaping beyond the agreed edit level | Revert to the agreed level and approve against the original |
| Colors look wrong in print | No soft-proof with the printer profile | Soft-proof with the destination ICC profile before approval |
Diagnose before adding another correction
For waxy skin, identify which layer removed the texture. Reducing the intact high-frequency layer indiscriminately can make matters worse; reduce the smoothing intervention or rebuild damaged detail from the untouched source.
For mismatched color, compare files under the same viewing conditions. Don't keep chasing each image by eye while an inconsistent base correction remains underneath.
Hair halos need edge repair, not stronger contrast. Use nearby texture carefully, and avoid a sharp cutout boundary where the original hair naturally falls out of focus.
Review against evidence
When likeness is the problem, compare the finished portrait with the original rather than relying on memory. Check the jaw, eye shape, nose contour, and facial shadow pattern before debating whether the result looks flattering.
For print complaints, distinguish a file problem from a display-to-paper expectation problem. Confirm the actual output conditions before changing skin color globally.
A useful approval comment names the location, symptom, and desired result. “Restore the texture on the forehead” gives an editor a bounded correction. “Make it more natural” leaves too much room for another interpretation.
Privacy, Retention and Deletion Terms to Get in Writing
A face file deserves a handling agreement before upload. The final portrait may be intended for public use, but that doesn't automatically authorize unrestricted access to source files, rejected frames, or working derivatives.
Our people photography focuses on authentic expression and flattering lighting. Our commercial photography covers products, people, and spaces for brands. For organizational assignments, the image-handling discussion belongs alongside the creative brief.
A checklist for the booking email
- Storage: Where will originals and working files be stored, and which roles can access them?
- Processors: Will subcontractors, cloud processors, or automated services receive the files?
- Derivatives: Does the retention schedule cover previews, temporary exports, working files, backups, and final masters?
- Training: Will any image be used to train AI systems, and can the agreement explicitly prohibit that use?
- Deletion: How can the client request removal, what will be removed, and what completion period will be confirmed in writing?
Don't accept “files are secure” as a complete answer. Ask for the operational terms, including any backup exceptions and whether deletion means immediate removal or expiry through a documented backup cycle.
Distinguish editing from identification
Under guidance on images and data protection, identifiable images can constitute personal data, while biometric protections become more stringent when facial features are processed for unique identification. The applicable obligations depend on the processing and jurisdiction, not merely on whether a photograph contains a face.
Ordinary cleanup isn't the same activity as creating facial embeddings or operating an identification system. The agreement should state which technologies are involved and whether any identification-related processing occurs.
A public-facing portrait and unrestricted permission to reuse its source files are different things.
For group portraits, document who authorizes publication and how a withdrawal request will be handled. Organizations should also establish a process for employee departures, portraits involving minors, and editorial reuse beyond the original campaign.
Premium production includes clear custody of the files. A retention schedule, documented permissions, client-controlled deletion process, and explicit no-training terms where applicable are more useful than a vague assurance of discretion. At organizational scale, neglected archives deserve as much attention as the editing itself.
Choose Your Level and Book With Confidence
Start with the intended use. A directory portrait needs recognizable presentation and consistent color; an advertising hero image may need detailed finishing, a different background, and output-specific approval.
Then choose the permission tier independently of the technique. Frequency separation is a method, not authorization to erase age, and beauty work isn't automatic permission to reshape a face.
Make the quote comparable
Send the same selection and requirements to anyone quoting the work. Include:
- Use and scope: Where the image will appear and which corrections are essential.
- Files and output: Source quality, selected image count, final crop, and delivery size.
- Approval ownership: Who submits feedback and who authorizes release.
- Commercial terms: What the quote includes, how additional requests are charged, and when work begins.
- File handling: Storage, processors, training restrictions, retention, and deletion expectations.
A single hero portrait can take longer than a batch of headshots because the editor may need to solve more difficult problems within that frame. Judge the quote by the work and responsibility involved, not by image count alone.
Book against a defined result
Our professional editing specialty supports portrait and brand-image production, but the assignment still needs its own agreed scope. Don't assume a portfolio example establishes the editing permissions, turnaround, or privacy policy for your files.
Before the shoot, send the intended use, selected level, identity boundaries, and handling questions. Request written answers on pricing, proof dates, review allowances, final delivery, and privacy so nobody has to negotiate the meaning of natural after the portrait is finished.
Our Atlanta-based practice offers people photography focused on authentic expression and flattering lighting, alongside professional editing. Visit Jimmy Clemmons Photographer to discuss portrait photo retouching services, and send your intended use, preferred editing level, delivery requirements, and privacy questions before booking.