
You arrive at a corporate campus just before sunset, unload the tripod, and discover that the façade lights are already on. The sky is changing faster than the client's shot list, windows are beginning to glow, and there's no time to guess at compositions or exposure. In blue hour photography, the strongest images come from treating that narrow transition as a scheduled production window, not a lucky visual effect.
For architectural work, the brief is usually clear. The image must hold the building's geometry, retain information in the sky, show controlled interior illumination, and feel polished enough for a website, annual report, editorial feature, or property campaign. That requires planning by solar angle, scouting the camera position before the light peaks, and making lighting decisions while the scene is still changing.
Why Blue Hour Rewards Planned Architecture Shoots
Blue hour rewards photographers who prepare before the color arrives. The building may look ordinary in daylight, but as direct sunlight fades, the sky takes on a cooler tone while windows, lobby lighting, signage, and façade fixtures begin to define the structure. That contrast gives commercial exteriors their visual authority, but only if the camera is ready when the balance appears.
The practical mindset is simple: plan the image before the usable light begins. Review the client's priorities, identify the principal elevation, decide whether the frame needs a broad environmental view or a tighter architectural study, and establish where the tripod can stand without introducing distracting foreground elements. A corporate campus may need enough surrounding context to communicate scale, while a hospitality façade may depend more on entrance lighting, window rhythm, and the relationship between the building and its setting.
Build the shot list around changing light
Start with the frames that depend most on the remaining ambient light. A wide exterior composition usually benefits from a brighter sky because it keeps landscaping, paving, and neighboring forms visible. As the sky deepens, move toward details that can tolerate stronger contrast, such as a glazed entrance, illuminated canopy, sign, or repeating window pattern.
A reliable sequence might include:
- Established exterior: Lock in the main elevation while the sky still carries detail.
- Balanced façade frame: Refine the composition as interior and exterior lights become more prominent.
- Detail studies: Isolate materials, entrances, signage, and window glow as the scene darkens.
- Client-safe alternatives: Capture a cleaner version without people, vehicles, or temporary activity when the site allows.
Production rule: Blue hour should appear on the call sheet as a timed deliverable, not as a vague instruction to “shoot at dusk.”
This approach also protects the assignment from changing conditions. Clouds, air quality, reflections, and lighting controls can alter the appearance of the site, but a sun-angle schedule still gives the crew a predictable framework. You'll know when to be composed, when to begin exposures, and when to stop pursuing the broad sky-and-building balance.
The result isn't merely a blue image. It's a file that communicates design intent. The sky supports the architecture, artificial sources look deliberate, and the building remains legible instead of disappearing into an underexposed frame.
The Science Behind the Blue Hour Window
Blue hour is a measurable phase of twilight, not a fixed countdown from sunset. It is commonly defined as the period when the Sun sits about 4° to 6° below the horizon, occurring twice each day, before sunrise and after sunset. The usable period is often roughly 20 to 40 minutes, but latitude and season change both its duration and visual character. Sunset Now's explanation of blue hour connects the timing to the balance between ambient sky brightness and emerging artificial light.
For an architecture assignment, that balance is the working window. The façade must remain legible while interior and exterior fixtures begin to define the building. Arrive too early and the sky overpowers the lighting design, making the structure look flat or sunlit. Wait too long and the sky can become nearly black, bright windows may clip, and the exterior loses the controlled relationship clients expect from a hero frame.
Twilight stages and usable contrast
Blue hour sits within the wider twilight sequence. Civil twilight extends from the horizon to approximately 6° below it. Nautical twilight runs from approximately -6° to -12°, while astronomical twilight continues from approximately -12° to -18°, as outlined in the PhotoPills Magic Hours guide. Blue hour occupies only part of this progression, commonly near the transition between civil and nautical twilight.
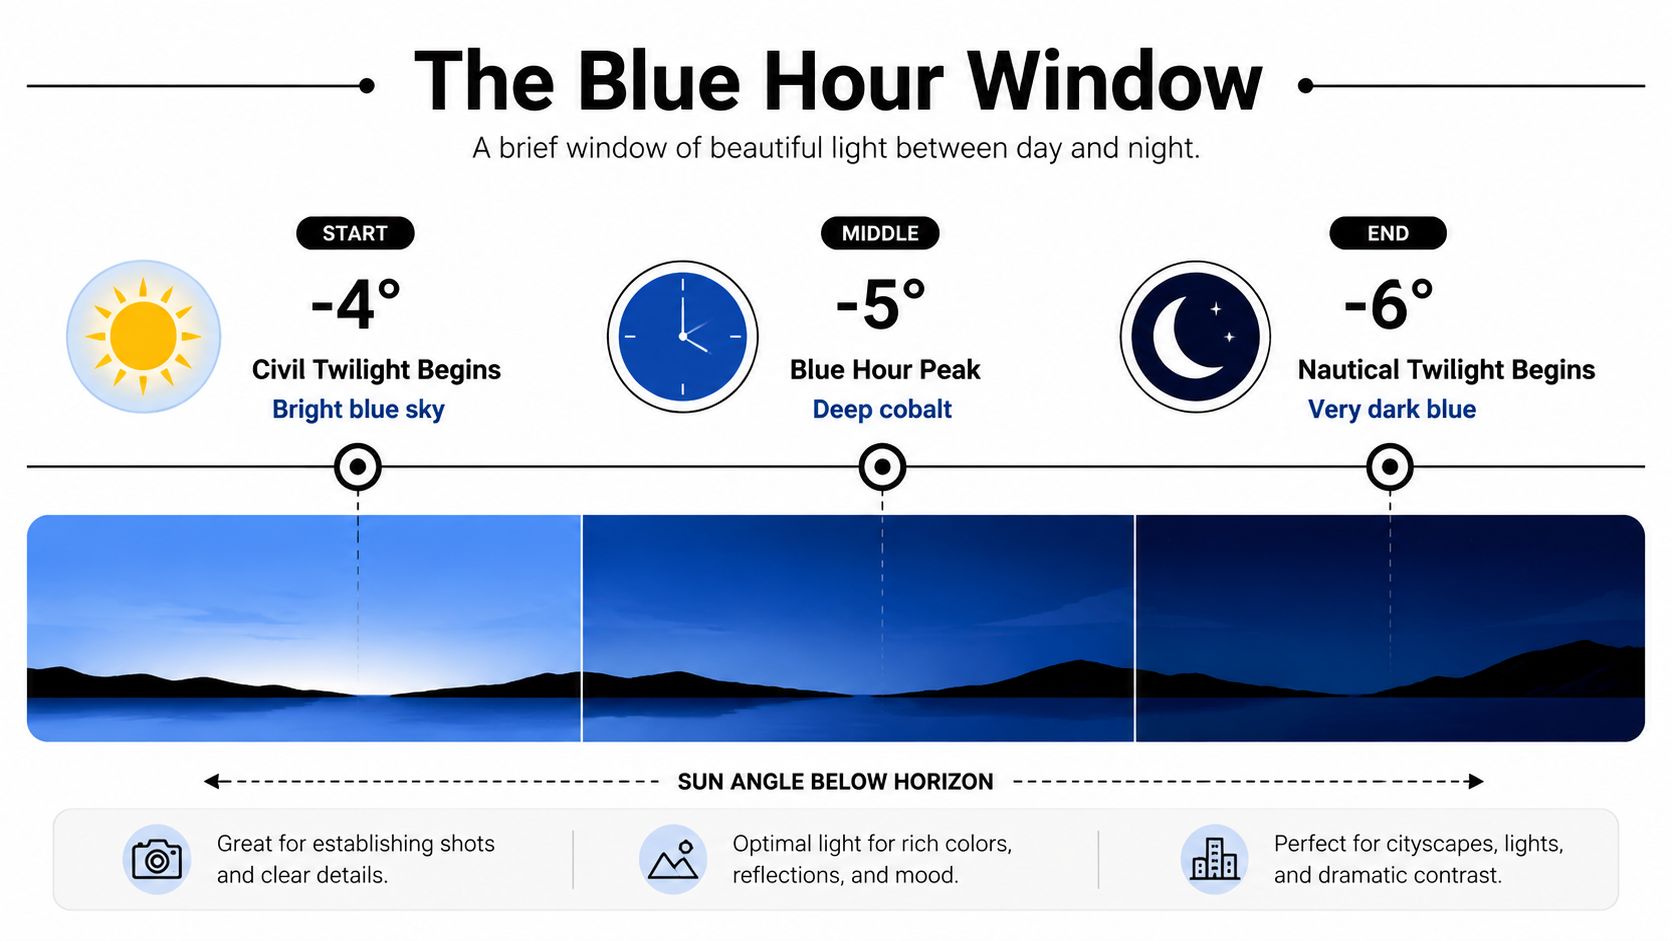
As the Sun drops lower, direct illumination weakens while the atmosphere continues scattering residual daylight. The background shifts cooler and retains color and structure, while the building's artificial sources become more visible. Clouds, haze, and reflective glazing can change the result, but the solar angle establishes the exposure problem you need to solve.
Solar angle creates a planning language
Sunrise and sunset times alone are too coarse for precise architectural scheduling. Two sites can share a sunset time yet provide different working conditions because latitude, season, and the rate of solar descent affect the transition. A solar-angle framework, such as the one described in the PhotoPills reference on magic hours, gives the crew a repeatable timing reference.
Use that reference to define the capture interval, then schedule access, composition, and lighting checks around it. The angle does not predict cloud cover or how a client's lighting system will behave. It does identify when the scene is likely to offer the required relationship between sky, façade, and illuminated interiors.
For projects across different latitudes, this distinction protects the call sheet from generic “arrive at sunset” instructions. Schedule by solar position, and the crew can adjust for local conditions without losing the intended lighting balance.
Scout and Schedule by Sun Angle Not Guesswork
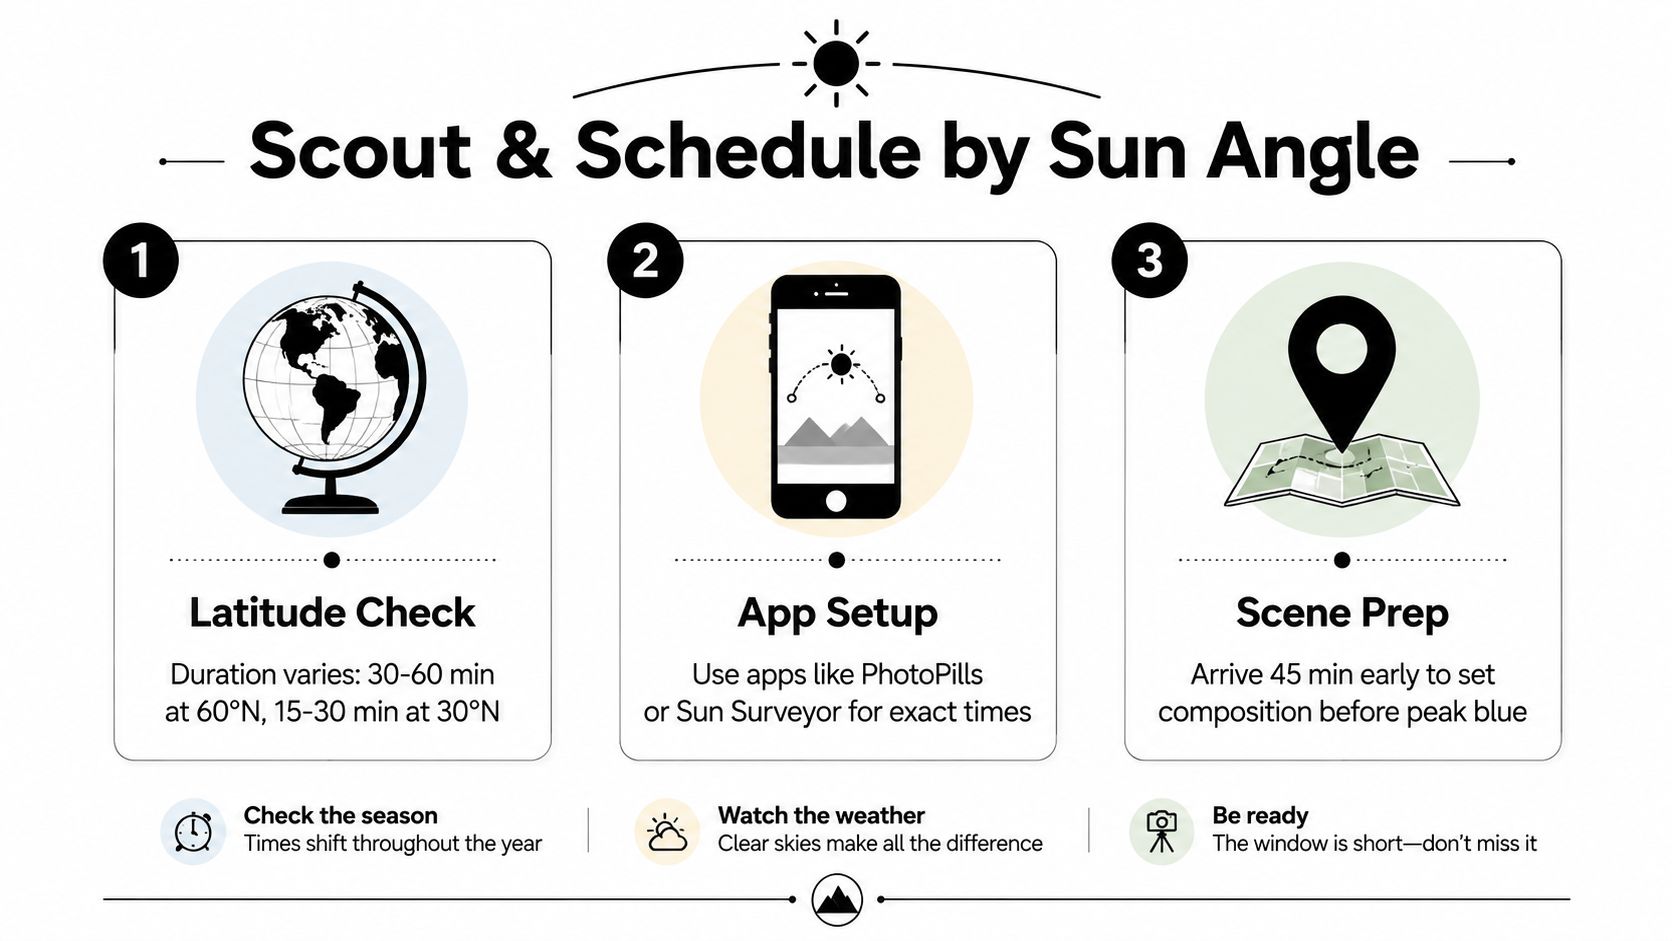
A generic instruction to arrive early breaks down across cities. The usable blue-hour period can vary materially by geography, with longer transitions at higher latitudes and shorter ones nearer the equator. The Digital Camera World guide to blue hour highlights this location and season dependence, while practical guidance commonly places the broader window around 20 to 40 minutes, depending on conditions and site.
For a commercial assignment, build the schedule from the angle backward. First identify the latitude and date. Then use a planning tool to find when the Sun reaches the relevant position below the horizon. Finally, work backward again to determine when the crew needs access to the property.
Turn the forecast into a call sheet
A useful schedule separates arrival, setup, and capture rather than treating them as one event.
- Confirm the solar-angle window. Record the start and end of the planned blue-hour interval for the exact location and date. Don't rely on a generic sunset time.
- Scout the principal view in daylight. Check lines, reflections, parked vehicles, landscaping, access restrictions, and the position of neighboring structures before the sky begins changing.
- Ask the site team about lighting behavior. Find out which offices remain occupied, whether lobby lights are controlled by timers, and whether signage or façade fixtures can be adjusted.
- Prepare the composition before peak color. Mount the camera, level the tripod, make the lens choice, and establish the final framing while visibility remains comfortable.
- Prioritize the deliverables. Capture the hero exterior first, then move to secondary angles and details as the sky darkens.
Let latitude change your expectations
At a higher latitude, the Sun can descend through twilight more gradually, giving you more time to refine a frame. Near the equator, the transition can move quickly, leaving less room for experimentation. Season adds another variable, so a schedule that worked for a summer campus shoot may not translate directly to a winter hospitality assignment in another city.
That's why a location database should include more than the address. Keep notes on the best camera positions, access points, lighting controls, reflective surfaces, and the solar-angle behavior you observed on previous visits. A returning property becomes easier to schedule because you're building production knowledge instead of starting from “arrive early” every time.
Scouting insight: The best camera position is often found in daylight, but the best decision about that position happens when you predict how the façade, windows, and sky will read together.
If the client needs consistent imagery across several cities, use the same planning language for each site. Record the target angle, arrival requirement, lighting status, and priority frames. That makes the creative intent portable even though the duration of the window changes.
Gear and Lighting Control for Mixed Sources
Blue hour is a controlled artificial-light problem as much as a natural-light opportunity. The sky is falling in brightness while interior spill, streetlights, signage, and façade fixtures remain active. A tripod solves camera movement, but it doesn't solve mismatched color, blown windows, or a lobby that reads much warmer than the exterior.
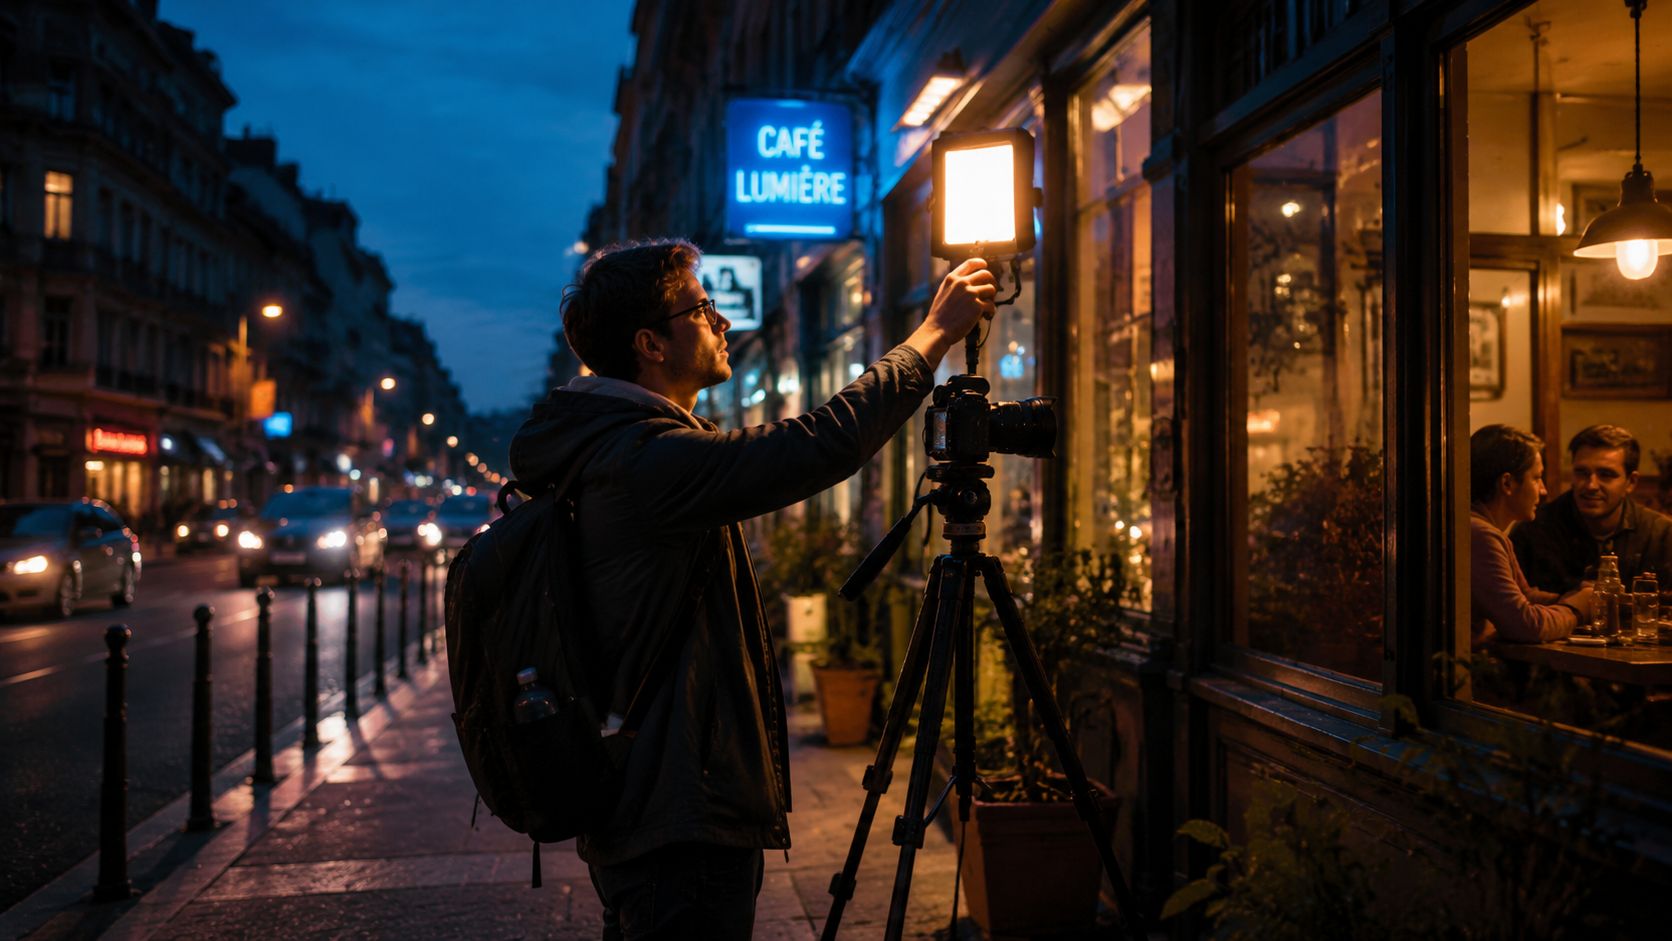
A stable tripod and a remote release are the baseline for long architectural exposures. A camera with good RAW flexibility helps, but the more important choice is whether you'll accept the property's existing lighting or shape it. Existing light is efficient and authentic, yet it may combine cool exterior fixtures with warm interior lamps and greenish commercial sources. Supplemental lighting gives you control, but it can look artificial if it doesn't match the building's scale and intended use.
Compare the lighting options
| Approach | What works | What can fail |
|---|---|---|
| Existing practicals only | Fast setup and a genuine sense of place | Mixed color and uneven brightness can distract |
| Controlled architectural lighting | Consistent emphasis on entrances, materials, and circulation | Requires access, coordination, and restraint |
| Supplemental LED or flash | Adds shape to a dark foreground or selected feature | Poor placement can flatten texture or reveal the intervention |
| Exposure blending | Preserves a broad range from sky to interior spill | Overprocessing can make the building look synthetic |
Use supplemental light as a targeted correction, not a blanket wash. A dim LED can lift a foreground planting bed or entrance threshold, while a carefully placed flash can define a near architectural surface. Keep the source direction consistent with the building's existing lighting so the added illumination feels integrated.
For a deeper treatment of color and source conflicts, review this guide to mixed lighting photography. The same principle applies here: decide which sources should lead, which should support, and which should be reduced or removed.
Direct the scene before you direct the exposure
Ask the property contact to close blinds, switch off an inconsistent office zone, or activate a cleaner lighting scene if that's possible. A few operational changes can matter more than a new lens. You should also watch for streetlights entering the frame, reflections from nearby glass, and signage that becomes disproportionately bright as the sky darkens.
The video below demonstrates the kind of on-location setup and low-light control that supports deliberate work rather than improvised exposure decisions.
Keep the lighting design subordinate to the architecture. The viewer should notice the building's form, material, and use first. Artificial sources should explain the space, not announce the photographer's equipment.
Camera Settings and Bracketing Workflow
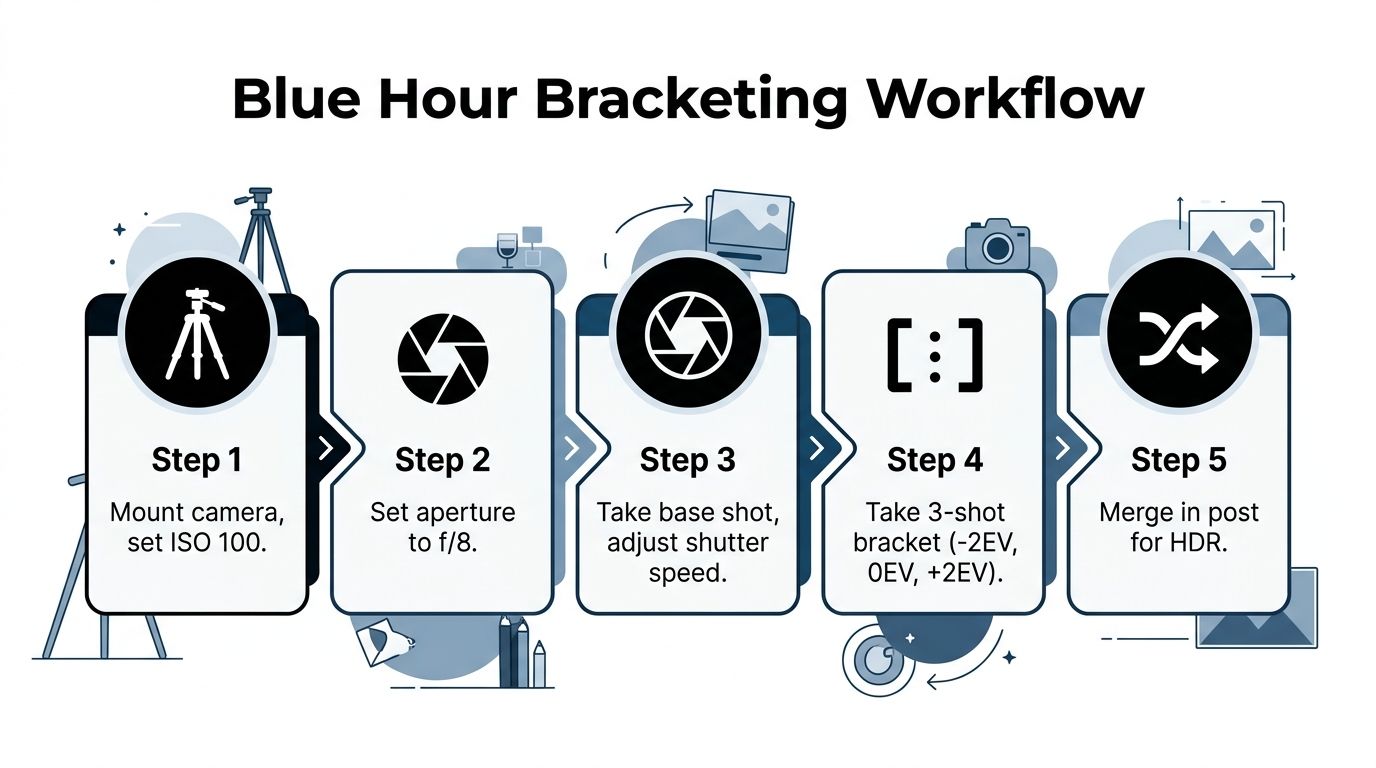
A reliable blue-hour exposure starts with a repeatable baseline. For architectural work, use ISO 100, an aperture around f/8 to f/11, and a tripod that remains stable despite wind or ground vibration. Let shutter speed extend as ambient light falls. Early blue-hour frames may run from 2 to 15 seconds, while 5 seconds or longer becomes common as the sky darkens, as described in this blue-hour photography field guide.
Use a frame-by-frame routine
Manual exposure keeps brightness consistent across a sequence, which gives you cleaner material for later blending. Aperture priority can save time, but bright signs, headlights, and glowing windows may cause the camera to alter shutter speed unpredictably. In a client sequence, that inconsistency can make the façade, sky, and interior sources harder to combine.
Inspect the histogram and highlight warnings after every frame. A darkening sky may encourage underexposure for a deeper blue, yet excessive darkness removes shadow information and increases noise. Bright interiors and signage can clip while the façade still appears too dark, so check both ends of the tonal range.
Use this order on site:
- Stabilize the camera: Mount it firmly and trigger the shutter with a remote release or the 2-second timer.
- Set the baseline: Begin at ISO 100 with an aperture between f/8 and f/11.
- Take the base frame: Adjust shutter speed until the building and sky hold a workable tonal relationship.
- Check the histogram: Review highlights, shadow detail, verticals, and movement between frames.
- Bracket when needed: Capture 2-stop increments when one exposure cannot retain comfortable detail in both sky and building.
- Repeat promptly: Blue-hour light can shift enough for a usable sequence to disappear in 30 to 60 seconds. Work through the bracket without changing the composition, then repeat the set if the sky or window balance changes.
Protect the sequence
Keep the camera position and focus fixed during bracketing. Disable settings that can create frame-to-frame variation, and note which exposure provides the strongest base for the blend. If people or vehicles cross the property, make extra clean exposures so moving elements do not dictate the final frame.
Bracketing serves a controlled lighting problem. It preserves a natural relationship between sky, façade, and interior sources when the scene exceeds a single exposure's range. The finished blend should resemble a carefully exposed photograph, with believable window glow and retained architectural texture, rather than an exaggerated HDR treatment. For a broader workflow reference, consult this blue-hour photography guide.
Composition and On-Set Direction
Composition decides whether the building looks valuable, accessible, imposing, or calm. Settings can preserve detail, but they can't repair a weak camera position. Begin with the client's communication goal, then choose the viewpoint that supports it.
For a corporate campus, a broad frame may need a clean approach, visible landscaping, and enough sky to establish atmosphere. For a hotel or restaurant, the entrance, terrace, or illuminated public zone may carry more persuasive weight than the full elevation. Keep the first composition simple. Correct verticals, remove distractions, and make sure the building's strongest lines lead the viewer into the space.
Work from broad to specific
Start with the established exterior while the sky still supports context. Once that frame is secure, tighten the view to show material transitions, canopy details, window patterns, or a doorway where the lighting tells a story. As the sky darkens, those smaller compositions often become stronger because artificial light carries more of the frame.
A practical order is:
- Main elevation: Use the strongest perspective and establish the property's identity.
- Approach or entry: Show how visitors experience arrival.
- Material detail: Look for stone, metal, glass, concrete, or designed outdoor elements.
- Occupied signal: Include restrained signs of use, such as controlled window glow, when they support the brief.
Direct people with the same precision you apply to the camera. Ask staff or client representatives to clear the primary axis, pause movement during a long exposure, or stand in a position that communicates scale without becoming the subject. If the assignment includes talent, keep their placement consistent with the architecture rather than treating the building as a background.
Tethering can help when the client or art director needs to verify signage, symmetry, and window balance on site. It also exposes small problems that a camera-back screen may hide, such as converging verticals, a distracting reflection, or a bright practical light pulling attention away from the entrance. Use composition planning for architectural photography to structure the visual decisions before the light becomes scarce.
The best blue-hour frame often feels quiet. It doesn't need every light on or every feature visible. It needs a clear hierarchy, clean geometry, and enough atmosphere to make the space feel intentional.
Post Processing and Exposure Blending
Start with the RAW files and establish a neutral foundation before making the blue cast more dramatic. Set white balance so exterior materials remain believable, then adjust tint if artificial sources introduce green or magenta contamination. Don't neutralize the entire image blindly, because the cooler sky is part of the scene's identity, but don't let the blue overwhelm concrete, stone, skin, or branded finishes.
Build a balanced master frame
Begin with the base exposure that best represents the building. Recover highlights in windows, signage, and bright fixtures before opening the shadows. If the frame still loses either sky structure or interior detail, use the bracketed exposures captured on the tripod.
Blend selectively rather than applying a global HDR preset. A darker frame may supply the sky and bright sources, while a lighter frame can restore façade or terrain detail. Use masks around window edges, rooflines, trees, and signage so the transition remains invisible. Moving people, foliage, or vehicles may require a clean-frame choice rather than an automatic blend.
The real estate photography editing workflow follows the same broader principle, preserve the scene's structure while making the final file easier to read. Keep perspective corrections restrained, maintain straight architectural lines, and check the image at both full size and delivery size.
Finally, compare the processed frame with the intended lighting design. The sky should support the façade, interior spill should look purposeful, and supplemental light should disappear into the overall logic of the scene. If one source dominates, reduce it before adding more color or contrast.
For architectural, hospitality, and corporate assignments, Jimmy Clemmons Photographer combines location scouting, sun-angle planning, lighting design, on-set direction, and precise editing to create cohesive blue-hour imagery. Visit Jimmy Clemmons Photographer to discuss an exterior campaign, property feature, or brand assignment that needs deliberate light and editorial-level execution.