

You're probably in that familiar spot right now. The room in front of you looks balanced, layered, expensive, and full of atmosphere. Then you raise the camera, make the frame, and the result comes back dark in one corner, blown out at the window, and oddly cramped. The sofa looks larger than it should. The lines in the walls lean. The finishes that felt rich in person look flat on screen.
That gap frustrates almost everyone who starts photographing interiors seriously. It's also the exact reason an interior design photography course can matter. Not because a course hands you a magic preset, and not because buying a wider lens solves the problem. It matters because good interior photography is a process. You learn how to read a room, decide what story the client needs told, manage the light that's there, and finish the files so they feel accurate rather than synthetic.
The photographers who make interiors look calm and effortless usually aren't winging it. They're following a repeatable workflow. That's what separates a snapshot from work an architect, designer, hospitality group, or editor can use.
Why Your Interior Photos Fall Short of Reality
A room can be beautifully designed and still photograph badly in untrained hands. That's not a creative failure. It's a technical and observational one.
Most weak interior photos fall apart in the same places. The camera sits too high or too low. The lens choice exaggerates the room. Window light dominates one side while practical fixtures push a different color into the other. The photographer tries to solve all of it in one click, then pushes the file too hard in editing and gets that brittle HDR look clients hate.
What makes interiors tricky is that a room isn't experienced as a flat rectangle. You walk through it. You notice how one seating group relates to another. You register texture in layers. A camera doesn't do that naturally. It has to be directed.
Professional-looking interior photos are built, not grabbed.
That's why strong training starts by changing how you see. Instead of asking, “How do I fit the whole room in?” you learn to ask better questions. Where does the design intent live? Which angle keeps the architecture honest? What can be left out? What needs to be styled before the shutter clicks?
A good course also corrects a common misconception. Most beginners think they need one hero image per room. In practice, one image rarely carries the whole assignment. Real interior coverage depends on a sequence of decisions. Planning, shooting, editing, and delivery all affect whether the final set feels editorial, commercial, or amateur.
Where the disconnect usually starts
- Composition first goes wrong: You stand where there's empty space for you, not where the room reads best.
- Light gets treated as background: Daylight, lamp light, and reflections fight each other unless you control them.
- Editing becomes rescue work: If the capture is careless, Lightroom and Photoshop can only do so much.
- Client purpose gets ignored: A designer, hotel, builder, and magazine editor don't need the same pictures.
If your photos don't match what you saw in person, the answer usually isn't more gear. It's a better method.
What a Good Course Actually Teaches You
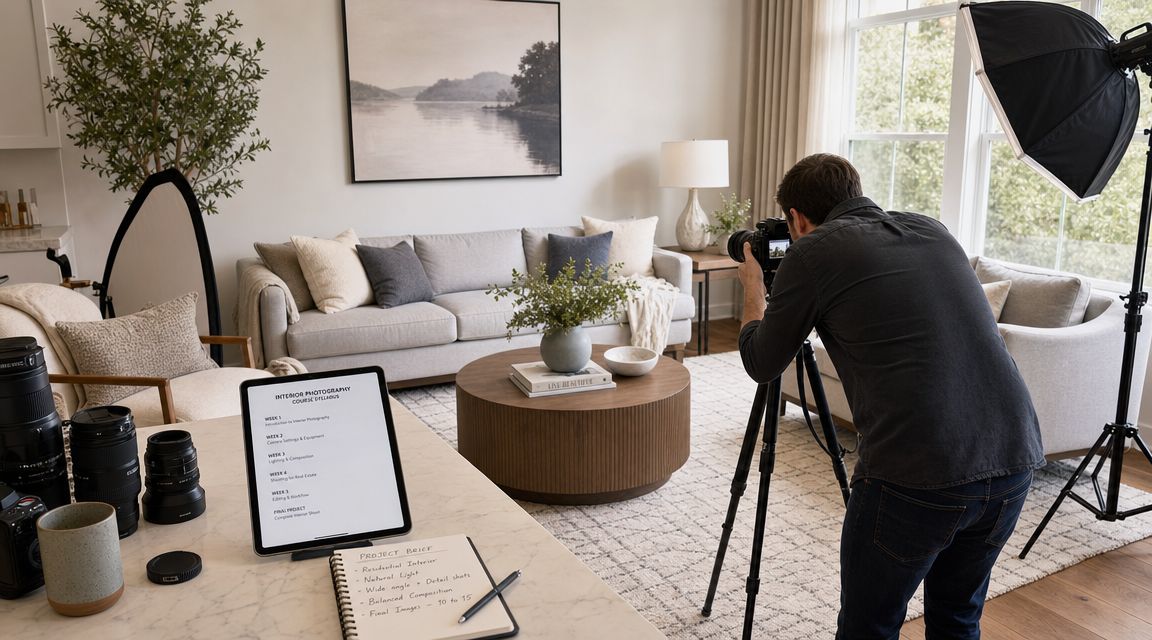
A good interior design photography course teaches you how to make decisions under pressure. The designer is waiting. The light is shifting. A window is blowing out, the sconces are too warm, and the room that felt balanced in person falls apart on the back of the camera. You need more than settings. You need a method.
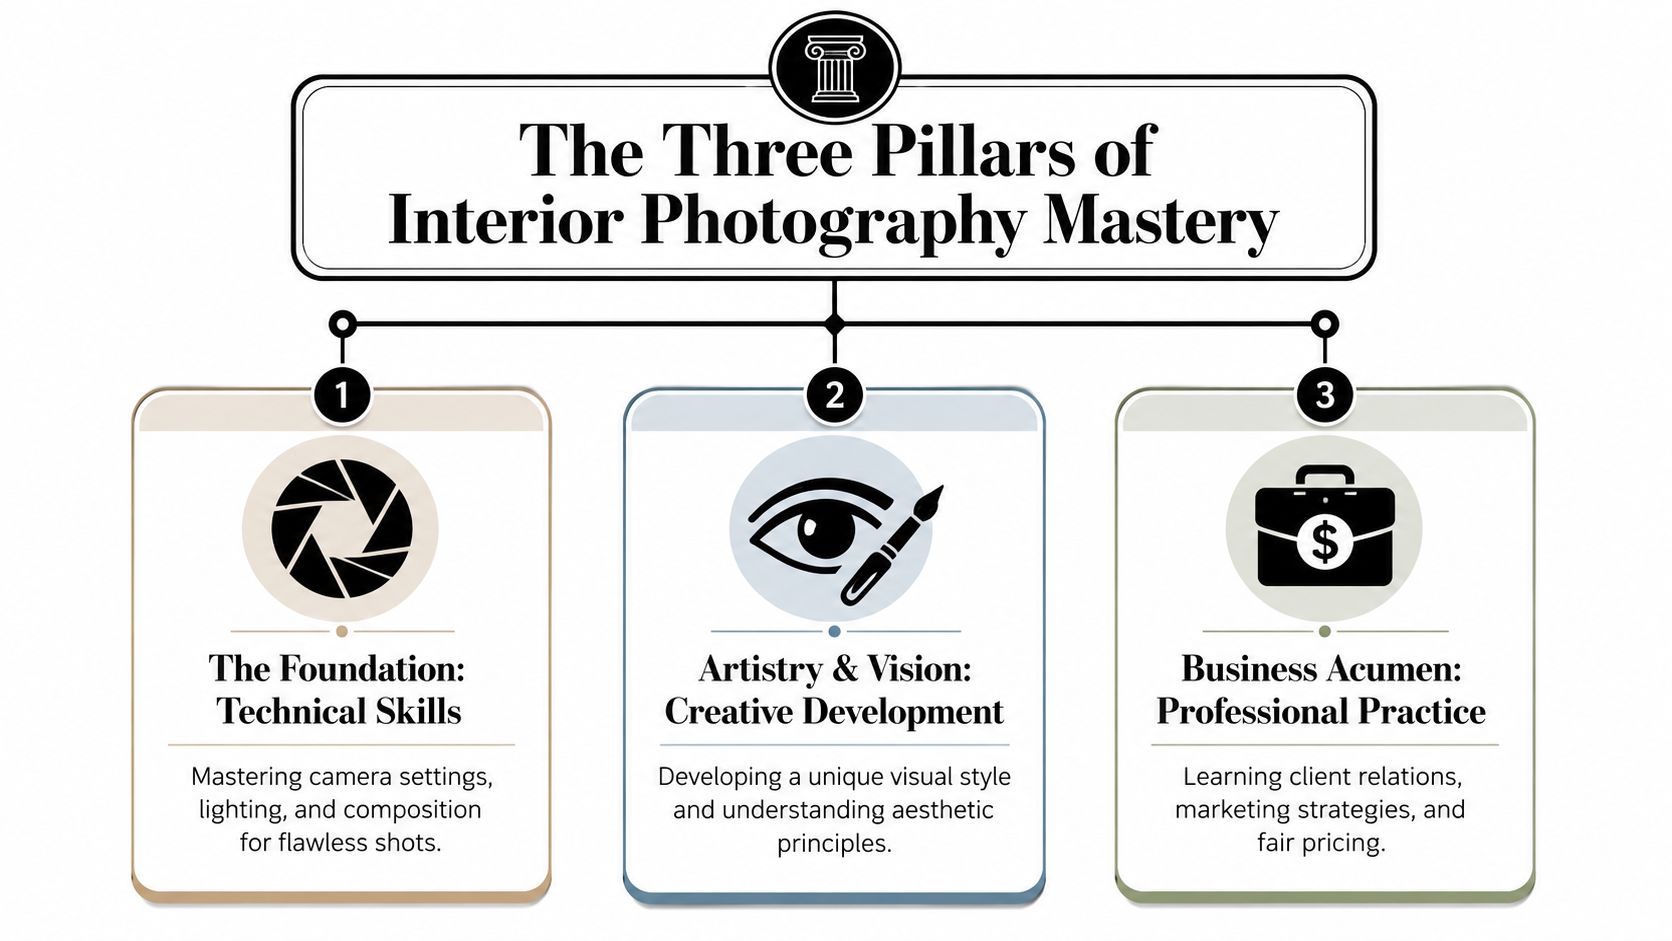
The Foundation
The first thing strong training builds is visual judgment. You learn how shape, line, negative space, and lens position affect the way a room reads. That matters because clients are paying for representation, not interpretation alone. If the kitchen feels expansive in person but cramped in the frame, or the millwork starts to bend at the edges, the image has stopped serving the design.
Good instruction also teaches restraint. New photographers often chase dramatic angles because they feel more photographic. Interior clients usually want the opposite. They want rooms to look calm, legible, and intentional. That means knowing when to square up, when to let a corner lead the eye, and when a wider view starts to damage proportion instead of helping the story.
Light control sits right beside composition. A course worth taking explains how to work with daylight, practical fixtures, and reflective surfaces as one system. The lesson is not “use natural light.” It is how to decide whether to turn lamps on, kill mixed color casts, wait for cloud cover, flag a reflection, or bracket for a cleaner blend later. Those choices affect mood, material accuracy, and how expensive the space feels in the final set.
The Toolkit
Technical skill matters, but good teaching ties every setting to a business reason. You are not choosing an aperture because a chart says so. You are choosing it because the client expects straight lines, believable depth, and sharp detail from foreground to background.
A solid baseline often starts around f/8 to f/11, low ISO, a tripod, and a focal length that keeps the room honest rather than exaggerated, as outlined in this beginner's guide to interior photography basics. Those settings buy you latitude. You get cleaner files, better consistency across a set, and fewer correction headaches later.
The tripod deserves more respect than it usually gets. In interiors, speed causes expensive mistakes. A tripod slows the process just enough for you to notice tangents at the frame edge, a chair leg merging into cabinetry, or a horizon line drifting off level. That pause is part of professional discipline.
It also helps to study examples of photographing architecture and interiors that show how camera height, lens choice, and framing change both the look of a room and the usefulness of the image to a client.
The Finish
Post-production is where many beginners either flatten the work or overstate it. A strong course teaches editing as correction and refinement, not rescue. The goal is to preserve the designer's intent while removing the distractions a camera exaggerates.
That includes judgment about color, contrast, window detail, and retouching. Wood should still look like wood. White walls should not turn blue. Brass should not swing orange. Clean files win trust because clients need images that hold up across websites, print features, portfolio decks, and social crops.
A polished course should also teach the less glamorous part that working photographers learn fast:
- Frame selection: Edit tightly. Near-duplicates make you look unsure.
- Sequence building: Deliver a set that explains the project, not a pile of unrelated good shots.
- Retouch limits: Remove temporary distractions, but keep the room believable.
- Delivery standards: Export files for the client's actual use, with naming and sizing that make handoff easy.
Practical rule: If the photograph shows off your editing more than the designer's work, the course taught the wrong lesson.
The best courses do one more thing. They teach you to think like the buyer of the images. A designer may need atmosphere and detail. A builder may care more about craftsmanship and layout. A hospitality client may need the room to sell experience. Once you understand that, your choices on set get sharper, and your photographs start doing what clients hire them to do.
From Syllabus to Set How Projects Work
You arrive at a shoot with a clean checklist, solid exposure technique, and a room that looked easy in the scout. Then the difficulties become apparent. Window light is shifting, the sofa is six inches off where it should be, a lamp throws a sick orange cast into one corner, and the client wants images that help sell the project by tomorrow. A good interior design photography course prepares you for that version of the job.
A single-room residential exercise
The first assignment that matters usually looks modest on paper. One living room. One window wall. A few styling decisions. In practice, it teaches the discipline that separates portfolio experiments from paid work.
Students should start by scouting with intent. Where does the room live? Which angle explains the layout without stretching the furniture or burying the designer's best decisions? What has to move before the camera goes on the tripod? Courses that skip those questions teach photography as camera operation. Real projects start earlier.
A useful exercise asks for a clear set of wide, medium, and detail frames. That structure trains coverage with purpose. The wide frame establishes architecture and circulation. The medium frame shows how furnishings, materials, and light work together. The detail frame earns its place by revealing finish quality, styling, or a small decision the designer wants remembered.
A typical submission might include:
- Wide frame: The room layout, window relationship, and major architectural lines.
- Medium frame: A seating vignette, fireplace wall, or transition between finishes.
- Detail frame: Hardware, textiles, millwork, or a styling moment that supports the design story.
The point is not to fill a folder. The point is to build a set a client can use.
That changes how the work gets judged. A strong student edit shows restraint. It avoids near-duplicates, keeps verticals disciplined, and proves the photographer can describe a room in a small number of useful images. Designers and editors notice that quickly because it saves them time and gives them a coherent story to publish or pitch.
A small commercial project
Commercial assignments expose weak habits fast. A café, retail shop, or small hospitality space has more zones, more reflections, more practical fixtures, and far less forgiveness. If one area is clean but the next is cluttered, the whole sequence falls apart.
This is why project-based courses should include pre-production and site-readiness, not just shooting. Students need to learn how to request staging changes, how to protect sightlines, and how to spot the distractions that kill a frame before the first exposure. Practical site prep advice in how to prepare a site for a photoshoot fits directly into that workflow.
The stronger lesson is about client thinking. In a commercial interior, the job is often to show movement through the space, brand character, and how one zone connects to the next. A restaurant owner may care about atmosphere and seat density. A hotel client may care about experience, amenities, and premium finishes. A course with real project structure teaches students to shoot for those goals, not just for isolated hero frames.
That is how classroom exercises start resembling paid assignments. The photographer stops asking, “What looks good from this corner?” and starts asking, “What does the client need this image set to do?”
How to Evaluate and Choose the Right Course
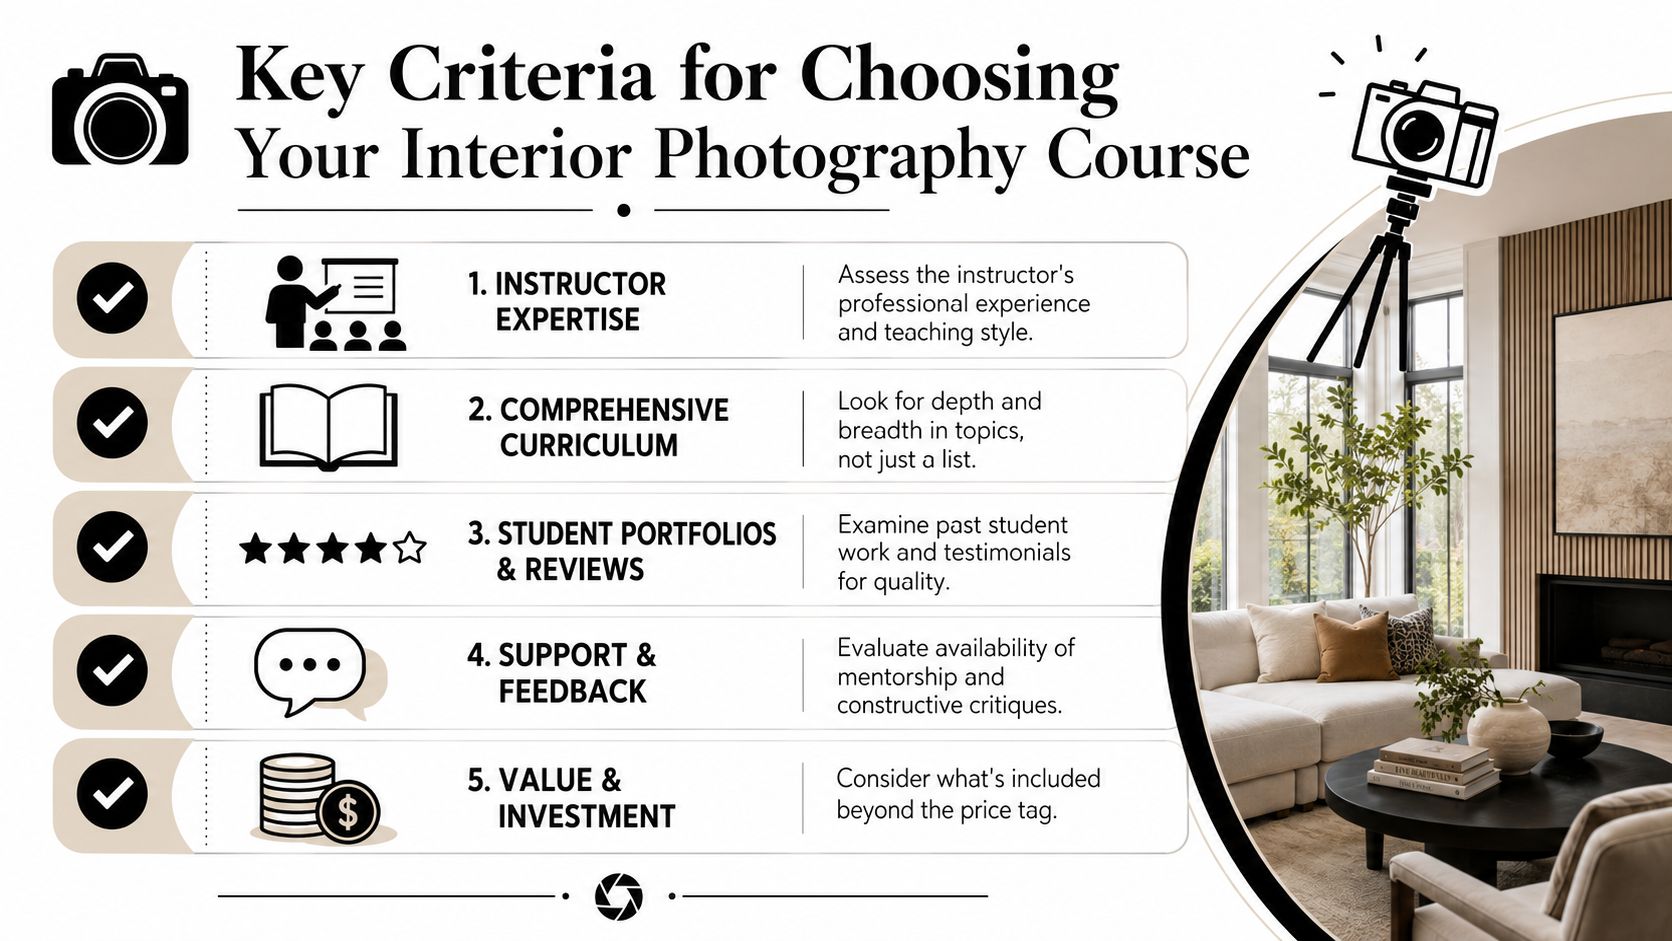
The sales page for an interior design photography course will usually promise confidence, creative growth, and professional results. Ignore the promises and inspect the proof.
The biggest gap in the market isn't basic instruction. There's already plenty of advice on shooting from corners, straightening lines, or turning lights off. The missing piece is whether a course teaches what to do in hard rooms, especially mixed-light spaces where daylight and tungsten fixtures fight each other and where heavy-handed processing can create an artificial HDR finish. That gap is called out directly in this discussion of mixed-light interiors and post-production tradeoffs.
What to look for before you enroll
A weak course teaches rules. A strong one teaches decisions.
Here's the filter I'd use.
| What to examine | What good looks like | Warning sign |
|---|---|---|
| Instructor portfolio | Consistent architectural accuracy and controlled interiors | Dramatic style with weak structural discipline |
| Curriculum | Lighting, post, shot planning, delivery, and client use | Mostly gear talk and surface-level composition |
| Student work | Clear improvement and professional consistency | A few standout images, many uneven sets |
| Feedback model | Critique on composition, editing, and client thinking | Passive video library with no response loop |
Questions that reveal real depth
Ask these before you buy:
- Can the instructor explain trade-offs? Good teachers don't just say “use natural light” or “use flash.” They explain when each approach helps and what it costs you.
- Do students learn post-production judgment? Interiors often fail in editing, not capture.
- Does the course address client intent? Designers, architects, leasing teams, and editorial buyers read images differently.
- Is there evidence of repeatable process? Great work shouldn't depend on luck or one spectacular property.
Student work matters more than course branding
The easiest way to judge a program is to look at the before-and-after thinking in the work. Not just whether the final images are attractive, but whether the photographer understood the room better over time.
If student portfolios show straight lines but muddy color, they learned one lesson. If they show balanced light but weak storytelling, they learned another. You want both.
A course becomes valuable when it shortens the trial-and-error phase and teaches you how to diagnose problems on set.
Investing in Your Craft Cost and Time Expectations
A photographer buys a course on Friday, watches six hours of lessons over the weekend, and expects sharper interiors by Monday. Then the first real job arrives. Mixed window light, warm lamps, reflective finishes, a client who needs the room to feel spacious but honest. That is usually when the gap shows between buying education and building a working skill set.
An interior design photography course can pay for itself, but only if you judge the investment the way a working photographer should. Ask what it will save you in failed shoots, weak edits, reshoots, and missed client confidence.
The format matters because each one asks something different of you. Self-paced training suits photographers who can test, review, and correct their own work without much outside pressure. Cohort programs help if deadlines and critique keep your standards high. In-person intensives shorten the learning curve because you see exposure, styling, lighting control, and client-facing decisions happen on location, in sequence, under time pressure.
Time is spent in practice, not just lessons
Course pages list video hours. Real improvement takes field hours.
Interior work develops through repetition in the same kinds of spaces clients will hire you to shoot. Photograph one room in flat daylight, then again with strong window contrast, then again after practical lights come on. Compare the files. Study where the walls shift color, where verticals start to feel strained, and where the mood stops matching the design intent. That is the work that turns instruction into judgment.
Good training also forces you to work on the client's clock, not just your own. Natural light changes. Access windows are short. Stylists, designers, and property teams rarely wait while you figure things out from scratch. A serious course should prepare you for that pace.
Tuition is only part of the cost
The budget usually includes a few predictable line items:
- Software: Lightroom and Photoshop are standard for sorting, color correction, compositing, and delivery.
- Tripod and head: Interior photography falls apart fast when camera position shifts between frames.
- Practice locations: You need repeated access to rooms with different surfaces, window sizes, and lighting conditions.
- Time for editing: Interiors ask for careful selections, layer work, and restraint. Rushed post-production shows.
There is also the cost of under-training.
A cheap course that stays at the level of broad tips can waste months. You end up solving perspective problems, color contamination, flash balance, and file prep through trial and error on your own. That is expensive in a different way. It slows portfolio growth, it weakens paid work, and it teaches bad habits that are hard to remove later.
The best investment is rarely the lowest price. It is the course that helps you produce dependable images under real conditions, because dependable work is what clients come back for.
Beyond the Certificate Career and Business Outcomes
Photographers don't get hired because they know where the aperture dial is. They get hired because they can produce images a client can use.
That's where many courses fall short. They teach prettier pictures, but not business outcomes. Yet the true commercial value of interior photography lives in deliverables, licensing, image selection, and how a set supports leasing, design marketing, or editorial pitching. That underserved angle is highlighted in this video discussion about business outcomes and deliverables.
What clients are actually buying
An interior designer may need images that express authorship and material sensitivity. An architect may need structural clarity and a coherent project narrative. A hotel group may need a versatile library that works across web, booking platforms, social content, and press outreach.
Those are different assignments, even if they happen in the same building.
A good course should connect technical skill to these commercial realities:
- Deliverables: Which views are essential, and which are optional.
- Usage: Whether the images are meant for portfolio, advertising, editorial, or internal marketing.
- Consistency: How one shoot supports a broader brand language.
- Approval flow: Why organized galleries and clear selects help teams make decisions faster.
Career paths open up when your thinking improves
Once you can solve interior problems reliably, you're no longer limited to “nice house” photography. You can work with design firms, architects, hospitality groups, developers, builders, lighting brands, and editorial clients. The common denominator isn't subject matter. It's trust.
Clients trust photographers who understand both aesthetics and purpose.
Here's a practical conversation worth watching:
The business habits that matter
The photographers who last in this niche usually get very good at a few unglamorous things.
- Shot planning: They don't arrive hoping the space will reveal itself.
- Expectation setting: They discuss what success looks like before the shoot.
- Licensing awareness: They know image use has business implications.
- Relationship building: They make designers, marketers, and project teams look organized.
For teams exploring what that kind of design-forward, client-oriented work looks like in practice, Jimmy Clemmons Photographer publishes architectural and interior photography resources alongside commercial imagery services.
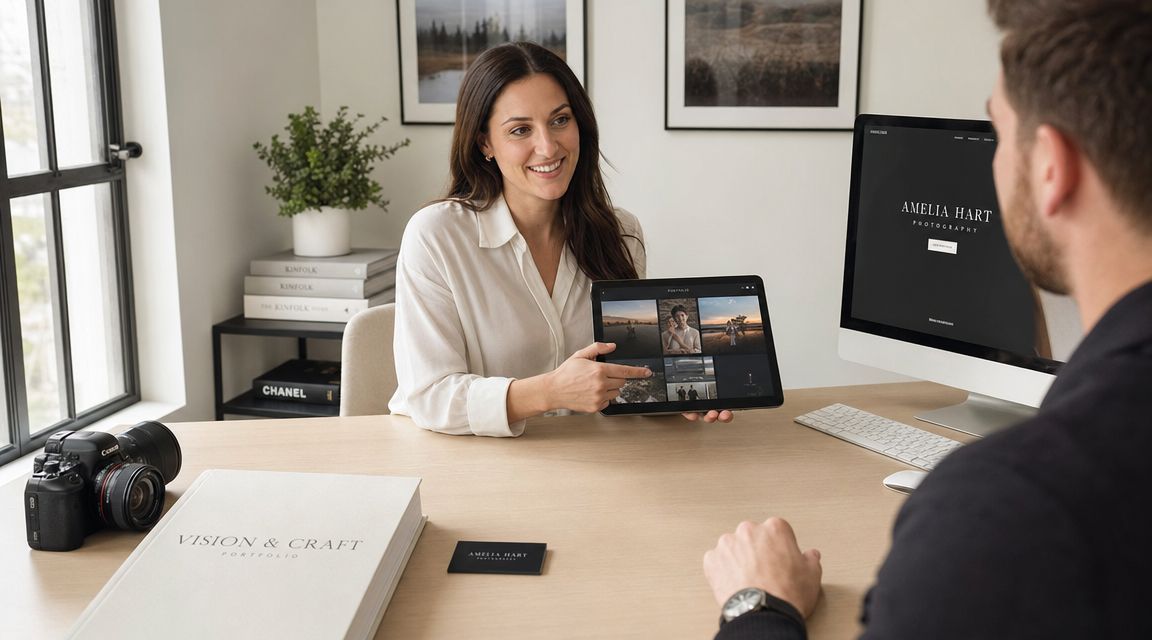
The strongest portfolio in this field isn't just beautiful. It proves you can help a client communicate value.
Your Next Steps Recommended Gear and Resources
If you're ready to move forward, keep the next step simple. Don't build a fantasy shopping list. Build a dependable working kit and a clear practice routine.
Start with a stable core kit
A capable camera body matters, but not as much as consistency and control. What you need first is a camera you understand, a tripod you trust, and a lens that lets rooms look believable instead of exaggerated.
For buyers sorting through current options, this guide to the best camera for interior design photography is a practical starting point. Treat it as one piece of the decision, not the whole answer. The camera doesn't create the photograph. The workflow does.
Learn the software professionals actually use
Two applications keep showing up in serious interior workflows for good reason:
- Adobe Lightroom Classic: Organizing, selecting, global tonal correction, straightening, and color cleanup.
- Adobe Photoshop: Targeted retouching, small removals, layer-based cleanup, and composite work when a single exposure can't carry the scene cleanly.
If you only learn capture and skip file finishing, your work will stall at “good enough.” Most clients can feel the difference between a decently exposed frame and a fully resolved image set, even if they can't name the reason.
Build your eye as deliberately as your technique
Spend time studying published work by architectural photographers, interior designers, and magazines that care about spatial storytelling. Don't just admire the final image. Reverse-engineer it. Ask why the camera height works, why the negative space is there, why one lamp is included and another is cropped out.
Then practice with intent:
- Revisit one room repeatedly: Shoot it in different soft-light conditions.
- Edit less, compare more: Put versions side by side and judge restraint.
- Work in sequences: Build a set of wides, mediums, and details.
- Seek critique: Feedback sharpens faster than private guessing.
An interior design photography course is most useful when it teaches you how to think, not merely how to operate a camera. That mindset is what turns a room into a portfolio piece and a portfolio into a career.
If you need interior imagery for architecture, design, hospitality, or commercial marketing, Jimmy Clemmons Photographer offers architectural photography and visual storytelling built around careful composition, controlled light, and client-ready delivery.