

You’re often closest to a photoshoot when the pressure spikes. The architect wants clean lines. The marketing team wants a hero image for the homepage. The property manager wants minimal disruption. The contractor wants the crew out before lunch. And then someone walks the site and realizes the glass is streaked, the lobby signage is crooked, two exit cones are in the frame, and the best facade angle is blocked by a delivery truck.
That’s normal. It’s also avoidable.
How to Prepare a Site for a Photoshoot starts long before the camera comes out. Good prep isn’t housekeeping. It’s editing. We’re deciding what the site says about the project, the brand, and the people behind it. A well-prepared location lets us spend shoot day making photographs. A poorly prepared one forces us to spend it solving preventable problems.
Why Site Preparation is the Secret to Great Photography
Two shoots can happen in the same building and produce completely different results.
On the first, the team arrives to a space that is technically finished but visually unresolved. Furniture sits wherever the installers left it. Cords snake across the floor. The windows haven’t been checked for reflections at the scheduled shoot time. Nobody has agreed on which spaces matter most. The client starts making creative decisions while the light is already changing. Every frame becomes a compromise.
On the second, the space is ready with intention. The team knows which rooms carry the story. Surfaces are clean, but the essential aspect is that they’re curated. Sightlines have been tested. Temporary distractions are gone. The building manager knows when we need elevator control and rooftop access. That kind of preparation changes the pace of the day. We stop reacting and start shaping.
That difference shows up in the final images and in what those images do for the business. Photography marketing data compiled by Kelly Heck Photography notes that articles featuring relevant images receive 94% more views than those without, and web pages with strong product photos attract 95% more organic traffic. If the images carry that much weight, the conditions that produce them matter just as much.
Preparation protects creative options. If we spend the morning moving trash cans, hiding cords, and negotiating access, we lose the time needed to wait for the right light or refine a composition.
Site prep also protects budget. Every delay pushes against crew time, access windows, and production energy. Reshoots are rarely caused by a camera problem. They usually come from a planning problem disguised as a visual one.
That’s why I advise clients to treat prep as part of the shoot, not the task before the shoot. The camera records what the site gives us. If you want those images to work hard across marketing, editorial, leasing, and brand channels, the site has to be prepared to tell the right story from the start. That’s also why the return on professional photography depends so heavily on what happens before shoot day.
The Blueprint From Creative Brief to Final Shot List
A successful site shoot starts with two separate documents that clients often blur together. One is the creative brief. The other is the shot list. When those are clear, the rest of the prep becomes easier, faster, and less expensive.
Start with the brief, not the camera
The creative brief answers simple but high-stakes questions. What are these images for. Who needs to believe in this project after seeing them. What feeling should the work leave behind. Are we selling calm, precision, warmth, scale, innovation, heritage, hospitality, or momentum?
That language matters because a healthcare interior, a law office, a private school, and a mixed-use development can all be beautifully photographed and still miss the mark if the visual tone is wrong.
A useful brief usually includes:
- Business purpose: Website refresh, editorial feature, leasing deck, awards submission, investor materials, recruiting, or social campaign.
- Audience: Prospective tenants, hotel guests, architects, general contractors, donors, buyers, or internal leadership.
- Visual priorities: Exterior identity, daylight interiors, materials, circulation, amenities, occupancy, team culture, or process.
- Brand cues: Neutral and restrained, energetic and people-forward, polished and premium, or raw and documentary.
- Usage requirements: Horizontal crops for a homepage hero, verticals for social, copy space for text overlays, and detail images for print layouts.
Without that brief, the shoot can drift into “let’s just get a little of everything,” which sounds flexible but usually produces a gallery without hierarchy.
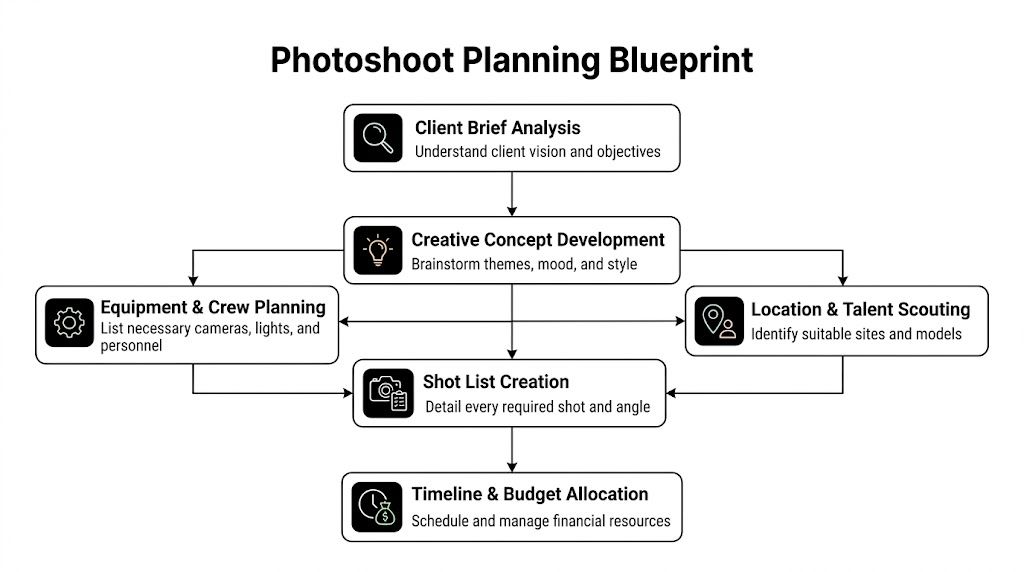
Turn the brief into a shot list
The shot list is where the concept becomes operational. It should identify exactly what we need to make, where we need to make it, and what has to be true on site for the image to work.
Foremost Media’s photoshoot planning guide recommends developing a detailed shot list 3-4 months in advance, with 3-5 key images per campaign page, and notes that this level of planning can reduce the need for costly reshoots by up to 40%.
That timeline makes sense for architecture, interiors, hospitality, education, and commercial environments because site readiness rarely lines up perfectly with marketing deadlines. The shot list gives everyone a target while there’s still time to fix things.
A useful shot list includes more than room names. It should spell out:
| Item | What to specify |
|---|---|
| Hero view | The image that carries the campaign or page |
| Secondary angles | Supporting wide shots, details, and alternates |
| Time of day | Morning, midday, dusk, overcast backup, or night exterior |
| Styling needs | Fresh florals, laptops closed, books arranged, tables reset |
| Access needs | Roof, upper floors, elevator hold, adjacent property permission |
| Technical notes | Lights needed, reflections to manage, mixed color temperature concerns |
| Occupancy plan | Empty, lightly populated, or active with directed talent |
Decide what the story is really about
Clients sometimes assume the subject is the building. Often it’s not. Often the subject is what the building enables.
A school might need images that emphasize belonging and focus. A contractor may need proof of craftsmanship and coordination. A corporate office may need to show not just finish quality, but how teams move through the environment. Once we identify that core idea, prep gets sharper. We know what to clear, what to keep, and where to spend time.
The strongest shot list doesn’t chase coverage. It builds sequence. One image establishes context. Another carries scale. A third reveals material quality. A fourth introduces human use.
Build mood before production starts
A mood board helps align taste before the crew is standing on site. This doesn’t need to be elaborate. A shared deck or simple reference board is enough if it tells us the visual language. Wide and airy. Contrasty and graphic. Warm and editorial. Sparse and formal.
Look for references that clarify decisions such as:
- Framing style: Symmetrical, layered, or off-axis.
- Light quality: Crisp daylight, soft ambient, dramatic dusk, or mixed practical light.
- Prop density: Minimal styling, lived-in styling, or polished hospitality styling.
- Human presence: No people, implied presence, or directed activity.
The board should guide choices, not trap them. If the site tells us something better on scout day, we should be ready to adjust.
Plan for use across platforms
One common mistake is preparing a site for a single hero image when the client needs a full library. The homepage may need one cinematic horizontal. The social team may need vertical crops. The PR team may need clean editorial frames. The sales deck may need details, signage, and process images.
That affects prep. A reception desk might look great from one angle but fail once we turn for a vertical crop and expose the clutter behind it. Good planning checks the whole radius, not just the first composition.
Location Intelligence Scouting for Light Power and Composition
The scout is where assumptions get tested. A floor plan can’t tell you how glare will hit the glass at 4 p.m. It can’t tell you that the best corner has a dead plant, an exit sign competing with the ceiling detail, and no nearby power for strobes. Walking the site does.
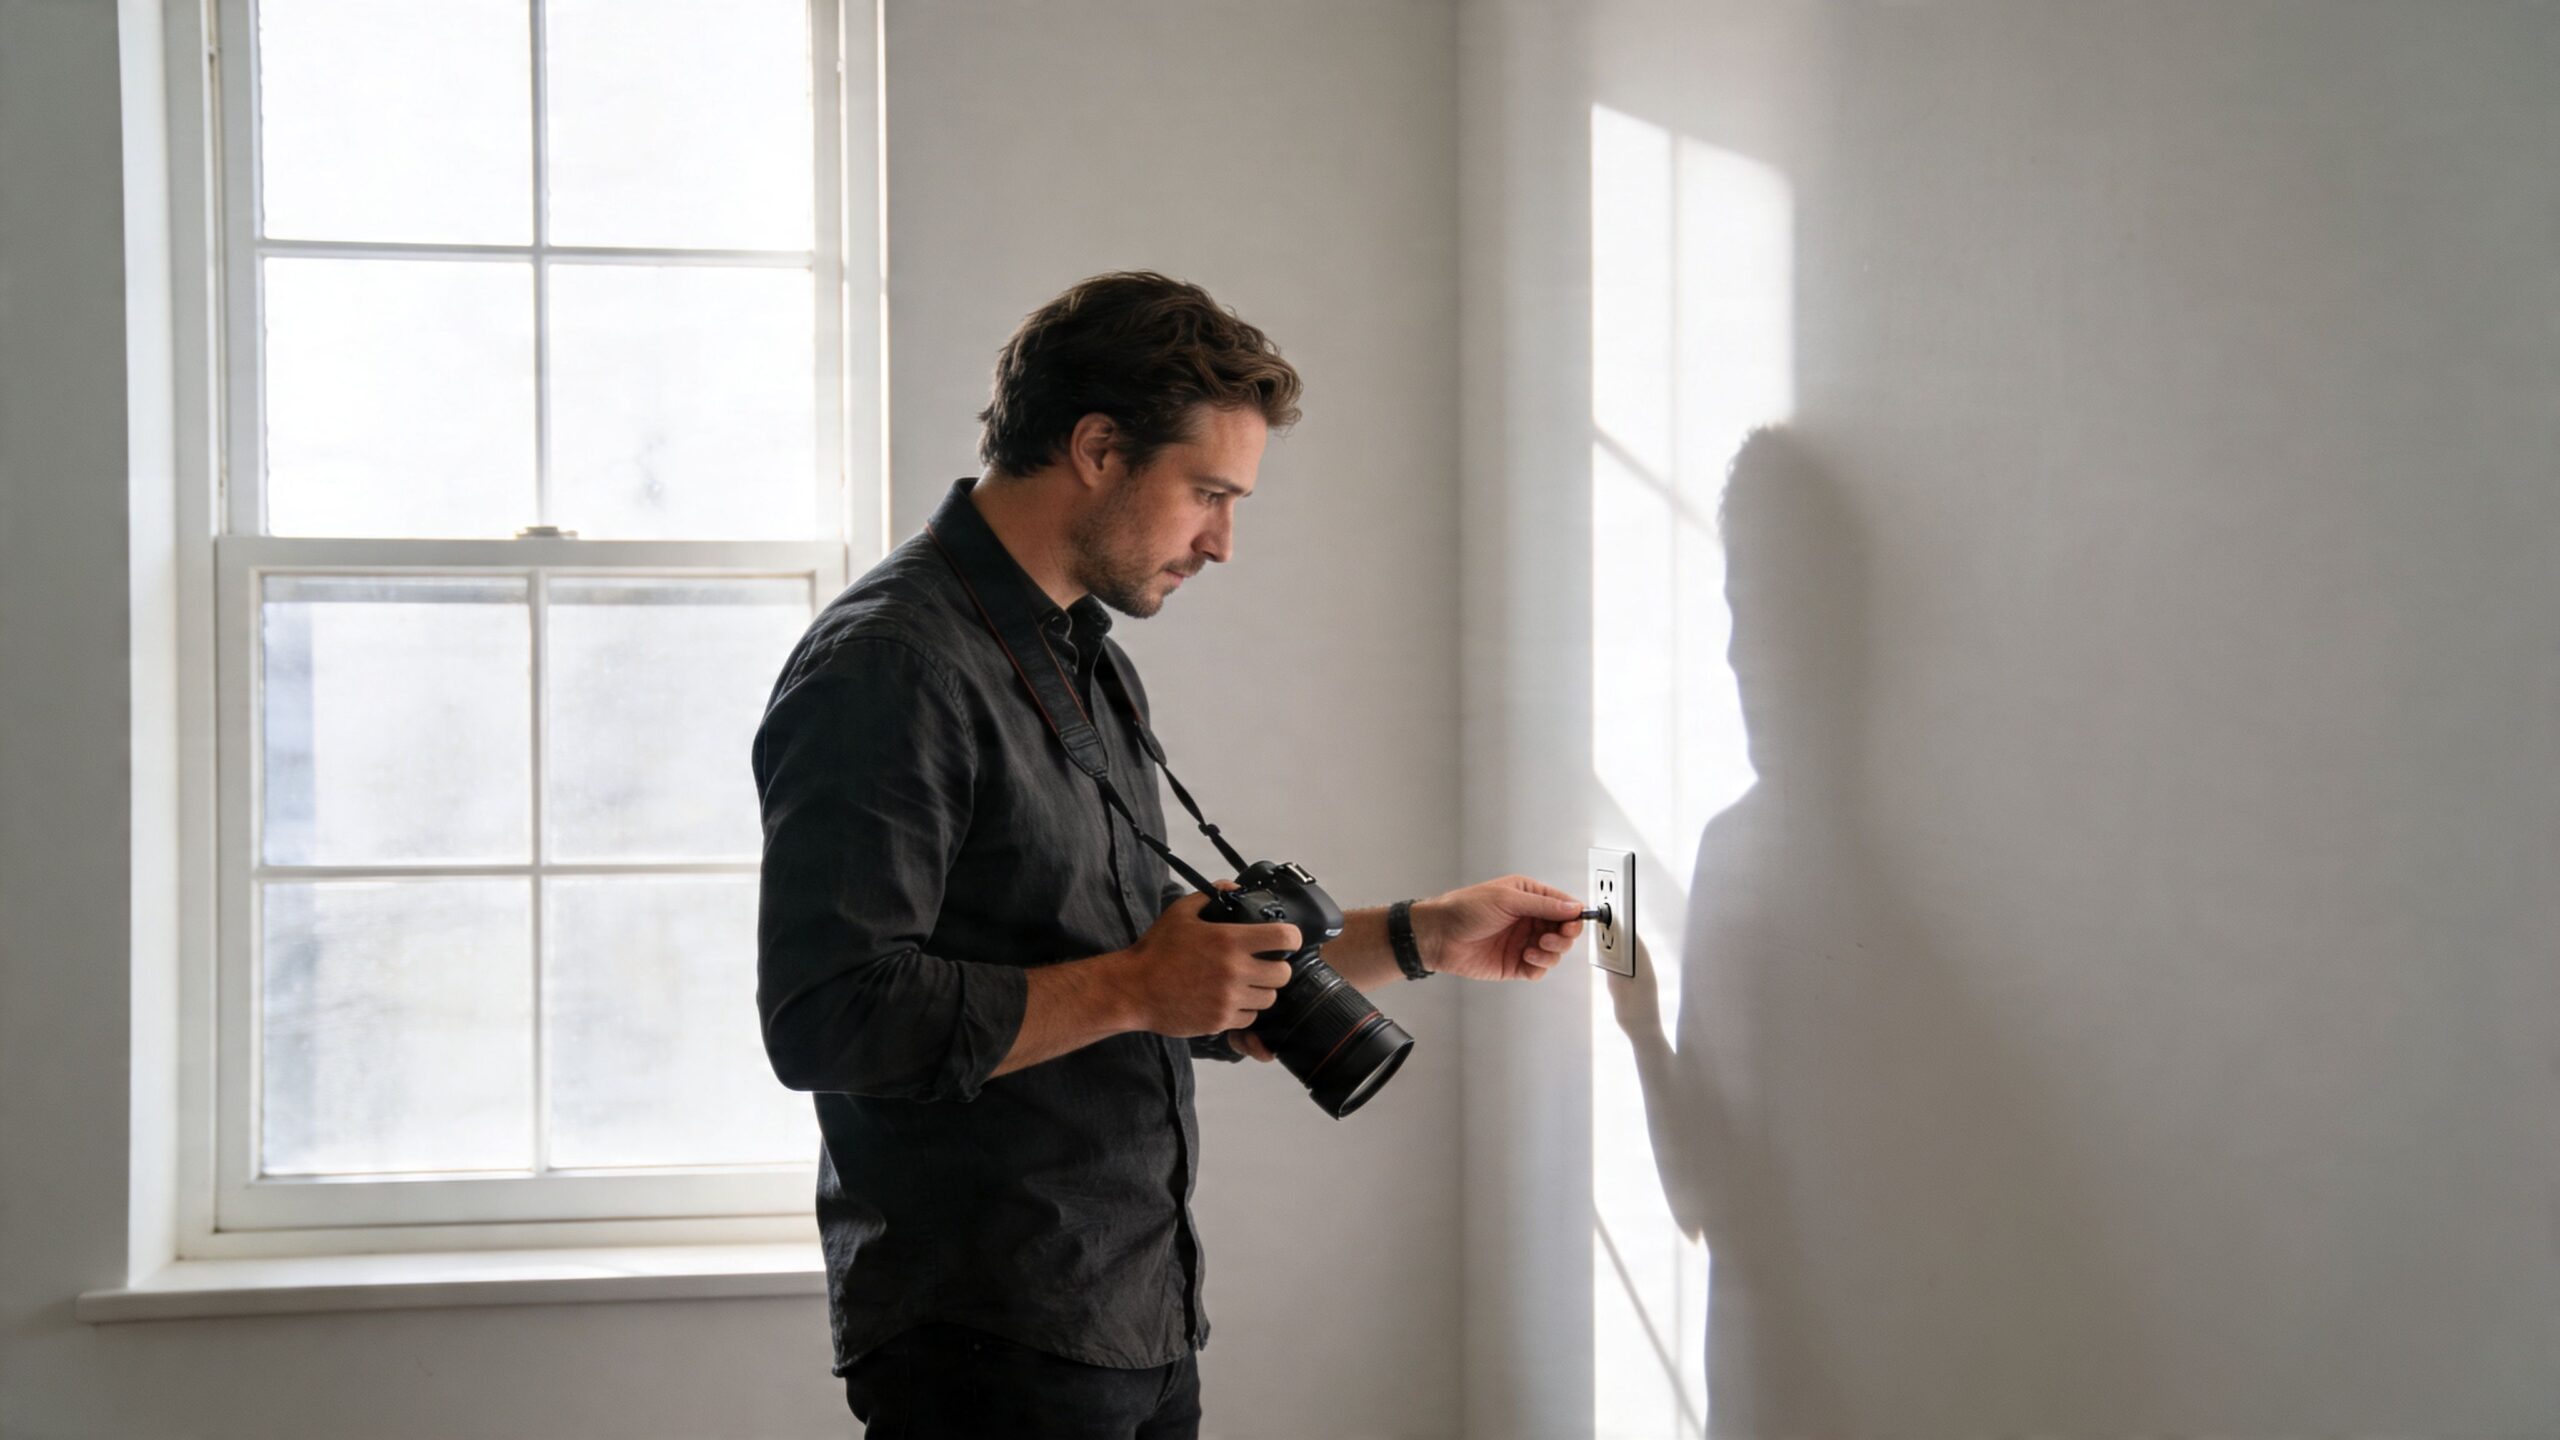
Read the light like a production variable
Light determines schedule more than most clients expect. A lobby with east-facing glazing may be perfect early and unusable later. A west-facing facade might look flat at noon and exceptional near sunset. Interior rooms with mixed practicals can shift from warm and inviting to muddy if we don’t plan for color temperature control.
On a scout, we look for three things first:
- Direction of natural light across key spaces at the intended shoot time.
- Reflection problems on glass, polished stone, metal, and monitors.
- Fallback conditions if weather changes.
For many projects, the best solution isn’t dramatic light. It’s stable light. If the brief calls for clean, descriptive architecture, consistency often beats spectacle. If the brief needs mood or editorial presence, then waiting for a specific window becomes worthwhile. That’s the balance behind choosing the best light for a site shoot.
Check power before you need it
Power is easy to ignore until lighting gear, charging stations, tethering, and production devices all need outlets at once. A location can feel production-ready and still be awkward to work in if the nearest usable outlet is in the wrong room or on a circuit we can’t touch.
During the scout, confirm:
- Outlet placement: Especially in large lobbies, conference rooms, and exterior transition zones.
- Circuit access: Whether facilities staff need to provide access to or approve anything.
- Practical light control: Which lamps, sconces, and overheads can be switched independently.
- House rules: Whether cables can cross public walkways and what taping methods are allowed.
This is also the time to identify if battery-powered lighting is smarter than running extension cables through occupied spaces.
Scout for compositions that do more than describe
A site walk should produce more than a route map. It should reveal where the design comes alive in a frame. That usually happens at intersections of light, geometry, and function.
A few examples:
- A corridor may look ordinary standing in it, but become strong when viewed from a doorway that layers foreground texture against repeated ceiling rhythm.
- A conference room may be less interesting front-on than from the side, where glazing, skyline, and table edge create depth.
- An exterior may need distance to read the building’s form, or a closer angle to let materials dominate over context.
Good scouting asks one hard question at every stop. Is this angle showing the project, or is it showing why the project matters?
Later in the scout, I like to check the site in motion. Open doors. Walk the circulation path. Sit where a guest would sit. Stand where a tenant first sees the lobby. Many useful images come from understanding how a space unfolds, not just how it looks when frozen.
A quick visual walkthrough can help teams see what photographers notice when evaluating light and coverage on location:
Don’t ignore sound and neighbor activity
Even if the assignment is still photography, many commercial shoots now include short motion clips or behind-the-scenes content. During scouting, note HVAC noise, street noise, nearby construction, elevator chimes, and building announcements. Also check adjacent tenant activity. A silent showroom at 10 a.m. may be unusable by noon if a neighboring space starts active work.
These details seem minor until they disrupt pacing. A scout turns those surprises into decisions.
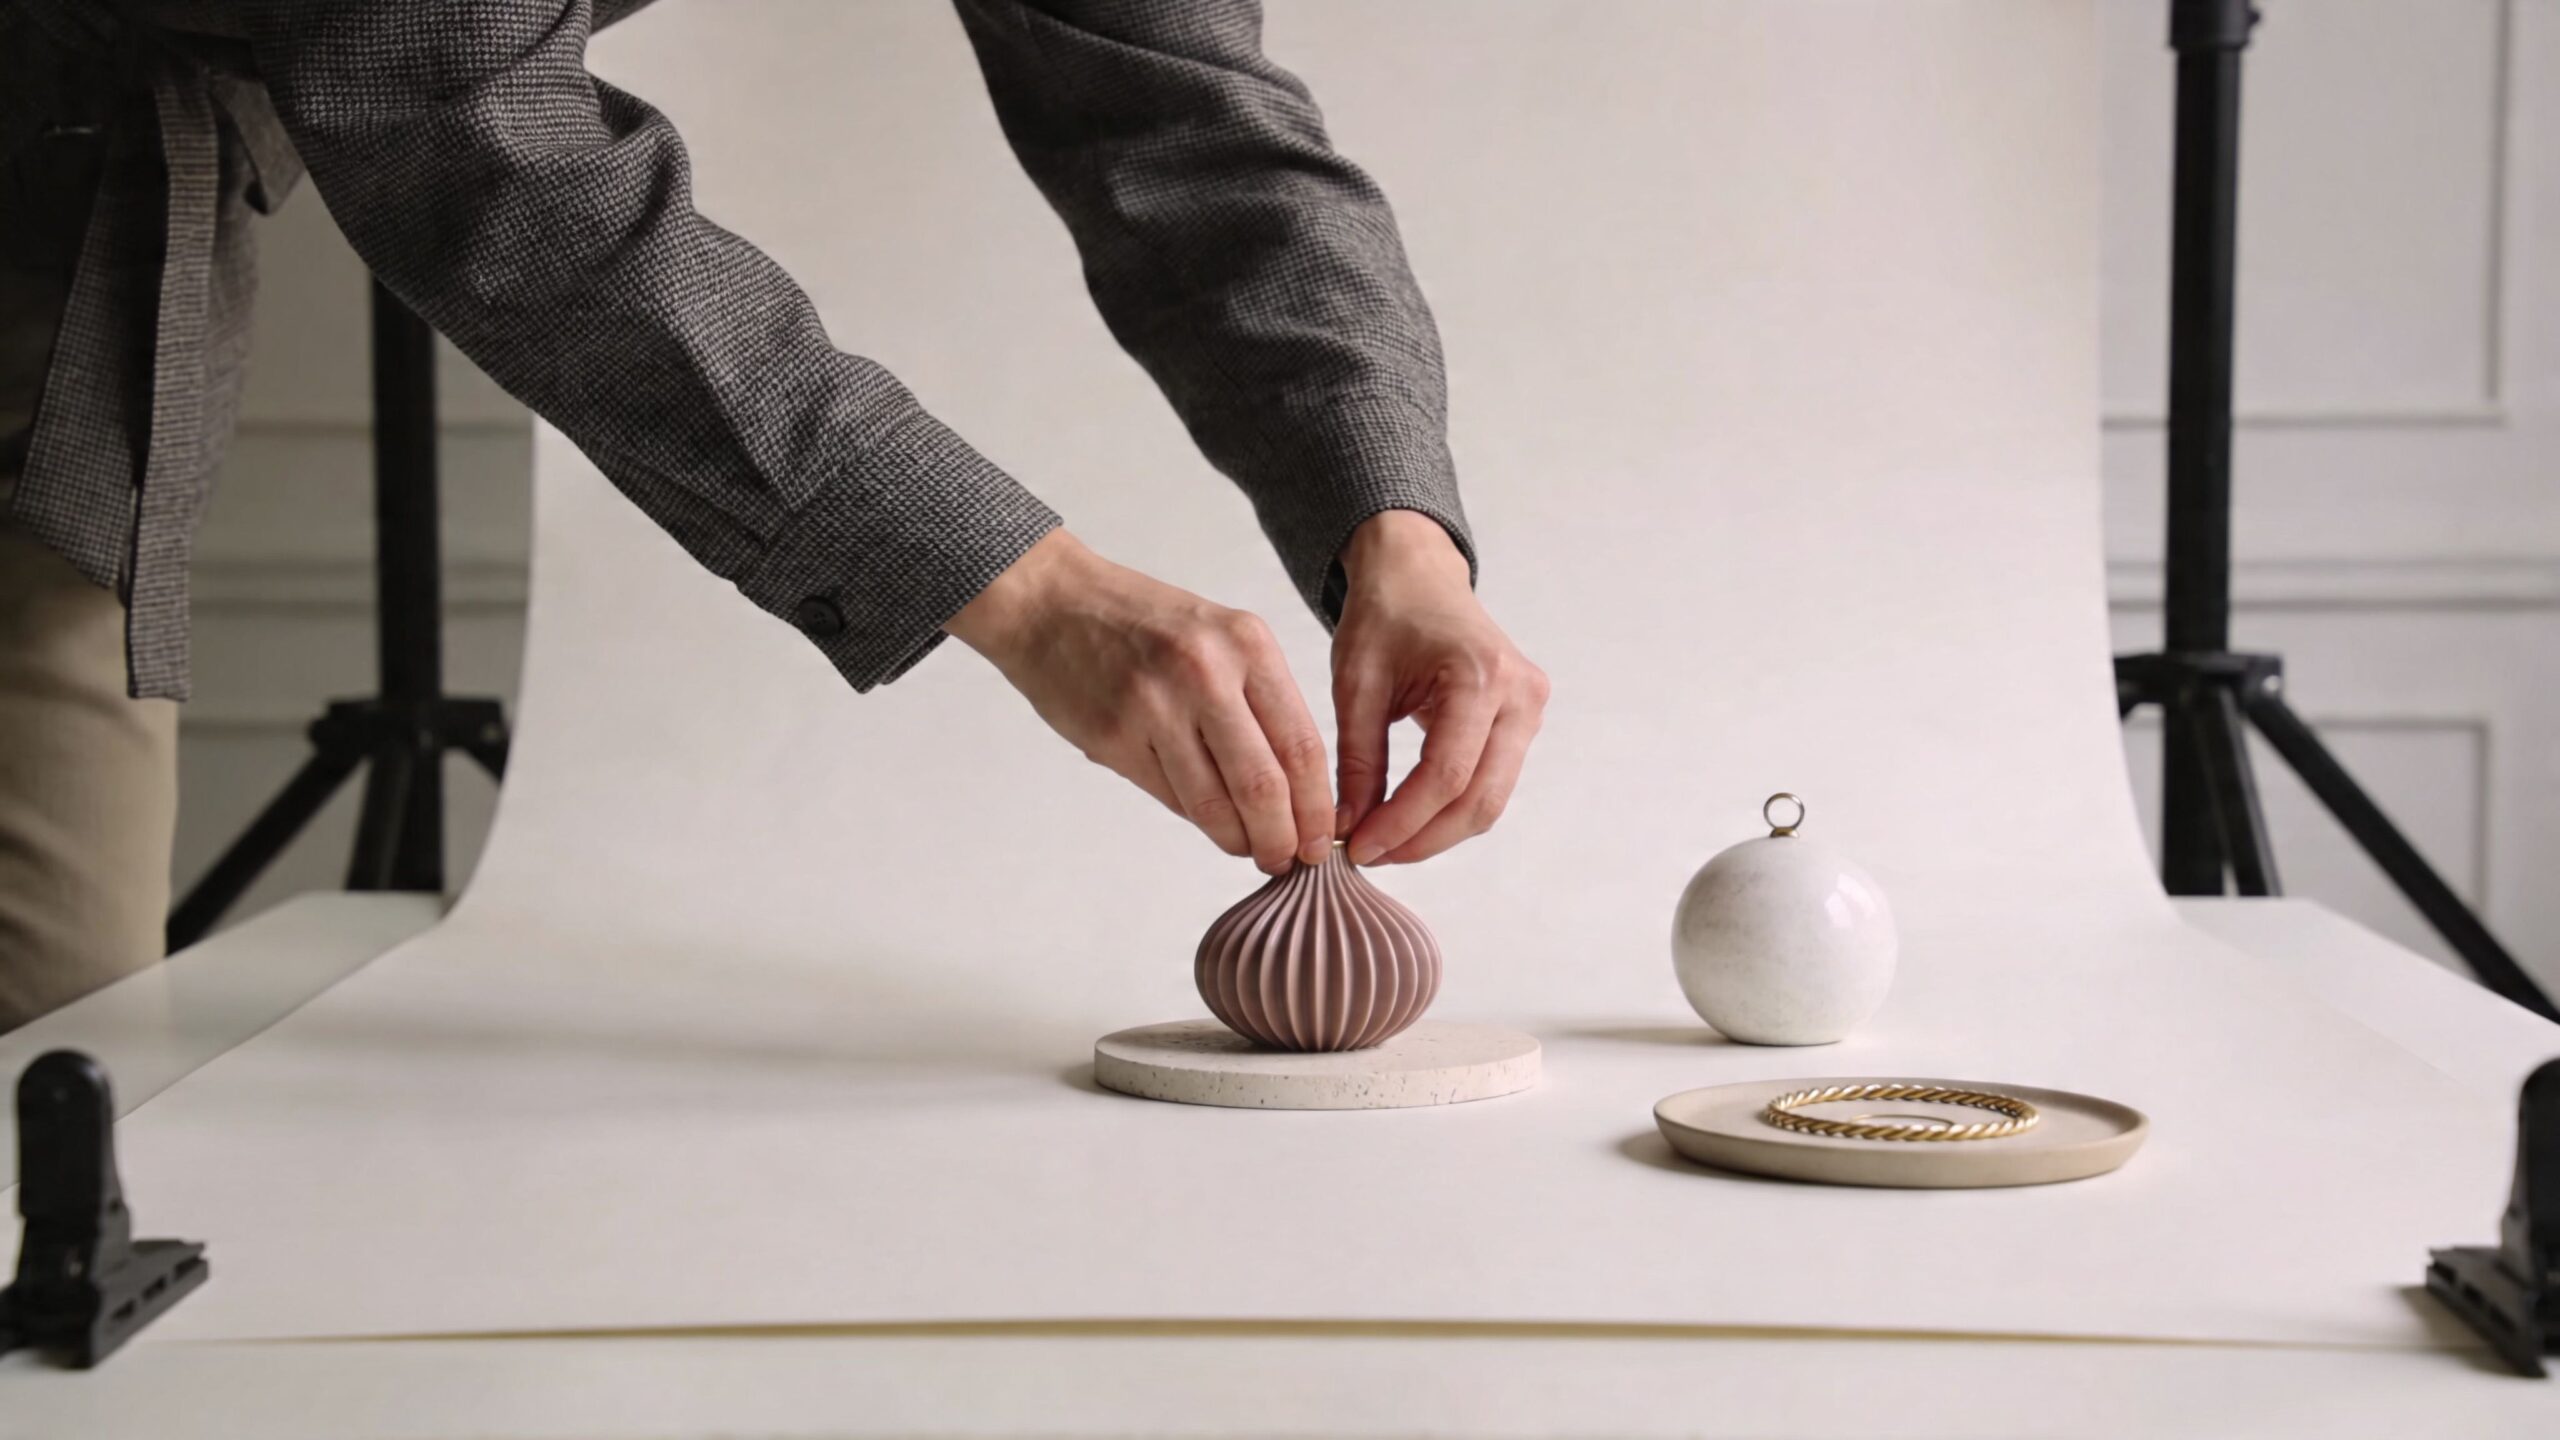
Setting the Stage Professional Styling and Decluttering
A camera is harsher than a guest. People walk into a room and read it broadly. A lens isolates, exaggerates, and compares. That’s why a site that feels “pretty clean” in person can still look unsettled in photographs.
Preparation for photography is curation. We aren’t trying to make a space look sterile. We’re trying to remove visual arguments inside the frame.
Cleaning is maintenance. Styling is authorship
Clients often put all their prep energy into cleaning crews and none into image logic. Clean matters, especially on glass, stone, polished metals, and dark floors. But cleanliness alone doesn’t create a photograph with hierarchy.
A styled frame answers a few questions immediately. What should the eye land on first. What supports it. What should disappear.
That can mean subtracting. It can also mean adding the right element in the right place. A stack of books on a side table can give a lounge scale. A carefully placed laptop can suggest use in a corporate setting. A single arrangement in a hospitality interior can carry color and soften hard materials. The mistake is adding props that fight the architecture or feel unrelated to the brand.
What to remove first
Decluttering for a photoshoot usually starts with the items everyone stops seeing because they live with them every day.
A practical first pass looks like this:
- Loose utility objects: Trash bins, tissue boxes, cleaning bottles, hand trucks, extension cords, spare monitors, and signage stands.
- Personal spillover: Water bottles, family photos, jackets, purses, desk snacks, charging cables, and sticky notes.
- Mismatched extras: Chairs from another room, temporary furniture, bad artwork, promotional materials, and leftover staging pieces.
- Visual noise on surfaces: Excess pamphlets, scattered remotes, too many tabletop objects, and overfilled shelves.
Then do a second pass for things that aren’t clutter but still damage the image. Crooked lampshades. Uneven chair spacing. Partially closed blinds. Smudged stainless steel. Those are the details clients often notice only after delivery.
Styling has to be aspirational and accurate
There’s a temptation to over-style. That usually backfires. The room may look polished in the moment, but if the final image misrepresents the actual space, the audience feels it. Studio Pod’s photography statistics roundup notes that 22% of product returns are because the item looks different in person than it did in the photo. In architecture, real estate, hospitality, and commercial interiors, the same principle applies. We want the image to enhance reality, not betray it.
That means:
| If the goal is this | Avoid this |
|---|---|
| Premium and refined | Filling every surface with decor |
| Active and lived-in | Random objects with no narrative purpose |
| Minimal and design-led | Empty rooms that feel abandoned |
| Honest and persuasive | Angles that hide core conditions a visitor will immediately see |
A styled site should feel like the best version of itself on its best day. It shouldn’t feel like a set borrowed from another project.
Match styling to the story
Different assignments need different staging discipline.
For an architectural feature, styling usually supports form, material, and light. Keep objects sparse. Let spacing do some of the work. For a corporate brand shoot, a room may need signs of use, but controlled signs of use. Open notebooks, coffee cups placed with intent, and a few people directed into natural positions can suggest energy without making the frame chaotic.
For hospitality, consistency matters more than abundance. If one room has fluffed bedding, aligned drapery, leveled art, spotless mirrors, and a carefully reset bath, every room on the list should meet the same standard. One weak room can drag down the whole set.
Site Management Logistics Safety and Access
A beautiful plan can still collapse at the loading dock.
Many shoot failures aren’t creative failures. They’re access failures. Nobody secured the roof key. The property manager didn’t approve after-hours lighting. The foreman didn’t know the crew needed the scaffold cleared for one hour. The lobby was promised, but a tenant event took over the space. If you’re preparing a commercial property, a school, or an active construction site, logistics deserve the same seriousness as styling and light.
Permits aren’t paperwork after the fact
If the property is public-facing, privately managed, under construction, or subject to tenant control, ask permit and approval questions early. Don’t assume a simple still photography crew can “just show up,” especially in busy urban environments.
A location guidance article on ShootQ cites an estimate that 68% of commercial property managers report shoot delays due to unpermitted photography in major urban markets. The same source notes that on active construction sites, 15% of photography-related injuries stem from unprepared access and a lack of hazard mapping.
That tracks with field reality. Delays often come from preventable blind spots, such as loading access, elevator reservations, adjacent property lines, drone restrictions, or insurance certificates that no one requested until the day before.
Build a simple access chain
One contact person isn’t enough on complicated properties. We need to know who can approve, who can grant access, and who can stop the shoot.
A reliable access chain often includes:
- Property manager: Approves use of common areas and building policies.
- Facility or engineering lead: Controls lights, doors, HVAC, elevators, and practical access.
- Tenant contact: Clears occupied suites and sets expectations with staff.
- Construction superintendent or foreman: Coordinates site safety, crew timing, and restricted zones.
- Marketing lead or project lead: Makes fast visual decisions when trade-offs appear.
When those roles are clear, the day moves. When they aren’t, the crew spends time waiting for authorization.
Treat safety as production design for real life
Construction and renovation sites can photograph beautifully, but they don’t tolerate vague planning. If the site is active, we need a defined safe path, PPE rules, controlled equipment movement, and a clear understanding of where photography can happen without interfering with work.
Use a pre-shoot checklist that covers:
- Entry route and parking for crew and gear.
- Required PPE such as hard hats, vests, boots, or eye protection if the site requires them.
- Restricted zones including exposed edges, live work areas, wet floors, or overhead hazards.
- Safe staging area for stands, cases, batteries, and personal items.
- Emergency contact process and nearest first-aid location.
The best safety plan is specific enough that a new crew member can walk onto the site and know where to stand, where not to stand, and who to ask before moving.
Lock down timing, not just dates
A calendar invite with a shoot date is not a schedule. Sites change by the hour. The loading dock may be open only early. The lobby may clear after breakfast service. The west facade may be in hard shadow until late afternoon. The electrician may need the light fixtures on before the photographer arrives.
A practical run sheet should identify arrival time, room order, occupancy windows, reset moments, and final exterior timing. That’s especially important when multiple stakeholders need the same space.
Good logistics don’t make a shoot glamorous. They make it possible.
Troubleshooting Your Shoot How to Handle Common Site Issues
Even with strong prep, reality usually edits the plan. Weather shifts. Deliveries appear. A room you expected to be empty becomes active. A construction site is less finished than promised. The useful mindset isn’t “how do we force the original idea.” It’s “what does the site still offer, and how do we use it well.”
When the site is imperfect
Many projects are photographed before they reach a polished, fully settled stage. That doesn’t automatically weaken the result. It changes the visual strategy.
Guidance on location scouting for photographers notes that 74% of architectural projects are photographed on imperfect or evolving sites, and that client satisfaction is 40% higher when photographers reframe "ugly" elements using creative techniques. The same source cites a 31% rise in demand for "raw build" imagery.
That means you don’t always need to hide every unfinished condition. Sometimes you should shape it.
What works when conditions fight back
A few field-tested adjustments solve a surprising amount:
- Bad weather: Shift toward interiors, tighten compositions, and use controlled lighting to maintain consistency. Overcast conditions can also help facades by reducing contrast and glare.
- Messy construction zones: Use selective framing. Let one honest area speak for the broader process rather than trying to explain everything in one wide shot.
- Awkward fixed furniture: Change height before changing lenses. A lower or higher camera position often solves the problem faster than brute-force rearranging.
- Distracting backgrounds: Open the aperture and create separation, or move laterally so the distraction stacks behind a structural element.
- Unflattering practical light: Turn off what hurts the frame if you can. If you can’t, balance it with supplemental light or lean into a moodier treatment instead of fighting for false neutrality.
Not every problem needs removal. Some problems need reframing.
Use imperfection deliberately
A raw site can carry real energy if we photograph it with discipline. Dust in a shaft of light, unfinished concrete beside refined steel, taped plans on a wall, or workers moving through a near-complete space can all communicate progress and authorship. Those frames are valuable for contractors, architects, and editorial teams because they show process, not just outcome.
The key is intention. Random mess reads as neglect. Selected imperfection reads as story.
There’s also a post-production boundary worth keeping in mind. Retouching is useful for cleanup, consistency, and structural correction, but it works best when the original frame is already strong. If you’re relying on editing to rescue every angle, the capture stage is already under strain. A thoughtful review of post-production for structural photography can help set realistic expectations about what should be fixed in camera and what can be handled later.
When clients understand that, shoot day becomes more collaborative. We stop chasing perfection that doesn’t exist on active sites and start making decisions that produce honest, persuasive images anyway.
If you need a team that can plan the narrative, scout the site, manage the details, and produce polished architectural and commercial imagery, Jimmy Clemmons Photographer works with architects, developers, contractors, and brand teams to create images that are as intentional as the spaces themselves.