
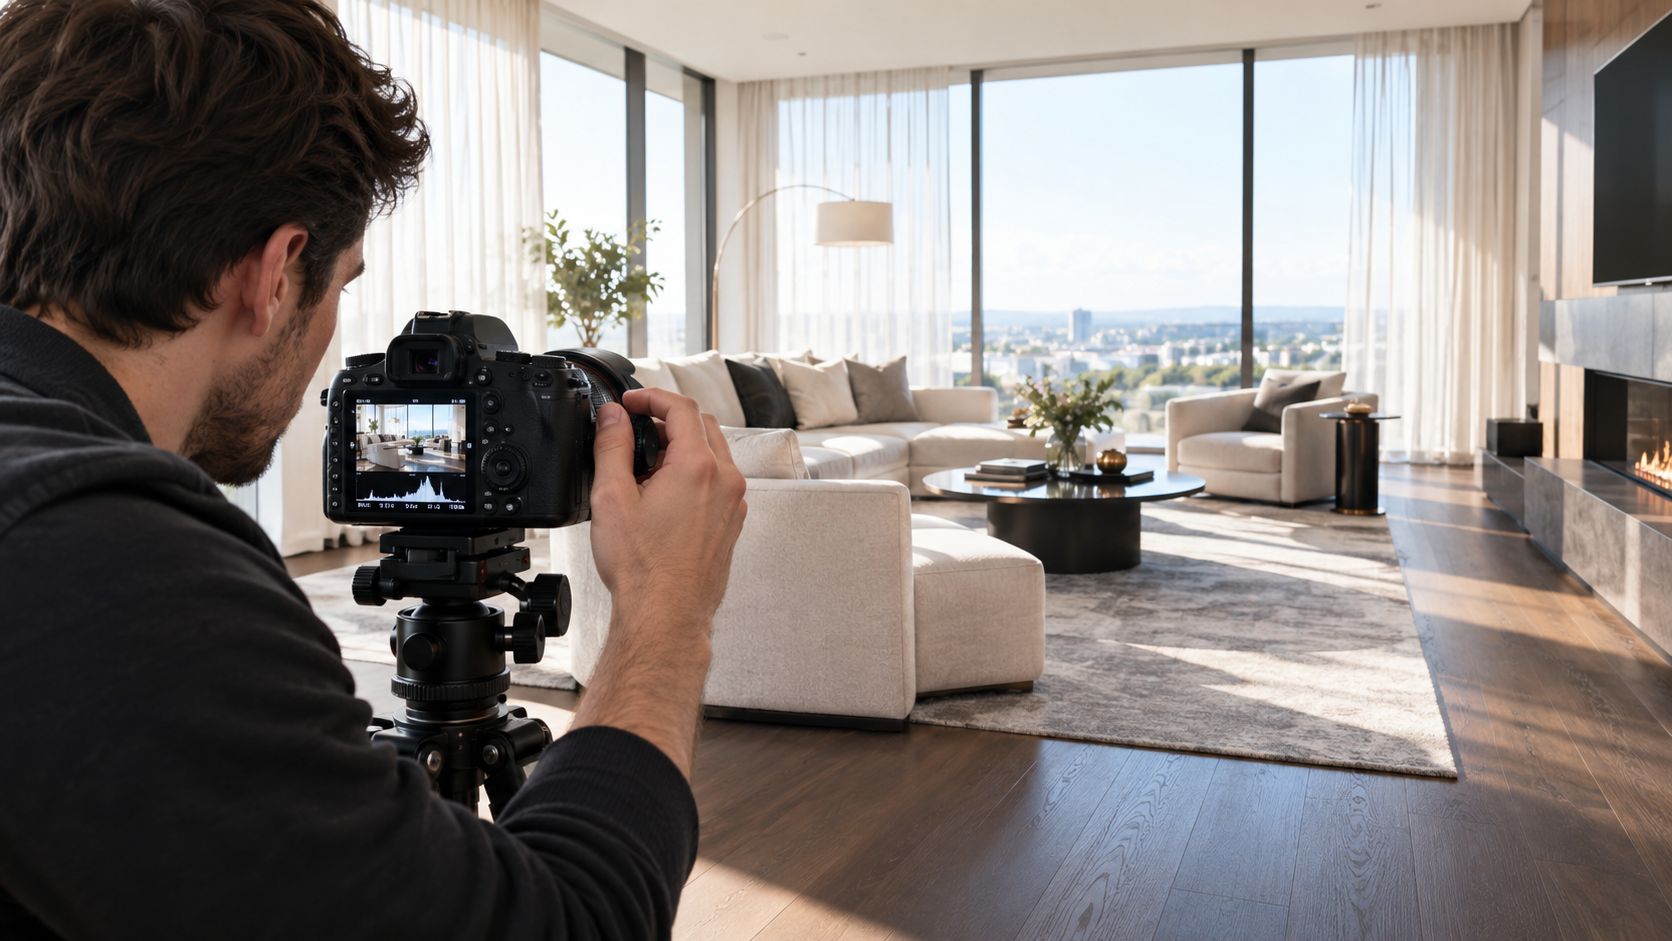
You've arrived at a property with a bright view, dark cabinetry, reflective surfaces, and practical lights that turn the room orange. The camera's automatic mode produces one exposure for the windows, another for the furniture, and a third that doesn't match either. The room looks acceptable on the rear screen, but the enlarged files reveal soft edges, clipped glass, and shifting colour from frame to frame.
High-end property photography depends less on a single “perfect” setting than on a repeatable operating system. The camera must stay stable, the exposure must protect the important information in the scene, and every room must belong to the same visual story. These real estate photography settings provide a reliable starting point, but the professional result comes from knowing when to hold the baseline and when to adapt it.
Establishing the Baseline for Architectural Interiors
A dark timber living room with floor-to-ceiling windows puts the exposure decision under pressure. The exterior may be several stops brighter than the room, while polished surfaces expose shifts in colour, glare, and sharpness. I begin by treating the space as a controlled capture, then adapt the settings to the view, the materials, and any movement in the scene.
For most interiors, a useful baseline is f/7.1 to f/9, ISO below 400, and a tripod-supported shutter speed from approximately 1/15 second to 2 seconds. The range balances depth of field, noise, and available light. Snappr's real estate photography guidance describes the same operating pattern, including tripod support and bracketed capture for rooms with high dynamic range.
Lock the variables that affect consistency
Aperture comes first. Around f/8, foreground furniture, architectural details, and rear walls usually remain within a useful zone of sharpness without forcing an unnecessarily long exposure. I move toward f/11 only when the composition needs more depth. A smaller aperture can introduce diffraction and extend the exposure without improving the final image.
ISO stays low because clean shadow detail matters in interiors. ISO 100 to 200 is a reliable starting point when the room permits it, while values below 400 remain a practical upper boundary for clean property work. Adobe also recommends f/8, shutter speeds from 1/60 second to 1/2 second, and ISO below 400 in its real estate photography settings guide.
The shutter is the setting that responds to the room. On a solid tripod, a slow exposure works well until movement enters the frame. Curtains, foliage outside the glass, ceiling fans, and people can create ghosting or softness, so I inspect the scene before extending the exposure. For a bright window pull, I protect the exterior detail and plan the bracket rather than forcing one shutter speed to handle every tone.
Practical rule: Keep the camera level, keep the aperture stable, and let the shutter speed respond to the light.
Build a property-wide visual language
Manual and aperture-priority shooting can both produce consistent work, provided the camera does not alter the visual relationship between rooms. I use the same foundational aperture and ISO wherever possible, then make deliberate shutter adjustments as the spaces change. In RAW, manual white balance prevents colour shifts between bracketed frames under mixed window and artificial lighting, a problem identified in practical HDR workflows.
Editorial consistency also depends on making the same decisions repeatedly. A kitchen with daylight, a hallway lit by warm fixtures, and a bedroom facing shade may need different exposure adjustments, but their colour and rendering should still feel related. I record the baseline and change one variable at a time, which makes the sequence easier to match during editing.
The commercial reason for this discipline is straightforward. Professional photography has been reported to help listings sell faster, and comparable homes photographed professionally have been reported to sell for more. Those findings appear in real estate photography market research, alongside Zillow's reported ideal listing range of 22 to 27 photos. The setup therefore supports a complete, consistent presentation rather than one attractive frame.
For teams planning the wider visual presentation, a boutique property service can provide context for fitting photography into a premium listing workflow. Before arriving on site, review practical guidance on lighting for interior photography so the chosen settings reflect the room's actual light sources.
Executing Flawless Exposure Bracketing and HDR Merges
A single exposure rarely holds both a bright window view and the detail in a shaded interior. HDR bracketing solves that limitation only when the camera captures a clean, aligned sequence. The process is mechanical, and small shortcuts create visible defects later.

Set up the sequence
Mount the camera on a stable tripod, then level it before composing. Aperture priority is a practical starting mode, with the aperture fixed at f/8, ISO locked at ISO 100, and manual white balance selected. Use continuous drive or a 2-second timer, then activate auto-exposure bracketing.
The standard sequence is three frames at 2 EV spacing, typically covering -2, 0, and +2 EV. That range handles many moderate interiors. When a room contains a very bright exterior view, deep cabinetry, or strong contrast across reflective materials, use five frames, either at 2 EV spacing where the camera supports it or at 1 EV spacing for a more compact spread. Guidance from Photo Founder's HDR workflow and Bright-Shot's real estate HDR recommendations both distinguish ordinary scenes from unusually wide dynamic-range situations.
Meter an interior area with mid-level brightness, not the window. Metering directly from the glass can force the room into excessive darkness, while metering from a deep shadow can sacrifice the view. The mid-tone reading gives the bracket a useful centre point.
Confirm what each frame is doing
Keep aperture and ISO constant. Only the shutter speed should change between exposures. If the aperture shifts, depth of field and lens rendering change. If ISO shifts, the noise pattern changes. Either variation can make the merge softer or produce unnatural transitions.
Before leaving the tripod, inspect the sequence:
- Level the body. Check vertical lines, door frames, and the horizon.
- Trigger without touching the camera. Use the timer or a remote release.
- Inspect the darkest frame. The window should retain meaningful exterior detail.
- Inspect the brightest frame. Shadow areas should reveal furniture and architectural surfaces.
- Review movement. Watch curtains, branches, people, and reflective highlights for changes between frames.
A common failure is using auto white balance. Under daylight mixed with warm practicals, the camera may assign a different colour temperature to each exposure, leaving the merged file with colour shifts. Auto ISO causes a similar problem through inconsistent noise and tonal response. PFRetour's bracketing reference reinforces the value of holding the core settings steady while varying shutter speed.
HDR software can align static details, but it can't fully repair a moving curtain or a changing reflection. I use tone mapping conservatively, then manually replace problematic areas from the most suitable bracket. AI-assisted tools can accelerate masking and blending, but they still need an untouched reference frame and a human decision about what the room looked like.
The same discipline applies whether the final image is blended manually or processed through an automated workflow. A clean sequence gives the editor choices. A careless sequence gives the editor artifacts.
Use this video as a visual reference for the capture mechanics and merge process:
Adapting Settings for Exteriors and Twilight Scenarios
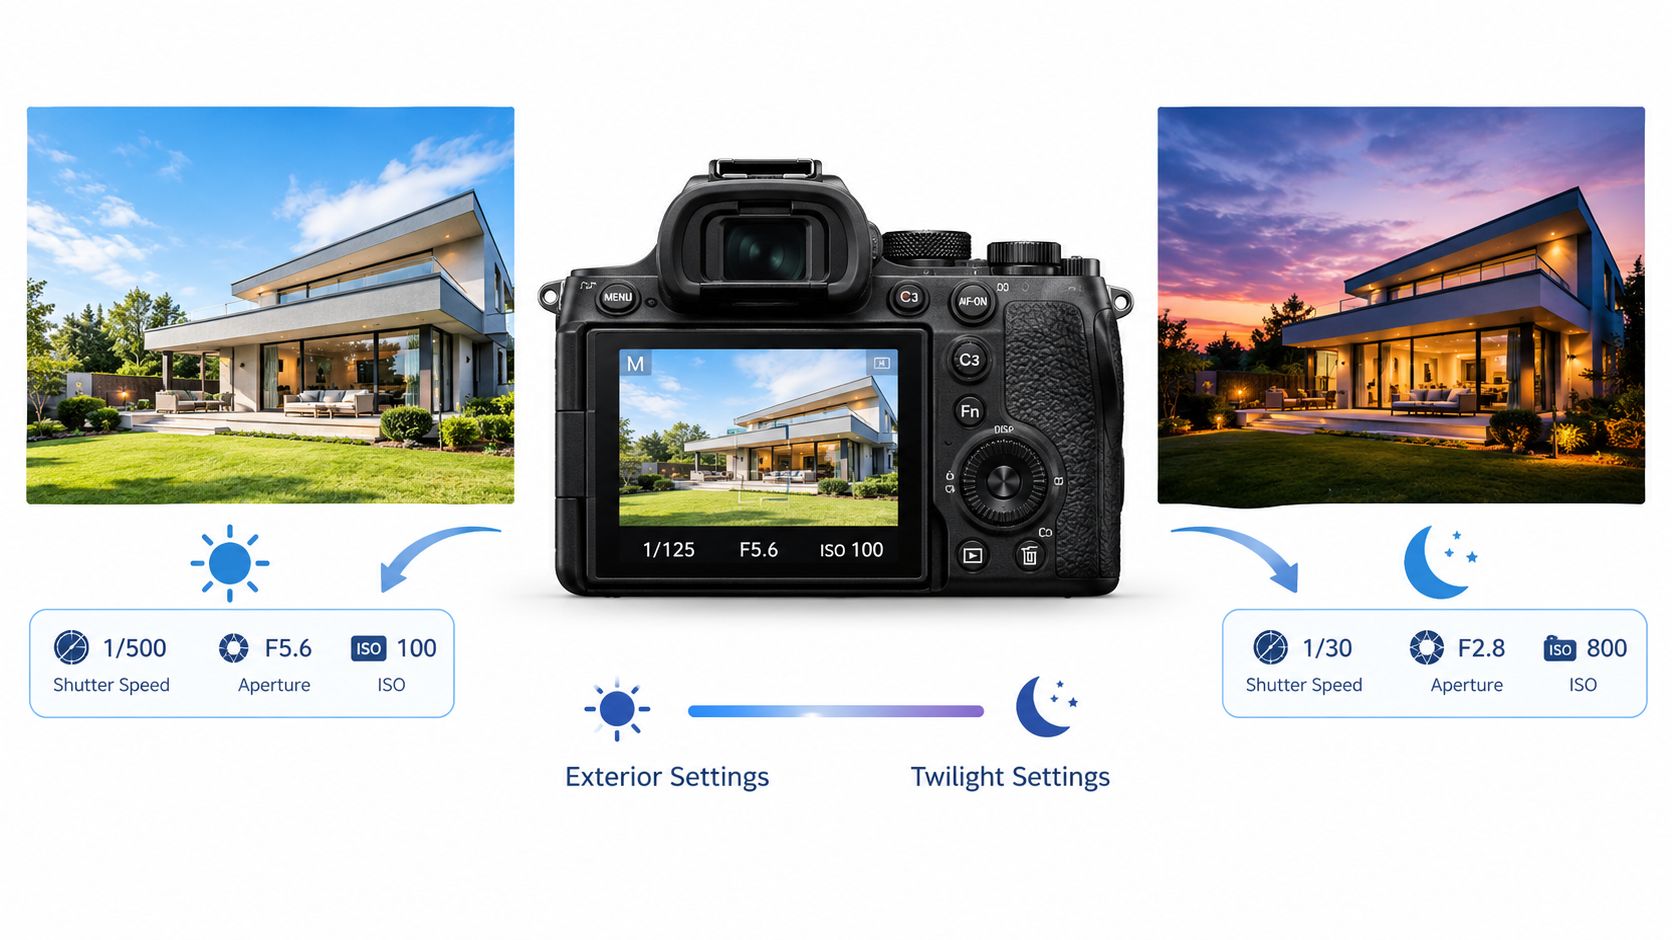
The interior baseline isn't a universal preset. A shaded study, a sunlit terrace, and a twilight façade place different demands on the exposure triangle. The useful habit is to preserve the principles, not the exact shutter speed.
Inside a dim room, the tripod permits a slow shutter while the aperture and ISO remain controlled. Outside in daylight, the shutter usually becomes much faster, and the concern shifts toward preserving sky detail, controlling reflections, and keeping the façade from looking flat. At twilight, the problem reverses again. Ambient light falls quickly, practicals become visually important, and each bracket sequence captures a slightly different balance between sky and building.
Daylight exteriors and bright window pulls
For a daylight exterior, I keep the aperture in the architectural range when depth across the façade matters, then adjust shutter speed to control the brighter sky and reflective surfaces. ISO stays low whenever possible. The tripod remains valuable even when the exposure is fast because it lets you refine perspective, repeat a composition, and capture matching frames without shifting the camera.
A bright window pull inside a room is more demanding than a straightforward exterior. The camera must protect the view while retaining enough interior information for a natural blend. I'll keep the composition fixed, close attention to the darkest and brightest brackets, and avoid letting the window dictate the entire exposure.
Off-camera flash can help when the façade has deep recesses or a porch falls into heavy shade. The light should support the architecture, not announce itself. Bounce, diffusion, or carefully placed indirect light usually looks more credible than a hard frontal burst. Continuous lighting can provide a similar fill when the output and placement are appropriate, but it must remain balanced with the ambient environment.
Twilight requires timing as much as settings
At twilight, the blue hour isn't static. The sky, interior windows, and façade change rapidly, so the photographer must work decisively. I begin by turning on practical lights and checking whether their colour supports the scene. If the interior is empty and dark, the windows can become black rectangles. If every lamp is excessively warm, the façade may look disconnected from the interior.
Bracketing remains useful, but the interval between sequences matters. A long delay can produce different sky brightness and window colour across frames, making the blend harder. For a high-contrast twilight scene, I prefer a stable tripod, a fixed composition, manual white balance, and a sequence that is completed quickly.
The architectural aim is cohesion. Interior images can feel luminous and spacious, while exterior images should preserve the same restraint in contrast and colour. Guidance on twilight architectural photography offers useful perspective on managing that transition without turning the evening frame into an artificial effect.
Navigating Mixed Lighting and Color Consistency
Mixed lighting causes more editorial damage than a slightly imperfect exposure. A room may contain cool daylight, warm tungsten lamps, neutral LEDs, and coloured reflections from painted walls. The camera can record all of it accurately, but accuracy alone doesn't guarantee a coherent final image.
Auto white balance is the main operational risk because it can interpret every composition differently. In one frame, the wall may appear neutral. In the next, the same wall may shift because the composition includes more window or a different lamp. RAW gives flexibility, but it doesn't eliminate the need for a stable capture decision.
Separate the lighting problems
Start by identifying the dominant visual source. If daylight defines the room, allow it to establish the neutral reference and reduce the influence of competing lamps where possible. If warm practicals are part of the design, preserve their character while preventing them from turning nearby walls and ceilings orange.
I don't treat every lamp as a problem. Practical fixtures often provide the atmosphere that makes a property feel inhabited. The issue is uncontrolled contrast between sources. Turning off unnecessary ambient lights can simplify the colour environment, while selective correction of the remaining fixtures keeps the lighting intentional. A strobe fitted with a CTO gel can be balanced toward a warm interior source when that approach suits the room.
Keep the same decision across the property
For each distinct lighting environment, establish a manual white balance and record the choice in the shooting notes. The value matters less than consistency. If the kitchen uses daylight as its reference, the adjoining dining area shouldn't drift dramatically unless the lighting genuinely changes.
Painted walls also complicate correction. A red or green cast can bounce into nearby surfaces and make a neutral reference appear misleading. I check several surfaces rather than trusting a single white object, especially in rooms with saturated finishes, mirrors, or glossy cabinetry.
A disciplined review follows this order:
- Inspect the windows. Look for a cool cast or colour contamination from exterior reflections.
- Check practical fixtures. Confirm that bulbs aren't creating distracting orange or green pools.
- Read nearby neutral surfaces. Walls, ceilings, and stone often reveal the dominant imbalance.
- Compare adjoining rooms. The property should feel continuous when images are viewed as a set.
Mixed light rarely needs to be erased completely. It needs to be controlled well enough that the viewer notices the space before noticing the colour correction.
The mixed lighting photography guidance provides a useful framework for deciding when to simplify the room, gel a source, or accept a warm practical as part of the design. That decision should happen on site, not after a batch of inconsistent files reaches the editing desk.
On-Set Verification and Tethering Workflows
The rear LCD is useful for composition, but it isn't a dependable quality-control system for a premium property shoot. Small focus errors, clipped colour channels, and subtle white-balance shifts become obvious only when the file is viewed at a useful scale.
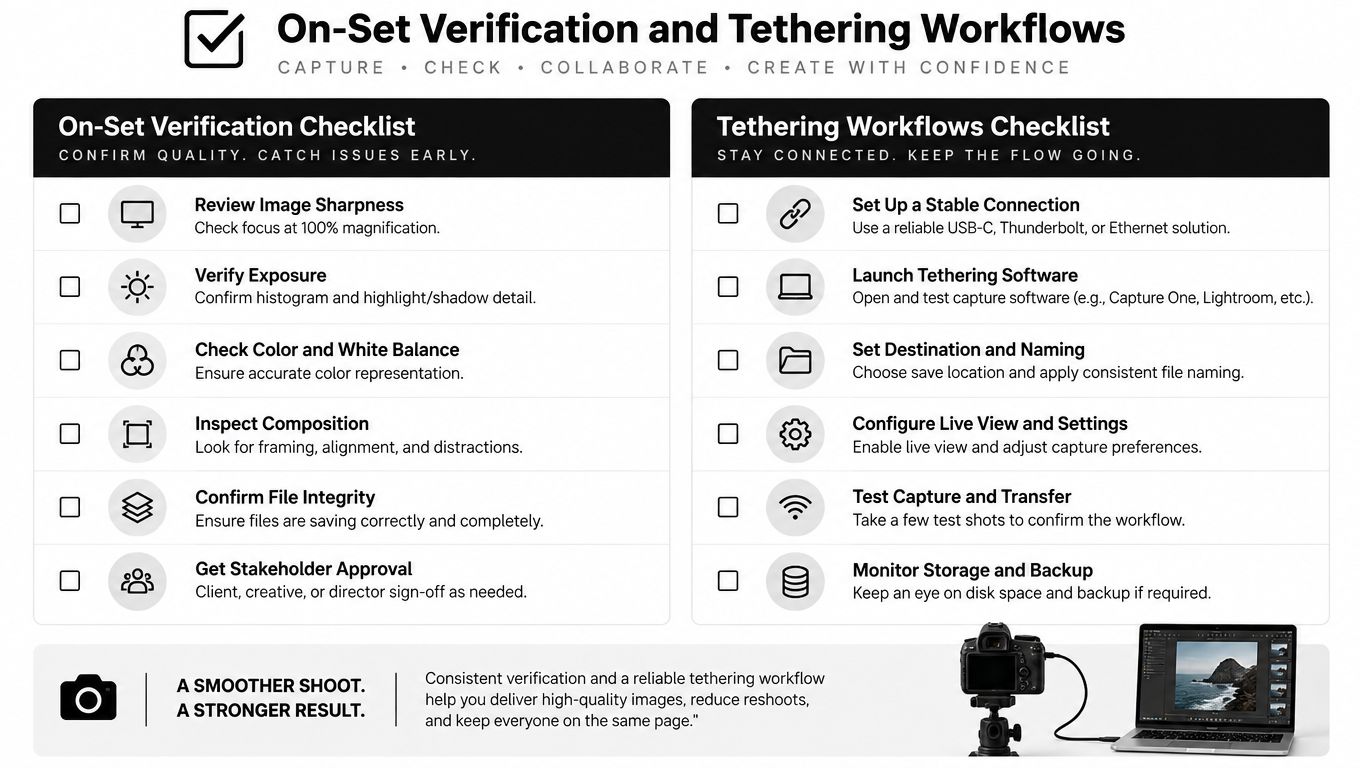
A tethered workstation gives the photographer and the client a shared reference. Connect the camera to a laptop or calibrated monitor, then display each selected composition as soon as the bracket sequence is complete. The point isn't to invite endless on-set opinions. It's to catch failures while the tripod and lights are still in position.
Verify the exposure before moving
Start with the histogram, not the appearance of the preview. A combined histogram can suggest a balanced exposure while one RGB channel clips in a bright painted surface or a warm lamp. Check the individual channels when windows, polished stone, fabric, or coloured walls carry important detail.
Use the brightest and darkest bracket as functional tests. The darkest frame should preserve the exterior view, while the brightest should open the deepest meaningful shadows. A middle frame may look attractive on its own, but it doesn't prove that the sequence will merge successfully.
Then magnify critical areas. Inspect the nearest furniture edge, the far wall, window mullions, and any fine architectural detail. Focus peaking can help locate the focus plane, while magnification confirms whether the detail is crisp rather than merely highlighted by the display.
Use a repeatable room checklist
A systematic review prevents the familiar end-of-shoot discovery that one room was never captured correctly:
- Composition: Confirm level verticals, clean edges, and an intentional relationship between furniture and openings.
- Exposure: Check histogram distribution and the bracket extremes.
- Focus: Magnify foreground and background details at the working aperture.
- Colour: Compare the room with adjacent spaces and inspect mixed-light transitions.
- Movement: Look for curtains, foliage, people, or reflections that changed between frames.
- File integrity: Confirm that the tethered files have transferred before changing location.
A client or art director can review the broad composition on the calibrated screen, but technical approval still belongs with the photographer. A pleasing thumbnail won't reveal a soft window frame or a clipped red channel. Verification turns the shoot from a sequence of hopeful captures into an accountable delivery process.
Connecting Capture Discipline to Post-Processing
Post-processing becomes predictable when the files arrive with stable exposure, focus, and colour decisions. It becomes defensive when every bracket has a different white balance, the camera moved between frames, or the editor must guess which exposure contains the honest shadow detail.
Shoot RAW and keep the aperture and ISO fixed throughout each bracket. Manual white balance gives the editing system a consistent starting point, while disciplined shutter changes preserve the same depth-of-field behaviour across the sequence. This reduces merge artifacts, colour shifts, and softness before any AI-assisted tool enters the workflow.
Organize files around the way you shoot
I keep each bracketed sequence together and preserve the original captures beside the working blend. Room names, view direction, and sequence order matter more than elaborate folder systems. An editor should be able to identify the living-room window pull, its source brackets, and the selected reference frame without opening every file.
The post-production process then follows a controlled order:
- Select the sequence. Confirm that the frames align and cover the required tonal range.
- Apply the base profile. Correct lens behaviour and establish a neutral starting point.
- Merge conservatively. Preserve window detail and shadow information without creating halos.
- Correct perspective. Keep verticals believable and avoid stretching furniture.
- Balance colour. Match adjoining rooms while retaining intentional warmth from practical lights.
- Review the property as a set. A polished individual image can still fail if it doesn't belong beside the others.
AI-assisted HDR and masking can speed up selections and tonal transitions, but automation must remain subordinate to the property's actual condition. Heavy tone mapping, invented details, or generative changes can make a listing look impressive while weakening trust. Recent workflow discussions also distinguish ordinary HDR, exposure, and white-balance processing from generative edits in relation to disclosure requirements under California AB 723. Verify the current legal position for the market and listing type before publishing.
Professional photography has been associated with faster sales and higher comparable sale prices in the research cited earlier, but those outcomes depend on the complete presentation, not on HDR alone. A useful resource for connecting image quality with listing presentation is sell faster with better property photos. The strongest workflow preserves the property's character, presents its spaces consistently, and removes technical distractions without manufacturing a different building.
For architectural and commercial assignments, Jimmy Clemmons Photographer combines location scouting, lighting design, on-set direction, and professional editing into a controlled production workflow. If your next property needs consistent real estate photography settings from the first interior frame through the final twilight exterior, visit Jimmy Clemmons Photographer to discuss the location, lighting conditions, and visual requirements.