
You're in a conference room with one outlet that works, a client who has ten minutes, and a wall that reflects everything except good judgment. That's the normal setup for a professional portrait lighting setup outside the studio, and it's exactly where the usual advice starts to break down. The skill isn't memorizing a diagram, it's making clean decisions when the room is small, mixed, and uncooperative.
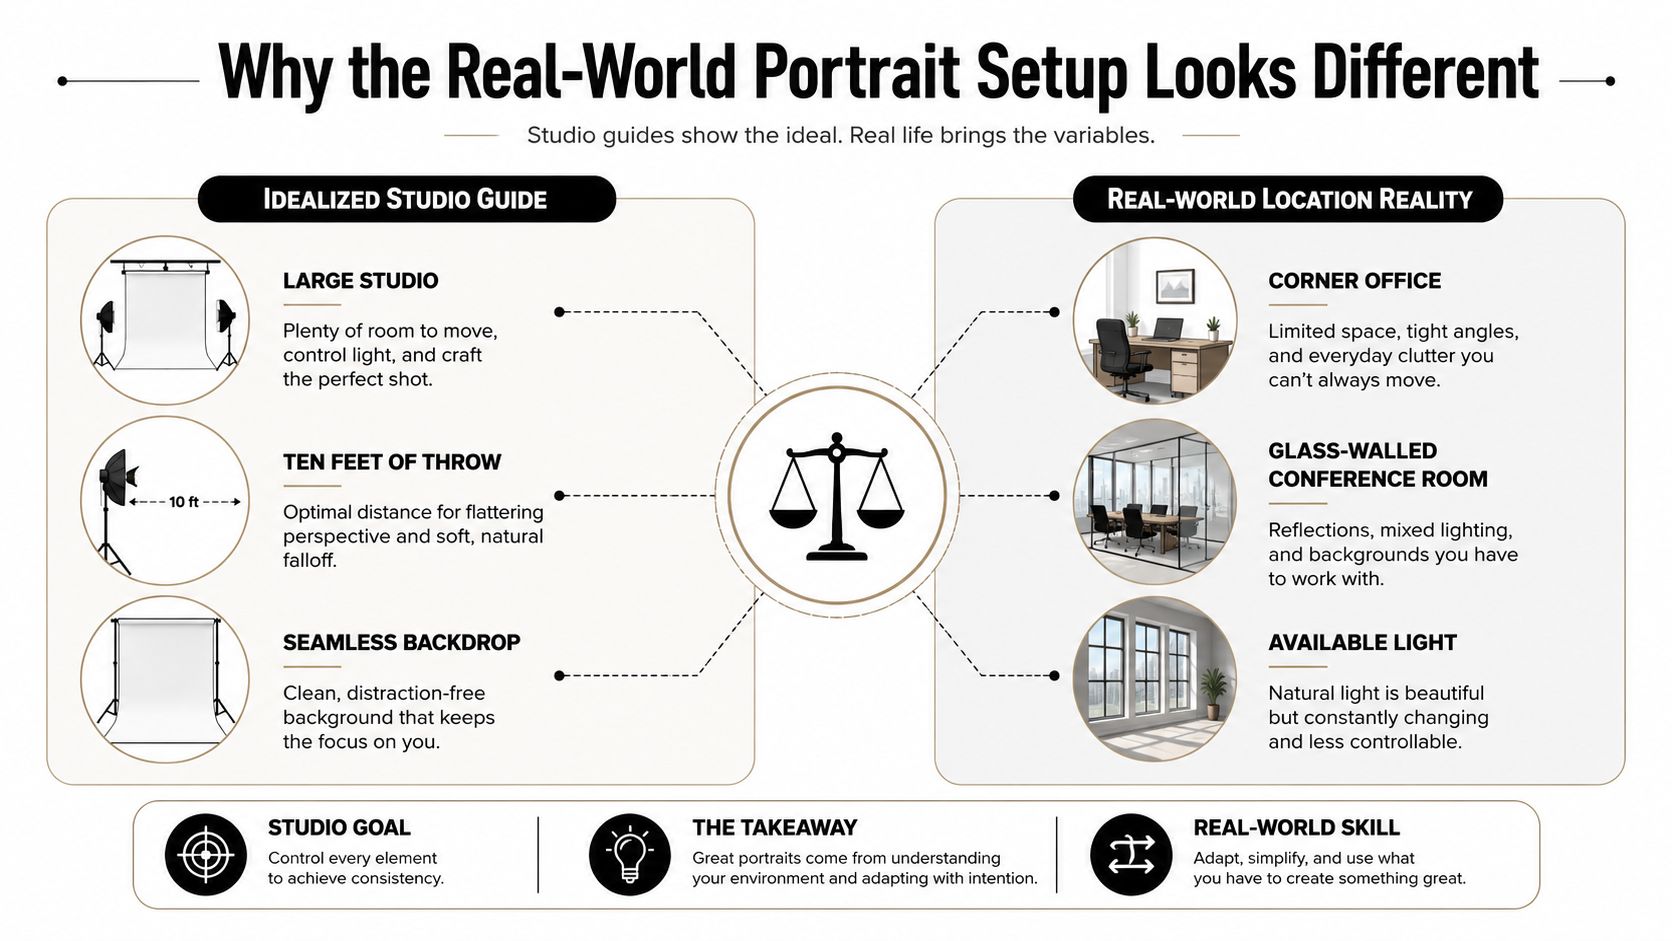
A studio guide assumes endless space, a background, and light that can sit wherever it wants. Real editorial and corporate portrait work happens in corner offices, glass-walled conference rooms, and hotel suites where every stand leg has to earn its keep. The job is to build a setup that looks deliberate anyway, using the room instead of fighting it.
Why the Real-World Portrait Setup Looks Different
A lot of portrait lighting lore comes from a world that had more room than most photographers ever get. Photographers were already experimenting with limelight in the mid-1800s, and by 1887 Adolf Miethe and Johannes Gaedicke had introduced a widely used flash powder mixture of magnesium powder and potassium chlorate, which tells you something important about the history of the craft, people have always chased control over light itself (according to this historical overview). By the early 1900s, safer incandescent bulbs and electronic flash units became common, and portrait work got much more repeatable because photographers could shape the face with consistent key, fill, and backlight instead of depending on weather or window position.
That shift still matters because most assignments do not happen in a purpose-built studio. They happen in boardrooms with reflective tables, offices with limited clearance, and conference spaces where the backdrop is whatever wall is left after the furniture lands. In those rooms, the classic 45-degree key-light recipe is still useful, but only if you can place the light where the diagram assumes.
The primary constraint is throw, not taste
What changes first is usable throw, the distance you can put between the subject, the modifier, and the camera. In a big studio, there's room to move the light far enough back to shape the whole frame. In a tight office, moving the source back too far makes it look smaller, which hardens the transition on the face and weakens the sense of wrap.
That is why the room should drive the lighting choice, not the other way around. If the setup can't keep the source large relative to the subject, it won't look like editorial portrait lighting, even if the angle is technically correct.
Practical rule: when the room gets smaller, treat modifier size and distance as part of the look, not just the gear list.
The second constraint is spill. Glass walls, white paint, and glossy tabletops bounce light into places you didn't choose. That stray bounce can flatten the shadow side and make the whole frame feel accidental.
So portrait setup is not a weaker version of the studio setup. It is a more conditional one. You're still building key, fill, and separation, but you're doing it with the room's geometry in mind, which means measuring the space before you meter the face.
Core Kit for a Repeatable Setup
A repeatable professional portrait lighting setup starts with role clarity, not with a shopping list. One light defines the face, one tool lifts the shadows, and one small source or reflector keeps the subject from falling into the background. Everything else is convenience, or a style choice that only matters after the basics are working.
In offices and conference rooms, the smartest kit is the one that sets up fast, packs small, and behaves the same way under mixed ambient light. A strobe gives you control over exposure, while a continuous light helps when you need to see the falloff before you fire the shutter. If you are deciding between those approaches, this continuous light versus strobes guide lays out the trade-offs clearly.
What earns a permanent place in the bag
A 36-inch softbox is the most useful workhorse in a tight room when the subject is close to the light. It fits into a corner office more easily, feathers around reflective walls with less fuss, and goes up quickly when floor space is limited. A 48-inch octa gives a broader, more enveloping look, but it asks for more clearance and more careful placement.
A silver umbrella is often the better choice when you need punch and efficient output. A setup guide notes a 2-stop version when using a silver reflective umbrella as key, which fits small spaces where you need more output without building a larger rig (as noted in this setup guide). A white umbrella feels softer, but it usually gives up control, and that matters more in mixed interiors than people like to admit.
A simple 5-in-1 reflector can replace a second strobe for fill when the client wants speed and the room will not tolerate more stands. It helps when you need a soft lift on one side without adding another power source or another cable run. A small LED panel earns its place as a hair or accent light because it can live on a light stand, tuck into a corner, and create separation without taking over the room.
| Working Space | Recommended Key | Fill | Separation |
|---|---|---|---|
| Tight office or conference room | 36-inch softbox | 5-in-1 reflector | Small LED panel |
| Standard meeting room | 36-inch softbox or silver umbrella | Reflector or low-power strobe | Small LED panel |
| Room with more clearance | 48-inch octa | Reflector or strobe fill | LED panel or kicker |
Why the minimum kit stays minimal
The point of the kit is not to reduce options. It is to reduce failure points. Each extra stand, modifier, or battery adds another thing that can slow the session down or spill into the background.
A lean kit lets you solve problems in the room instead of in the bag. That matters when a corporate client thinks the session is starting on time, because it is.
Light Placement Geometry That Holds Up
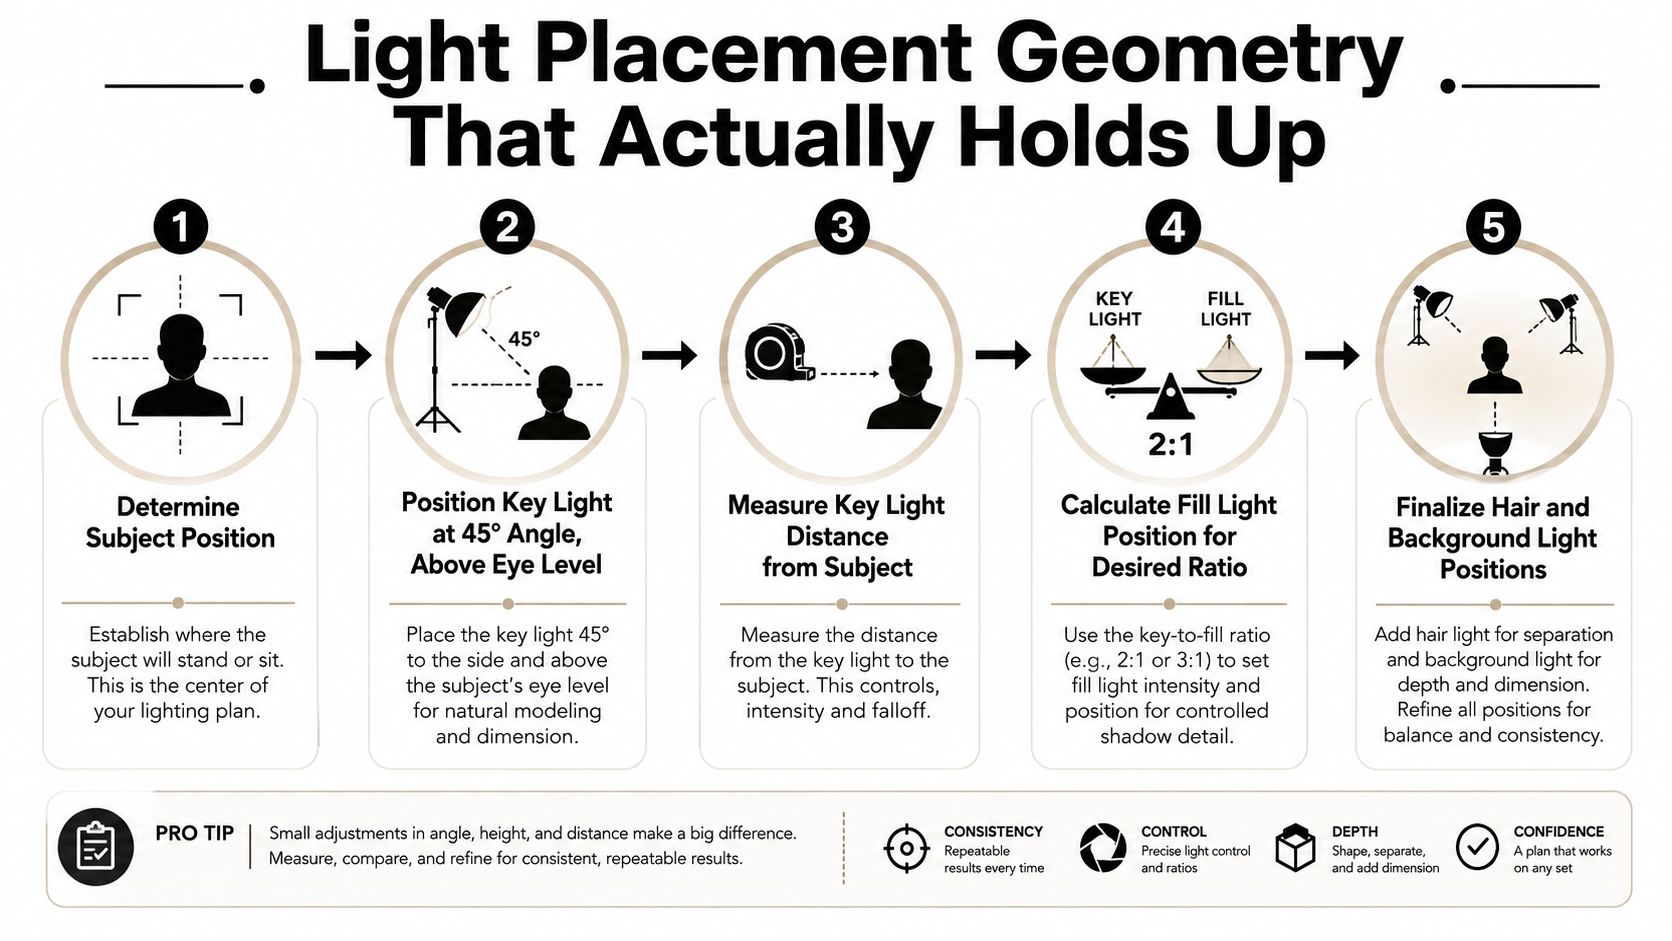
The familiar starting point still works, 45 degrees off-axis and slightly above eye level, because it gives shape without pinning the face flat to the frame. The useful part is not the formula itself, it is the geometry behind it. In a cramped office, conference room, or tight interior, the angle can stay familiar while the distance and working space decide whether the setup feels polished or awkward.
A workable baseline is to keep the main softbox relatively close, about 32 inches from the subject's face, and leave at least 3 feet of working space for the photographer, camera, tripod, and fill light. That close placement keeps the source large relative to the subject, which softens the transition from highlight to shadow. Move the light farther back to clear a wall, plant, or doorway, and it starts to behave like a smaller source, which makes the light harder and less forgiving.
Distance changes the look faster than angle does
A lot of photographers fixate on angle because it is easy to see. Distance is the quieter variable, and in a small room it usually matters more. If the modifier has to move back to clear a wall or a plant, the subject gets a different quality of light even though the diagram still says key at 45 degrees.
That is why the closest clean placement usually wins. It gives you the biggest apparent source from the modifier you already own and keeps shadow edges gentler without reaching for oversized gear.
Ratio should stay readable, not rigid
A practical starting point is a 3-stop key-to-fill ratio, for example key at f/11 and fill at f/4, which keeps depth while holding skin tone under control. In a smaller room, that ratio is a target, not a rule. If the key has to sit farther back than you want, the light will harden, so the fill usually needs to move closer or become more directional just to keep the face from turning too contrasty.
Keep the light close enough that it still feels like a source, not a spot.
If the room cannot support the textbook layout, split the difference. Keep the 45-degree idea, place the modifier as close as the frame allows, and favor the softness that comes from size and proximity over the purity of the diagram.
Camera Settings That Support the Lighting
Lighting only works if the camera doesn't fight it. Once the modifier, distance, and ratio are set, the camera's job is to lock that look in and keep ambient light from wandering into places it doesn't belong. That starts with choosing an exposure that respects the flash instead of trying to average the whole room.
The simplest rule is to set the shutter speed at or below your camera's sync limit, then choose aperture for the depth and power you want, and keep ISO as low as practical for the job. On a corporate portrait day, consistency matters more than cleverness, because every subject needs to look like they belong to the same session.
Let the strobe do the heavy lifting
If the room's ambient light is attractive and you want some of it in the frame, let it contribute a little. If the room light is ugly, mixed, or uneven, reduce it until the strobe defines the portrait. The decision is visual, not ideological.
The useful habit is to meter or test at the subject's face before you start the sequence. That tells you whether the flash is carrying the image or whether the existing room light is sneaking in and changing the face from shot to shot. On mixed-location jobs, that one check saves time later when the first few frames look almost right but not quite consistent.
Aperture should match the room, not the habit
A wide aperture can be useful when the room is dark and the strobe is modest, but it also narrows your margin for error in posing and eye focus. A smaller aperture gives you more headroom for slight movements, which helps when you're directing executives who don't want to stand perfectly still. The correct aperture is the one that gives you enough depth for the face and enough flash efficiency for the modifier you're using.
ISO should stay conservative if you expect a long shoot with repeated setups. Clean files matter more when the client wants a cohesive grid of portraits, because mismatched noise or color can show up faster across a set than in a single hero frame.
Directing a Corporate Team Portrait Session
A leadership portrait in a glass-walled boardroom asks for calm pace and a fixed rig. The lighting doesn't need to be rebuilt for each person, it needs to stay put while the subject changes. That's what makes the session feel efficient instead of improvised.
The best move is to mark the floor for subject position and camera placement before the first executive arrives. Once the key is stable, the subjects rotate through the same spot, and the light-to-face relationship stays close enough to preserve the look. That consistency matters more than fancy posing because it keeps the group from turning into a stack of unrelated portraits.
Keep the light fixed and move the people
When the room is tight, it's smarter to rotate each subject around a fixed light than to re-rig for every person. That preserves exposure, keeps the shadow side familiar, and reduces the chance of someone walking into the stand or reflector. It also lets you give each person small adjustments in chin, posture, and hand placement without changing the base setup.
The fastest session rhythm is simple. Bring one person in, set the stance, check jawline and shoulders, make a short burst of frames, then swap. The minute the crew starts moving stands between subjects, the session slows and the portraits start to drift.
Wardrobe and expression need just as much control
A collar wrinkle or a crooked jacket shows up faster in a clean portrait than most clients expect. So do glasses reflections, shiny forehead hotspots, and a hand that disappears into a pocket at the wrong angle. Those are not lighting problems, they're direction problems, and they're easiest to fix before the shutter count climbs.
If the team wants a polished, editorial look, the direction should be concise. Stand tall, turn slightly, lean in a fraction, and keep the hands intentional. For corporate groups that need a coherent final set, this professional headshots guide for design teams pairs well with the portrait workflow here.
A good corporate portrait session feels boring in the room and strong on the proofing screen.
That's the right target. The client remembers the efficiency, and the final images read as unified because the lighting never wandered off script.
On-Location Adjustments for Mixed Light
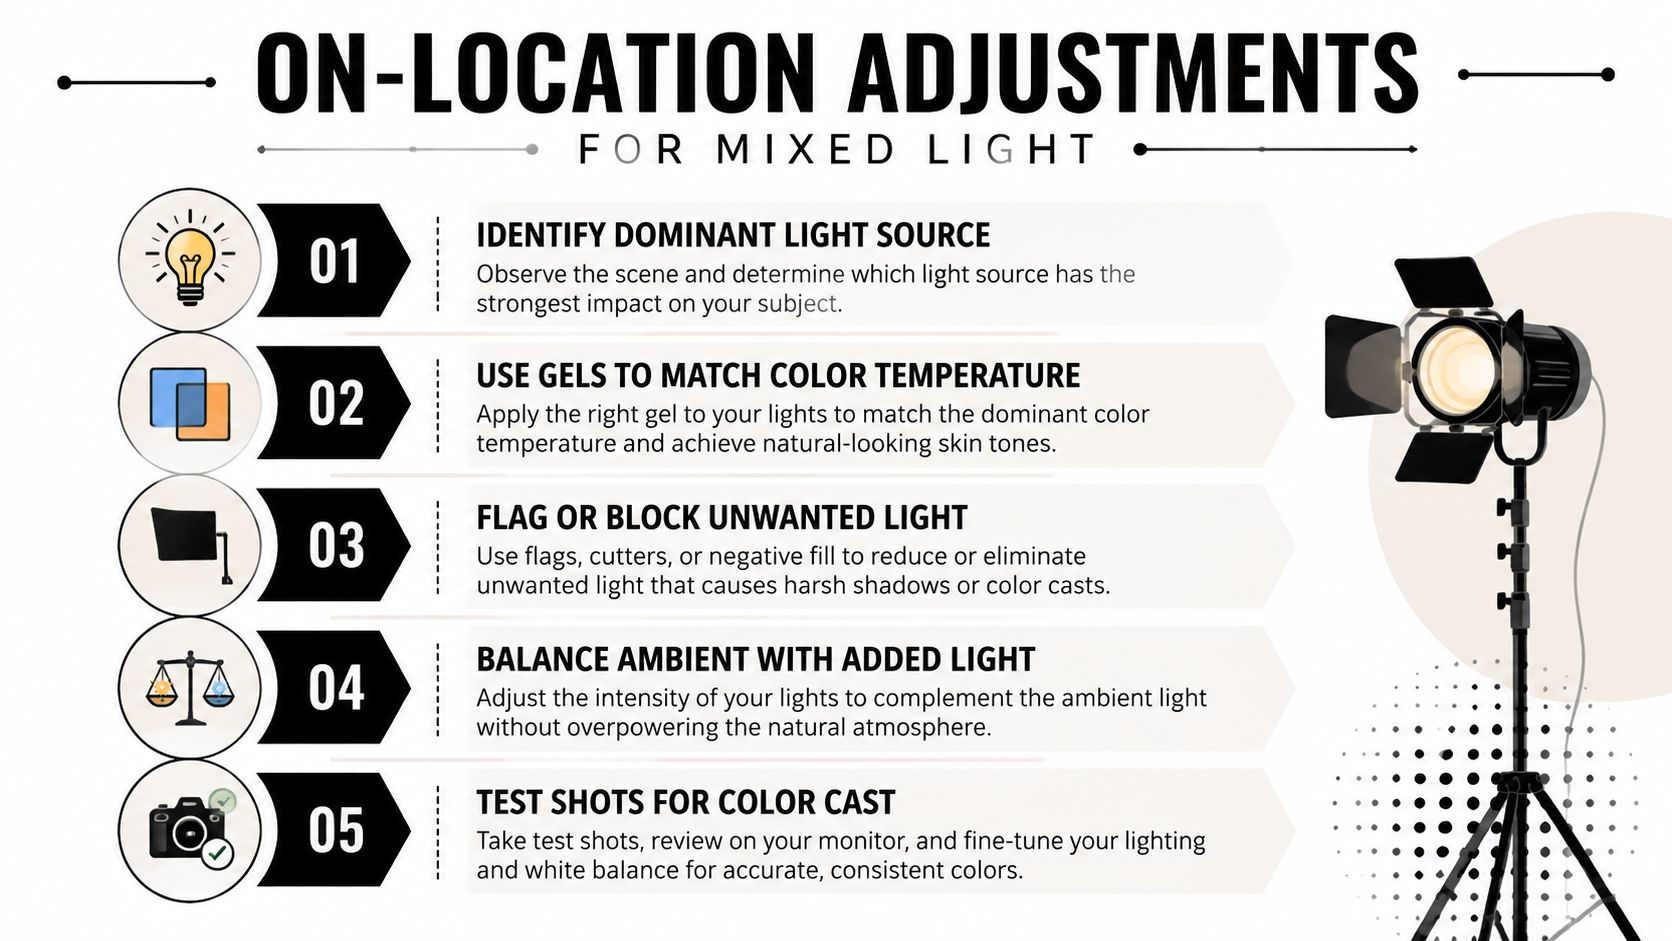
Mixed light is where many office portraits go sideways. Fluorescents cool the room, tungsten fixtures warm the background, and a window keeps changing the subject's cheek by the minute. The answer is not to chase every source, it's to decide which one gets to lead.
If the ambient light is ugly or unstable, overpower it with your own setup. If the room's existing light is flattering and consistent, shape your flash to match it instead of erasing it. The key is to make one light language dominate the frame.
Match the room, then control the spill
When the dominant source is warm, a gel on the strobe can help the subject stop looking pasted into the scene. When the room has a window that throws a bright stripe across the face, the fix is usually positioning, not postproduction. Move the subject a step or two, or turn the face slightly so the highlight doesn't land like a flashlight beam.
Reflective glass and white walls are useful until they aren't. If they're filling shadows without permission, flag them off or change the angle so the bounce lands somewhere less damaging. That's especially important in conference rooms where one white wall can act like a second fill source and flatten the portrait.
Read the failure mode before you change gear
Color casts on the shadow side usually mean the room light is still contaminating the frame. A hot cheek from a window means the face is too exposed to the source, or the subject needs a small turn away from it. A background that should separate but doesn't usually means the room is lifting the shadows too evenly, which calls for more control, not more power.
The working rule is simple. Fix the dominant problem first, then shoot another test frame. If the room still looks too busy, subtract light before you add anything new.
For more on working through those room-color problems, the mixed lighting photography guide is a useful companion.
Pre-Shoot Checklist and Troubleshooting
A reliable portrait setup starts before the first frame. The room may change, but the sequence shouldn't. Confirm the gear, read the space, establish the ratio, and test before the client settles into the rhythm of the shoot.
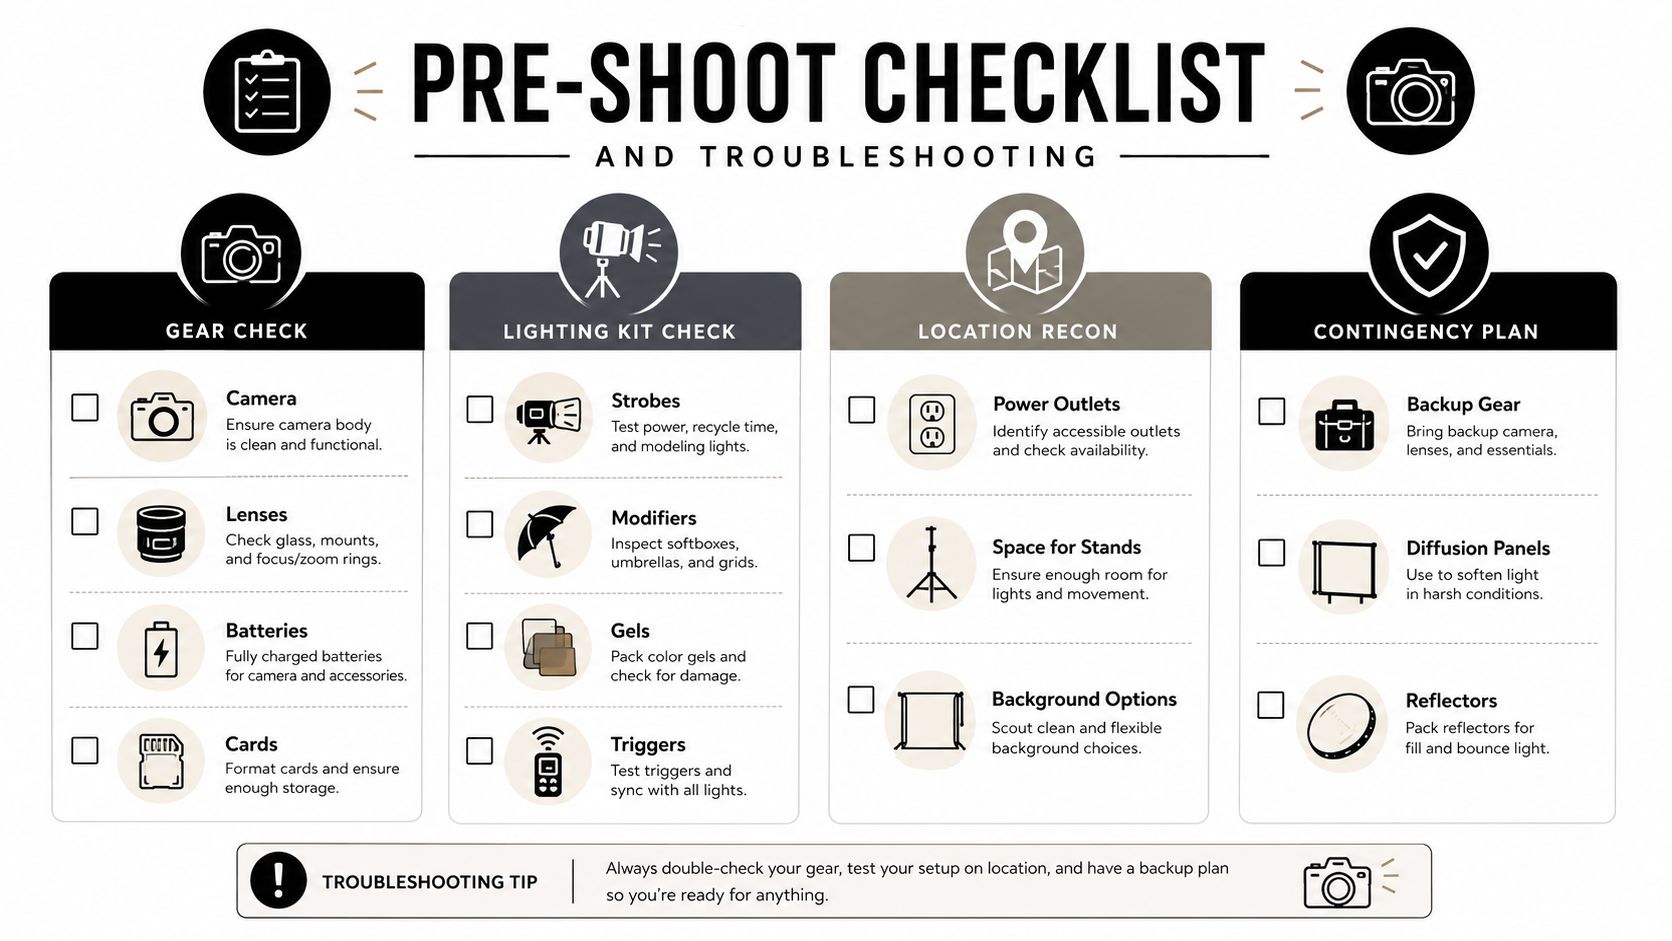
The checklist that keeps the session moving
- Gear check: Camera, lenses, batteries, cards, and the trigger system need to be on the table before setup starts.
- Lighting kit check: Strobes, modifiers, gels, reflectors, and stands need to match the room you're walking into.
- Location recon: Power outlets, stand clearance, background options, and reflective surfaces should be assessed before the first subject arrives.
- Contingency plan: Backup gear, diffusion panels, and a reflector should be ready when the room won't cooperate.
When the portrait looks wrong, look here first
Flat light usually means the source is too far away or too frontal. Harsh shadows usually mean the modifier is too small for the space, or it's been pushed back too far. Color contamination usually comes from untreated room light or reflective surfaces, while an uneven ratio across subjects usually means the setup moved between frames instead of staying fixed.
The fastest fix is usually the least glamorous one. Move the light closer, block the spill, or rotate the subject instead of rebuilding the whole room. That's how a professional portrait lighting setup stays professional in a room that wasn't designed for one.
If you want portraits that feel controlled in offices, boardrooms, and other awkward spaces, Jimmy Clemmons Photographer builds lighting and direction around the room you have, not the room you wish you had. The work is designed for corporate teams, editorial needs, and brand use cases where consistency matters as much as style. Reach out if you need portraits that look intentional from the first frame to the last.