
You've set the tripod in the corner, opened the curtains, switched on the practical lights, and made the room look inviting. Then the test frame appears: the window is nearly white, the sofa sits in a blue cast, the pendant light turns the ceiling warm, and the walls lean inward. Good interior photography settings solve more than brightness. They preserve the room's geometry, material character, and believable relationship between light sources.
Understanding the Foundations of Interior Photography
A well-made interior photograph is a translation. The room exists in three dimensions, with depth, circulation, texture, and changing illumination. The camera reduces all of that to a single plane, so the settings must preserve spatial relationships rather than merely make the frame bright.
That responsibility has been present since the beginning of architectural photography. Nicéphore Niépce's 1826 or 1827 photograph, commonly identified as the earliest surviving permanent photograph, showed the view from a window at his estate in Saint-Loup-de-Varennes, France. The exposure reportedly required several hours because the asphalt-coated plate had extremely low sensitivity compared with modern photographic materials, as documented in the history of architectural photography.
By the 1860s, architectural photography had become an established visual medium. The tools were slow, but the purpose was already familiar: document the built environment with enough precision that another person could understand its form, proportion, and construction.
The room is the subject
Modern cameras make interior work dramatically faster, but the underlying problem hasn't disappeared. Windows can be far brighter than walls, dark joinery can absorb detail, and a camera placed only slightly too high can change the apparent proportions of furniture and ceiling lines.
That's why a deliberate setup usually outperforms a quick handheld frame:
- Low ISO keeps tonal transitions in walls, floors, and shadow areas cleaner.
- Careful aperture selection gives the room enough depth of field without treating every image as a detail shot.
- Stable camera support permits a slower shutter when available light is limited.
- Controlled exposure protects important highlights and preserves information for post-processing.
The camera is not merely recording decoration. It's making a technically faithful two-dimensional record of a three-dimensional environment. That distinction affects every decision, from where the tripod stands to whether a warm lamp should remain warm.
Practical rule: If the image makes the room look larger, flatter, brighter, or more symmetrical than it really is, the settings have changed the subject instead of documenting it.
A strong interior frame therefore begins before the shutter is released. Look at the visual hierarchy of the space, identify the architectural lines that must remain credible, and decide whether the final image should describe atmosphere, construction, circulation, or all three. Exposure follows that purpose.
Mastering the Exposure Triangle for Interiors
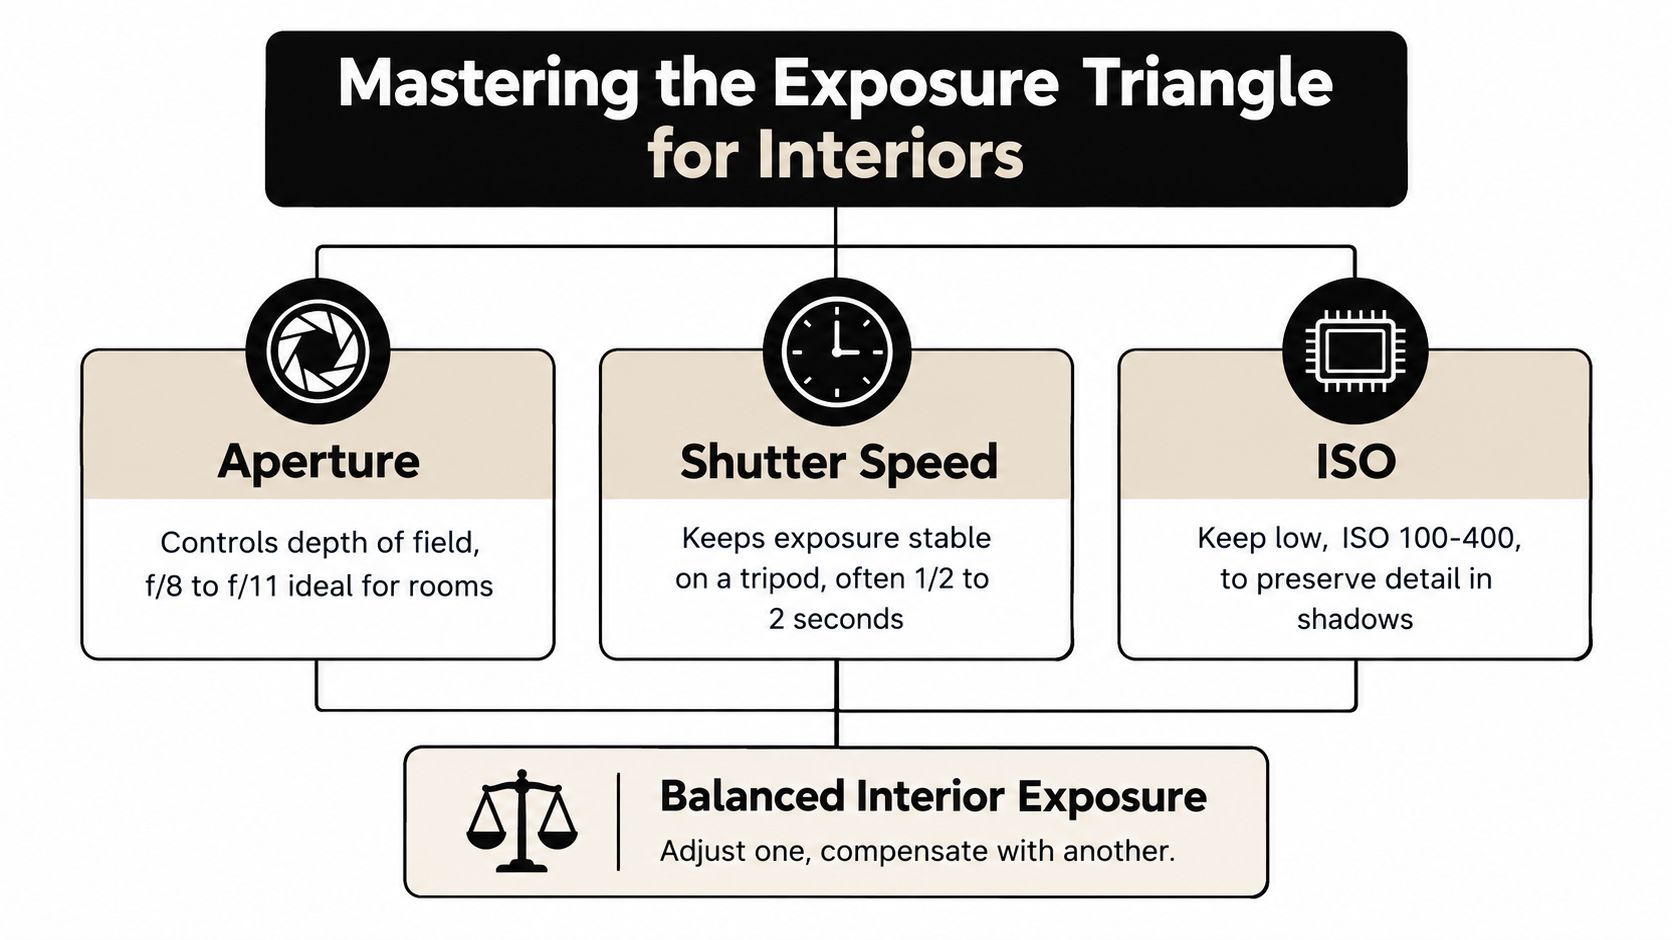
The exposure triangle has three controls, but they don't carry equal responsibility in a static room. Aperture controls depth of field and light transmission, shutter speed controls exposure duration and motion blur, and ISO changes the sensor's brightness response while increasing visible noise at higher values. A one-stop increase in one variable requires a one-stop decrease in another to preserve equivalent brightness, as explained in this exposure triangle reference.
For expansive interiors, a widely used starting point is ISO 100, f/8 to f/11, and a shutter speed adjusted to the available light, sometimes from approximately 4 seconds to 1/125 second. These values aren't a recipe to follow blindly. They establish a sensible order of decisions, described in this interior room settings guide.
Choose aperture for the room
Start with the depth of field the composition requires. f/8 to f/11 generally keeps foreground furnishings, architectural details, and distant walls acceptably sharp in a room with substantial depth. A narrower aperture reduces incoming light, so the shutter will often need to stay open longer.
That trade-off is useful on a tripod. It gives you spatial sharpness without forcing the ISO upward just because the room is dim. For a detail shot or a deliberate vignette, a wider aperture around f/2.0 to f/3.5 can isolate a lamp, material junction, or furnishing, but it isn't usually the right starting point for a whole-room view.
Let shutter speed finish the exposure
Once the aperture is set, adjust shutter speed until the exposure is correct. In a static room, a slow shutter isn't a problem if the camera is secure and nothing important is moving. It becomes a problem when people, foliage beyond the glass, curtains, or unstable fixtures introduce blur between frames.
A tripod changes the calculation. Instead of raising ISO to maintain a handheld shutter speed, you can allow the exposure to lengthen and preserve cleaner shadow detail. Use a self-timer or remote release, and check the image at full size before changing position.
Keep ISO as low as practical
Keeping ISO between 100 and 400 is commonly recommended because lower sensitivity reduces visible digital noise and supports smoother tonal transitions in painted walls, floors, and shadowed corners. Raise it only when movement, camera position, or available support makes the slower shutter unusable.
The hierarchy is simple:
- Choose aperture for the depth of field the composition needs.
- Use shutter speed to complete the exposure while protecting sharpness.
- Raise ISO last, and only as far as the scene requires.
For another practical reference on this sequence, see these real estate photography settings. The useful principle is consistent: a bright frame isn't automatically a successful frame. The room must remain sharp, stable, and tonally credible.
Managing Mixed Lighting and White Balance
Mixed lighting is where a technically correct camera setting can still produce a visually incorrect photograph. A room may contain daylight from a window, warm decorative lamps, fluorescent sources, and LEDs, each affecting nearby surfaces differently. A single Kelvin value can shift the overall image, but it can't make every source neutral at the same time.
Typical starting points illustrate the problem. Tungsten is approximately 3,200 K, many fluorescent environments fall around 4,000 to 4,500 K, and daylight-balanced sources sit near 5,600 K, according to this white balance guide. These are starting points, not guarantees, because LED spectra vary substantially.
Measure the light where the subject is
White balance is a measurement problem, not merely a menu choice. Place a neutral gray card where the principal subject will be photographed, orient it toward the relevant light, and fill most of the frame. Capture the reference in RAW while the card receives the same illumination as the room surfaces you need to judge.
A gray card beside a window doesn't necessarily represent a countertop several feet inside the room. Likewise, a card under a pendant light won't accurately describe a wall receiving cool daylight. The reference can be technically consistent and still be wrong for the visual zone that matters.
Take another reference when the lighting condition changes. That includes moving curtains, a shift in exterior daylight, or switching practical fixtures on or off. RAW preserves flexibility, but it can't erase the fact that two surfaces received different colors of light.
Don't force false uniformity
The instinct to neutralize everything often produces an interior that feels sterile. Warm lamps can communicate hospitality, residential comfort, or material character, while neutral walls and countertops may need accurate rendering. A believable image doesn't require every source to look identical.
Before changing the white balance, decide which surfaces carry the most visual or commercial importance. White walls, cabinetry, countertops, branded finishes, and artwork may need localized correction, while a warm decorative lamp can remain warm. Guidance on how lighting shapes a living room is useful here because the emotional role of a light source can matter as much as its measured color.
A correct white balance can preserve a color difference instead of removing it.
For difficult spaces, consider switching off competing sources, replacing mismatched bulbs, or using controlled supplemental lighting. Regional correction in post-processing is often more convincing than pushing the entire room toward one global temperature. The same principle applies when deciding how to approach mixed lighting photography.
Common reference errors
Several habits create inconsistent color even when the camera is set manually:
- Using a white wall: Painted surfaces may contain subtle color, and reflected light can vary across the room.
- Placing the card near a window: The card may receive daylight while the principal subject sits under interior fixtures.
- Clipping the reference under a lamp: An overexposed card can't provide a reliable neutral reading.
- Relying on automatic white balance across a bracket: Each frame can receive a different interpretation, complicating alignment and blending.
The aim isn't laboratory uniformity. It's controlled interpretation. Preserve the light differences that explain the room, correct the casts that distract from its materials, and make that decision intentionally rather than leaving it to automatic white balance.
Choosing Between HDR and Single Exposure
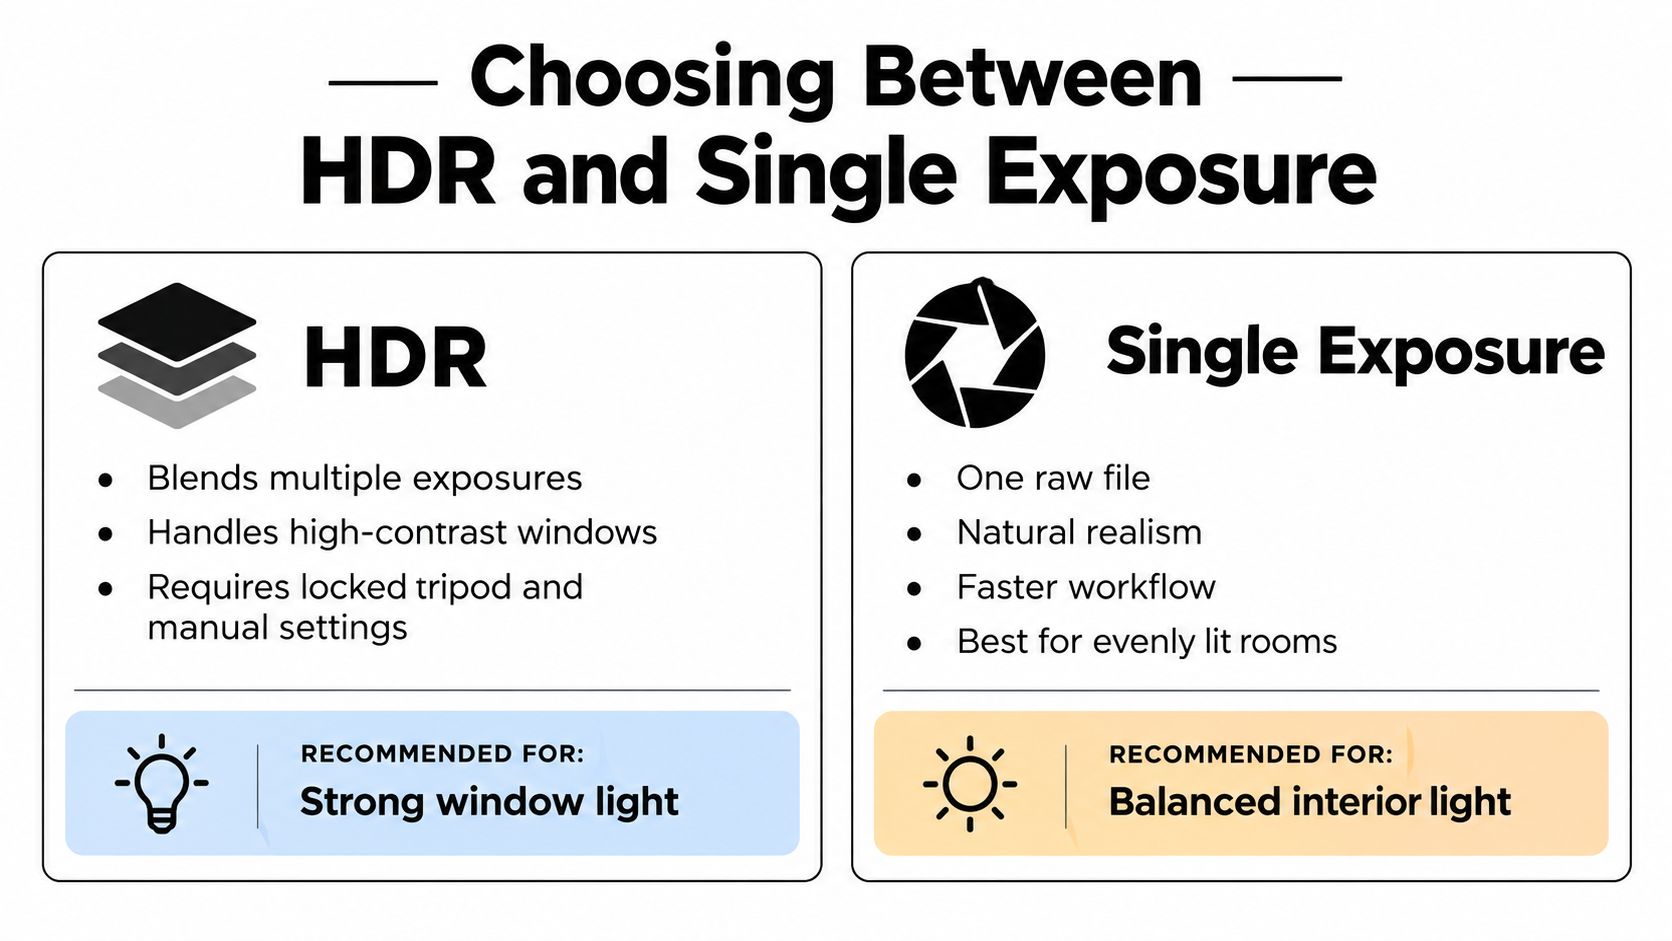
A bright window beside a dark room creates a genuine dynamic-range problem. One exposure may protect the glazing but leave the furnishings too deep, while another may reveal the room and lose the exterior view. HDR bracketing can solve that technical mismatch, but it can also introduce a visual style that makes the interior feel processed rather than observed.
When bracketing earns its place
For a high-contrast room with windows, skylights, and darker architectural surfaces, lock the tripod, switch to manual exposure, fix focus, and capture a bracketed RAW sequence. Meter the midtone composition, then vary shutter speed rather than aperture or focus.
When the scene spans roughly 16 stops, a practical sequence is five exposures at approximately -4, -2, 0, +2, and +4 EV. Technical guidance recommends 1-stop spacing for scenes up to 12 stops and 2-stop spacing for wider ranges. Field-test claims indicate that scenes up to 14 stops can often be covered with three frames at -2, 0, and +2 EV, while scenes from 14.1 to 17.5 stops may require five frames, as discussed in this HDR workflow guide.
Keep the aperture around f/8 to f/11 for lens sharpness and depth of field, and retain the lowest practical ISO. A self-timer or electronic shutter helps reduce tripod vibration.
What can go wrong
Bracketing records several interpretations of the room, not several identical moments. Subject movement, foliage outside the windows, LED flicker, and tripod vibration can create differences that become obvious when the frames are merged. Inspect every frame at full size before leaving the location.
Aggressive HDR processing can flatten contrast, create halos around window frames, and make daylight and artificial light appear synthetic. It may reveal information, but revealed information isn't automatically believable information.
| Workflow | Strength | Risk | Suitable use |
|---|---|---|---|
| HDR bracket | Handles strong contrast between glazing and darker surfaces | Ghosting, halos, flattened contrast, and visible processing | Rooms with important window detail and insufficient single-file range |
| Single RAW exposure | Natural contrast and a faster, cleaner workflow | May lose either highlights or shadow detail | Evenly lit rooms or scenes whose windows aren't central |
| Flash-blended RAW frame | Can provide controlled midtones and sharper local contrast | Requires careful light placement and blending | Architectural images where material texture and realism matter most |
Start with the least invasive solution
The best sequence is often less dramatic than the default HDR workflow. First protect important window highlights. Then see how much shadow information a single RAW file can recover without making the room look washed out. If that isn't enough, bracket and use the additional frames as selective masks rather than applying a strong global HDR look.
A comparative test found that a flash-blended RAW frame produced more believable midtones and sharper local contrast than a five-frame HDR merge in some interiors. That doesn't make flash blending universally superior. It does establish a useful test: compare the merged result against a controlled single exposure before committing to the HDR treatment.
Real estate coverage may favor broad visibility throughout the room. Editorial, hospitality, and branded interiors often benefit more from controlled contrast, believable light direction, and material texture. The client's visual objective should decide the method, not the presence of a bright window alone.
Essential Gear and Setup for Architectural Clarity
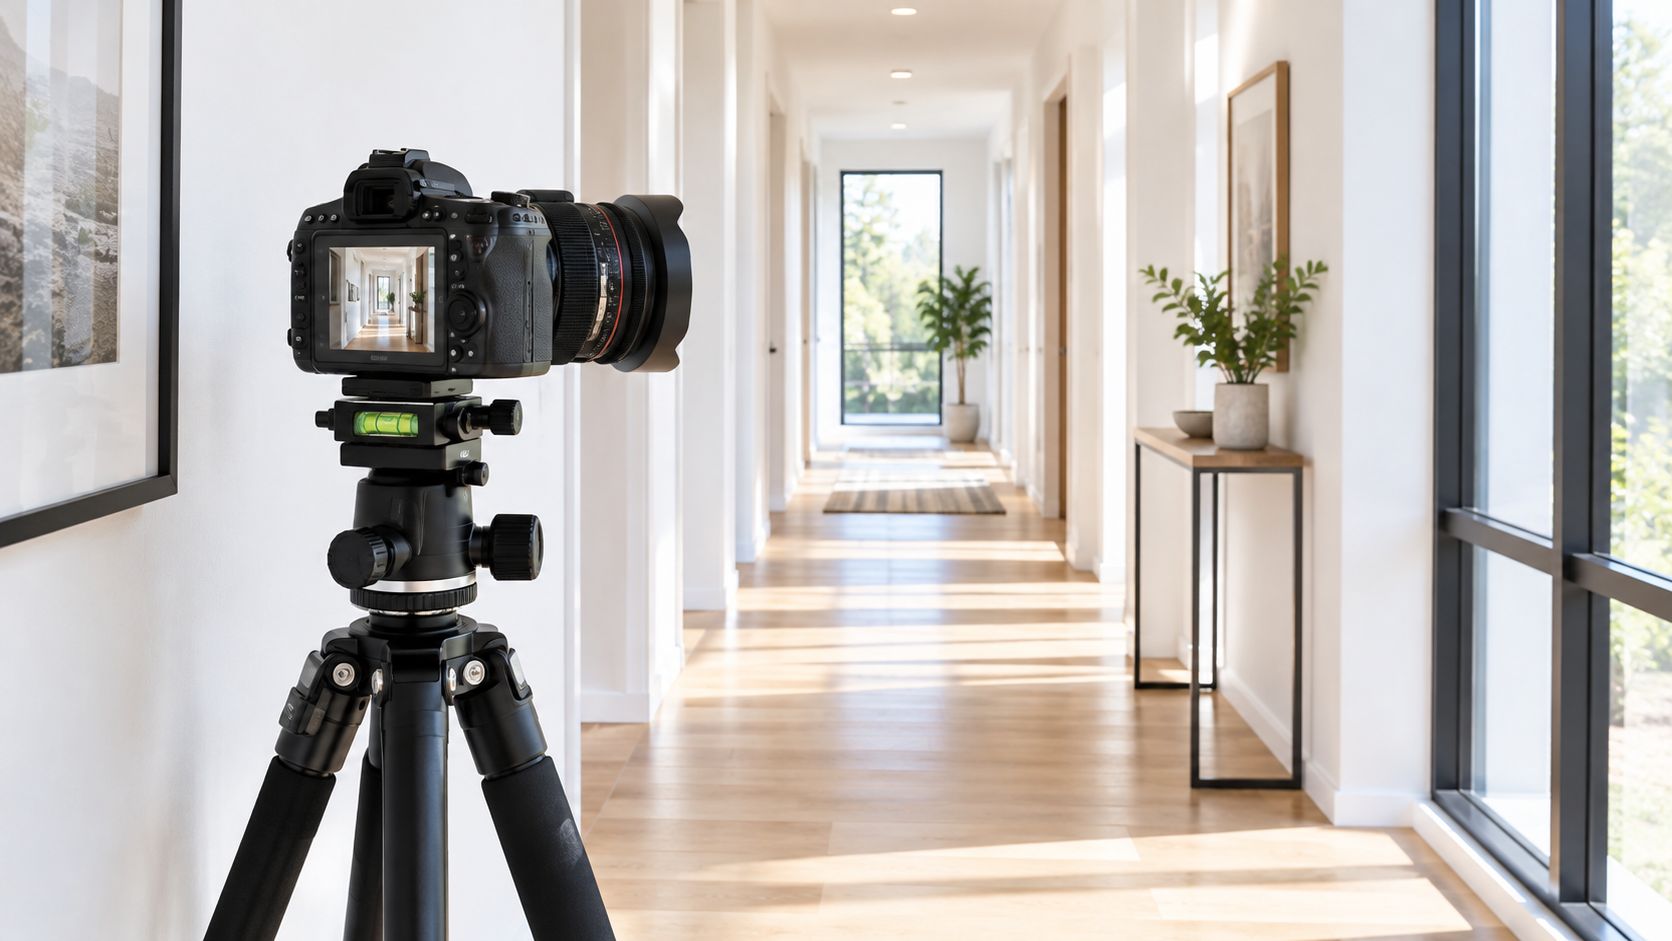
A tripod is not just a support for long exposures. It's a framing instrument. Once the camera is stable, you can level it precisely, make small position changes without losing the composition, and compare exposure or focus decisions from the same viewpoint.
Perspective becomes the central concern in tight interiors. Wide-angle lenses can exaggerate distance, while tilting the camera upward or downward makes vertical lines converge. Doors, cabinetry, columns, and wall edges then appear to lean, even when the construction is perfectly plumb.
Build the frame from the structure
Set the tripod height and position with the architecture in mind, not just the furniture. Keep the camera level before making fine composition adjustments. A lens with an appropriate field of view is preferable to forcing an excessively wide lens into a small room, where stretched corners and exaggerated foregrounds can weaken the record.
A level camera helps preserve the apparent geometry of walls, doors, cabinetry, and columns. If the room still feels cramped, change your position first. Step back if possible, remove an obstruction, or accept a tighter composition rather than tilting upward and correcting an extreme convergence later.
Correct carefully in post
Perspective-correction tools can straighten residual distortion, but aggressive correction reduces usable image area and may require cropping. That loss can remove important furniture, circulation space, or architectural context. Capture as much compositional margin as the room allows, while still treating correction as refinement rather than rescue.
Clean glass also matters. Reflections and exterior grime can look like exposure or contrast problems, particularly when a window occupies a large part of the frame. If the surface needs attention before the shoot, hire Pine Country Window Cleaning for practical guidance on preparing the inside of a window.
Make stability part of the exposure
Lock the tripod before changing settings, and avoid touching the camera during the exposure. A stable platform supports the low-ISO, narrow-aperture approach used for architectural interiors, while a level head makes repeated compositions easier to match.
The real estate photography gear guide can help organize the broader kit around camera support, lenses, and control accessories. The exact equipment matters less than whether it lets you preserve geometry, repeat the frame, and make deliberate exposure decisions.
Creating a Consistent Workflow for Every Shoot
Consistency comes from reducing variables before the first frame. Scout the room, identify each primary light source, remove distractions, and decide which surfaces and views carry the architectural story.
Then work through the camera setup in a fixed order:
- Position the tripod: Choose a viewpoint that describes the room without forcing the lens too wide.
- Level the camera: Check verticals and horizontals before adjusting exposure.
- Choose the aperture: Start around the depth of field the composition requires.
- Set the lowest practical ISO: Preserve clean shadow and wall detail.
- Complete exposure with shutter speed: Use the tripod rather than sacrificing image quality unnecessarily.
- Lock focus and exposure: Don't let the camera alter the relationship between frames.
- Record a gray-card reference: Repeat it whenever the lighting condition changes.
- Choose the capture method: Use a single RAW file when the range permits, and bracket only when the windows or shadows demand it.
- Inspect at full size: Check focus, vibration, movement, flicker, reflections, and clipped highlights before moving the tripod.
This workflow leaves room for judgment. A warm lamp may stay warm. A single exposure may be more honest than an HDR merge. A slightly tighter frame may preserve architecture better than an extreme wide-angle view. The settings support those decisions, but they don't replace them.
For production that includes location scouting, lighting design, on-set direction, and professional editing, Jimmy Clemmons Photographer offers architectural and interior photography services shaped around room compositions, interior details, circulation, and amenities. Visit Jimmy Clemmons Photographer to discuss an interior assignment where controlled light, accurate geometry, and a repeatable production workflow need to work together.