

You know the moment. The install is finished, the plaster has movement, the oak has depth, the boucle looks touchable in person, and the metal detailing catches light exactly the way the designer intended. Then the first round of photos arrives and everything looks flat. The room is technically documented, but the materials don't speak.
That gap is where most interior photography succeeds or fails. High-end spaces rarely depend on layout alone. They depend on surfaces, transitions, finish choices, and the way one material sharpens the next. If the photography loses that, it also loses a large part of the design intent.
Capturing Texture in Interior Design Photos isn't about adding grit in post or pushing clarity until the image looks brittle. It's about making the camera describe what the eye feels. That takes planning with the client, careful lens choice, disciplined lighting, and a willingness to slow down for the small shots that usually carry the emotional weight of the project.
Beyond Flat Surfaces Why Texture Defines Luxury Interiors
Clients usually describe the same frustration in slightly different words. The limestone looked rich on site but dull in the frame. The walnut millwork read as brown instead of dimensional. The linen and plaster blended together when they were meant to play off each other.
That isn't just a taste issue. It affects how viewers understand the room. A photograph has to signal whether a surface is soft, polished, rough, reflective, porous, hand-finished, or precise. When those cues disappear, the image stops feeling expensive even if the project is.
Why the eye reads material before it reads style
A useful scientific grounding comes from a Frontiers in Psychology study on material recognition. The researchers found that texture summary statistics play a critical role in distinguishing materials, and that original photographs let viewers identify materials like wood with significantly higher accuracy than images where texture was artificially synthesized. In plain terms, when photography preserves natural grain, sheen, and relief, people recognize the material more accurately.
That matters in interiors because design value often lives inside those subtle differences. Honed stone and polished stone can carry completely different moods. Quarter-sawn oak and flat-sawn oak tell different stories. Matte lacquer and brushed plaster may sit in the same tonal family, but they don't behave the same way under light.
Practical rule: If a viewer can't tell what a surface would feel like, the photo hasn't finished its job.
Editorial work teaches this quickly. Magazine images don't just inventory a room. They suggest a tactile sequence. Your eye lands on a nubby fabric, slides to the cool edge of a metal detail, then settles into the softness of a rug or the dry depth of a painted wall. Texture gives the frame rhythm.
Why luxury needs tactile cues
Luxury interiors almost never rely on quantity. They rely on restraint and specificity. Fewer objects, better materials, sharper choices. That means photography can't hide behind busy styling. The image has to let materials carry the narrative.
Three things usually make a room feel tactile in a still image:
- Surface variation that shows grain, weave, pores, veining, or patina
- Edge definition where one finish meets another and the separation feels intentional
- Light behavior that reveals whether the material absorbs light, scatters it, or throws it back
When those are present, the room feels inhabited and designed. When they aren't, even strong architecture can start to look generic.
The photographers who do this well aren't chasing texture as a special effect. They're protecting it from being lost. That's a different mindset, and it shapes every decision on set.
Foundational Gear and On-Set Preparation
The gear matters less than people like to pretend, but the wrong gear creates problems you can't finesse away later. Texture work asks for precision. You need lenses that render surfaces accurately, support that keeps the frame locked, and enough control over light to separate one finish from the next.
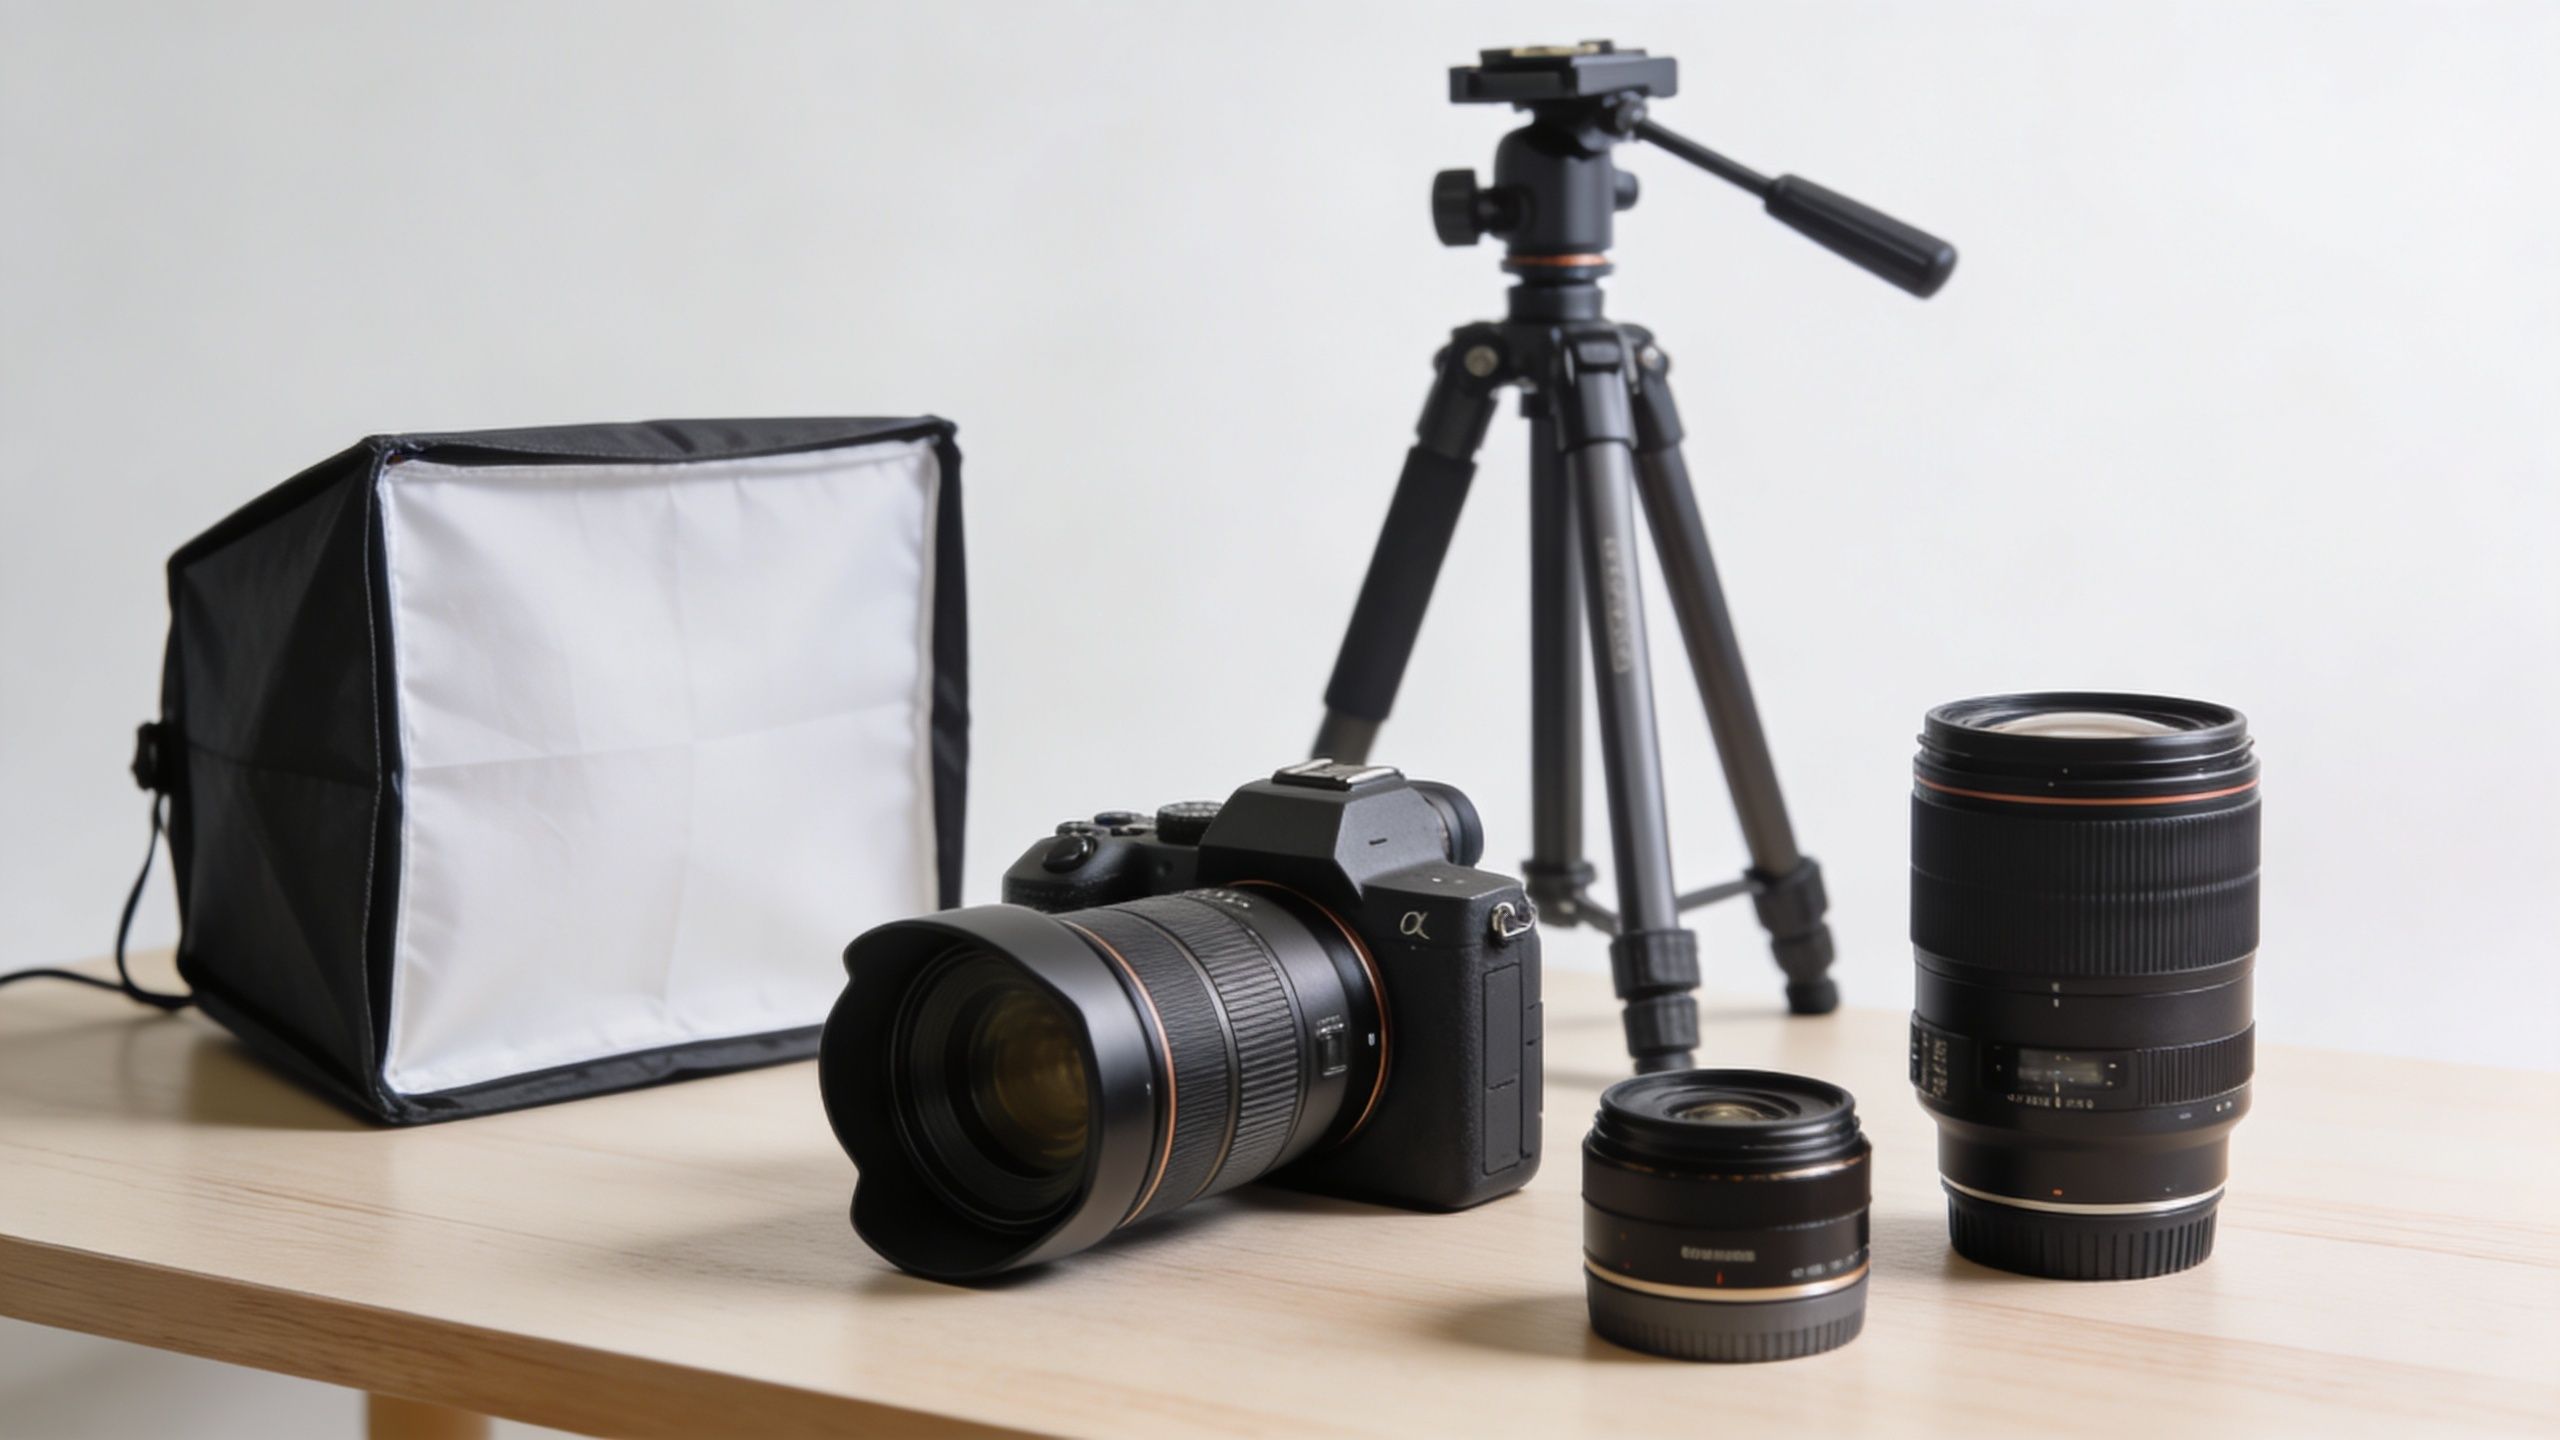
The core kit that earns its place
A practical interior texture kit usually comes down to a few dependable pieces.
- A full-frame body with strong shadow handling. Interiors ask you to hold detail in dark woods, textured fabrics, and corners without turning them muddy.
- A 24-70mm zoom for the working range. It handles room views, medium vignettes, and a lot of client-requested compositions without changing lenses every minute.
- A 50mm prime when the room needs a more natural perspective and less wide-angle drama.
- A true macro lens for detail frames. Stitching, stone pits, leather grain, tile edges, and hardware finishes start to come alive with this lens.
- A rigid tripod and remote release because texture dies fast when micro-blur creeps in.
- Controlled lighting tools such as off-camera flash, softboxes, grids, flags, and diffusion.
A phone can record a space. It won't reliably describe a velvet chair against matte plaster while keeping both believable.
What changes in tight urban interiors
Constrained spaces are where a lot of photographers lose texture. They go wider, stand farther back than the room wants, then fight distortion later. That may solve coverage, but it often weakens material presence because surfaces at the frame edges stretch, lines bow, and detail gets sacrificed in cropping.
This is no small niche. Shupe Studios notes that 2026 Architectural Photography Awards data shows a 42% rise in "micro-space" submissions, while 67% of forum queries on shooting texture in tight interiors go unresolved. The same source states that tilt-shift lenses or specific wide-angles with low barrel distortion can reduce unwanted distortion by up to 25% and prevent the 30-50% crop losses common in post-production.
That lines up with field experience. In narrow hospitality corridors, compact urban apartments, powder rooms, and adaptive reuse offices, the lens choice isn't just about fitting the room in. It's about keeping joinery and finish work believable.
A short comparison helps:
| Gear choice | What it solves | Trade-off |
|---|---|---|
| 16-35mm wide zoom | Gets coverage in compressed rooms | Easier to overstate space if used carelessly |
| Tilt-shift lens | Controls perspective and distortion beautifully | Slower workflow, higher setup discipline |
| 24mm or 35mm prime | Cleaner rendering and strong medium vignettes | May not be wide enough for full-room hero shots |
| 100mm macro | Makes material detail unmistakable | Needs distance or selective framing |
Prep with the design client, not around them
Texture photography starts before the first frame. The best shoots happen when the photographer and design team identify the materials that must read clearly. Not every surface deserves equal attention. Some are background. Some are signature decisions.
Ask the client direct questions:
- Which materials were the hardest to source or fabricate?
- Where do two finishes meet in a way that defines the project?
- Which details are likely to be missed in a wide shot?
- Which rooms are physically constrained and need a different lens plan?
- Which surfaces should feel soft, crisp, moody, warm, or reflective in the final edit?
A simple site-prep conversation prevents a lot of avoidable problems. If you want a practical reference for coordinating the space before cameras go up, this guide on how to prepare a site for a photoshoot is worth reviewing with the team.
Most texture problems aren't created in post. They start when nobody names the critical materials before the shoot begins.
What works and what usually doesn't
What works is a restrained kit chosen for the actual project. A compact condo needs a different approach than a showroom, and a hospitality lounge needs a different lens sequence than a clean corporate interior.
What doesn't work is trying to solve every challenge with the widest lens in the bag, a lightweight travel tripod, and whatever ambient light happens to be available. Texture is unforgiving. The more compressed the space, the more disciplined the setup needs to be.
Mastering Light to Sculpt Texture and Form
Light is where texture either appears or disappears. The same plaster wall can look chalky and dimensional in one frame, then smooth and lifeless in the next. The material didn't change. The direction and quality of the light did.
This is the section where most interiors stop being documentation and start feeling tactile.
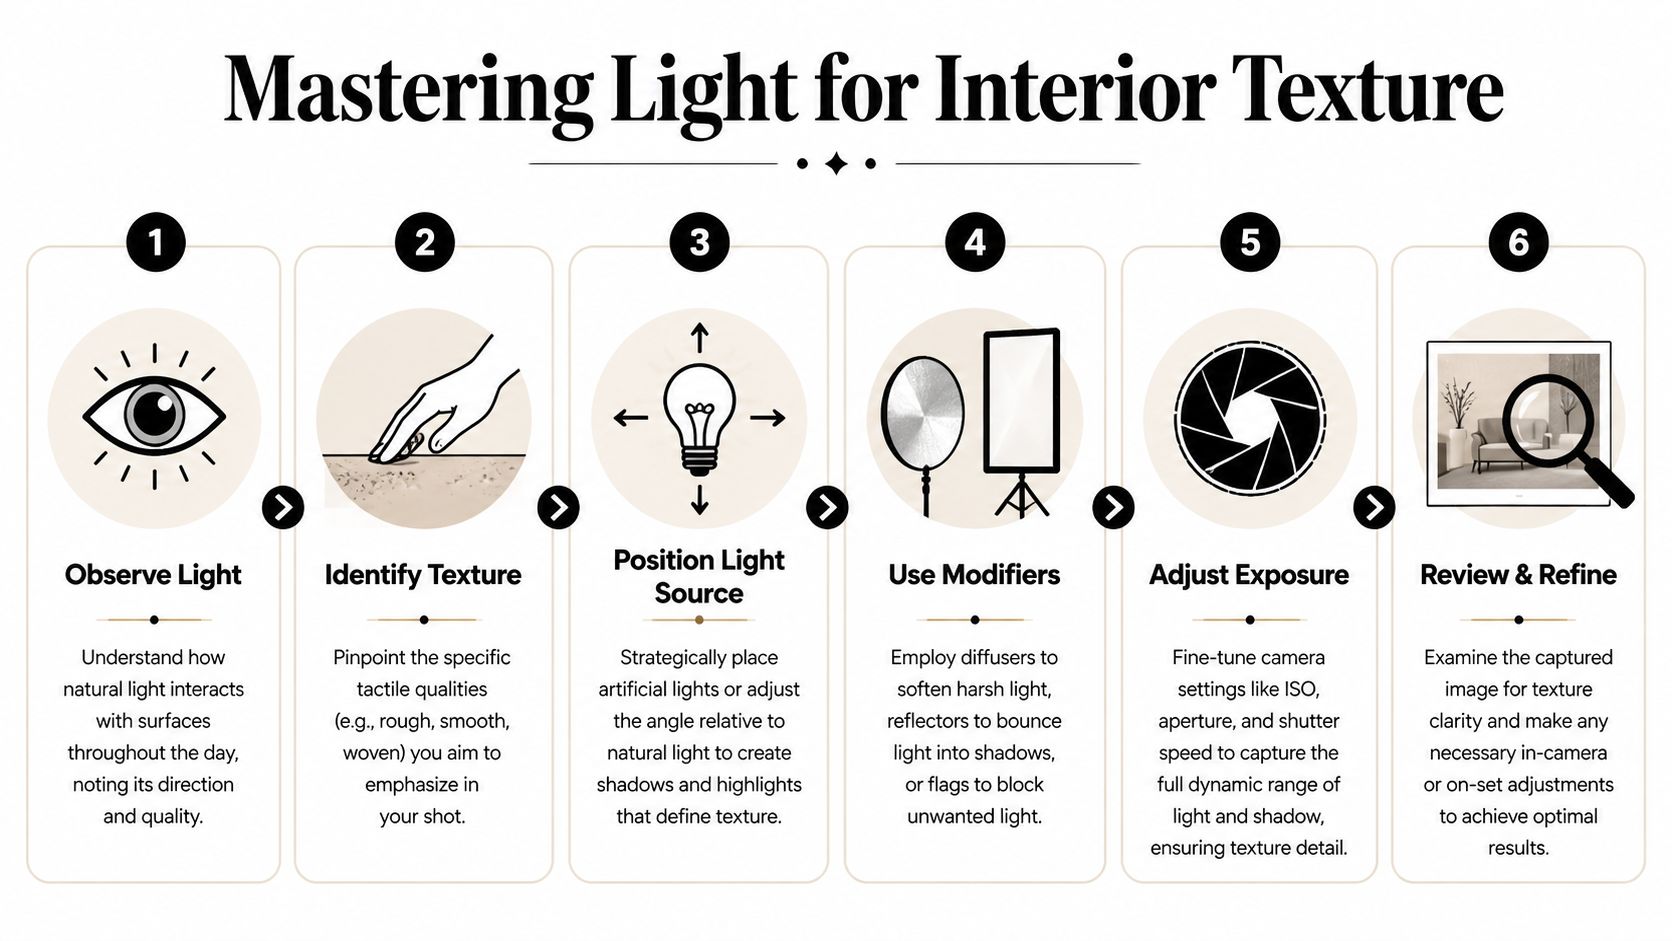
Start by reading the room before you light it
Before placing a strobe, watch what the natural light is already doing. Windows often create beautiful side light for linen, wood, stone, and plaster. They can also flatten a room if the light is too frontal or too broad.
The question isn't whether natural light is good or bad. It's whether it's doing something useful for the specific surface. A brushed metal fitting wants different treatment than a boucle sofa. A polished tile floor needs control to avoid glare. Reclaimed wood often benefits from directional light that catches ridges and imperfections.
Three quick observations help on set:
- Direction. Is the light skimming the surface or hitting it front-on?
- Contrast. Are the shadows deep enough to show relief without choking off detail?
- Spread. Is the light shaping one material, or washing the whole room evenly?
Evenly lit rooms often feel pleasant in person and dead on camera. Texture usually needs shape.
Why raking light does the heavy lifting
The most reliable technique for bringing out texture is raking light, where the source hits the surface from a low, oblique angle rather than head-on. That creates tiny highlights and shadows across the material itself. Grain, weave, seams, pits, and edges suddenly become legible.
The available data supports what working photographers see every week. A 2022 DPReview poll cited here found that 65% of top interior photos use raking light at a 30-45° angle to amplify texture. The same source states that professional architectural photographers report strobe use can boost perceived texture depth by up to 65% compared with natural light alone, and that 70% of amateur shots appear flat when they rely too heavily on available light.
That doesn't mean every scene needs flash. It means serious texture work usually benefits from controllable direction.
A good light setup doesn't brighten a room. It tells the material how to speak.
Here is the basic decision pattern:
| Surface | Light approach that usually works | Common mistake |
|---|---|---|
| Wood grain | Side or raking light to show variation and cut lines | Front light that makes the surface read as one tone |
| Stone and plaster | Controlled side light with soft falloff | Overfilling shadows until relief disappears |
| Velvet and woven textiles | Gentle directional light with careful angle shifts | Lighting too broad and losing nap or weave |
| Metal finishes | Precise, flagged light to control reflections | Letting the room reflect everywhere and muddy the finish |
| Gloss tile or lacquer | Shape reflections deliberately | Random hotspots that overwhelm surface detail |
When natural light is enough and when it isn't
Natural light can be beautiful for texture if it arrives from the right direction and the schedule matches the room. Large windows can behave like giant softboxes. Morning or late-day side light often gives wood, stone, and fabric just enough modeling without looking theatrical.
But natural light has limits. It shifts. It disappears behind clouds. It may illuminate the whole room while missing the exact banquette, wall treatment, or headboard upholstery that the designer cares about most.
When that happens, adding flash isn't cheating the room. It's restoring what the eye was already reading on site.
A balanced approach often works best:
- Keep the ambient light for atmosphere and spatial truth.
- Add a strobe where one key surface needs separation.
- Flag or grid the artificial source so it shapes the material instead of flooding the room.
- Review tethered if possible and judge the transitions, not just the histogram.
A deeper look at balancing available and added light is in this piece on choosing the best light for a site shoot.
The practical sequence matters. Start with the room's existing light character. Then add only what the materials need.
A working strobe setup for texture
On high-end interiors, a controlled off-camera strobe setup gives you repeatability. One light, well placed, often beats a room full of weak corrections.
A strong starting point:
- Identify the hero surface. Pick the texture that must read cleanly in the frame.
- Place the strobe off-axis so the light skims across that surface rather than faces it directly.
- Choose the modifier based on spill. A softbox gives shape with softness. A grid tightens control. Flags protect nearby surfaces from contamination.
- Set the ambient first so the room still feels plausible.
- Bring the strobe up gradually until the texture separates without looking artificially spotlit.
- Check reflective materials from camera position because a small angle change can clean up or destroy the shot.
What different materials ask from you
A lot of photographers light interiors as if every material wants the same treatment. It doesn't.
Plaster and limewash need restraint. Push them too hard and the finish can look harsh or dirty. Let the side light skim softly so movement appears without turning every variation into a flaw.
Dark wood needs confidence. If you expose only for overall brightness, it often collapses into a flat block. Give it directional light and enough tonal separation to show cut, grain, and joinery.
Textiles are sensitive to angle. Move a light a little and the entire character changes. Boucle, linen, mohair, and velvet don't just need illumination. They need angle testing.
Stone benefits from seeing the edge of its relief. If the room is full of ambient fill, the surface can lose all sense of depth. Sometimes subtracting light matters more than adding it.
On-set reminder: If the room looks bright but the material looks mute, the problem usually isn't exposure. It's direction.
What fails most often
Three habits flatten texture fast.
- Relying on window light because it feels safer. Safe light often produces safe, forgettable files.
- Overfilling shadows with bounce or excessive ambient lift. Texture lives in controlled shadow transitions.
- Lighting the whole room equally instead of deciding what deserves emphasis.
The strongest texture images tend to look calm, not flashy. But under that calm is a very deliberate lighting strategy. The photographer has decided what surface matters, how light should hit it, and what the frame should let fall away.
Composition and Staging for Tactile Storytelling
A room can be perfectly lit and still feel emotionally thin if the composition doesn't direct the eye toward touch. In such cases, editorial thinking matters. Texture isn't only a capture problem. It's also a framing problem.
The mistake is assuming wide room shots will carry everything. They rarely do. Wide views establish architecture and flow, but tactile interest usually enters through tighter moments. A corner of banquette upholstery against fluted millwork. The edge of a handmade tile backsplash beside brushed brass. A throw with enough weight and drape to soften a severe chair.
The vignette is where design intent becomes visible
Magazine-trained photographers learn to hunt for the frame inside the frame. The full room tells you what the project is. The vignette tells you why it matters.
One useful technical anchor comes from MasterClass guidance on texture photography. It recommends stabilizing the camera on a tripod and using a macro lens at a 30-60° angle to the surface, which exaggerates form through elongated shadows. The same source notes that this technique, paired with proper lighting, can enhance texture visibility by 75%, and that using a remote and a slow shutter speed below 1/60s helps avoid camera shake, which is responsible for up to 60% of rejected commercial images.
Those numbers ring true because detail shots expose every small mistake. If focus is soft, the fabric loses its bite. If the angle is too frontal, the texture compresses. If the composition is casual, the image becomes a catalog record instead of a story.
How to frame details that feel tactile
A good texture composition usually does one of three things well.
- It layers materials so one surface sharpens another. Rough against smooth. Matte against reflective. Woven against clean-lined.
- It uses angle intelligently instead of shooting every surface straight-on.
- It gives the eye a path from a dominant texture to a supporting one.
Consider a hospitality lounge. The wide frame may show the room's geometry, but the stronger tactile sequence might be a cropped composition where the viewer reads leather stitching in the foreground, ribbed wood behind it, and a soft pool of drapery farther back. That layered progression makes the room feel real.
In strong interior work, the detail shot isn't filler. It's often the frame clients remember.
Staging that supports material, not clutter
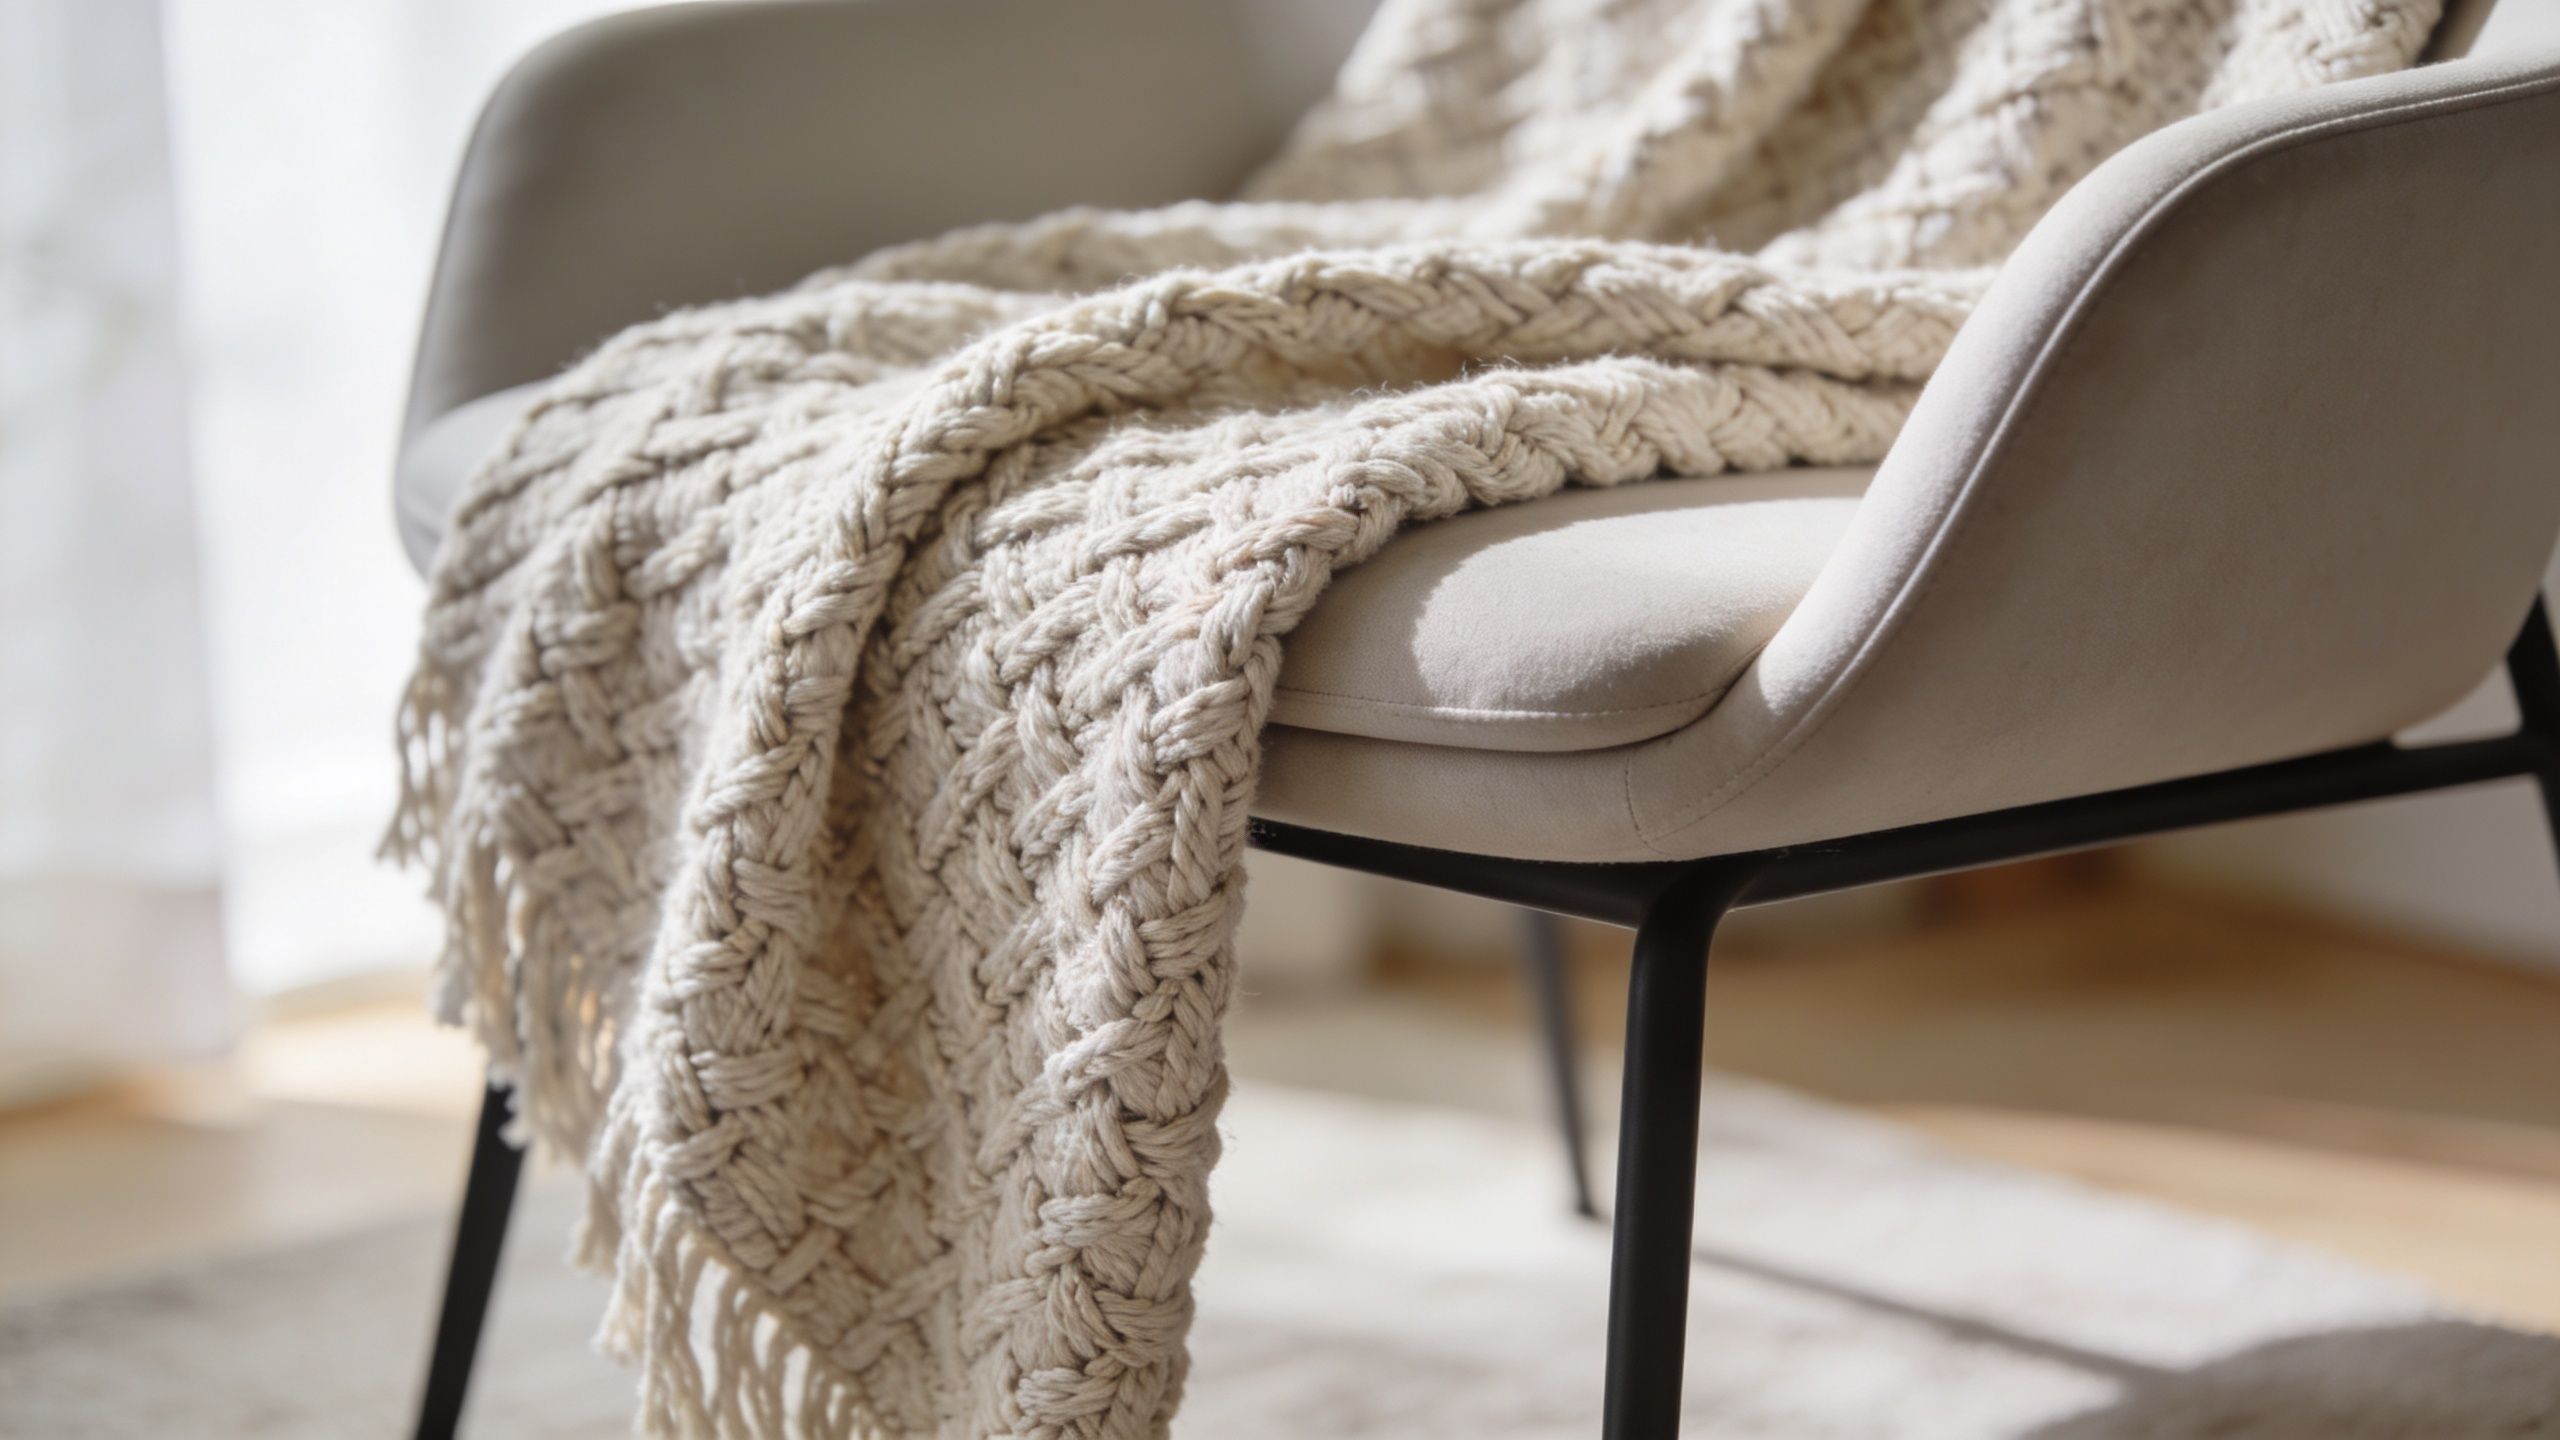
Staging for texture is subtle. The goal isn't to decorate the frame more heavily. It's to make the chosen surface easier to read.
A few moves help repeatedly:
- Adjust fabric by hand. A blanket tossed thoughtlessly can look messy. A blanket shaped with intention can reveal knit, weight, and softness.
- Open negative space around a material junction. If the critical story is tile meeting millwork, don't crowd it with accessories.
- Turn objects until their surface catches properly. Ceramics, books, trays, and lampshades can either support the texture story or interrupt it.
- Use styling contrast. A crisp object beside a tactile one helps both read more clearly.
- Remove the one distracting thing that's flattening the image. Often that matters more than adding another prop.
A simple example:
| Scene element | Better staging move | Why it helps texture |
|---|---|---|
| Throw blanket | Shape a clean fold and let one edge catch side light | Shows knit depth and weight |
| Coffee table books | Stack simply, avoid busy covers | Keeps attention on adjacent stone or wood |
| Ceramic vase | Rotate for highlight control | Reveals surface finish without glare |
| Dining chair | Pull slightly off table | Lets upholstery and frame profile separate |
Shooting constrained interiors without losing intimacy
Small urban interiors demand restraint in composition. Photographers often overcompensate by going too wide, which makes the room feel larger but less tactile. The frame becomes about coverage instead of contact.
The better move is usually to build a sequence. Take the necessary wide. Then step into the room's material relationships with medium and close compositions that make the small space feel considered rather than cramped.
In a narrow kitchen, that might mean skipping the ultra-wide hero as the lead image and instead opening with a tighter frame of stone edge, cabinet finish, and hardware. In a compact hotel room, it might mean letting bedding texture and wall treatment establish tone before the full spatial reveal.
Texture gives small spaces dignity. It prevents them from reading as merely limited.
Execution In-Camera and In Post-Production
Sharp, believable texture comes from a workflow, not a trick. The file has to hold the information first. Then post-production can refine it. If capture is careless, editing turns into rescue work, and rescue work usually looks like rescue work.
In-camera choices that protect detail
Texture asks for discipline more than drama. A stable camera position, thoughtful aperture, and careful focus selection matter more than speed.
For most interior work, I want enough depth of field to hold the important layers while avoiding the brittle look that can come from stopping down too far. Detail vignettes often need even more attention because the foreground material can fall out of focus quickly.
A reliable capture routine looks like this:
- Lock the camera on a solid tripod and use a remote or timer.
- Choose the aperture for the scene, not by habit. Many interior frames live comfortably in the mid apertures, while close detail work may need more depth.
- Bracket exposure when contrast is difficult so the texture in both highlights and shadows stays recoverable.
- Check edges at high magnification on tether or playback. Texture errors often hide until you zoom in.
- Focus where the tactile story begins, not necessarily at the center of frame.
If the composition has distinct foreground, middle ground, and background elements that all need to read sharply, shoot for a stack. Focus stacking isn't overkill when a designer needs a foreground textile and a rear wall finish both described cleanly in the same frame.
A simple focus-stacking habit
Focus stacking for interiors doesn't have to become elaborate. It just needs to be intentional.
- Set the frame and lock the tripod.
- Keep exposure consistent across all captures.
- Start with the closest critical plane.
- Move focus incrementally through the scene.
- Review each frame for overlap before changing the setup.
- Blend carefully in post so the result still feels natural.
The key is moderation. A successful stack is invisible. The image should feel crisp, not clinical.
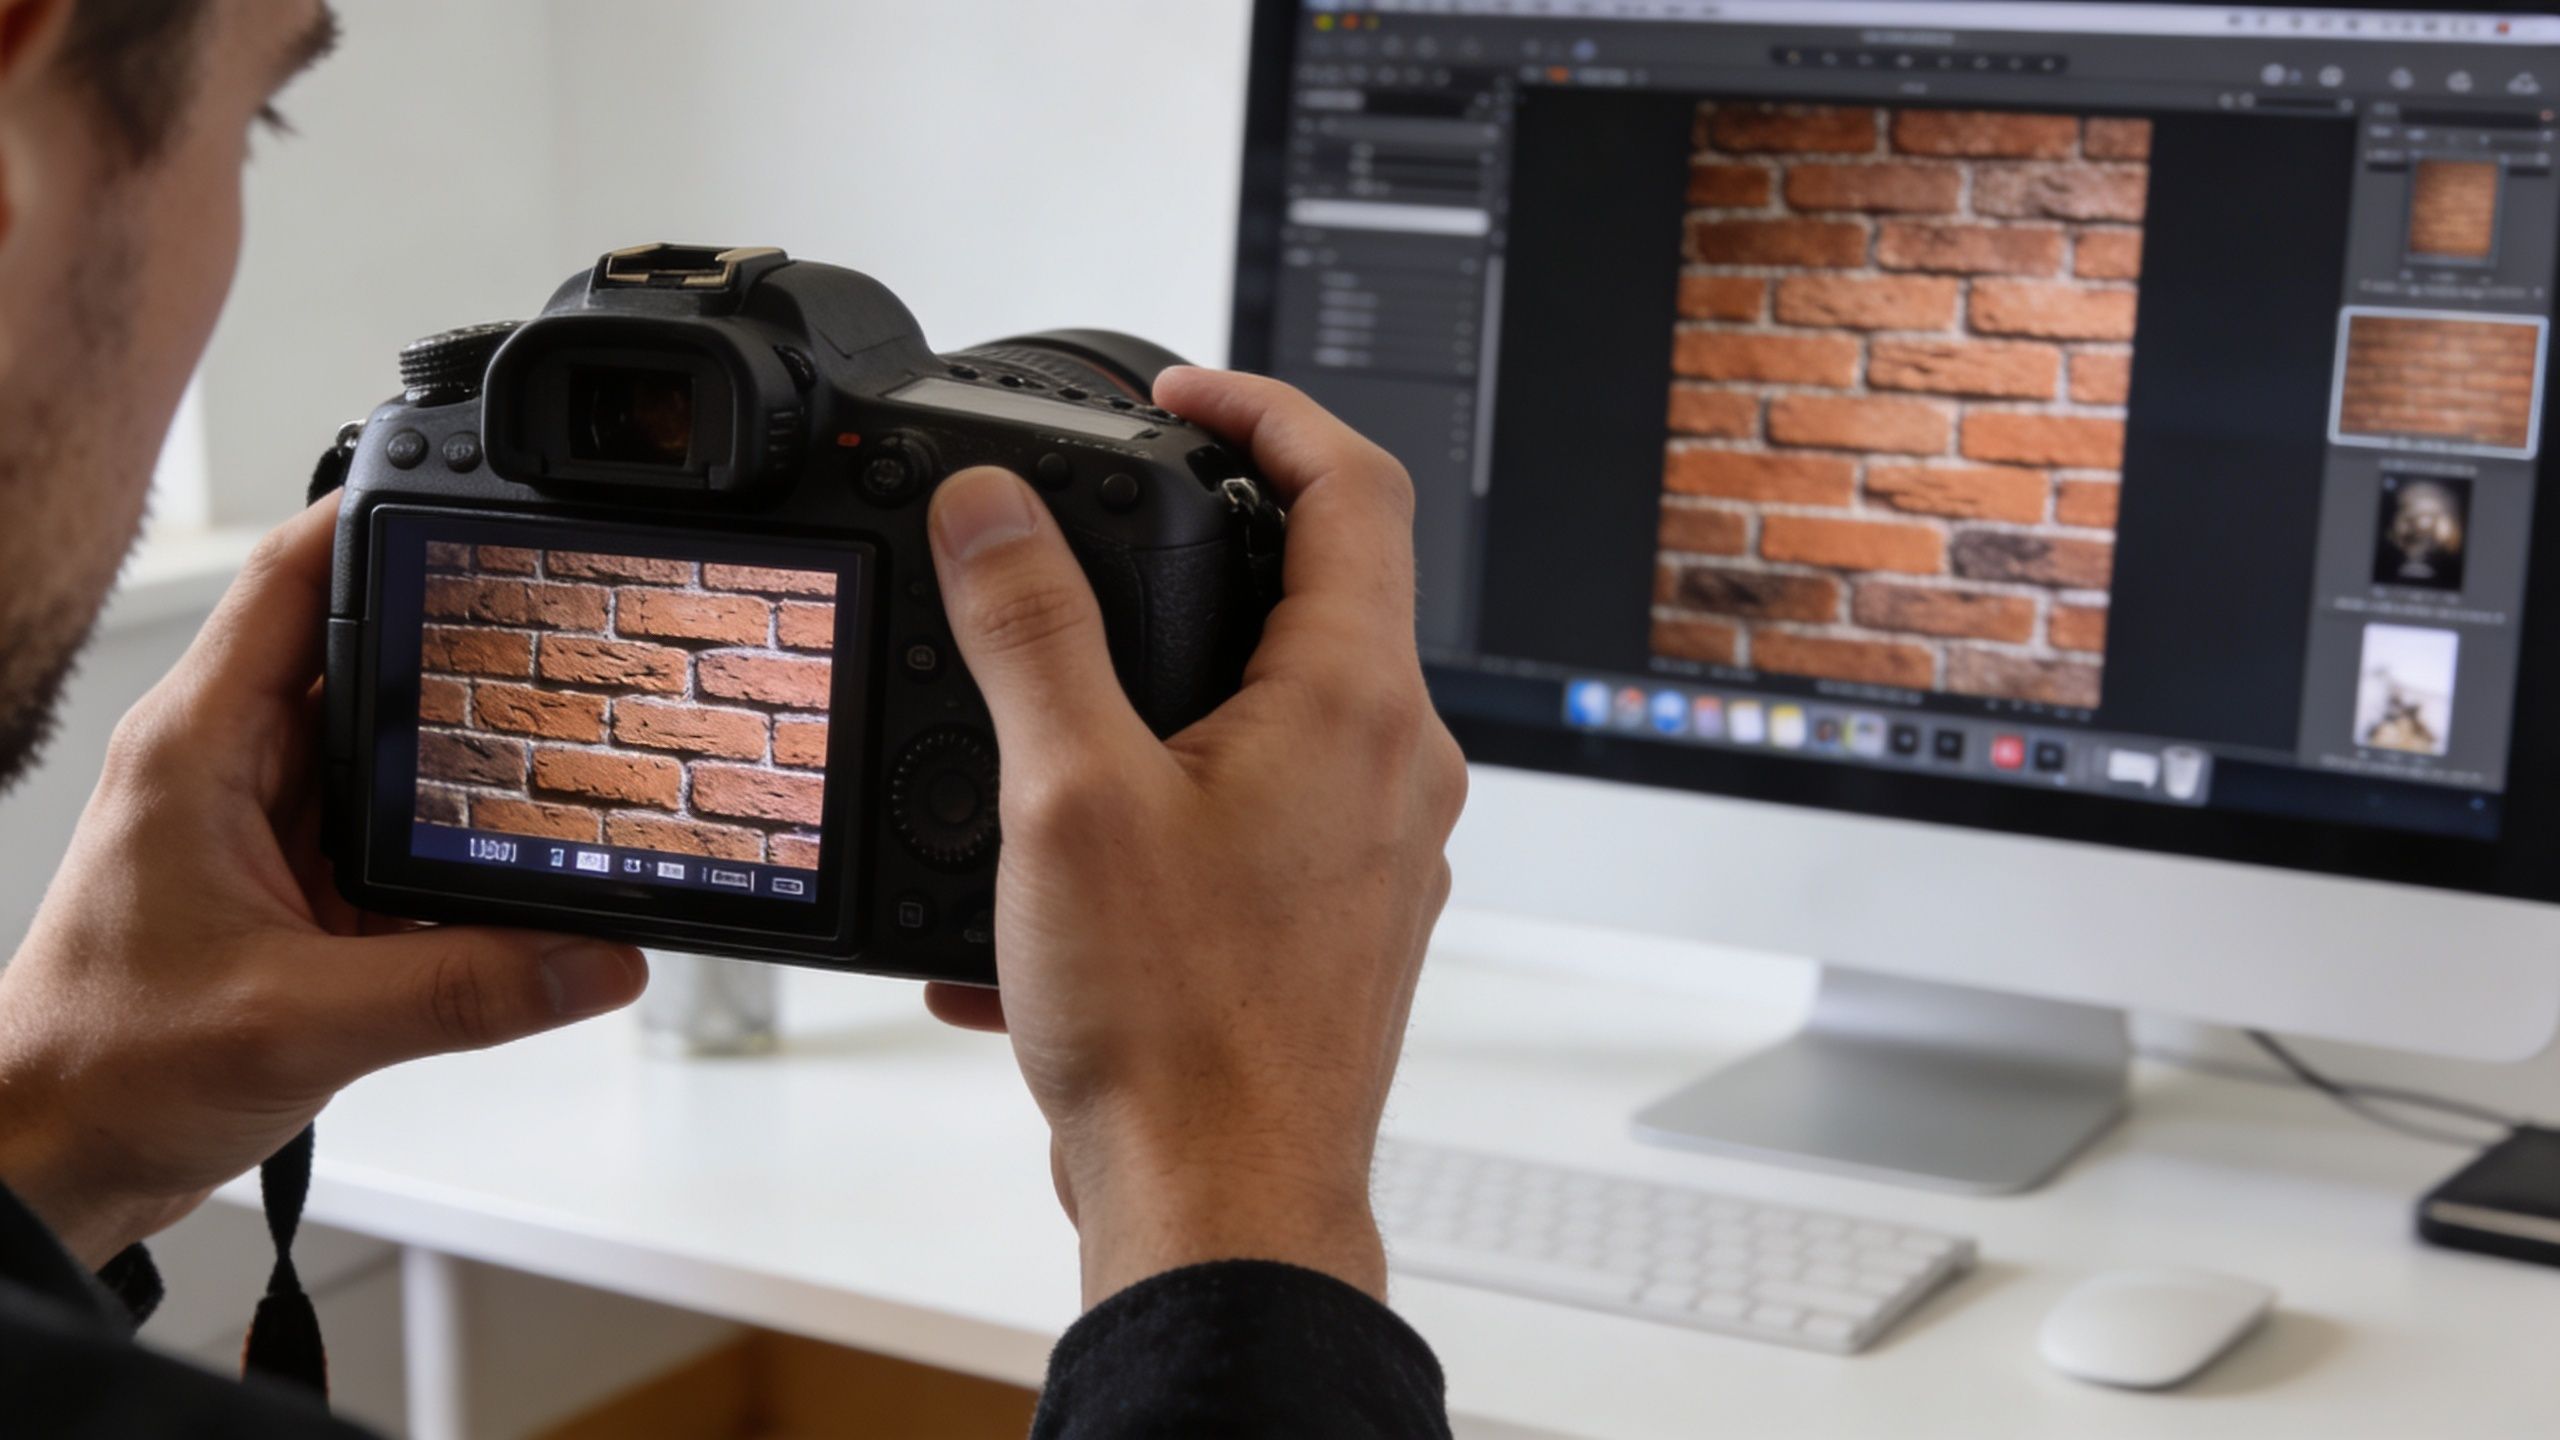
Editing texture without making it look synthetic
Many otherwise strong interiors often falter here. The photographer captured a good file, then pushed Texture, Clarity, and Sharpening until plaster looks crunchy and linen looks abrasive.
Post should reveal what the light already described. It shouldn't invent a surface that wasn't there.
A useful editing order:
| Step | What to evaluate | What to avoid |
|---|---|---|
| Global tonal balance | Are blacks too heavy for dark materials? | Lifting everything until contrast disappears |
| White balance | Do material temperatures still separate naturally? | Neutralizing the room so every finish feels the same |
| Local texture adjustments | Does one area need more micro-contrast? | Applying strong global texture everywhere |
| Sharpening | Are edges clean at intended output size? | Haloing around high-contrast material edges |
For structural files, perspective and cleanup often belong in the same finishing conversation. This article on using post-production to fix structural photos covers the kind of corrections that can preserve architectural integrity without stripping away the room's character.
Good retouching respects the material. If the viewer notices the editing before the finish, you've gone too far.
What a finished texture image should feel like
A finished image should let the viewer infer touch without second-guessing the space. Wood should still look like wood, not sharpened plywood. Stone should carry weight, not fake contrast. Upholstery should look soft where it's soft and structured where it's structured.
That's the standard to hold through the entire workflow. Capture enough. Edit lightly. Protect the truth of the material.
Conclusion Your On-Set Checklist for Textural Excellence
The easiest way to miss texture is to treat it as something you'll notice if it isn't there. On a live shoot, that never works. Clients are asking about angles, stylists are adjusting objects, daylight is shifting, and the schedule keeps moving. Texture needs its own checklist.
Pre-shoot alignment
- Ask for the signature materials early. Find out which finishes define the project.
- Identify the important junctions. Material transitions often photograph better than isolated surfaces.
- Flag the constrained rooms. Powder rooms, corridors, compact kitchens, and small hospitality spaces need a lens plan before the day starts.
Lighting checks on set
- Read the existing light first. Decide whether it shapes the material or flattens it.
- Test side light on hero surfaces. Texture usually appears when light skims instead of floods.
- Control spill. Keep light off surfaces that don't need attention.
Composition decisions
- Capture the wide frame, then earn the detail frames. Don't stop at the room view.
- Work medium and close. The tactile story often lives there.
- Stage for surface clarity. Shape fabrics, simplify props, and clear distractions around important finishes.
Camera and file discipline
- Stabilize everything. Texture is unforgiving of small blur.
- Check focus where the tactile story begins.
- Bracket when contrast threatens detail.
- Stack focus when one frame can't hold the scene.
- Edit to reveal, not exaggerate.
The best collaboration happens when the designer can stand beside the monitor and say, "Yes, that's the material we chose."
That sentence is the target. Not just a clean room photo. Not just a technically correct exposure. A frame that carries the client's decisions with enough clarity that someone who wasn't there can still understand the space.
If your firm needs architectural and interior images that preserve material depth, design intent, and editorial polish, Jimmy Clemmons Photographer brings a magazine-trained eye to built environments, brand spaces, and commercial assignments across Atlanta and the region.