
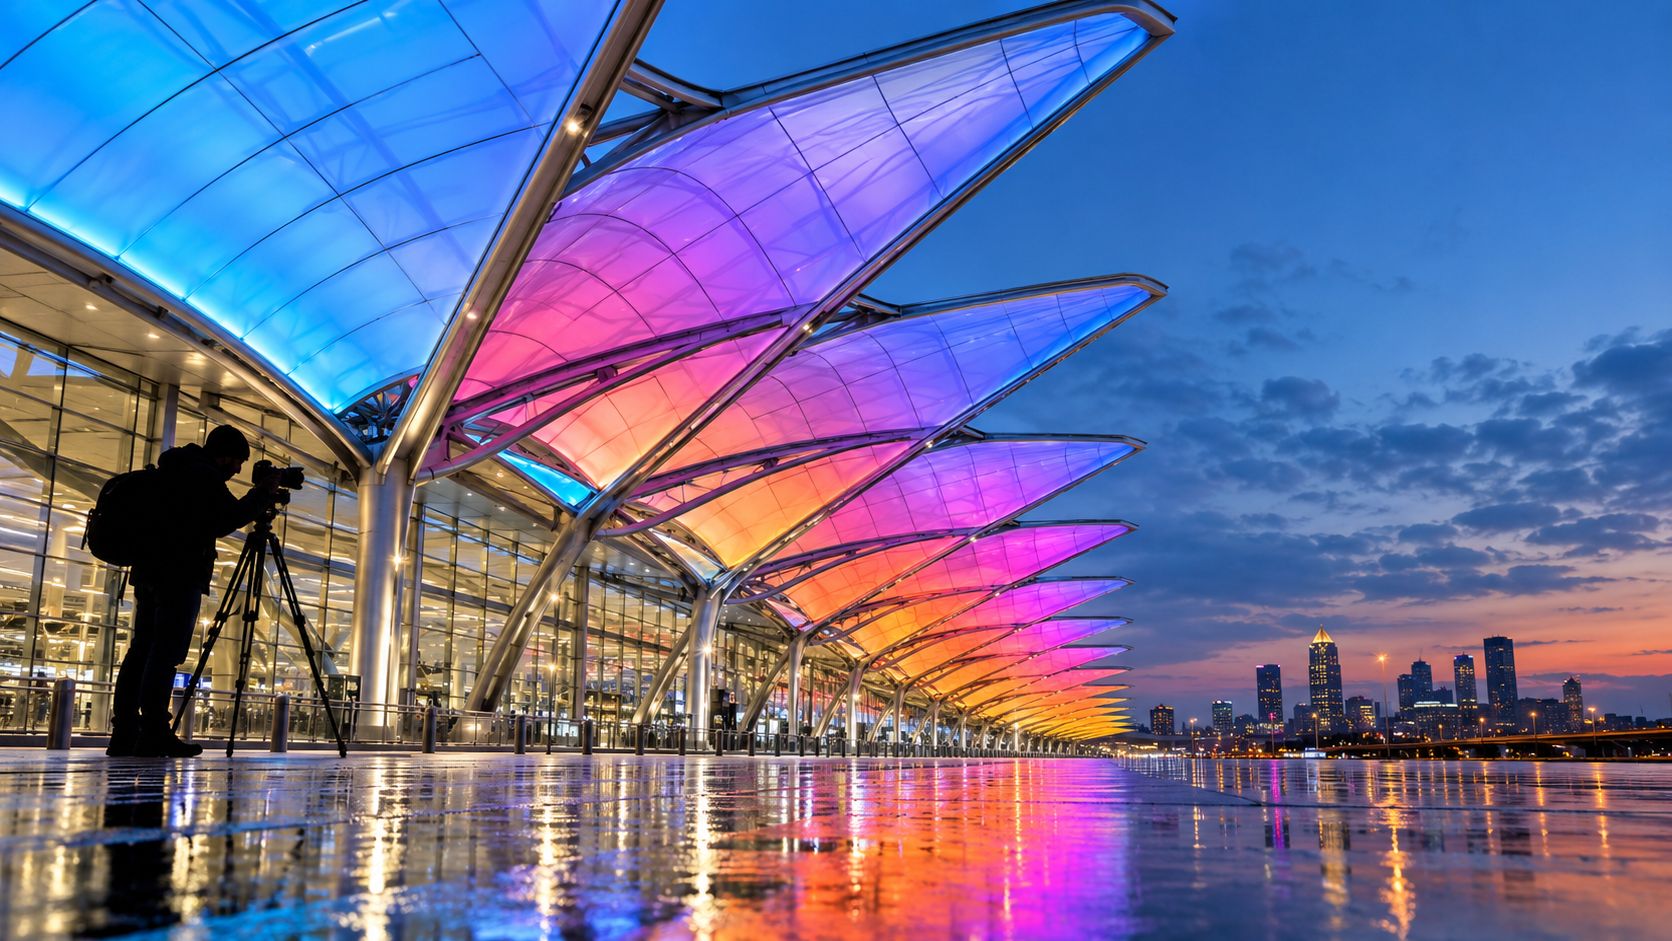
You're probably standing in the wrong place the first time you try to shoot the Atlanta airport canopy lights.
Most shooters walk up to the curb, see the glow overhead, throw on a wide lens, and assume the scene will carry itself. It usually doesn't. The canopy is bright, the roadway is messy, the passenger flow is constant, and every stray source around the terminal wants to pull color in a different direction. What looks dramatic in person can flatten fast once it hits the sensor.
The good news is that this is a solvable subject. If you treat the canopies like a real architectural assignment instead of a travel snapshot, you can build a workflow that holds up under changing themes, mixed curbside light, and client review.
Why the Canopies Deserve a Dedicated Plan
The first real problem here is scale. Once you get under the terminal approach, the canopy stops behaving like decorative airport lighting and starts behaving like a giant luminous ceiling over active traffic. The airport's history page notes the project was completed in 2019, and that timing matters because you are shooting a relatively modern LED installation built to read from a long distance, not a small facade feature meant for close architectural study.
That changes how I plan the job. A quick curbside stop can get you a record shot. It rarely gets you a set a client can use across web, press, and campaign work.
What fights your frame
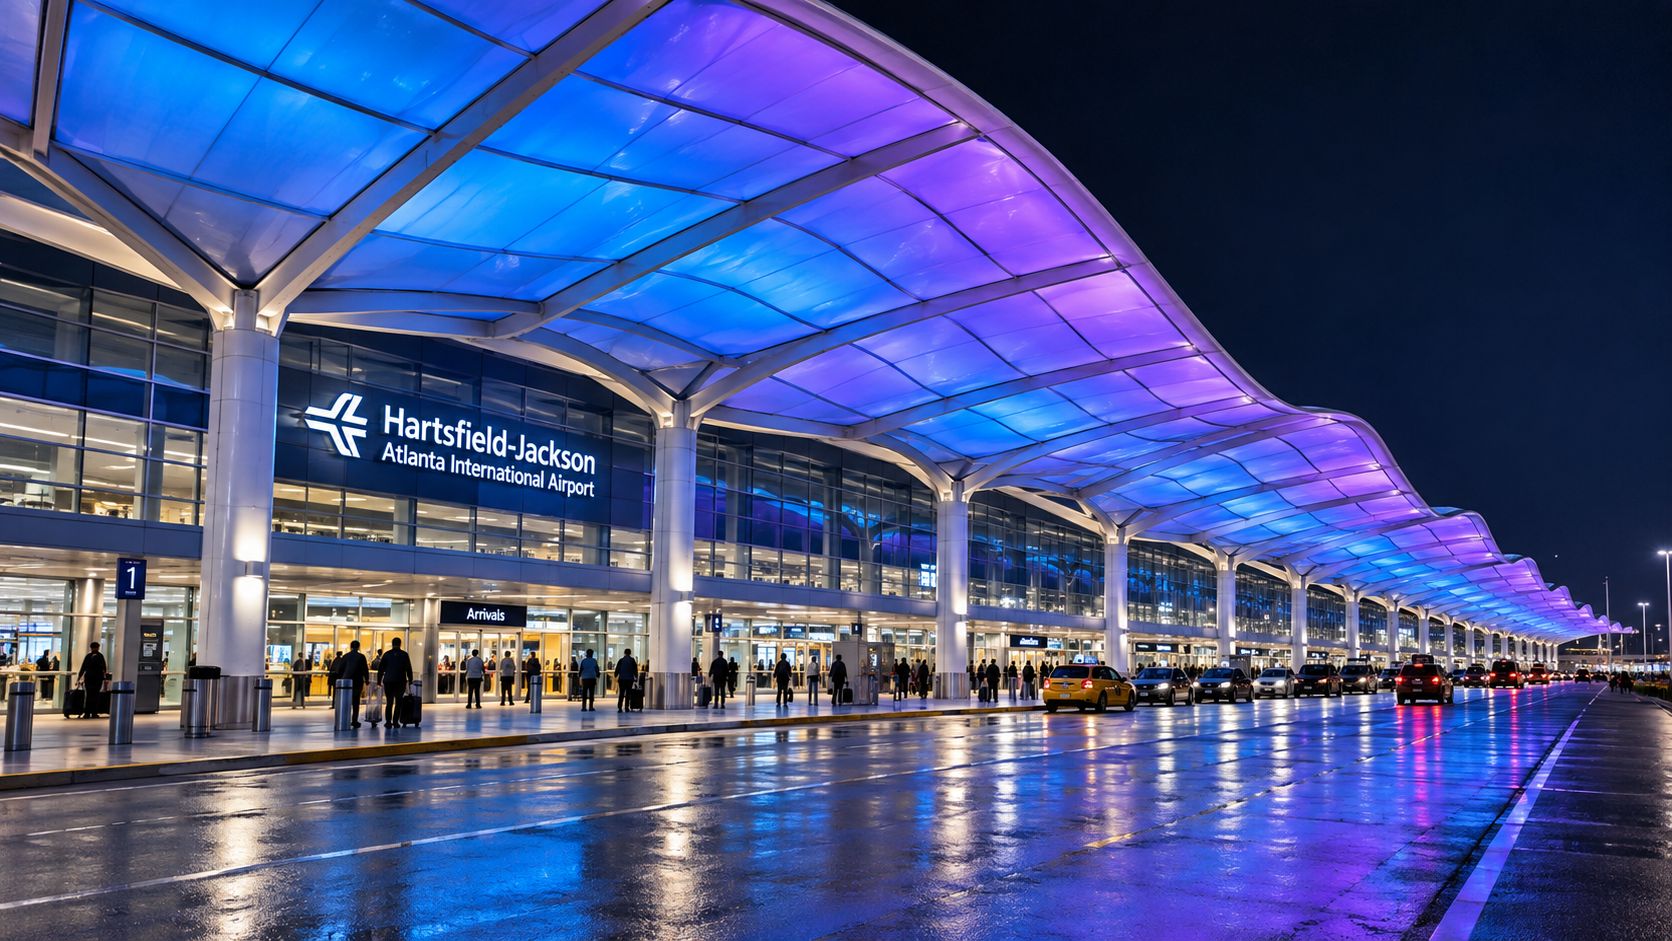
The hard part is not finding the subject. The hard part is keeping the subject consistent while the curb keeps throwing competing light back into the file.
Three practical problems show up fast:
- Mixed curbside light: The canopy color is only one part of the scene. Roadway fixtures, brake lights, LED signs, and interior terminal spill all shift the file in different directions.
- Perspective control: If you choose focal length before you choose position, the canopy structure starts to bend, the verticals get sloppy, and the frame feels more like a rushed travel shot than an architectural image.
- Working room: Good tripod positions are limited by traffic flow, passenger loading, and whatever obstruction is parked at the curb when the light looks best.
The airport's canopy policy page gives the numbers that explain why this happens. Each domestic terminal canopy uses more than 3,400 programmable LED fixtures per structure, and the ETFE canopy system measures about 864 feet by 200 feet. The same page also confirms the practical headache for photographers: the installation runs across 22 approved lighting schemes in 2025, so color is not fixed from one shoot to the next. That is why this subject needs a repeatable workflow, especially if you expect to revisit it over the canopies' long LED service life rather than treat it as a one-off spectacle shoot.
The minimum plan that actually works
My baseline is simple. Scout once, then shoot once with intent.
The scout is for problem-solving, not portfolio frames. I use it to find where the curb opens up, where the structure reads cleanly, and where I can hold a position without fighting foot traffic or security concerns every two minutes.
One rule saves time here:
Pick your standing positions before you pick your lens.
During the scout, lock down three things:
- Which side gives you cleaner geometry: Arrival and departure areas do not photograph the same way.
- Which legal positions stay usable after dark: A good angle is useless if you cannot stand there safely with support gear.
- Which background clutter you can remove in camera: A lower horizon and cleaner lane pattern usually make the canopy feel more architectural and less chaotic.
The canopies deserve a dedicated plan because the assignment is not just about color overhead. It is about handling mixed curbside lighting, keeping 22 theme variations under control, and building files that still look consistent when a client asks for the same scene again months later.
Reading the Lighting Schedule Before You Shoot
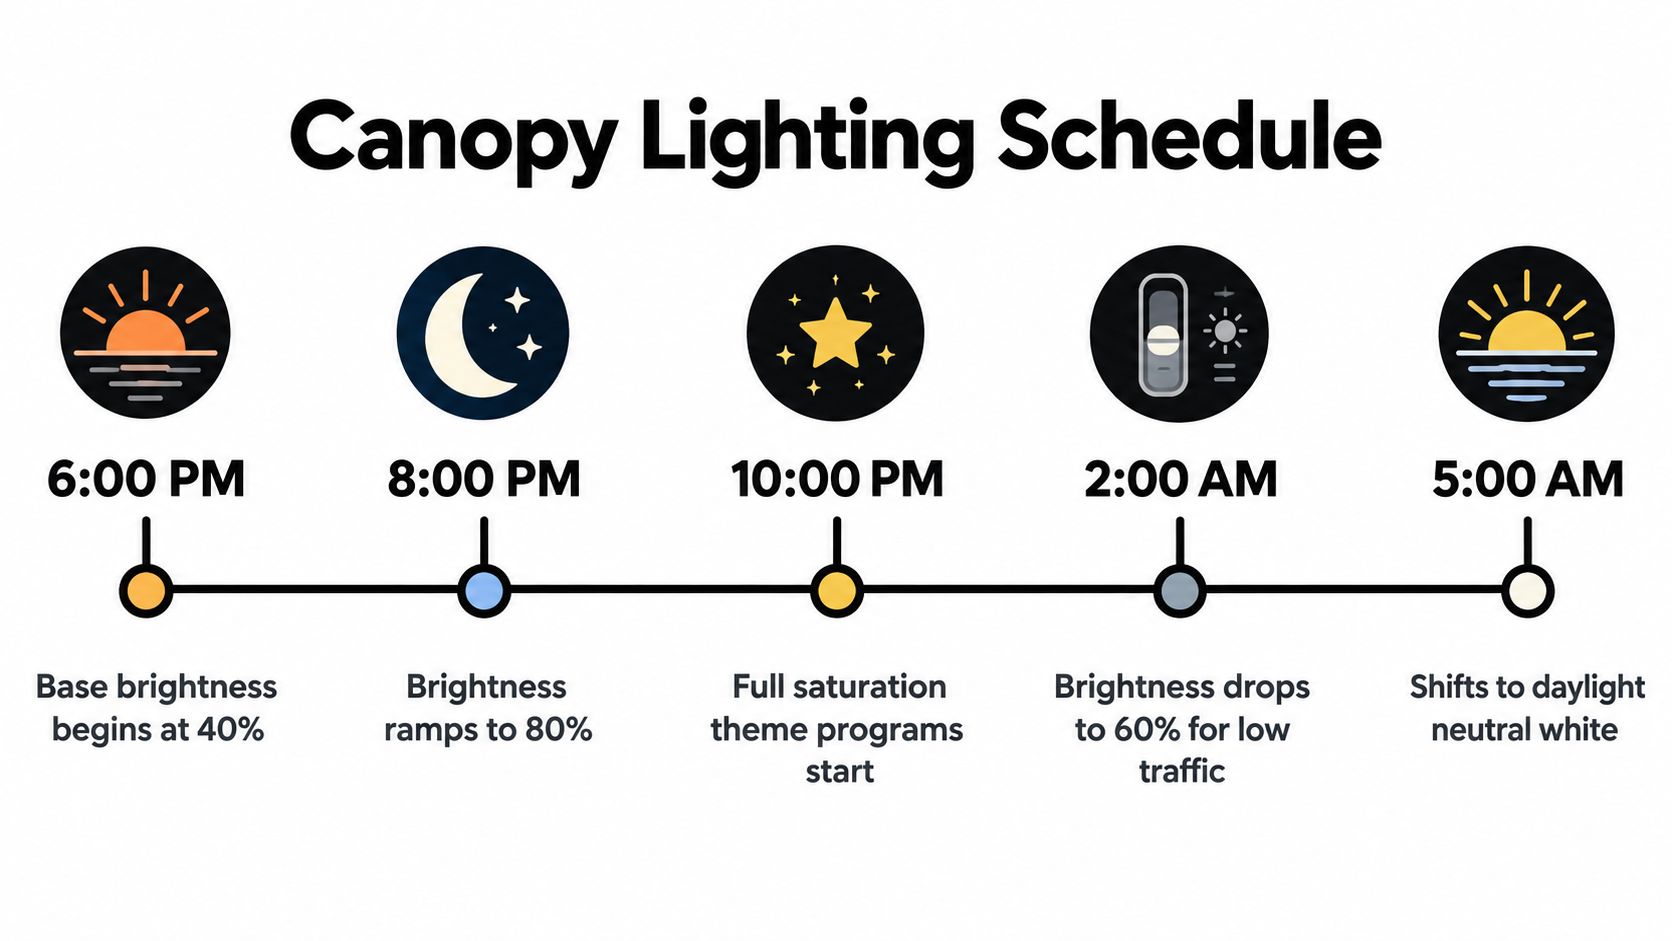
You can show up with the right lens, a solid tripod, and a clean composition in mind, and still miss this shoot by 20 minutes. The failure point is usually timing. At the Atlanta airport canopies, the file changes fast as the sky drops, the roadway fixtures come up in the mix, and the active theme starts to dominate the frame.
Work from the sky, not the clock
Posted time windows are useful for planning arrival. They are not enough for deciding when to start the set.
I build around visible conditions on site. If the sky still carries shape and tone, the canopy can sit inside the scene instead of flattening it. Once that ambient layer disappears, curb lighting usually takes over and the color relationships get harder to hold together in post.
My working sequence is simple:
- Arrive before sunset: Give yourself enough time to confirm the active theme and watch how the roadway light is building.
- Start during civil twilight: This is often the cleanest balance between canopy color, ETFE surface detail, and background separation.
- Shoot the next window with discipline: You usually get a short stretch where the canopy reads clearly and the rest of the curb has not gone muddy.
- Stay later only for a specific deliverable: Deep-night frames can work well, but they read more graphic and less architectural.
Some nights the sky helps you. Some nights it fights you.
Theme changes alter your baseline
Photographers lose consistency across repeat shoots. The canopy program is not one fixed look. As noted in this project report, coverage of the installation describes the system with different counts and programming details, including one reference to 1,938 lights on each canopy with 7 to 8 color variations and another to 3,708 LED lights with custom software supporting 12 color themes. Those figures likely refer to different parts or phases of the project, but the useful takeaway for a shooter is simpler. The lighting program changes enough that one white balance starting point will not carry every assignment.
That matters in the files.
Warm themes can make neutral curb fixtures go cyan. Cooler themes often keep the canopy skin cleaner but can push passenger areas toward green. Heavier saturation usually looks impressive in person and thin in RAW if you neutralize it too aggressively.
Verification beats assumptions
I check the theme the same day if the client cares about a specific look, and I recommend doing the same on any return visit. The canopies have a long service window, the airport runs multiple approved themes, and special-event overrides can change the look you expected.
Use two checks before you commit to setup:
- Call the airport information line: Ask if a special-event lighting program is scheduled that evening.
- Review recent traveler posts: Use them to confirm what is running, not to judge color.
That five-minute check saves a wasted trip, and it gives you a better shot at building a series that still matches when the client asks for the same curbside view months later.
Choosing Camera, Lens, and Support Gear
This subject doesn't need a heroic gear list. It needs the right trade-off choices.
A standard wide-to-normal zoom does most of the work because the curbside environment forces small framing corrections you can't always solve by moving your tripod. The moment luggage traffic, barriers, or passenger flow pin you into a spot, lens flexibility matters more than theoretical sharpness gains from a bag full of primes.
The lens decision that carries most of the shoot
For most canopy assignments, a 24-70mm f/2.8 is the working lens. It handles the majority of curbside frames because it lets you stay planted and adjust composition without rebuilding the setup. A 16-35mm earns its place when you want a stronger vanishing-point pull or a more symmetrical overhead read from farther back.
Tilt-shift glass is useful, but only in narrow circumstances. If you're shooting from a low curbside angle and the canopy ribs start collapsing inward, perspective control can save the frame. If you're already in a balanced position and delivering mostly editorial or brand-use imagery, it can slow you down more than it helps.
Full-frame versus crop body
The cleaner choice at the edge of blue hour is usually full-frame. You get a little more tolerance when the light drops and a little more room to crop if a lane opens up for just a moment and then closes again.
Crop bodies still work well if your composition is tighter and you're isolating one run of the ceiling instead of trying to describe the full curb environment. I wouldn't reject the assignment over body format. I would decide based on how much flexibility you need when the scene gets busy.
| Option | Strength for Canopy Work | Trade-off |
|---|---|---|
| 24-70mm on full-frame | Fast reframing, reliable curbside coverage, strong general-purpose choice | Not always wide enough for big symmetrical terminal views |
| 16-35mm on full-frame | Best for dramatic depth, leading lines, and overhead sweep | Easy to overstate foreground and bend the space |
| Tilt-shift wide lens | Corrects converging lines from low positions | Slower to use, more specialized, less forgiving in active curb conditions |
| Crop body with standard zoom | Useful for tighter bay details and efficient kits | Less forgiving when light drops and when you need wider coverage |
If you also shoot controlled interiors or client portrait support work between architecture jobs, this 2026 guide to renting a photography studio is worth a read because it frames gear choice around assignment needs instead of gear collecting.
Support gear that matters
Skip the gimbal talk. Skip the monopod.
Use these instead:
- A sturdy tripod: The bottleneck here is exposure stability and precise framing.
- A center-column hook or ballast option: Curbside airflow and passing vehicles can introduce vibration.
- A geared head: Small corrections make a big difference when lines need to stay disciplined.
- A remote release: It keeps the setup still and speeds up bracketed sequences.
The strongest canopy files usually come from boring support choices made well.
Exposure and White Balance for Mixed Light
The mistake I see most often is metering the whole scene like it's a cityscape. It isn't. The canopy is the visual anchor, and if you let sodium spill, curb lamps, or passing headlights drive the exposure, the ETFE ceiling can lose shape fast.
Start with the lit surface itself. The canopy gives you the dominant luminance and the clearest reference for what the image is about.
Meter the canopy first
Spot or partial meter a representative illuminated panel and move to manual exposure from there. Lock it in. Don't let the camera revise your decision every time a vehicle swings through or a bright sign enters the edge of the frame.
The useful discipline is simple:
- Read the illuminated ETFE surface first
- Set manual exposure
- Bracket for protection
- Review highlight integrity before changing composition
The airport-facing guidance around the canopies is useful here because it explicitly notes a practical imaging method: shoot after full exterior illumination is active, then bracket canopy and curbside separately because the lighting can shift from white to themed color scenes across the approved programs on the canopy policy page.
Build white balance around the surface, not the street
I like a custom white balance built from the canopy itself. A practical starting range for many nights is 4000K to 5500K, then a small tint correction depending on whether the ETFE picks up a green bias from surrounding sources. You're not trying to make every light in the scene neutral. You're deciding what deserves neutrality.
Mixed-light discipline pays off. If you need a refresher on balancing conflicting sources in real-world conditions, this walkthrough on mixed lighting photography techniques is a helpful reference. I also like this art placement and lighting guide by Colorado because it's grounded in how surfaces receive and reflect light, which carries over well to ETFE and illuminated architectural skins.
| Theme Color | Suggested Kelvin | Tint Adjustment |
|---|---|---|
| Neutral white scene | 4800K to 5200K | Slight magenta if the surface trends green |
| Warm-biased theme | Lower end of your normal baseline | Small green check, then correct only if skin tones matter |
| Cool or blue-heavy theme | Higher end of your normal baseline | Keep tint restrained so the theme still reads intentional |
| Saturated civic or event theme | Build from a gray reference and preserve the programmed color | Fine-tune by eye, avoid forcing neutrality |
Bracket for survival, not for drama
Use a three-frame bracket at ±1.5 stops when the curb gets contrasty. That spread usually protects the highlights in the canopy while preserving enough roadway and traveler information to build a usable final frame.
Field note: If the canopy clips, the image rarely recovers gracefully. If the curb goes a little dark, you can usually work with it.
A handheld incident reading can help when you're including people or vehicles and need to understand how much ambient curbside light is really contributing. For pure architecture, the canopy reading leads. For editorial crossover frames, ambient context matters more.
Composition and Storytelling on the Curb
The curb is chaotic, but it isn't random. Once you stop reacting to traffic and start treating the site like a stage, composition gets easier.
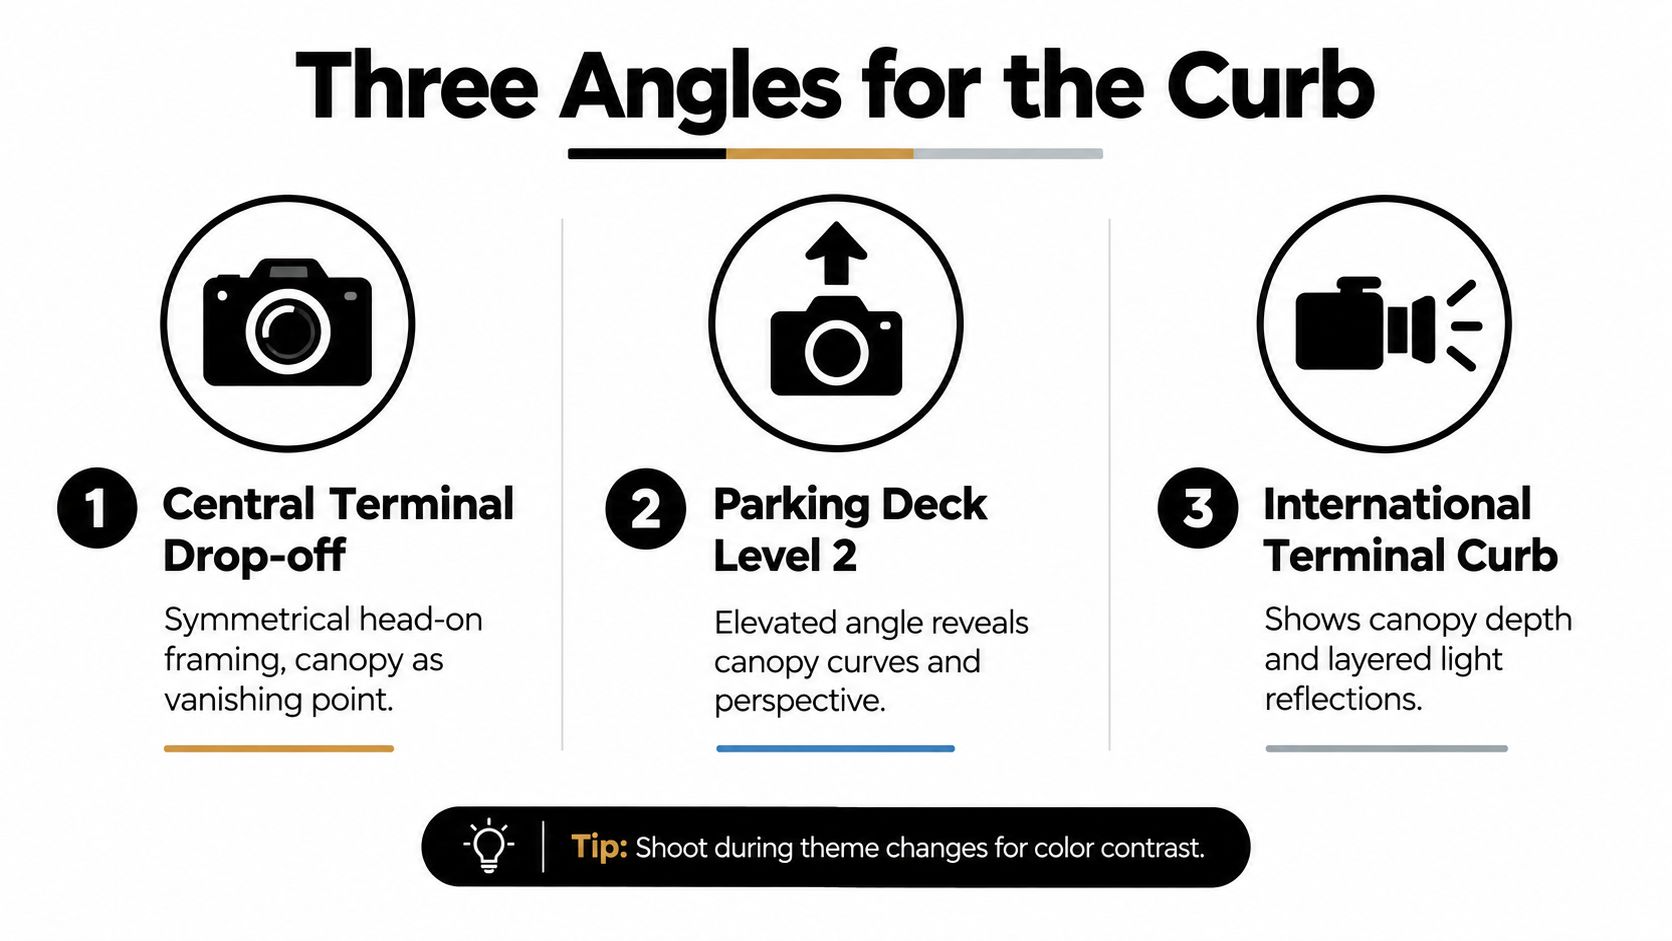
Three positions consistently produce useful work. They each tell a different version of the canopy story, and they each change how the ceiling geometry reads in the frame.
Three positions that produce real options
- Central terminal drop-off: Best for clean symmetry and a strong vanishing point. The canopy reads most like architecture.
- Parking deck level two: Useful when you need to reveal depth and curvature instead of just graphic ceiling pattern.
- International curb perspective: Strong for layered reflections and longer reads down the structure.
The domestic canopies are large enough that one position rarely tells the whole story. Public project descriptions emphasize that the structures span about 864 feet by 200 feet and are intended to function as wayfinding and civic storytelling visible from air and land approaches, as described in this project background PDF. That intent matters for composition because it argues against treating the job as one hero shot only.
Use the ground as part of the composition
Lane striping, curb edges, and cart tracks do real work here. They aren't clutter if you place them deliberately. They become the lines that pull the eye into the illuminated ceiling.
For architectural briefs, I'd favor:
- centered framing
- lower horizon placement
- minimal human interruption
- disciplined verticals
For editorial or brand storytelling, I'd loosen the frame and pair images:
- A tight detail of rib structure, ETFE glow, or repeating bays.
- A wider frame with travelers, signage, or curbside motion.
- A transitional image where the canopy supports the scene instead of dominating it.
A client usually needs both kinds of images. The iconic frame earns attention. The human-scale frame explains the place.
When to stitch
Some curbside views exceed what a single wide frame can hold without looking distorted. That's when a multi-frame stitch is worth the effort. Rotate carefully from the head, overlap consistently, and keep the camera level so the roof doesn't wobble across the final merge.
I only stitch when the structure needs breadth more than drama. If the frame starts feeling engineered instead of observed, I'd rather step back and simplify.
Permissions, Safety, and On-Site Logistics
This is the least glamorous part of shooting the Atlanta airport canopy lights, and it's the part that keeps the assignment from going sideways.
Public-facing curb areas can feel casual because people are constantly moving through them. A professional shoot isn't casual. Once you bring a tripod, work for a client, or occupy space for more than a quick snapshot, you need to think like a location operator.
Know what kind of shoot it is
Approval paths often depend on who the images are for. An editorial assignment, a commercial brief, and a property documentation shoot don't usually move through the same internal process. Clarify the intended use before you ask for access or begin staging.
I'd sort it this way:
- Editorial use: Often lighter-footprint, but still worth confirming where you can stand and how long you can stay.
- Commercial client work: More likely to trigger questions around insurance, usage, and coordination.
- Property or design documentation: Usually easiest to justify operationally, but still needs planning.
If you use releases as part of your standard prep, keep them organized and assignment-specific. This guide to location release forms for photographers is a solid framework for that part of the workflow.
Safety beats the shot
Airports are unforgiving places to freelance your own rules. Stay behind painted pedestrian buffers. Don't step into active drop-off lanes for a cleaner axis. Don't park a tripod where it narrows accessible movement or interrupts loading.
A few habits make the evening easier:
- Wear a reflective vest: Low-light visibility matters when drivers are focused on pickups.
- Consolidate your kit: One rolling case is easier to manage than loose bags spread across the curb.
- Keep your footprint tight: You want to look prepared, not sprawling.
- Have a weather fallback: Light rain can turn the ETFE surface into one big reflective source and change the whole look.
Understand the lighting environment around the site
One overlooked issue is that not every airport-adjacent light is treated the same under local rules. A municipal lighting ordinance, for example, distinguishes navigation lighting systems as exempt, while other airport lighting such as loading areas, terminal aprons, parking areas, and hangars must comply. The same ordinance also says service-station canopy fixtures must be fully shielded with flat lenses and caps under-canopy output at 40 lumens per square foot in Lighting Zones 2 and 3 and 20 lumens per square foot in Lighting Zone 1, as shown in this municipal lighting code. The exact code may not govern your shoot location, but the distinction is useful because it reminds you that navigation light, roadway light, and canopy light serve different operational goals.
That's why clean-looking airport images usually come from restraint. Work within the site, not against it.
Post-Processing Workflow for a Cohesive Series
Good canopy files can still fall apart in edit if the series loses internal consistency. The theme changes are part of the subject, but the set still needs to feel like one assignment.
I organize the work before import. Folder naming matters more than people admit, especially when a site can run many approved looks over time. A dated folder structure with the active theme and curb position in the name saves a lot of confusion later.
Cull hard and choose one hero early
Reject anything with clipped canopy highlights, awkward vehicle smears, or traveler motion that distracts from the structure. Then flag a hero frame for each usable scene type. That gives the set a backbone before you start adjusting color.
I want the first pass to answer three questions:
- Is the canopy shape intact
- Does the curb support the image or distract from it
- Is the color believable for that programmed theme
Project reporting around the installation gives useful context for why consistency matters. Early coverage noted that nearly 1,000 lights were tested on the North canopy before full completion, later describing a finished system of more than 3,600 lights diffused through the translucent structure, with LED fixtures expected to last 15 to 20 years in this contemporary airport coverage. When you're editing a long-lived lighting installation, your job isn't to reinvent it. It's to render it faithfully and cleanly.
Build a neutral baseline, then adjust per frame
I start by sampling the illuminated ETFE surface with the white balance selector, then correct tint conservatively. After that, I usually tame the lower frame separately because curb spill often feels warmer and dirtier than the canopy itself.
Typical adjustments look like this in practice:
- Baseline white balance from the canopy surface
- Moderate highlight recovery to protect luminous detail
- Shadow lift only as needed
- Targeted HSL corrections instead of global vibrance
If your edit process gets inconsistent from frame to frame, a documented photo editing workflow for architectural and commercial shoots helps keep the series predictable.
Don't let the roadway dictate the grade. The canopy is the subject, and the rest of the image should support it.
Deliver according to use
Architectural clients often want files with room for layout flexibility and careful downstream color handling. Editorial clients usually need lighter assets that move quickly through review and production.
I keep deliverables separated by use case:
| Deliverable Type | Best Use | Editing Priority |
|---|---|---|
| 16-bit TIFF | Architectural and design documentation | Tonal depth, restrained color, profile consistency |
| sRGB JPEG | Editorial and marketing review | Fast loading, clean contrast, strong readability |
| Proof contact sheet PDF | Quick client selection | Clear sequence, easy comparison across themes |
The final series should feel cohesive even when the canopy colors shift. If every frame looks like it came from a different photographer, the problem usually started in edit, not on location.
Jimmy Clemmons Photographer creates architectural and commercial imagery with the kind of exposure control, composition discipline, and on-location workflow this subject demands. If you need polished coverage of illuminated exteriors, mixed-light environments, or Atlanta properties that have to look as intentional in photos as they do in person, visit Jimmy Clemmons Photographer.