
The layout proof is open on the editor's screen. The opener works, the portrait is strong, and the caption is nearly finished. Then comes the familiar request: “Can you send one more frame?” That request usually isn't about collecting another attractive photograph. The editor needs a horizontal image for the opening spread, a quieter option for the contents page, or a detail that gives the story room to breathe.
That moment captures the working reality of magazine editorial photography. The assignment isn't to make images look stylish. It's to build a usable visual story inside a publication's schedule, layout, voice, and rights structure. A successful shoot anticipates the crop, the sequence, the caption, the digital version, and the frame that may become more important during editing than it seemed on location.
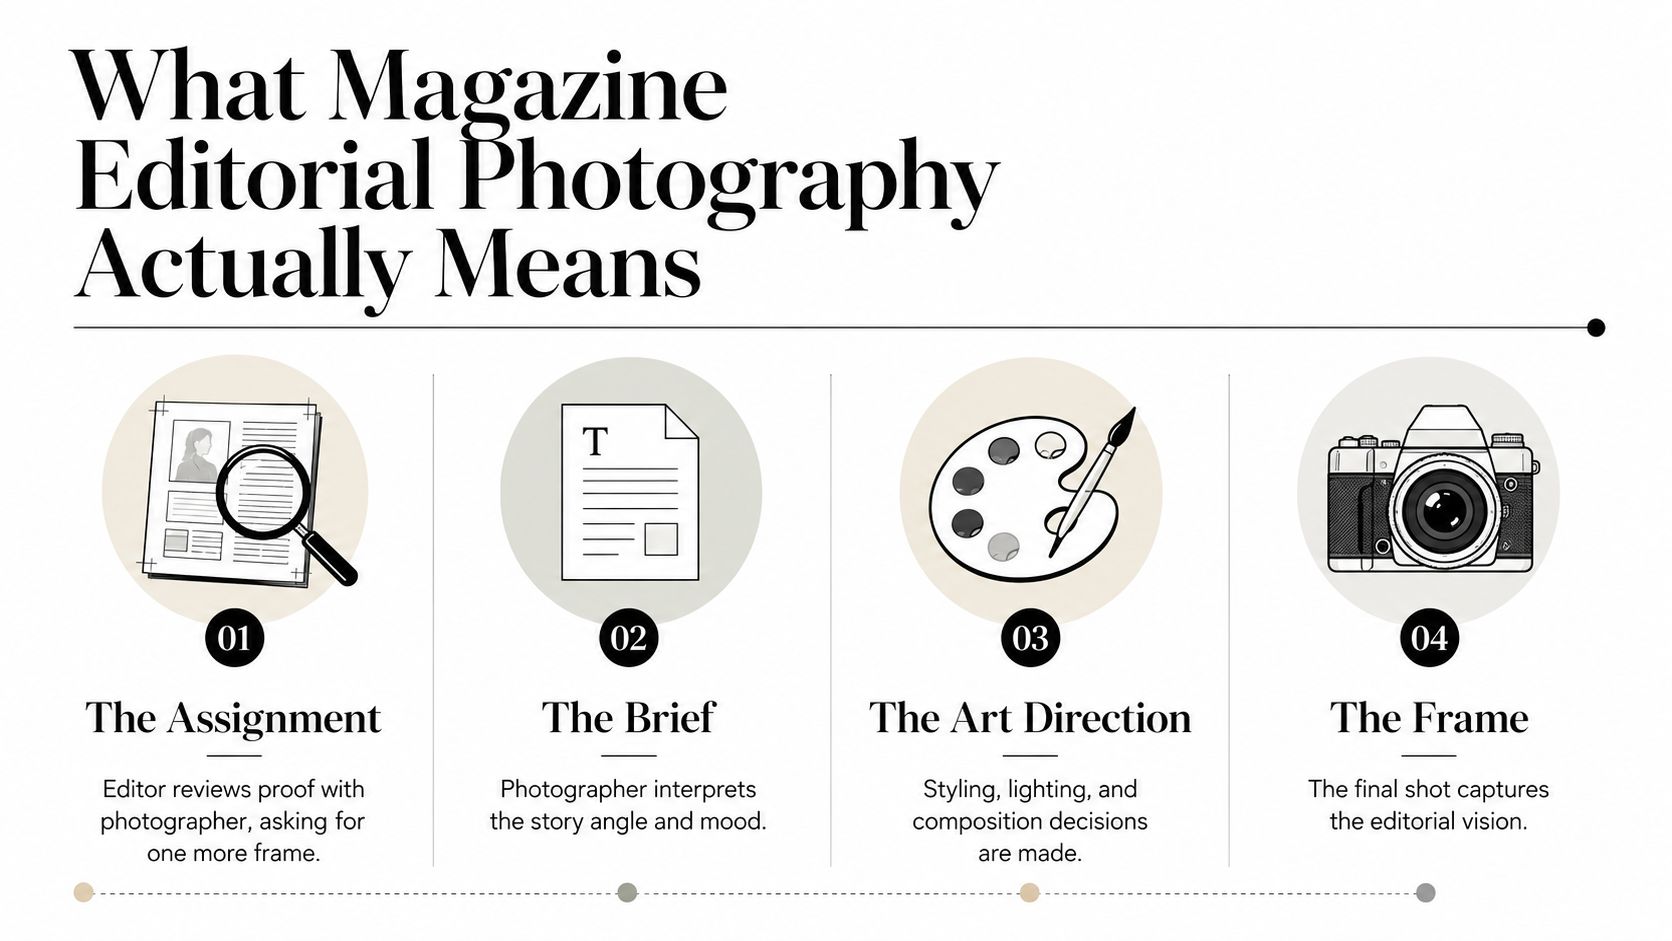
What Magazine Editorial Photography Actually Means
Magazine editorial photography is image-making commissioned to support a publication's story, point of view, and reader experience. The photographer may work in fashion, portraiture, documentary, architecture, or lifestyle imagery, but the assignment remains editorial when the images serve a written or reported narrative rather than a direct sales message.
The distinction matters because a magazine editor doesn't commission a collection of isolated hero images. The editor commissions coverage. That coverage needs an opener, a sequence, supporting moments, and enough visual variation to fit an actual page plan.
The format's visual grammar developed during the era when illustrated magazines were the dominant mass channel for photographic storytelling. Between 1910 and 1970, the vast majority of photographs printed and consumed worldwide appeared in illustrated magazines, and one analysis of 35 magazines found an average of 98 photographic illustrations per issue in editorial content. Advertising averaged 117 photographic illustrations per magazine, while Popular Science reached 313 editorial images in a single issue and Life contained 250, as documented by the Developing Room's history of magazine photography.
That volume encouraged editors and photographers to think in visual rhythm. A cover line, a large opening image, a close portrait, a contextual scene, and a small object detail each perform a different job. Picture Post sold 1,000,000 copies a week within two months of its launch in 1938 and reached 1,950,000 weekly copies by December 1943, while Life eventually peaked at more than 8.5 million in circulation, according to the historical circulation record for Picture Post. Editorial photography was therefore a high-reach communication system, not a minor branch of portrait work.
The assignment is bigger than the hero frame
A magazine may expect:
- A cover frame: Designed with negative space for typography and a crop that survives the cover template.
- An opener: The image that establishes the story's emotional and visual direction.
- A sequence: Portraits, scenes, and transitions that create movement through the feature.
- Supporting cutaways: Hands, objects, architecture, wardrobe, tools, and environmental details that help an editor build a page.
Editorial work overlaps with fashion, portrait, and documentary photography, but the brief changes the photographer's responsibility. A fashion image may prioritize garment presentation. A portrait may concentrate on expression and character. Documentary work may follow events with minimal intervention. Editorial photography can borrow from all three, yet it must still answer the publication's narrative needs.
The photographer has to anticipate how images will be cropped, captioned, sequenced, and repurposed for print and digital editions. That's why a documentary-style photography approach can be valuable even on a directed portrait assignment. The working discipline, not a particular color grade or lighting trend, is what separates editorial photography from other commercial applications of the camera.
How Editorial Work Differs from Commercial and Advertising Shoots
The easiest way to understand editorial photography is to compare the decisions made on set. A commercial photographer usually starts with a product, service, or brand promise. An advertising photographer starts with a campaign concept and a placement requirement. An architectural photographer starts with the built form and the need to describe it accurately. An editorial photographer starts with a story and asks what the reader needs to see next.
| Dimension | Editorial | Commercial / Product | Architectural | Advertising |
|---|---|---|---|---|
| Primary purpose | Serve a publication's story and editorial voice | Present or support a product or service | Document and interpret built form | Deliver a campaign concept and selling message |
| On-set priority | Speed, coverage, and narrative cohesion | Control, repeatability, and consistency | Perspective, structure, and technical precision | Concept execution, placement, and polished production |
| Photographer's discretion | High within the story framework | Guided by a brand brief and approval process | Focused on viewpoint, light, and accuracy | Shared with creative, art, and brand teams |
| Typical usage | Narrow, issue-specific editorial use | Broader brand or product use | Project, portfolio, publication, or marketing use | Campaign-defined advertising use |
| Post-production | Restrained and publication-conscious | Consistent across products and deliverables | Careful perspective and tonal correction | Often intensive, including compositing and detailed retouching |
The brief changes the definition of success
Editorial usage is generally limited to the publication, story, issue, term, and territory agreed in the license. Commercial and advertising assignments often require broader rights because the client may place the images across websites, social channels, campaigns, packaging, sales material, or paid media. The rights question should be settled before the shoot, not after a client decides to use an editorial portrait in an advertisement.
On set, the differences are visible. Editorial lighting often needs to be portable and fast because the photographer may have to cover several locations or make decisions around a subject's limited availability. A commercial product shoot can justify a controlled setup that stays unchanged while multiple products move through the frame. Architectural photography rewards patience, clean perspective, and quiet light, while advertising production may require a heavily designed scene that leaves intentional space for a headline or product claim.
Practical rule: If the client's success depends on a direct sales message, don't treat the assignment as editorial simply because the images have a candid look.
Editorial photographers pitch a visual interpretation and execute it inside a story framework. Commercial photographers fulfill a brand requirement with defined deliverables and approvals. Neither approach is automatically better. The mistake is allowing a client to commission editorial behavior while expecting commercial rights, advertising flexibility, and unlimited revisions.
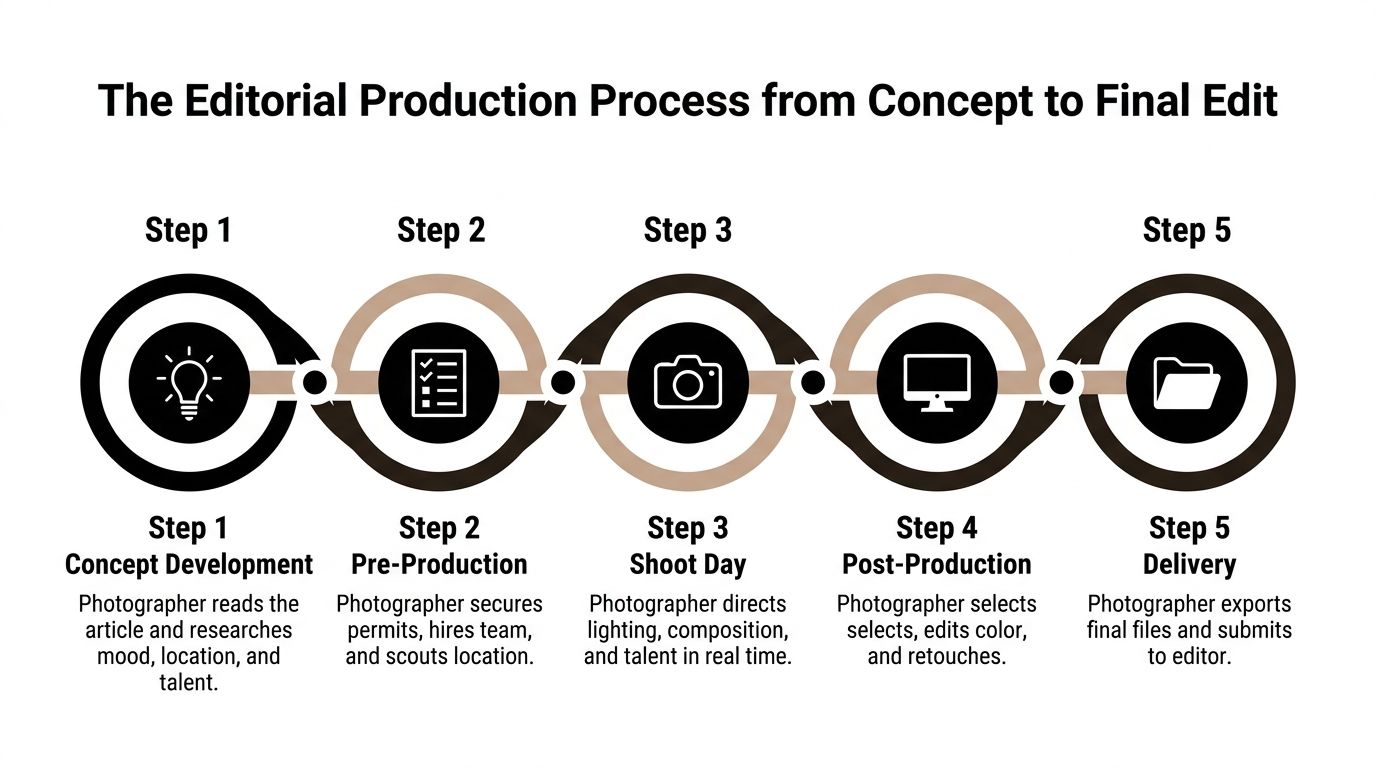
The Editorial Production Process from Concept to Final Edit
Editorial production works best as a chain of connected decisions. The concept determines the location, the location shapes the lighting, the lighting affects how the subject can move, and that direction determines which photographs remain useful during the edit.
Start with the story spine
Read the article, interview, or assignment notes before developing a shot list. Identify the subject, the tension, the setting, and the emotional shift the reader should experience. A feature about an architect's process may need images of the person thinking, drawing, reviewing materials, and moving through a completed space. A profile of a musician may need a portrait, a performance-adjacent environment, and details that connect the person to the story.
Build a visual approach that fits the publication's voice and layout grid. A restrained magazine may need quiet backgrounds and controlled gestures. A more energetic title may welcome direct flash, hard shadows, or a tighter sequence of imperfect moments. The style should serve the story, not cover the absence of one.
Scout for decisions, not just locations
A useful scout records what the space allows. Visit in available light, identify backgrounds that remain clean under pressure, and note where foot traffic will interrupt the frame. Check access windows, permits, parking, power, weather exposure, and the distance between usable positions.
A location that looks excellent in a still reference can fail when the subject arrives. The background may need a longer lens than the space allows, the best light may disappear behind a neighboring building, or the quiet corner may become unusable once a small crew enters. Mark an alternative position and an indoor fallback before shoot day.
Keep lighting portable and intentional
Editorial lighting has to create shape without slowing the story. Available light can preserve context and speed, while a compact strobe or LED can provide control when the subject moves into a darker area. Heavy rigs may produce beautiful results, but they can consume the time needed for coverage.
A defined ratio gives the photographer a practical starting point. Guidance for editorial portrait lighting recommends fill at about 1:3 when shadow detail needs to remain visible, or 1:4 to 1:6 for a moodier, more cinematic result, as explained in this editorial portrait lighting guide. Starting around f/8 can provide useful subject definition, while a rim light 1 to 2 stops brighter than the key can separate the subject from the background. Grids and flags keep spill from flattening the scene.
The trade-off is direct. More contrast creates drama but removes information from the shadow side. A fast, softer setup may preserve expression and context but offer less visual tension. Choose based on the spread, not on a lighting diagram that looks impressive behind the scenes.
Direct behavior instead of poses
Non-models often become stiff when asked to “look natural.” Give them a small action with a reason. Ask a team member to review a material sample, walk toward a doorway, adjust an object, or speak to a colleague. For a small group, assign positions and relationships rather than asking everyone to stand shoulder to shoulder.
Capture the tight portrait, the wider scene-setter, and the candid detail while the activity is still believable. The editor needs options that feel related, not repeated.
On-set observation: Direction becomes easier when the subject has something to do. The action gives the hands, eyes, and body a believable purpose.
Edit for publication, not personal attachment
During post-production, triage for layout value first. Select images that provide different crops, distances, expressions, and background densities. Match color treatment to the publication's print profile, retouch distractions without reshaping the subject, and export according to the magazine's crop, resolution, and file specifications.
A professional photo shoot checklist helps protect the handoff, but control comes from connecting every phase. Scouting informs lighting, lighting informs direction, and direction determines whether the final set reads as a story or a folder of unrelated portraits.
The production sequence is also supported by this practical editorial photography workflow guidance, which recommends building coverage rather than relying on a single hero image.
The video below provides another visual reference for production planning and execution.
Building an Image Package Editors Can Publish
Editors need an image package that gives the layout room to work. The strongest photograph in isolation may not be the most valuable file in the submission if it has no usable crop, no visual partner, or no place in the story's sequence.
Practical industry guidance recommends an 8 to 12 image package for a small story, including an opener or cover image, 2 to 3 supporting portraits, 1 to 2 wider contextual frames, and detail shots, as outlined in this editorial image package guide. Treat those figures as a planning structure, not a reason to pad the delivery.
| Frame Type | Typical Count | Retouch Level | Delivery Format |
|---|---|---|---|
| Opener or cover candidate | 1 to 2 | Clean distractions, preserve texture | High-resolution master and web-ready JPEG |
| Supporting portrait | 2 to 3 | Natural skin and wardrobe cleanup | High-resolution master and web-ready JPEG |
| Environmental frame | 1 to 2 | Correct distractions and tonal balance | High-resolution master and web-ready JPEG |
| Detail or cutaway | Several options | Minimal cleanup | High-resolution master and web-ready JPEG |
| Wild card | 1 or more | Light correction only | High-resolution master and web-ready JPEG |
Build sequence before perfection
Start with the frame that establishes the subject and setting. Follow it with a tighter portrait or an action frame, then use details and quieter images to create pacing. A photograph of a hand on a railing, a marked-up drawing, a worn tool, or an empty chair can connect two stronger images and give the editor a visual pause.
Deliver alternate frames selectively. Two or three variations of an important moment can protect the edit, especially when one expression works better for a crop or one background leaves more room for type. Sending every near-duplicate burdens the editor and makes the photographer look undecided.
Make the files easy to use
Use consistent naming that includes the subject, assignment, and sequence. Embed captions and relevant metadata where the publication's workflow supports it. Keep color management consistent, export the requested master files, and separate web versions from high-resolution files so an editor doesn't have to guess which file belongs in print.
RAW files and outtakes generally stay with the photographer unless the contract says otherwise. The editor receives the licensed selects and the metadata needed to publish them, not an unorganized archive.
Licensing, Deliverables, and Usage Rights Explained
A magazine assignment begins with a story, but it finishes with a rights decision. Editorial usage usually means the publication can use the commissioned images for the agreed story, issue, print edition, digital edition, term, territory, and related editorial promotion. That license doesn't automatically allow a brand, subject, sponsor, or partner to use the same image in advertising.
Separate editorial from collateral and commercial use
Collateral licensing can cover internal communications, brochures, presentations, or marketing materials. Commercial licensing may extend to advertising, paid media, broad promotional use, and other placements defined in the contract. The wider the use, the more carefully the agreement should identify term, territory, media, exclusivity, sublicensing, and approval requirements.
If a magazine photographs a company executive for a profile, the publication may have editorial rights to run the feature. The company may still need a separate license to place that portrait on a recruitment campaign or paid social advertisement. Repurposing changes the context, the audience, and the commercial value.
Define the handoff
The contract should identify which files move with the license:
- High-resolution masters: TIFFs or other publication-ready files for print production.
- Web JPEGs: Sized and sharpened for the approved digital destinations.
- Captions and metadata: Supplied in the format the editor or production team uses.
- Releases: Model or property releases where the assignment and intended use require them.
- Excluded materials: RAW files, outtakes, rejected selects, and working files unless separately negotiated.
The exact fee depends on the assignment, the photographer's production responsibilities, and the usage requested. The licensing structure shown in the supplied planning material lists editorial, collateral, and commercial examples of $500, $1,500, and $5,000, respectively, but those figures should be treated as a brief-specific reference rather than a universal rate.
Before signing, read the publication's standard contract for indemnity, cancellation, exclusivity, credit, portfolio use, kill fees, and AI-related language. Current guidance from ASMP's field guide to AI photography also recommends documenting provenance, disclosing AI assistance, considering Content Credentials and C2PA, keeping edit logs, and addressing synthetic likenesses and client assets in writing. In mixed human-AI workflows, provenance is part of the deliverable, not an administrative afterthought.
For projects involving buildings, review the distinction between editorial publication and broader property or brand use with this guide to architectural image rights and licensing.
A Commissioning Checklist and Pricing Guide for Clients
A client can prevent most editorial production problems before contacting a photographer by answering a short set of practical questions. The brief doesn't need polished marketing language. It needs decisions.
Clarify the assignment
Write down the story angle, subject, mood, location, intended publication, image count, delivery deadline, and approval contacts. If an art director or designer will influence the crop and styling, involve that person before the shoot. A photographer can make stronger decisions when the visual authority is clear.
Confirm access and permissions early. Talent releases, property permissions, location permits, parking, travel, assistants, styling, hair and makeup, and equipment can all affect the quote. A short shoot in a difficult location may cost more to produce than a longer assignment in a prepared studio.
Scope pricing by work and use
Ask the photographer to separate production from licensing. A quote may include a day rate, assistant or equipment costs, post-production, and a usage fee. Stock photography may be efficient for a generic supporting image, while commissioned work is more appropriate when the story depends on a specific person, place, team, or point of view.
The supplied commissioning guide uses a $2,000 to $5,000 day-rate range and states that usage is priced separately, as shown in the required checklist visual. That range isn't a universal quote. It's a planning bracket, and the final estimate should reflect the crew, travel, access, retouching, schedule, and rights.
Client checkpoint: A low production fee with broad advertising usage is not automatically a low-cost assignment. It may simply move the cost into an unfavorable licensing arrangement.
Build time for concept approval, scouting, production, editing, client review, and publication changes. Rush delivery can create a surcharge, and a postponed shoot can create cancellation or rescheduling costs. Ask how many review rounds are included and whether additional retouching is billed separately.
Editorial discipline improves commercial and architectural assignments because it forces the team to think about narrative value. A developer may need a lobby image that reveals circulation rather than just finishes. A corporate team may need a portrait that shows how people work together instead of another row of formal faces. The same production choices produce more specific assets, provided the license matches the intended use.
Applying Editorial Discipline to Built Environments and Teams
Buildings and teams often look generic because the photographer treats them as subjects to record rather than stories to cover. Editorial discipline changes the question from “What does this place look like?” to “How does this place function, and what should the viewer understand about the people inside it?”
Photograph the way a space is used
Scout the building before deciding on the hero angle. Watch how people enter, pause, gather, work, and move between areas. A lobby may be most informative when a person crosses through it, while a factory floor may need a worker's gesture or a relationship between machine, material, and operator.
Choose a viewpoint that reveals use without turning the image into a diagram. Correct perspective where necessary, but don't remove every trace of life. A perfectly empty space can describe architecture while failing to communicate scale, purpose, or atmosphere.
Lighting should support the building's character. Window light may reveal depth and texture. A controlled source can lift a dark passage or separate a person from a busy background. The choice is less about making the space bright than about directing attention through it.
Direct teams as participants
Move a leadership team out of the boardroom when the boardroom says nothing about their culture. Place people in an environment connected to their work, give each person a role in the composition, and direct interaction instead of forcing identical poses.
A team portrait can include conversation, shared attention, movement, or a deliberate pause. The photographer still has to organize the frame, but the result should feel like coverage of a working group rather than a stock image assembled for a directory.
Use the same sequence of decisions for a building, a factory, a campus, or a corporate office:
- Find the subject: Decide whether the story is about design, use, people, process, or change.
- Scout the behavior: Observe where the strongest interactions and transitions occur.
- Shape the light: Add control only where available light fails to describe the subject.
- Direct with purpose: Give people actions and relationships that support the story.
- Edit for variety: Deliver wide, medium, close, detail, and quiet frames that can work together.
Independent trend reporting has described growing interest in direct flash, harsh daylight, vertical crops, candid framing, and documentary-style editorial blending, alongside demand for more inclusive and authentic imagery, as discussed in this 2025 editorial-inspired trend report. The useful lesson isn't to copy a look. It's to make images that remain specific, textured, and usable across print, mobile, social, and mixed-media publishing.
For clients commissioning this work, the next step is straightforward. Write the story angle, confirm access and rights, and ask the photographer to propose a package rather than a single hero image. For photographers pitching editorial assignments, show how your location choices, lighting decisions, and sequencing will help an editor publish the story.
Jimmy Clemmons Photographer offers location scouting, lighting design, on-set direction, architectural imagery, commercial brand content, and professional portraits from an Atlanta-based studio. Visit Jimmy Clemmons Photographer to discuss an editorial-minded assignment for a built environment, corporate team, publication, or brand.