
You're on assignment, the vehicle's already been loaded once, and the light at dawn is too good to waste on a dead battery or a forgotten filter. A professional safari packing list is different from a leisure traveler's checklist because the cost of one small miss is higher. If your work has to hold up in a magazine layout, on a client proof gallery, or in a brand deck, you need redundancy, protection, and power discipline built into every layer of the kit.
The smartest safari wardrobe advice still applies to photographers, just with a different priority stack. Major travel guides consistently point toward a small, layered capsule wardrobe with only three or four mix-and-match outfits in breathable fabrics, while others recommend a broader set such as 6 T-shirts, 2 safari shirts, 2 pairs of safari pants, 2 pairs of shorts, a rain jacket, a fleece, and a light puffer coat for colder Southern Africa months from May to August andBeyond safari packing guidance. Those same guides also stress 7 underwear, 2 pajamas, a hat, and sunglasses, which tells you the core purpose of safari packing is staying functional across long, variable days in the bush, not dressing for city hotel comfort.
For photographers, the clothing logic matters because the gear logic matters even more. Safari operators and travel publications consistently recommend soft-sided luggage, high-SPF sunscreen, insect repellent, a refillable water bottle, and proper travel documents, including a passport with at least 6 months' validity and empty pages Collette safari packing list. One detailed packing guide also advises bringing cash in US dollars, and sometimes Euros and local currency, since tips and rural lodge purchases often depend on small denominations Collette safari packing list. The point is simple. Safari work rewards the photographer who packs for continuity, not the one who hopes the camp generator, the weather, or the airport counter will make up the difference.
Professional Camera Body and Backup
A safari assignment can look calm from the outside, then turn rough in a few minutes. Dust gets into zippers, heat drains batteries faster than expected, and vehicles keep moving when you still need the shot. That is why a single-camera setup is too risky for client work. If a shutter problem, card failure, or sensor issue shows up in the field, the job does not wait for a repair bench.
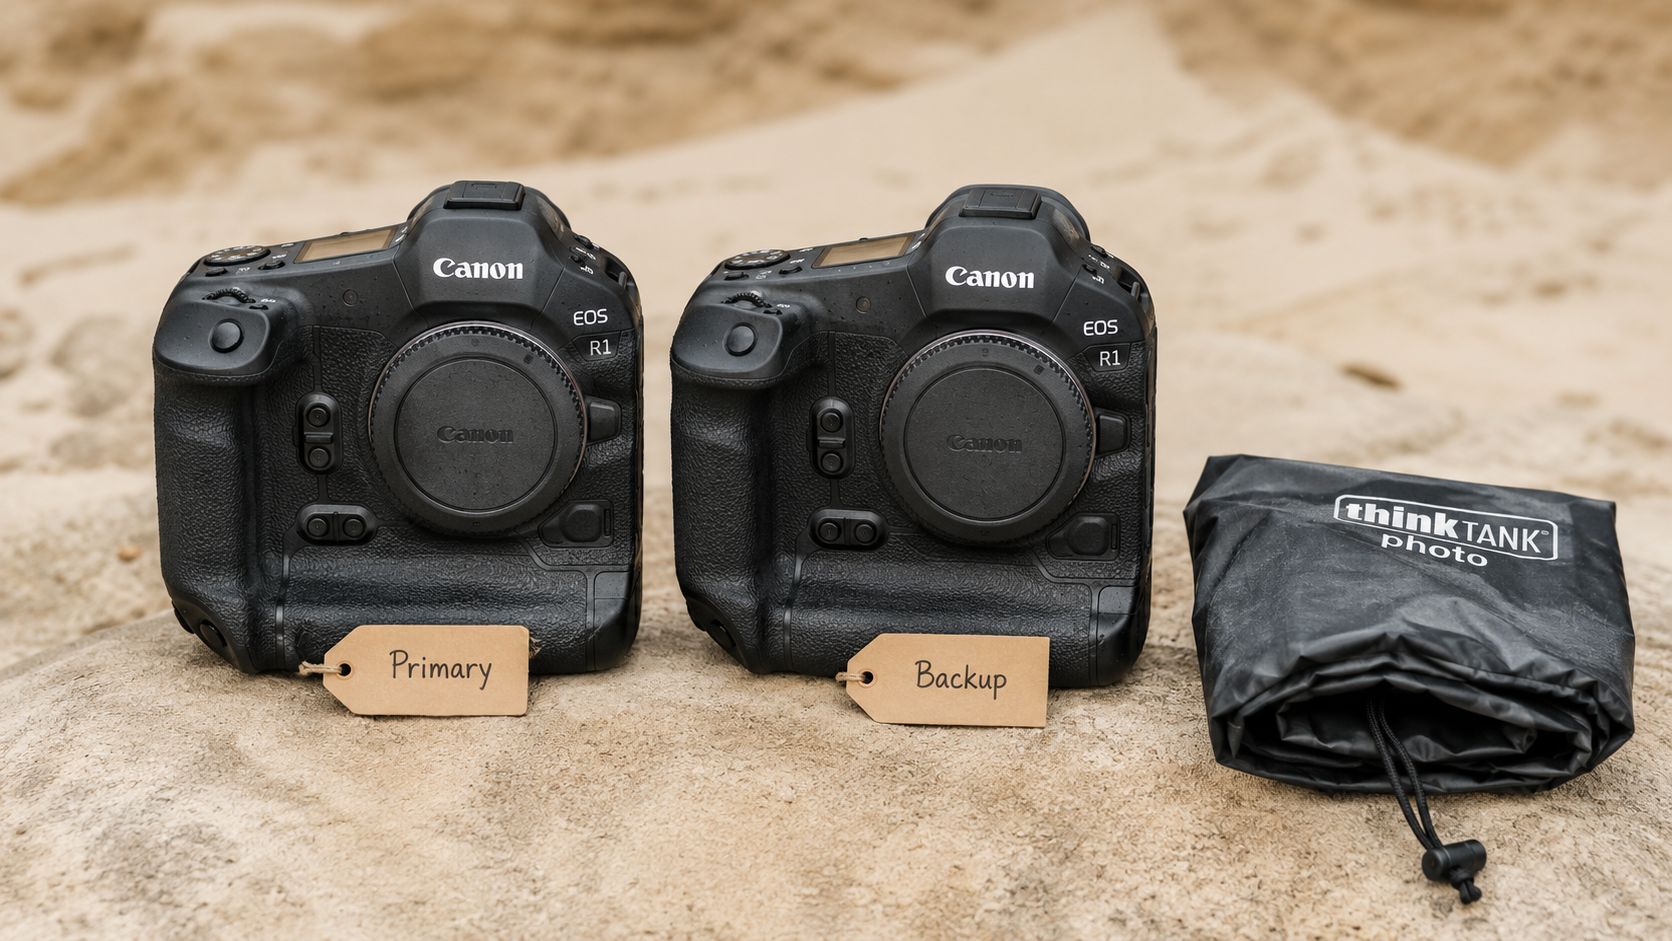
A weather-sealed full-frame DSLR or mirrorless body is the right baseline, and the usual pro choices fit the environment well. Canon EOS R5, Nikon Z9, and Sony A1 are all sensible examples because they are built for demanding field use, but the key decision is consistency across bodies. If a client expects fast delivery and clean files, both cameras should respond the same way under pressure. For photographers who already know the value of backup gear from assignments in other fields, including real estate photography gear, the principle is the same. The job depends on redundancy, not hope.
Redundancy beats optimism
Professionals who photograph high-end editorial and brand clients do not carry backup bodies as a luxury. They carry them because the cost of a failed body is a missed cover image, a broken sequence, or a reshoot that may never happen. Keep the backup body in a different case from the primary, and test both before departure so your menu settings, autofocus behavior, and exposure habits line up.
Practical rule: register both bodies with the manufacturer before you travel, then keep the support contact details in your phone and in your kit bag. Remote service access matters more when you are several transfers away from a city repair center.
A strong habit is to assign roles. One body handles the long lens, the other stays ready with a shorter zoom or prime. That setup cuts lens swaps, protects the sensor from dust, and lets you react faster when animal behavior changes. For a photographer documenting architecture, hospitality, or conservation stories on the same trip, that split is the difference between moving deliberately and constantly reconfiguring.
High-Quality Zoom and Prime Lenses
Safari lens choice is really about range management. You need reach for wildlife moments, flexibility for environmental storytelling, and a fast option for interiors, guest suites, and lodge details. A kit built around a 24-70mm, a 70-200mm, and a 35mm prime covers most professional safari scenarios without turning your bag into a parts warehouse.
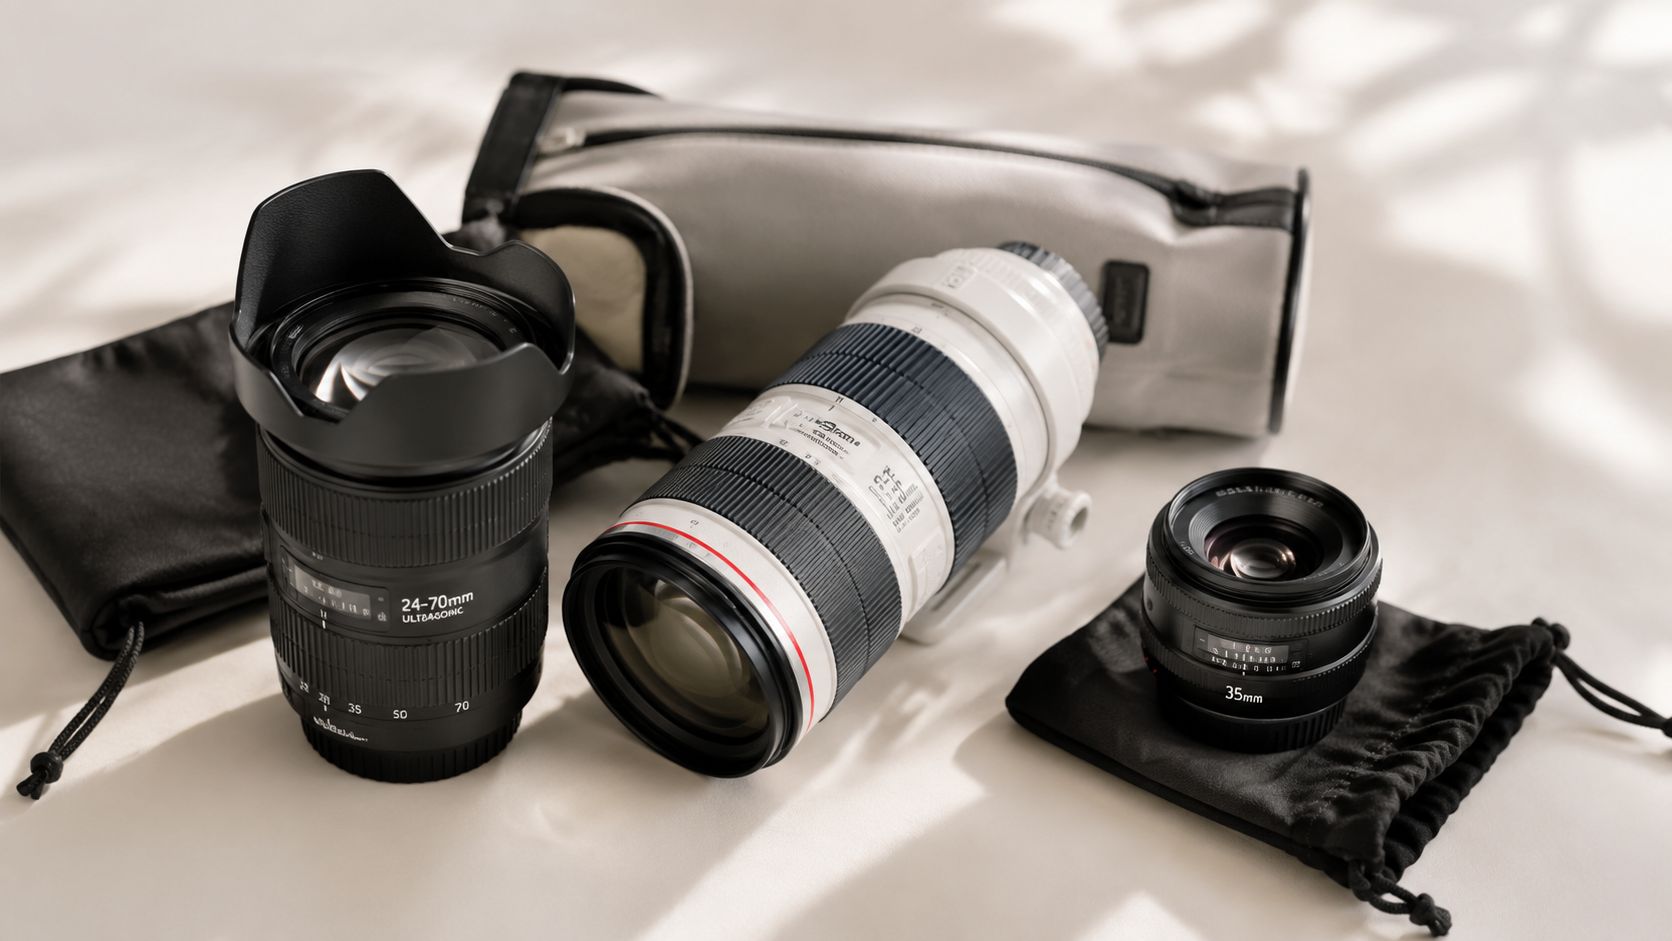
A fast f/2.8 zoom earns its place immediately. The 24-70mm is ideal for interiors, scene-setting frames, and portraits in lodge spaces. The 70-200mm brings compression and reach for animals across waterholes or distant ridgelines. A 35mm prime gives you cleaner low-light work when you're in a tented camp, a dark dining area, or a lodge room where flash would feel intrusive.
Change lenses less often than you think
Dust is the enemy of speed. The less you open the camera, the less contamination you invite into the body and onto the rear element. That's why many seasoned photographers keep one body mounted with the long zoom and the other with the standard zoom or prime. It's not glamorous, but it's efficient, and efficiency usually wins at first light.
Pack each lens in its own pouch, with front and rear caps on. Use a blower before wiping, and use UV protection if you prefer a sacrificial front layer for the lens element. A proper cleaning routine matters because safari dust isn't just cosmetic, it can slow you down when the day is moving fast.
The best safari lens is the one that's already on the camera when the moment breaks.
For editorial and architectural coverage, the 35mm prime becomes especially valuable inside lodges and private villas, where natural light may be weak and the client wants a clean, believable look. For a photographer like Jimmy Clemmons, who works with built environments and design-forward spaces, that focal length gives you a disciplined way to document texture, shape, and atmosphere without distorting the room.
Sturdy, Lightweight Tripod with Ball Head
A tripod is still one of the most underrated pieces of safari kit, especially for photographers who shoot interiors, exteriors, and brand visuals on the same itinerary. It sharpens architectural frames, steadies long-lens compositions, and makes self-timed client portraits far less awkward. If you're moving between vehicles, bush paths, and lodge decks, carbon fiber is the sensible compromise between strength and carry weight.
The best tripod is the one you'll deploy quickly. Gitzo Systematic systems, Really Right Stuff setups, Manfrotto 055 series tripods with Arca-Swiss compatible heads, and the Peak Design Travel Tripod all solve the same problem in slightly different ways. The test is whether the locks are intuitive, the ball head holds precisely, and the kit feels stable on uneven ground.
Use the tripod for more than landscape work
Safari photographers often think of tripods as sunrise tools only. That leaves value on the table. A solid support helps in lodge interiors where shutter speeds drop, in late-afternoon architectural frames where you want straight verticals, and in low-light porches where a hand-held shot would soften badly.
Before travel, practice setup in your studio or at home. Know how the legs open, how the ball head levels, and how fast you can go from carry mode to ready mode. Add a remote shutter release or use the timer function so camera shake doesn't ruin a sharp frame.
Field habit: keep the tripod in a padded case, because a damaged ball head is harder to ignore than a scratched leg.
If your assignment includes hiking between properties or moving through cramped interiors, a monopod can be a smart secondary support. It's not a replacement for the tripod, but it can save a shot when space is tight and the light isn't generous.
ND and Polarizing Filters with Professional Filter Case
On safari, the light decides fast. A polarizing filter cuts glare on water, glass, and polished surfaces, while ND filters give you control over shutter speed when you want to hold detail in bright conditions or blur motion in a waterfall, fountain, or reflective scene. For architectural and hospitality work, that control separates polished editorial frames from flat documentation.
If you work with multiple lenses, carry multiple polarizers in different sizes so you are not improvising at the vehicle door. Multi-coated glass from brands like B+W, Hoya NiPro HD, Tiffen, or Lee earns its place because it holds contrast better and reduces the kind of flare that can weaken a client's final selects. The case matters too. Dust on a filter is still dust, even before it reaches the lens, so the filter system needs the same protection discipline you would give a body or prime lens.
Match the filter to the situation
A circular polarizer is the most useful everyday choice when you are fighting reflections on vehicle glass, lodge windows, or polished surfaces. ND filters matter more when you want to slow the shutter for a creative effect, or when you are balancing a bright exterior against a darker foreground. A variable neutral density filter can be useful for travel kits that need flexibility, and I break down the trade-offs in my variable neutral density filter review. Test filter combinations before you leave, because some stacks introduce color shifts that are tedious to correct under deadline.
Practical rule: if you know a scene will involve reflective glass or bright water, mount the polarizer before the vehicle leaves camp.
For photographers documenting premium interiors, a clean filter workflow matters because every surface in the frame becomes part of the story. A smudged filter shows up quickly in a polished lobby, a suite window, or a reflective countertop. Keep the filter case within reach, not buried under chargers and cables.
Professional Lighting Kit
Safari light is rarely gentle. Midday sun can crush detail outdoors, while lodge interiors often need controlled fill to keep skin tones and wood finishes from going muddy. A compact lighting kit with strobes, triggers, and simple modifiers lets you shape the scene instead of chasing it.
The kit doesn't have to be huge, but it does need to be reliable. Canon 600EX-RT units, Nikon SB-5000 flashes, Godox LED panels, or a more advanced strobe setup all serve the same professional purpose, which is consistency. Wireless triggers matter because time is short, assistants are sometimes absent, and you may need to move fast from one room to another.
A short video reference can help if you're refreshing flash placement before departure.
Keep the lighting simple enough to deploy fast
You don't want a safari kit that takes so long to build that you miss the natural light window. Bring high-capacity rechargeable batteries, a stable stand setup, and a soft modifier or diffusion panel that can travel without damage. Sandbags are ideal where wind is an issue, but even a second set of hands can keep a stand from tipping.
Place key light at a 45-degree angle when you need shape in portraits or interior scenes. That gives you dimension without making the light feel overworked. For hospitality assignments, the best look is often controlled and clean rather than dramatic.
Flash should solve a problem, not announce itself.
If your work crosses into branded portraits for staff, managers, or hosts, this kit becomes even more useful. You can keep faces consistent across multiple areas of a property while preserving the atmosphere of the location.
Storage and Backup
Safari image storage is where good assignments are saved from bad surprises. Cards fail, files get corrupted, and camp internet is never something to trust with your best files. A good storage plan means fast media, daily offload, and at least two backup destinations.
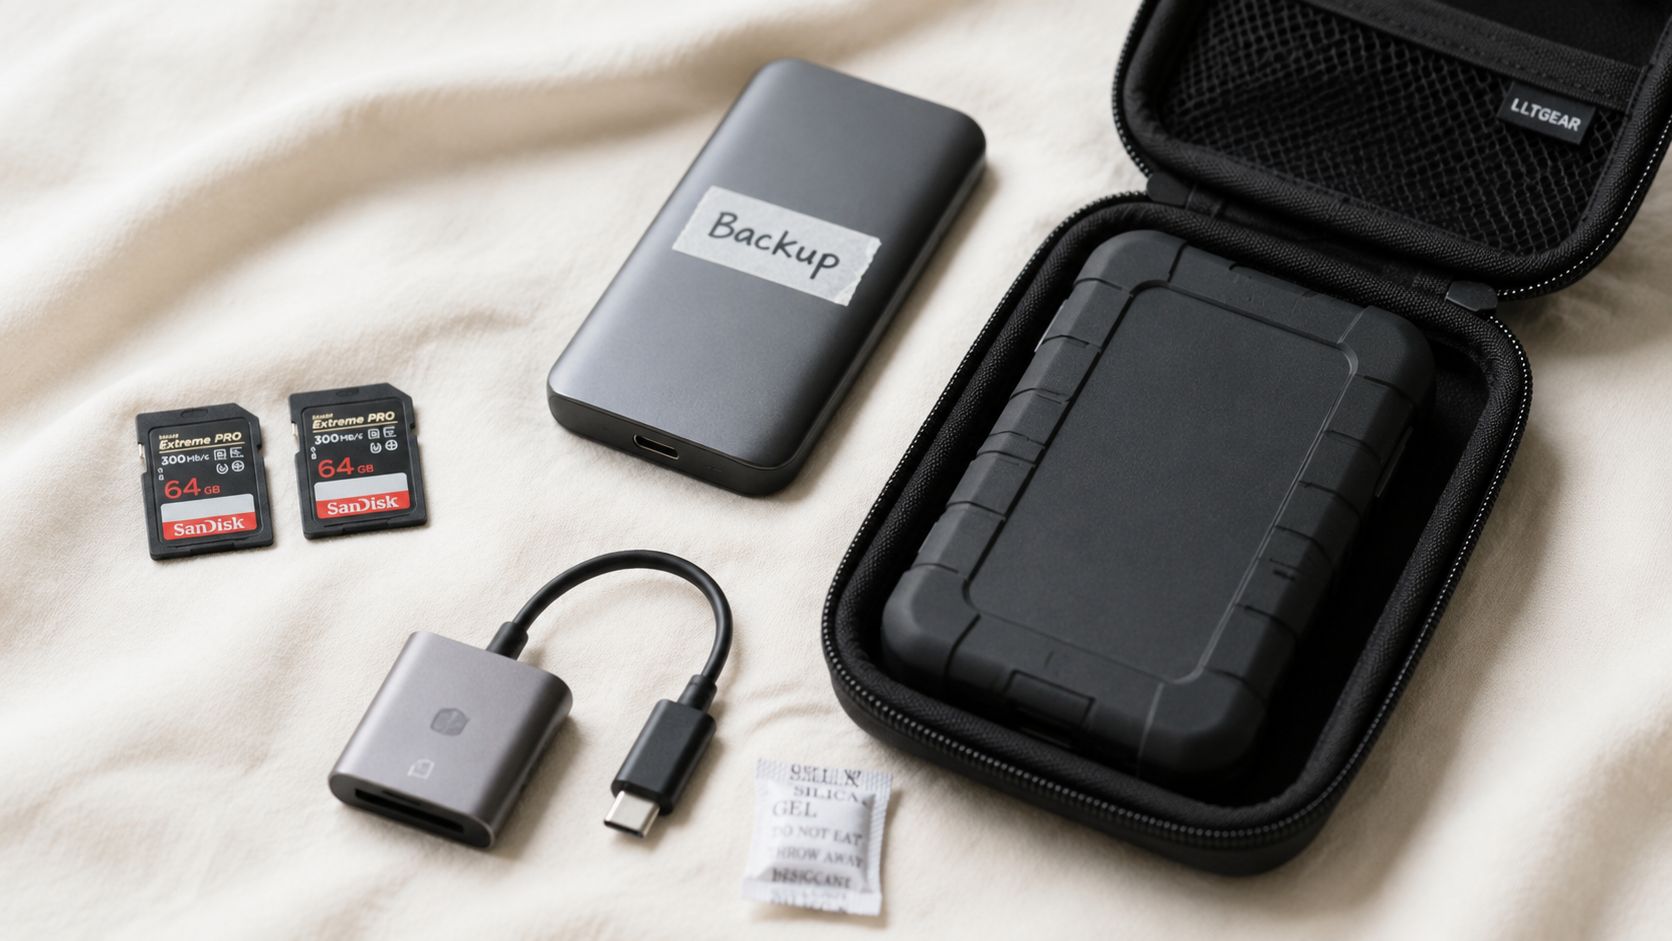
Fast cards like SanDisk Extreme Pro UHS-II or Sony SF-G Tough media are appropriate for burst shooting and 4K video. Add a rugged external drive such as a LaCie Rugged HDD and a portable SSD such as a Samsung T7, then keep both in protective cases. A UHS-II compatible reader is not optional if you want efficient offloads after a long day.
Make the backup process boring
Boring is good here. Card case organization matters, and simple labels like “used” and “unused” reduce mistakes when you're tired. Format cards in-camera before each shoot, not on your laptop, and download files daily to an external drive whenever possible.
Practical rule: back up to the HDD first, then duplicate that to the SSD as your second copy.
If the assignment is long enough, leave one copy on the laptop and another on the drive. That may sound conservative, but safari work is full of small risks, vehicle bumps, humidity, power interruptions, and rushed packing at dawn. The more controlled your file handling, the less likely you are to discover a missing folder when you're already home.
For photographers shooting both stills and video, storage discipline becomes even more important because file sizes climb fast. The solution isn't more optimism. It's more cards, more offload time, and a media case that keeps the workflow clean.
Complete Lens Cleaning System
Dust is constant on safari. It gets on the lens barrel, the front element, the camera body, the tripod, and your hands. If you're photographing wildlife from an open vehicle or making interiors and exteriors all day, a real cleaning system is part of the job, not an afterthought.
A rocket blower is the first tool out of the bag because it removes loose grit without contact. After that, use lens cleaning solution and a microfiber cloth, and keep sensor swabs reserved for moments when cleaning is necessary. Zeiss cleaning kits, Giottos blowers, Visible Dust swabs, and similar professional tools all fit the same purpose, which is protecting image quality and coatings.
Clean at day's end, not after every frame
There's no need to obsess over every speck in the field. Clean too aggressively and you create more risk than the dust itself. End-of-day cleaning is the smarter routine because it clears the build-up before it settles overnight.
Store every lens with caps on when it's not mounted, and rotate clean cloth sections so you're not moving grime from one optic to another. Bring more than one microfiber cloth so one can dry while the other is in use.
A clean front element won't save a weak composition, but a dirty one can absolutely ruin a strong one.
For editorial photographers, the big issue is not just visible smudges. It's the cumulative effect of small marks on repeated client deliveries. You don't want to spend time fixing avoidable flaws when you could be editing for sequence, tone, and story.
Weather-Protective Gear
Weather protection on safari has to handle rain, dust, and sudden humidity shifts. Even in dry season, a camera bag can get exposed to grit in transit, and in greener regions a surprise shower can arrive before you've closed the vehicle door. The right protection strategy uses layers, not a single miracle cover.
A weatherproof bag with sealed zippers, rain sleeves for the body, and dry storage for cards and drives should all be part of the kit. Peak Design, Lowepro, Op/Tech, and Pelican all make sense here because they're built around field durability rather than casual commute use. Silica gel desiccant packs are cheap insurance for electronics at night.
Protect the kit before the weather changes
Don't wait for rain to start before you deploy a cover. Keep one rain sleeve accessible in the day bag and one spare in the main pack if the assignment is remote. If you're moving between open vehicles, boats, or dusty tracks, put the gear away immediately after shooting so contamination doesn't settle while you talk or travel.
Silica gel should stay with the electronics overnight, especially in humid climates. Replace or refresh it regularly if your trip runs long, because moisture control loses value once the packs are saturated.
Field habit: pack the camera into the weatherproof bag first, then worry about what else fits around it.
For photographers carrying backup drives and batteries, protection matters as much as access. A rugged bag is only useful if you can still reach the thing you need quickly. Choose a layout that supports fast deployment and clean stowage at the same time.
Power Management System
Power is the assignment's silent dependency. Cameras, strobes, phones, drives, and chargers all need current, and remote safari operations can make charging less predictable than you'd like. A serious photographer travels with enough battery capacity to work through a full day without hoping the room outlet cooperates.
Pack multiple camera batteries, a dedicated multi-battery charger, a portable solar charger if the itinerary moves far from grid access, and an external power bank for emergency use. Canon LP-E6N, Nikon EN-EL15c, Goal Zero solar panels, and Anker PowerCore-style banks are all examples of the kind of redundancy that keeps the assignment alive. Keep batteries in a case so the contacts can't touch metal.
Treat power like a schedule, not a backup plan
Charge everything before departure, because the first day can be too chaotic to depend on a landing-charge routine. Rotate batteries rather than draining one repeatedly, and label them so you can track which ones perform best. That's especially useful on long assignments where one battery may age faster than the others.
Practical rule: use the power bank for emergency device charging, not as your everyday battery reserve.
A solar charger is most useful when the itinerary includes long transit days or camp setups with limited access to outlets. Even then, it should be considered support, not your only plan. The photographer who always has a charged body and a charged phone is the one who gets the shot, confirms the location, and still has enough power to send a proof later.
Professional Editing and Backup Workflow Setup
A laptop turns safari from a capture-only trip into a full production environment. If you can review files, flag gaps, and do preliminary edits on location, you'll return home with fewer surprises and a cleaner handoff. That matters on editorial work, brand shoots, and high-touch client assignments where turnaround time is part of the service.
A lightweight workstation with enough RAM and a fast processor is the baseline, and Adobe Lightroom plus Photoshop cover most field needs. Add a portable monitor, a calibration tool like the DataColor SpyderX Elite, and a USB hub so your drives, monitor, and reader can all connect without a cable mess. For a photographer whose work includes architectural and commercial imagery, this setup helps preserve color discipline and file order.
Edit for review, not perfection
Safari editing on site should focus on clarity, selection, and continuity. Build Lightroom Collections by location or session, then create a simple flagging process so you know what's been reviewed. If the client has a brand look, build or load presets before departure so your test edits match the final aesthetic more closely.
You should also keep catalog files backed up daily, just like image files. Losing your edit history after several days in the field is avoidable, and it creates noise you don't need at the end of a demanding assignment.
Practical rule: install the editing software you'll use before you leave, and test it with the external drive you'll actually travel with.
For work that needs to impress design teams, editors, or brand leads, on-location review is valuable because it reveals missing angles early. That saves time later, and it gives you a better chance of delivering a set that feels complete rather than merely adequate.
Top 10 Safari Photography Gear Comparison
| Item | Core features | Quality (★) | Price / Value (💰) | Target (👥) | Unique / USP (✨🏆) |
|---|---|---|---|---|---|
| Professional Camera Body & Backup | Weather‑sealed full‑frame, dual card slots, fast AF, high res | ★★★★★ | 💰 Very high, $3k–6k / body; redundancy cost | 👥 Editorial, commercial & architectural pros | ✨ Redundancy & ruggedness for remote shoots · 🏆 Editorial metering & reliability |
| High‑Quality Zoom & Prime Lenses (24‑70, 70‑200, 35mm) | Constant f/2.8 zooms, 35mm prime, VR/OIS, sealed design | ★★★★★ | 💰 High, $1.5k–3k per pro lens | 👥 Versatile brand, portrait & architecture shooters | ✨ Wide focal coverage reduces lens swaps · 🏆 Publication‑grade optics |
| Sturdy, Lightweight Tripod with Ball Head | Carbon fiber legs, Arca‑Swiss ball head, quick‑release, <24" folded | ★★★★☆ | 💰 Mid‑High, $800–2k | 👥 Architectural & location photographers | ✨ Fast precise framing, low weight for travel · 🏆 Consistent sharpness |
| ND & Polarizing Filters + Case | Variable ND (3–10 stops), circular polarizer, multi‑coated glass, case | ★★★★☆ | 💰 Low‑Mid, $50–500 | 👥 Exterior/landscape & architectural shooters | ✨ Control glare & exposures in harsh sun · 🏆 Preserve color fidelity for editorial |
| Professional Lighting Kit (Strobes, Triggers, Modifiers) | Wireless strobes, softboxes, HSS, stands & sandbags, reliable triggers | ★★★★☆ | 💰 Mid‑High, $800–2k+ | 👥 Commercial, hospitality & portrait work | ✨ Off‑camera shaping for interiors & portraits · 🏆 Consistent brand lighting |
| Storage & Backup (Cards, HDD, SSD) | UHS‑II cards, V60/V90, external HDD (2–4TB) + SSD (500GB–1TB), USB‑C | ★★★★★ | 💰 Mid, $200–800 | 👥 All pro shooters on multi‑day assignments | ✨ Fast offload + 3‑2‑1 redundancy · 🏆 Protects against data loss |
| Complete Lens Cleaning System | Rocket blower, cleaning solution, microfiber, sensor swabs, case | ★★★★☆ | 💰 Low, $20–100 | 👥 Field & safari photographers | ✨ Prevents dust artifacts & scratches · 🏆 Maintains editorial sharpness |
| Weather‑Protective Gear (Rain Cover, Bag, Dust) | Weatherproof bags, rain sleeves, silica gel, dry cases | ★★★★☆ | 💰 Mid, $100–800 | 👥 Remote/location & expedition pros | ✨ Multi‑layer protection vs dust & moisture · 🏆 Keeps gear operational |
| Power Management System (Batteries, Solar, Power Bank) | 4–6 high‑cap batteries, dual charger, solar panel (40W+), 20k mAh bank | ★★★★☆ | 💰 Mid, $150–600+ | 👥 Remote & multi‑day assignment photographers | ✨ Off‑grid charging resilience · 🏆 Ensures shoot continuity |
| Professional Editing & Backup Workflow (Laptop, SW, Monitor) | Portable workstation, Adobe CC, calibrated monitor, ext HDD integration | ★★★★☆ | 💰 High, $3k–5k+ setup | 👥 Commercial photographers offering on‑site review | ✨ On‑location color‑accurate edits & client review · 🏆 Speeds turnaround / reduces backlog |
Final Checks Your Assignment-Ready Safari Kit
Packing for a safari assignment is about more than gear; it's about risk management. Every choice in this list supports one of three outcomes: protecting your files, protecting your equipment, or protecting your ability to keep shooting when conditions change. That's the core difference between a travel bag and a working photographer's kit.
The safest safari setup starts with redundancy. Two camera bodies reduce the chance that a single mechanical problem stops the assignment. A lens kit built around a standard zoom, a telephoto zoom, and a fast prime gives you the flexibility to move from wildlife to lodge interiors without constant swaps. A tripod, filters, and a small lighting kit add control when the scene is too bright, too dark, or too reflective for straight capture.
The next priority is protection. Dust, rain, humidity, and impact are not theoretical risks in safari environments. They're normal parts of the workflow. Weatherproof bags, rain covers, silica gel packs, and a serious cleaning system protect the optics and storage devices that hold your deliverables. If you're documenting hospitality, architecture, or branded spaces, that protection matters just as much as the creative choices.
The final priority is power and file discipline. A dead battery or a lost card can erase a day that you can't repeat. Multiple batteries, a solar charger, a power bank, daily backups, and a clean editing workflow keep the assignment moving. A professional photographer on safari doesn't just shoot well. They manage the trip so the files survive the trip.
This is also where the broader safari logistics still matter. Travel guides consistently emphasize soft-sided luggage, passport and visa documents, vaccination records when required, and practical items like sunscreen, insect repellent, and a refillable water bottle Collette safari packing list. Packing for a safari is never only about photography. It's about staying compliant, healthy, and ready to work when the vehicle doors open and the light is right.
Before you fly, run one last check on every battery, every memory card, every lens cap, and every backup drive. If the kit is organized, protected, and charged, you're ready to move with confidence and stay focused on the frame in front of you.
If you want safari imagery that feels polished, intentional, and ready for client use, Jimmy Clemmons Photographer brings the same editorial discipline to architecture, commercial spaces, and branded environments. Visit Jimmy Clemmons Photographer to see how that level of precision translates into visuals that hold up under pressure.