

The first time I walked up on Georgia Southern's engineering complex, the thing that stood out wasn't a grand front door. It was the way the older academic building and the newer research facility behaved like two different jobs on the same campus. One gives you compact, repeatable interiors. The other gives you a bigger, more assertive frame to work with.
Stepping Onto the Statesboro Campus
The georgia southern engineering building complex doesn't read like a single object from a photographer's point of view, it reads like a paired location with two separate rhythms. That matters before the camera even comes out of the bag, because you're choosing between a campus asset that feels established and another that feels purpose-built for modern engineering visibility. Georgia Southern's original Engineering Building was dedicated in 1995 and is a two-story, 80,868-square-foot facility that houses Civil Engineering & Construction and Mechanical Engineering, while the Engineering and Research Building opened on January 8, 2021 as a roughly 135,000-square-foot, $60 million facility that centralizes programs that had been spread across three buildings. Georgia Southern's CEC facilities page and the building completion report give you the hard facts, but the practical read is simpler. The older building is for texture, the newer one is for scale.
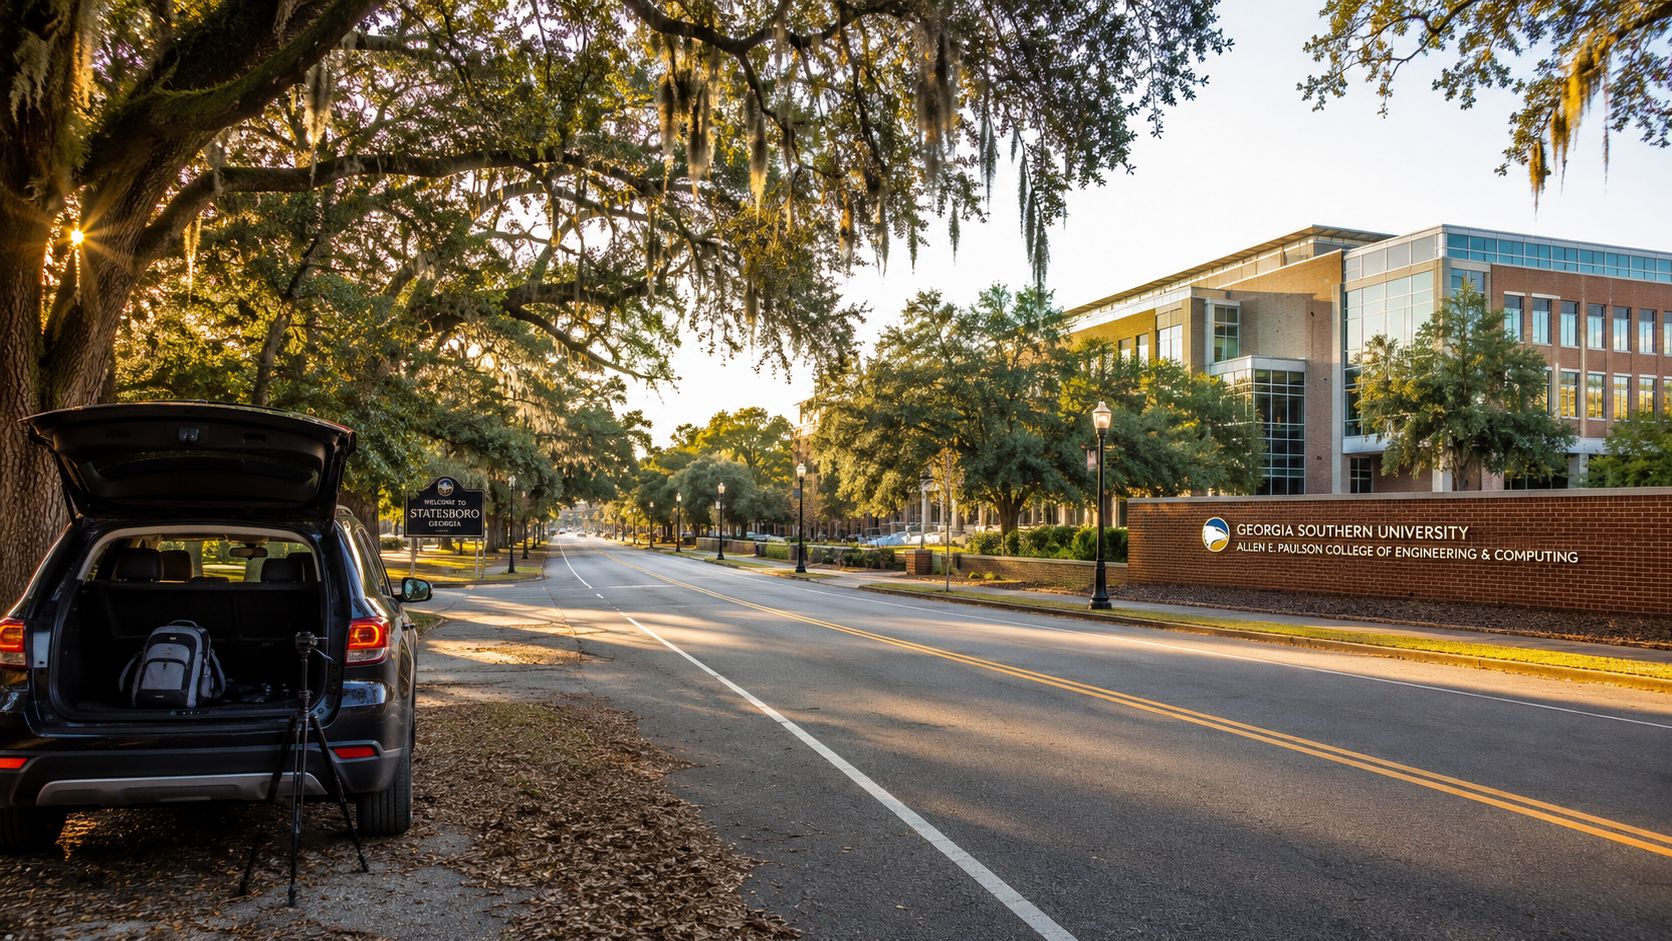
What you notice first on arrival
You rarely get a clean, postcard-style reveal on a campus like this. What you do get is a working environment, moving students, faculty, and visitors, plus a building pair that's honest about what it is. That's good news for a photographer, because it means the architecture can be shot as infrastructure, not just as a brochure object.
The first pass should be about orientation, not hero frames. Look for the building massing, where the long faces hold light, and where the campus circulation naturally pushes people. On a project like this, the best images usually come from understanding how the complex is used, then choosing angles that respect that use instead of fighting it.
Practical rule: treat the campus approach like a scouting session, not a shoot. The best exterior frame is usually the one that explains where people enter, where they pause, and how the building sits in relation to its neighbors.
For architects, developers, contractors, and photographers commissioning a campus assignment, that first read changes the shot list. You're not just collecting elevations. You're deciding whether the story is about a long-serving teaching facility, a newer research statement piece, or both in dialogue. That decision shapes everything that follows, from lens choice to whether you lead with intimate interior coverage or a broader exterior sequence.
Reading the Architecture Before You Raise a Camera
The Engineering and Research Building is the one that rewards you most if you understand its spatial logic before setting a tripod. SmithGroup describes it as being organized around a 350-foot-long, two-story-high bay that acts as the project's spatial and structural core, with three levels of academic learning spaces and instructional research labs running parallel to it, and one of southeast Georgia's only ISO Class 7 cleanrooms. SmithGroup's project page tells you enough to plan, but the primary value is what that arrangement means for the frame.
How the bay changes your composition
A long bay gives you clean sightlines if you can keep your camera position disciplined. It also punishes lazy framing, because every line is visible and every vertical tilt gets obvious fast. The best use of a wide lens here is not to exaggerate space for the sake of drama. It's to show depth without collapsing the structure into a gimmick.
The parallel academic wings ask for a different approach. These spaces are more controlled, and they tend to work better with compositions that hold onto relationship, a corridor view, a stair detail, a bridge, a lab threshold. In other words, the building gives you a wide-gesture story in the bay and a human-scale story in the wings. That's useful, because it lets you build a sequence instead of chasing one oversized “master shot.”
Why the cleanroom matters visually
The ISO Class 7 cleanroom is not just a technical footnote. It tells you to expect a space where finishes, control, and cleanliness are part of the visual language. That usually means your exposure has to be more deliberate, because reflective surfaces, bright overheads, and contamination-sensitive interiors don't forgive sloppy handling.
A cleanroom also earns its place in a portfolio by behaving differently from a standard lab. It suggests precision, discipline, and specialized work, which is exactly what campus engineering clients usually want to communicate. If you're shooting for an architect or a development team, that kind of room gives you a detail series, glove-level documentation, and a set of images that feel earned rather than decorative.
Keep the camera honest in the long bay. If the verticals lean, the whole building feels softer than it really is.
Two Buildings, Two Different Shoot Personalities
The older Engineering Building and the newer Engineering and Research Building ask for different shooting decisions from the start. The 1995 building is the more compact subject, with 8 classrooms, 19 laboratories, 40 faculty offices, 4 administrative suites, 3 conference rooms, and 3 staff offices inside its 80,868-square-foot shell. The facilities page at Georgia Southern's facilities page gives the room count, but the true value for a photographer is how that density changes the frame. Tight circulation, repeated doorways, and a steady corridor rhythm support sequences that feel measured and close to the work.
The newer building plays a different role on camera. It was announced as a $60 million project, opened in 2021, and brings about 2,000 engineering students into one place after programs that had been spread across three buildings. BDC Network's report captures the basic project details, and the shoot takeaway is simple. This building gives you room to back up, work wider, and let massing and depth do more of the visual work.
What the older building gives a camera
The 1995 facility fits editorial documentation and people-in-place imagery better than a broad architectural hero shot. Faculty doors, lab thresholds, and recurring hallway geometry create a cadence that works well with a 35mm or 50mm approach. It is the kind of place where a photographer can build a story out of workflow, a student carrying a model, an office door left half open, or a corridor repeating until it becomes part of the visual identity.
The practical trade-off is space. You do not get much room to wander, and that is not a flaw. It means you have to commit to cleaner framing, controlled sightlines, and angles that respect the building's tighter scale instead of trying to force it into a monumental read. If you are planning a site shoot and need to choose light first, this guide to choosing the best light for a site shoot is a useful way to think about timing before you ever lift the camera.
What the newer building gives a camera
The 2021 building is more open, more assertive, and easier to read from a distance. The 350-foot bay, the larger footprint, and the specialized research zones give you options for hero exteriors, wide interior frames, and raised viewpoints that show how the building is put together. It also concentrates activity in one place, which helps if the goal is to show a working academic hub rather than a tucked-away department suite.
That wider footprint comes with its own trade-off. The building can look strong in a broad frame, but it also asks for discipline so the image does not flatten into a generic campus exterior. You need to choose angles that keep the spatial core clear, avoid dead frontage, and let the structure feel intentional instead of merely large.
The choice between the two depends on the brief. If the client wants warmth, craft, and proximity to teaching life, the original building usually serves that better. If the job calls for modernity, scale, and a more direct architectural statement, the newer facility should lead.
| Shoot goal | Better lead building | Why it works |
|---|---|---|
| Human-scale academic detail | Original Engineering Building | Tighter rooms and repeatable corridors support close framing |
| Exterior statement image | Engineering and Research Building | Bigger massing and a stronger spatial core support wider compositions |
| Lab and research narrative | Engineering and Research Building | Specialized spaces read as contemporary and technical |
| Faculty and teaching life | Original Engineering Building | Offices and classrooms feel more intimate |
Lenses, Lighting Windows, and How to Expose the Building
The building tells you what focal lengths to bring if you're paying attention. The long bay in the newer facility wants a wide lens, often around 24mm, when the point is to hold the length of the space without clipping the spatial core. When you move into faculty offices, conference rooms, and tighter support zones, a 35mm or 50mm gives you a more truthful working distance and keeps the frame from feeling stretched. For parallel lines in taller interior spaces, a tilt-shift is worth the carry if you're being paid for architectural control rather than casual documentation.
Let one light source lead each frame
The easiest way to lose a campus shoot is to let daylight and fixture light compete. Interior engineering spaces often mix daylight from glazing with LED ceiling fixtures, and that's where color balance starts to drift. Pick the dominant source first, then expose around it instead of trying to make every source equal in one frame.
A simple rule works: if the window light is the story, let the fixtures fall back. If the room is built around the interior lighting, wait until the daylight is weaker or shape it so it doesn't take over the scene. That's especially important in spaces with reflective floors, glass, and polished surfaces, where metering can swing faster than expected.
Time the long elevations with intent
The long exterior faces of the building reward side light more than flat front light. Morning and afternoon give you better shadow definition, which is useful when the goal is to show volume and depth instead of just a façade record. The newer building's scale also benefits from some distance, so don't rush to a close frame unless the detail itself is the subject.
The cleanroom and rooftop renewable-energy lab should be treated as set-pieces, not afterthoughts. Those spaces usually need a separate lighting plan, cleaner camera positions, and more time for reflections, specular highlights, and equipment placement. Existing light alone often isn't enough if you're trying to make them look like part of a polished portfolio.
For a practical light-selection mindset, this guide pairs well with choosing the best light for a site shoot, especially if you're deciding what to prioritize before the first setup.
Exposure advice: pre-scout the brightest patch in the room and the darkest one you can't afford to lose. If the range feels hostile, change the angle before you change the camera settings.
Getting There, Parking, and First-Time Wayfinding
The most concrete public location data for the engineering department is the physical address, Engineering Building, Room 1120A, 201 COBA Drive, BLDG 232, Statesboro, GA 30458. Georgia Southern's civil engineering page lists that address, but it doesn't publish detailed public guidance on parking, accessible entries, or visitor wayfinding on the same page. The department page is useful because it confirms the destination, and also because it shows the information gap you need to plan around.
What that gap means in practice
If you're arriving with a cart, lighting kit, or a client in tow, don't assume the campus will explain itself at curbside. You'll want confirmation on parking, the correct entrance, and where to check in before you roll in. That's not overcautious, it's normal campus logistics.
The smartest move is to treat the first arrival like a controlled delivery. Confirm the room number, ask where a visitor should stop first, and get clarity on how to reach the department office without wandering through academic space with gear. If you're bringing large cases or stands, ask whether there's a level route from parking to the entry so you're not carrying weight up the wrong path.
What to verify before you leave
- Exact arrival point: confirm whether the department wants visitors to enter through the main engineering building access point or a different campus-facing door.
- Parking location: ask which lot is acceptable for short-term visitor parking and whether any spaces are reserved or restricted.
- Accessible entry: verify the door that works best for anyone who needs step-free access.
- Check-in location: write down the room number and the name of the person expecting you.
- Gear movement: ask whether carts can move freely through the route you'll use, especially if you're arriving early or after hours.
If your assignment depends on a smooth first ten minutes, confirm all of that by phone or email before the shoot day. Campus buildings often look more obvious on a map than they are in person.
Permits, Permissions, and Who to Call First
A university shoot usually lives or dies on coordination, not camera skill. The building itself may be open for business, but that doesn't mean every space is fair game for tripods, lighting stands, or extended setup time. For any image-making that goes beyond a quick walk-through, start by asking the department what access they can authorize, then find out whether facilities or another campus office needs to approve exterior positioning, roof-adjacent work, or anything that affects circulation.
Build the permission stack in the right order
Start with the academic contact for the engineering building, because they know the space, the schedule, and which rooms matter. If your shot list includes exteriors, utility edges, or anything beyond the department's direct control, loop in the relevant campus operations contact next. If you're planning anything that could affect foot traffic, lighting, or public safety, ask who handles those decisions before you arrive.
That sequence matters because it keeps you from asking the wrong office to solve the wrong problem. A department can often open doors, but it may not be the office that clears every part of the site. The more your shoot affects normal campus function, the more careful that chain needs to be.
For image rights and release language, keep architectural image rights and licensing close at hand before you publish or hand off a final gallery.
Keep the shoot respectful of the building's daily use
The best campus crews move lightly. That means floor protection where needed, gear wrap that doesn't scratch finishes, and a schedule that avoids class change chaos whenever possible. If a lab is in session or a corridor is busy, you'll get better work by waiting five minutes than by forcing the room.
Don't treat a campus like an empty set. You'll make better pictures if you protect the route, the floor, and the people using the space.
A solid first email usually asks for access, confirms the intended dates, identifies the spaces you want, and states whether tripods, portable lighting, or assistant carry-in will be part of the day. Keep it direct and specific. University staff can answer a precise request faster than a vague creative brief.
Your Pre-Shoot Checklist Before Driving to Statesboro
The engineering complex is easiest to shoot when the logistics are settled before the car leaves the driveway. If you keep one thing in mind, keep this, the original Engineering Building and the Engineering and Research Building ask for different camera plans. The older building rewards tighter framing and a sense of rhythm. The newer building asks for broader views, cleaner sightlines, and more control over exposure.
Shoot Planning Snapshot
| Decision | What to confirm |
|---|---|
| Building focus | Original building for compact academic interiors, newer building for hero exteriors and research spaces |
| Lens kit | Wide lens for the bay, 35mm or 50mm for offices and conference rooms, tilt-shift for critical verticals |
| Light plan | One dominant light source per frame, daylight or fixtures, not both fighting for control |
| Access | Room 1120A check-in, arrival point, parking, and step-free entry route |
| Coordination | Department access, facilities approval if needed, and timing around classes or lab activity |
Start with the engineering address, then map the route to parking, entry, and room-level access. If any part of that chain is unclear, resolve it before you load the car. A campus shoot can lose its first hour to one missing detail, and that usually means fewer usable frames by the end of the day.
Use how to prepare your project site for a professional photoshoot as a field checklist before you build the call sheet. It keeps the planning tied to the actual site, not to a generic template that ignores how a building, a crew, and a campus move together.
When the brief is to document the Georgia Southern engineering building as a working place, not a polished render, the preparation shows in the final set. If you need a crew that understands architectural spacing, controlled lighting, and the pace of a campus assignment, visit Jimmy Clemmons Photographer and bring the shoot to someone who works like a location professional, not a tourist with a camera.