

Long before I even think about unpacking a single light, the most critical decisions have already been made. My entire approach to lighting a space is built on a simple foundation: understanding the location and defining the story we need to tell. A solid plan is always the most powerful tool in my bag.
Setting The Scene Before You Set The Lights
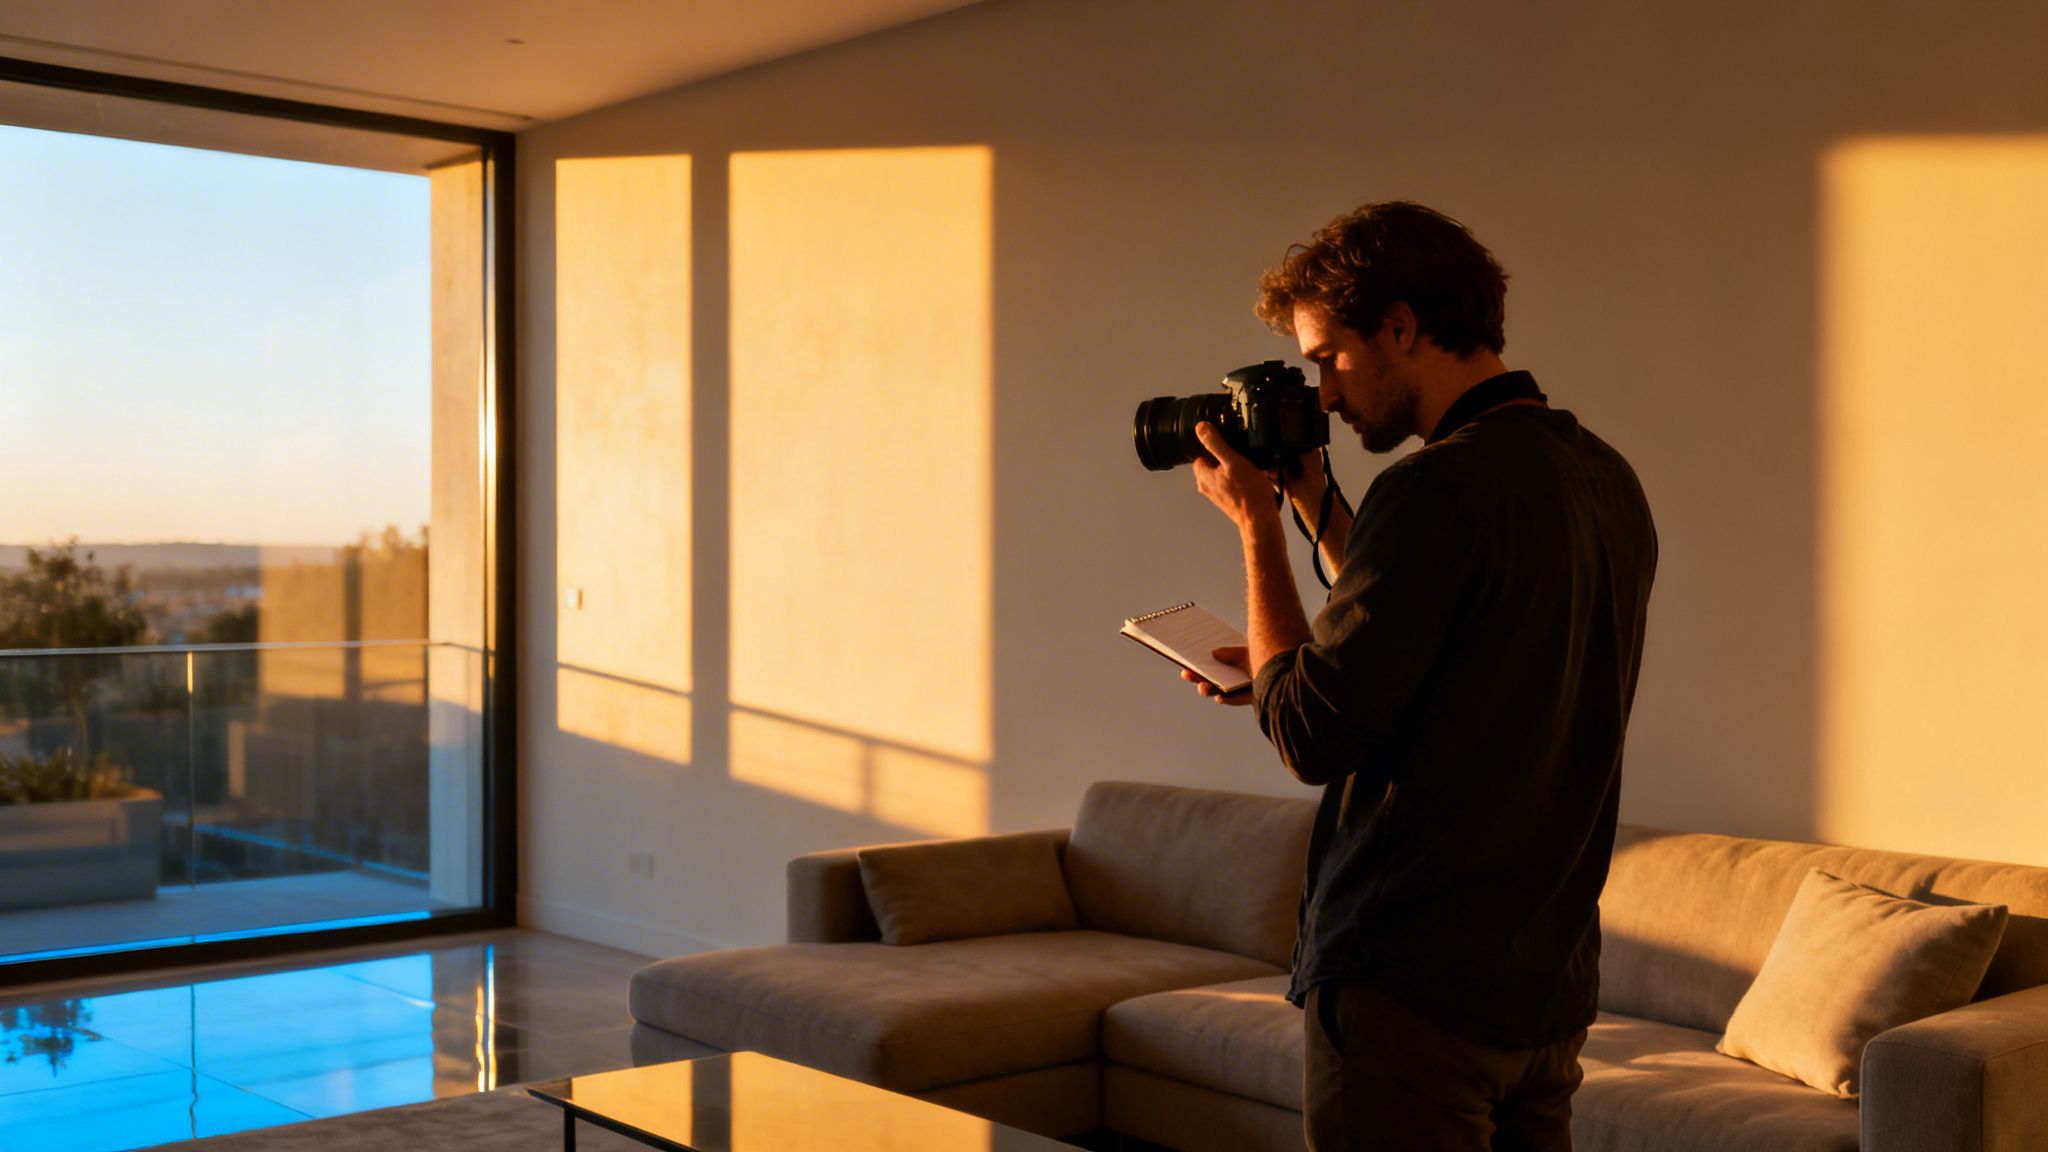
Great architectural photography isn't about overpowering a space with strobes. It's about a thoughtful collaboration with the environment you're walking into. That's why I dedicate so much time to scouting before my camera ever leaves its case. This isn't just a casual walkthrough; it's a deep dive that informs every choice I make on shoot day.
My first order of business is always analyzing the existing light. I need to see how it moves, what color it is, and what quality it has throughout the day. The "golden hour" might create beautiful, soft light, but a corporate office needs to feel alive and active, which means shooting mid-morning under its own cooler, brighter lighting.
It’s about working with what’s there. The architectural lighting market is evolving fast, and most modern builds feature sophisticated, built-in systems. In fact, LED lighting is on track to claim over 38.16% of the market by 2026 because it uses up to 75% less energy than older tech. I see this firsthand on sites all the time. Knowing I can use the building’s own high-quality lighting as a starting point is a huge advantage. You can see more on these trends in this Fortune Business Insights report.
Define the Shoot's Narrative
Every shot I take needs to tell a story. Is the goal to capture the warm, inviting soul of a family home? Or is it to showcase the crisp, modern precision of a new corporate headquarters? This narrative becomes the filter for every lighting decision.
Warm & Inviting: For a residential project, I'm thinking about soft, beautiful light that feels like the sun pouring through a window. I’ll likely use a big softbox to mimic that quality and add warming gels to my strobes so they blend seamlessly with the interior lamps.
Sleek & Modern: In a corporate space, the story is about clean design and sharp execution. Here, I’m reaching for harder, more defined light. I'll probably use grids to create focused pools of light, carving out architectural details and textures.
Anticipate On-Set Challenges
Every location has its own set of puzzles to solve. During the scout, I’m on a mission to find potential problems so I can walk in with solutions, not stress. This is a vital part of the job, which we cover more in our guide on how to prepare your project site for a professional photoshoot.
I always bring a polarizer, gaffer's tape, and black cloth to every shoot. These three simple items can solve 90% of the reflection and light-spill problems you'll encounter on a typical site.
Here are a few common issues I’m always looking for:
Reflective Surfaces: Glass walls, polished floors, and glossy countertops are notorious for creating unwanted reflections of your gear. I make a mental map of these surfaces and plan my lighting positions to keep them out of the camera’s view.
Mixed Color Temperatures: It's the classic scenario: cool fluorescent light from the ceiling, warm tungsten from a desk lamp, and neutral daylight from a window, all in one room. Spotting this early lets me plan how to gel my lights or decide if I need to composite multiple exposures to get a clean, consistent final image.
The last thing I do on a scout is build a mental shot list. As I walk the space, I’m framing up the key compositions in my head and visualizing where my lights will need to go to bring that vision to life. A little pre-visualization on the front end saves an incredible amount of time once the clock is ticking.
Your Professional Lighting Toolkit Decoded

Once your plan is locked in, it's time to build your toolkit. The world of lighting can feel endless, but for architectural work, I've found it boils down to a few key players. Knowing why you’d pick one light over another is what elevates a good shot to a great one.
It’s all about matching the tool to the challenge. My kit is built around this very idea, with each light serving a very distinct purpose on site.
The Powerhouse Strobes
When I need brute force, I grab a strobe. These lights, also known as flashes, give me a massive, instantaneous burst of light that no other portable source can match. This is my non-negotiable for any exterior where I have to overpower the midday sun or paint light across a huge building at dusk.
Their real magic is the sheer output. A single 400-600 watt-second (Ws) strobe becomes my second sun, letting me shape light and create drama even in the harshest daylight. This is how I can underexpose the sky to get those rich, deep blues while keeping the building perfectly lit.
Of course, you can't see the effect until you fire a test shot. It’s a process of shooting, checking, and adjusting, but for that polished, high-impact exterior shot, nothing else comes close.
The Speed and Control of LEDs
For most of my interior work, I’m reaching for an LED panel. These are continuous lights, which means they stay on—what you see is what you get. That makes them incredibly fast and intuitive, a massive advantage when I’m moving through a dozen rooms on a tight schedule.
Modern bi-color LED panels are particularly game-changing. They let me dial in the color temperature to perfectly match the room’s ambient light, whether it’s a warm lamp or cool daylight from a window. This often eliminates the need for gels, which really speeds up the workflow.
Your choice of lighting can make or break a portfolio, especially in the architectural photography market. Today's high-end clients expect color-perfect visuals, and using lights with a high Color Rendering Index is non-negotiable.
The one spec I absolutely never compromise on is the Color Rendering Index (CRI). I won't use an LED with a CRI below 95. When an interior designer has spent months obsessing over a color palette, my photos have to render those colors with perfect accuracy. Anything less would misrepresent their work.
The Heavy Hitter: HMIs
When the job calls for the biggest gun, that's the Hydrargyrum medium-arc iodide, or HMI. These are the titans of continuous lighting, reserved for large-scale commercial jobs or video productions where you need an unbelievable amount of daylight-balanced light. Think lighting up a massive warehouse interior or an entire building facade for video.
While they are incredibly powerful, they come with some serious baggage:
- Power Needs: They are power hogs and almost always need a dedicated generator or a direct tie-in to the building's electrical panel.
- Cost and Size: HMIs are expensive to rent, heavy, and require a bigger crew just to manage them safely.
- Warm-Up Time: They need several minutes to warm up and stabilize their color and output.
For most of my still photography, a powerful strobe is a much more practical and portable solution. But when the shot demands a stunning amount of sustained, daylight-quality light, nothing beats an HMI.
Why High-Quality Light Matters
Investing in your lighting is a direct investment in your final product. With the professional architectural lighting market projected to hit USD 16 billion by 2030, clients expect perfection. Deploying high-CRI 95+ lights isn't just a technical detail; it's a business necessity.
A Color Rendering Index over 90 ensures textures and materials look true-to-life, which is what architects and designers need to see. In fact, some research has shown that high-CRI lighting can improve the perceived luxury of a space by 25% in marketing visuals. You can find more on these market trends from Grand View Research.
To make it simple, here’s a quick breakdown of how these lights stack up. This table should help you decide what to pack for your next shoot.
Strobe vs LED vs HMI A Technical Comparison
| Feature | Strobe (Flash) | LED (Continuous) | HMI (Continuous) |
|---|---|---|---|
| Best For | Overpowering the sun, large exteriors, freezing motion. | Fast interior work, color matching, video interviews. | Large-scale commercial projects, film sets. |
| Power Output | Extremely high burst of power (measured in Ws). | Moderate to high, consistent output. | Extremely high, sustained output. |
| Portability | Excellent, with many battery-powered options. | Excellent, often lightweight and battery-operable. | Poor, requires significant power and support. |
| Color Accuracy (CRI) | Generally excellent and consistent. | Varies; high-end models offer excellent CRI (95+). | Excellent, typically locked to daylight balance. |
| Workflow | "Shoot and check," requires test shots. | "What you see is what you get" (WYSIWYG). | WYSIWYG, but requires setup time. |
Ultimately, your choice comes down to balancing power, portability, and workflow. For me, a mix of battery-powered strobes and high-CRI LEDs covers about 99% of my architectural work.
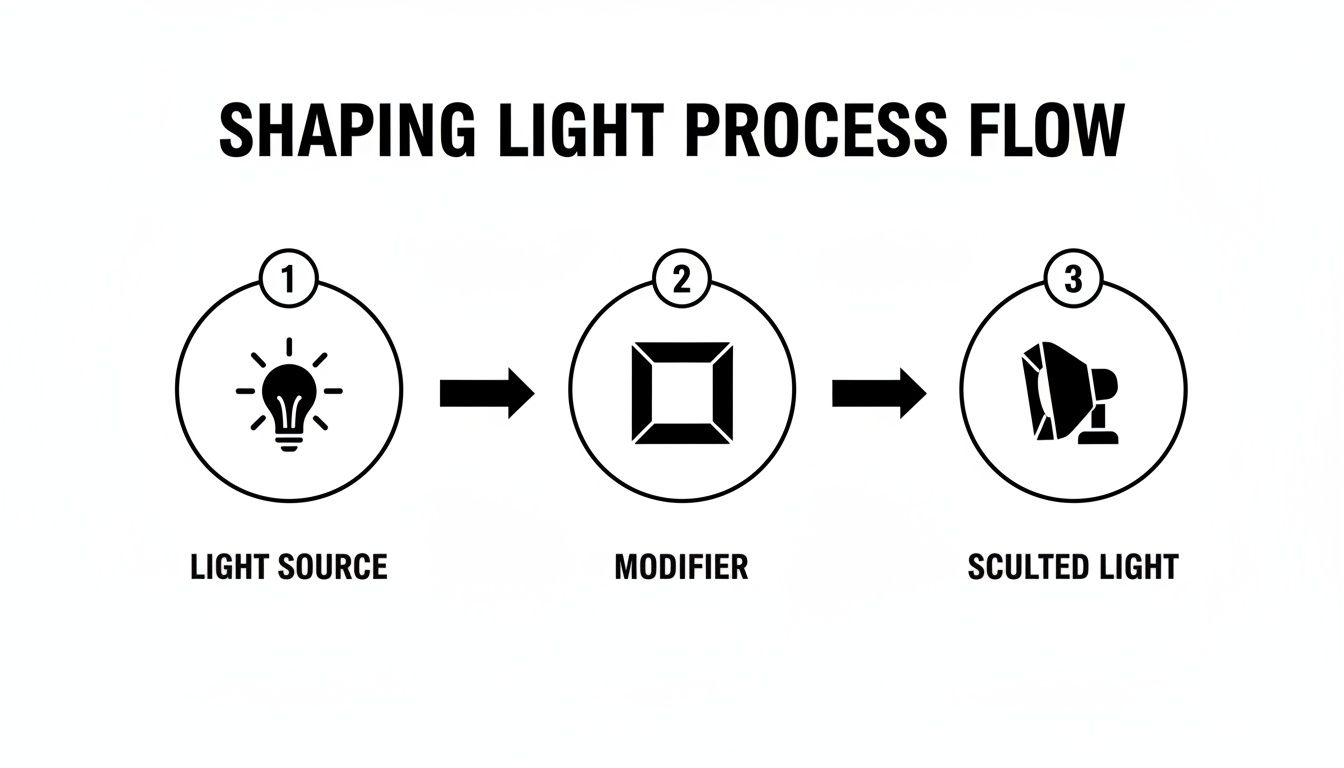
Shaping Light to Sculpt Form and Mood
Getting a light on set is one thing. Knowing how to shape it is where the real work—and the art—begins. A raw strobe or LED is just a blunt instrument, a blast of unfocused light. It’s the modifiers that act as our chisels, allowing us to sculpt, soften, and direct that light to tell a story. This is how we transform a harsh, unappealing beam into a tool for defining form and creating a specific mood.
Every decision, from the type of softbox to its angle, directly impacts how a viewer perceives the space.
This process is really the core of what we do on location. It’s how we guide the eye and make a space feel a certain way, whether it's grand and expansive or intimate and serene.
The Essential Light Modifiers
Over the years, I've curated a go-to kit of modifiers. Each one has a specific job, and I rarely leave for a shoot without these workhorses.
Large Softboxes & Octaboxes: When I need to replicate the feel of soft, beautiful window light, a large softbox is my first choice. The principle is simple: the larger the light source relative to the subject, the softer the light. A five-foot octabox placed just out of frame can make an interior feel as if it's bathed in gentle morning sun.
Gridded Strip Boxes: For a more dramatic and controlled effect, nothing beats a gridded strip box. The grid narrows the beam into a tight, rectangular slash of light. It’s perfect for creating a highlight along a feature wall, accenting the form of a single piece of furniture, or adding a controlled edge light to separate an object from its background.
Umbrellas: These are my broad-stroke tools. A large, white shoot-through umbrella is fantastic for raising the ambient light level across an entire room with soft, widespread coverage. They’re less precise than softboxes but are incredibly fast to set up and break down.
Scrims & Silks: Sometimes the sun is the best light source you have, but it’s just too harsh. A large scrim acts like a portable cloud, diffusing direct sunlight to soften shadows and reduce brutal contrast. It's an absolute lifesaver for taming harsh sunbeams pouring through a window.
It’s amazing what a difference a single modifier can make. Using a softbox with a diffuser can easily reduce the intensity of hard shadows by as much as 60%. This mirrors my own film-honed approach to creating nuanced, believable visuals, a style clients appreciate—one industry report noted that 70% of corporate clients judge an image's trustworthiness based on the subtlety of its lighting. You can see more on industry trends with these insights from Zion Market Research.
Advanced Shaping Techniques
Once you're comfortable with the basics, you can start combining modifiers and using more advanced techniques to build complex, layered lighting. These are the skills that really elevate an image from a simple snapshot to a professional architectural photograph.
The goal is never to eliminate shadows; it's to control them. Shadows create depth, define texture, and guide the viewer's eye. Learning to sculpt shadow is just as important as learning to sculpt light.
One of my favorite techniques is feathering. Instead of pointing the center of my softbox directly at the subject, I’ll aim it slightly past them. This uses the light from the edge of the modifier, which is softer and has a more gradual falloff. The result is a beautiful, gentle wrap of light that feels incredibly natural. It’s a subtle adjustment that makes a massive difference.
Another critical tool in my belt is negative fill—the art of adding shadow. By placing a large black card or piece of fabric opposite my key light, I absorb stray light and prevent it from bouncing back into the shadows. This deepens the contrast and makes textures pop. I use negative fill constantly to chisel out the shape of modern furniture or define the planes of a minimalist interior.
By layering these techniques—a feathered key light, a gridded accent, and a touch of negative fill—you move beyond simply lighting a room. You begin to paint with light, creating a final image that feels polished, intentional, and full of dimension. You can dive deeper into how these principles play out across different projects in my architectural photography portfolio.
Mastering the Mix of Natural and Artificial Light
This is where the real craft of architectural photography comes into play. The most powerful images aren't about blasting a space with strobes; they're a result of a thoughtful blend between the light I bring and the light that’s already there. Nailing this balance is what separates a decent shot from a truly breathtaking one.
Think of it like having two independent dimmer switches for your scene. Your camera settings give you total control over the artificial light from your strobes, and at the same time, separate control over the ambient light of the environment.
Controlling Two Exposures at Once
Once you pop a strobe onto the scene, the old rules of exposure get a powerful new twist. Understanding this separation is the absolute key to blending light sources like a pro.
Shutter speed becomes your ambient light dial. A strobe fires in a flash—a tiny fraction of a second. Because of this, your shutter speed has almost no effect on the flash exposure. It only controls how much of the existing room light or the evening sky you let into the frame.
Aperture and ISO dictate your flash exposure. These two settings directly control how sensitive the sensor is to that brief, powerful burst of light from your strobe.
Once that clicks, everything changes. Your shutter speed is now a tool to paint with the world's light. You can drag the shutter to turn a bright sky into a deep, moody blue or let in just enough ambient glow to keep a room from feeling like a black hole—all without messing up the light on your subject.
My process always starts with the ambient light. I’ll get the camera locked down and dial in a shutter speed that makes the sky or the interior lamps look perfect. Only then do I even turn on a strobe and start building my own light on top of that foundation.
This method isn't about just taking a picture; it’s about building the light in the scene, layer by meticulous layer.
Gelling for a Natural Feel
One of the most obvious signs of a flash-lit photo is a weird color mismatch. A clean, white flash hitting a room full of warm tungsten lamps just looks clinical and wrong. The fix is simple but incredibly effective: color correction gels.
I never go to a shoot without a full set of CTO (Color Temperature Orange) and CTB (Color Temperature Blue) gels. These are just thin, colored plastic sheets that slide over my strobes to perfectly match the color of the ambient light.
Shooting at dusk? As the sun dips below the horizon, the sky takes on a gorgeous, cool blue tone. I'll pop a 1/4 or 1/2 CTB gel onto any strobes lighting the building's exterior. This little trick makes my artificial light blend right in with the twilight for a completely cohesive and believable image.
Capturing a cozy interior? Most homes use warm lighting, somewhere around 2700-3000 Kelvin. To match this, I’ll often put a full CTO gel over my flash. When I get the white balance right in camera, the final shot feels like it was lit entirely by the home's own lamps, even though my strobe was doing the heavy lifting.
A Walkthrough: The Classic Dusk Exterior
Let's walk through a classic scenario: lighting a modern home at twilight.
First things first, the camera goes on a rock-solid tripod and I frame up my composition. My goal is to capture that rich, deep blue of the sky right after sunset, so I’m thinking a slow shutter speed—maybe 1/2 second or even longer—and a clean ISO of 100. I’ll tweak the shutter until the sky looks exactly how I envision it.
With the ambient exposure locked, I’ll bring in my main light, often a battery-powered 400Ws strobe. I might place it just out of frame, angled to "graze" light across the front of the house to bring out its texture. Since my camera's white balance is set for the cool sky, I’ll add that CTB gel to my strobe so its light has the same cool character.
From there, it’s all about refinement. I’ll take a test shot, check my histogram, and dial the flash power up or down until the building is perfectly lit against that dramatic sky. Sometimes, I’ll even take several shots, moving the light to highlight different parts of the property, and then blend them together in post-production to create that one perfect, polished final image.
Real World Lighting Setups for Architectural Shots
Theory is one thing, but seeing it in action is what really makes it click. Let's move from the abstract and break down how I lit a few real-world projects. I want to walk you through my thought process and the specific gear choices I made on site.
Think of every location as its own unique puzzle. Getting a feel for why a certain light or modifier was chosen will build the instinct you need to walk into any space and know exactly how to make it shine.
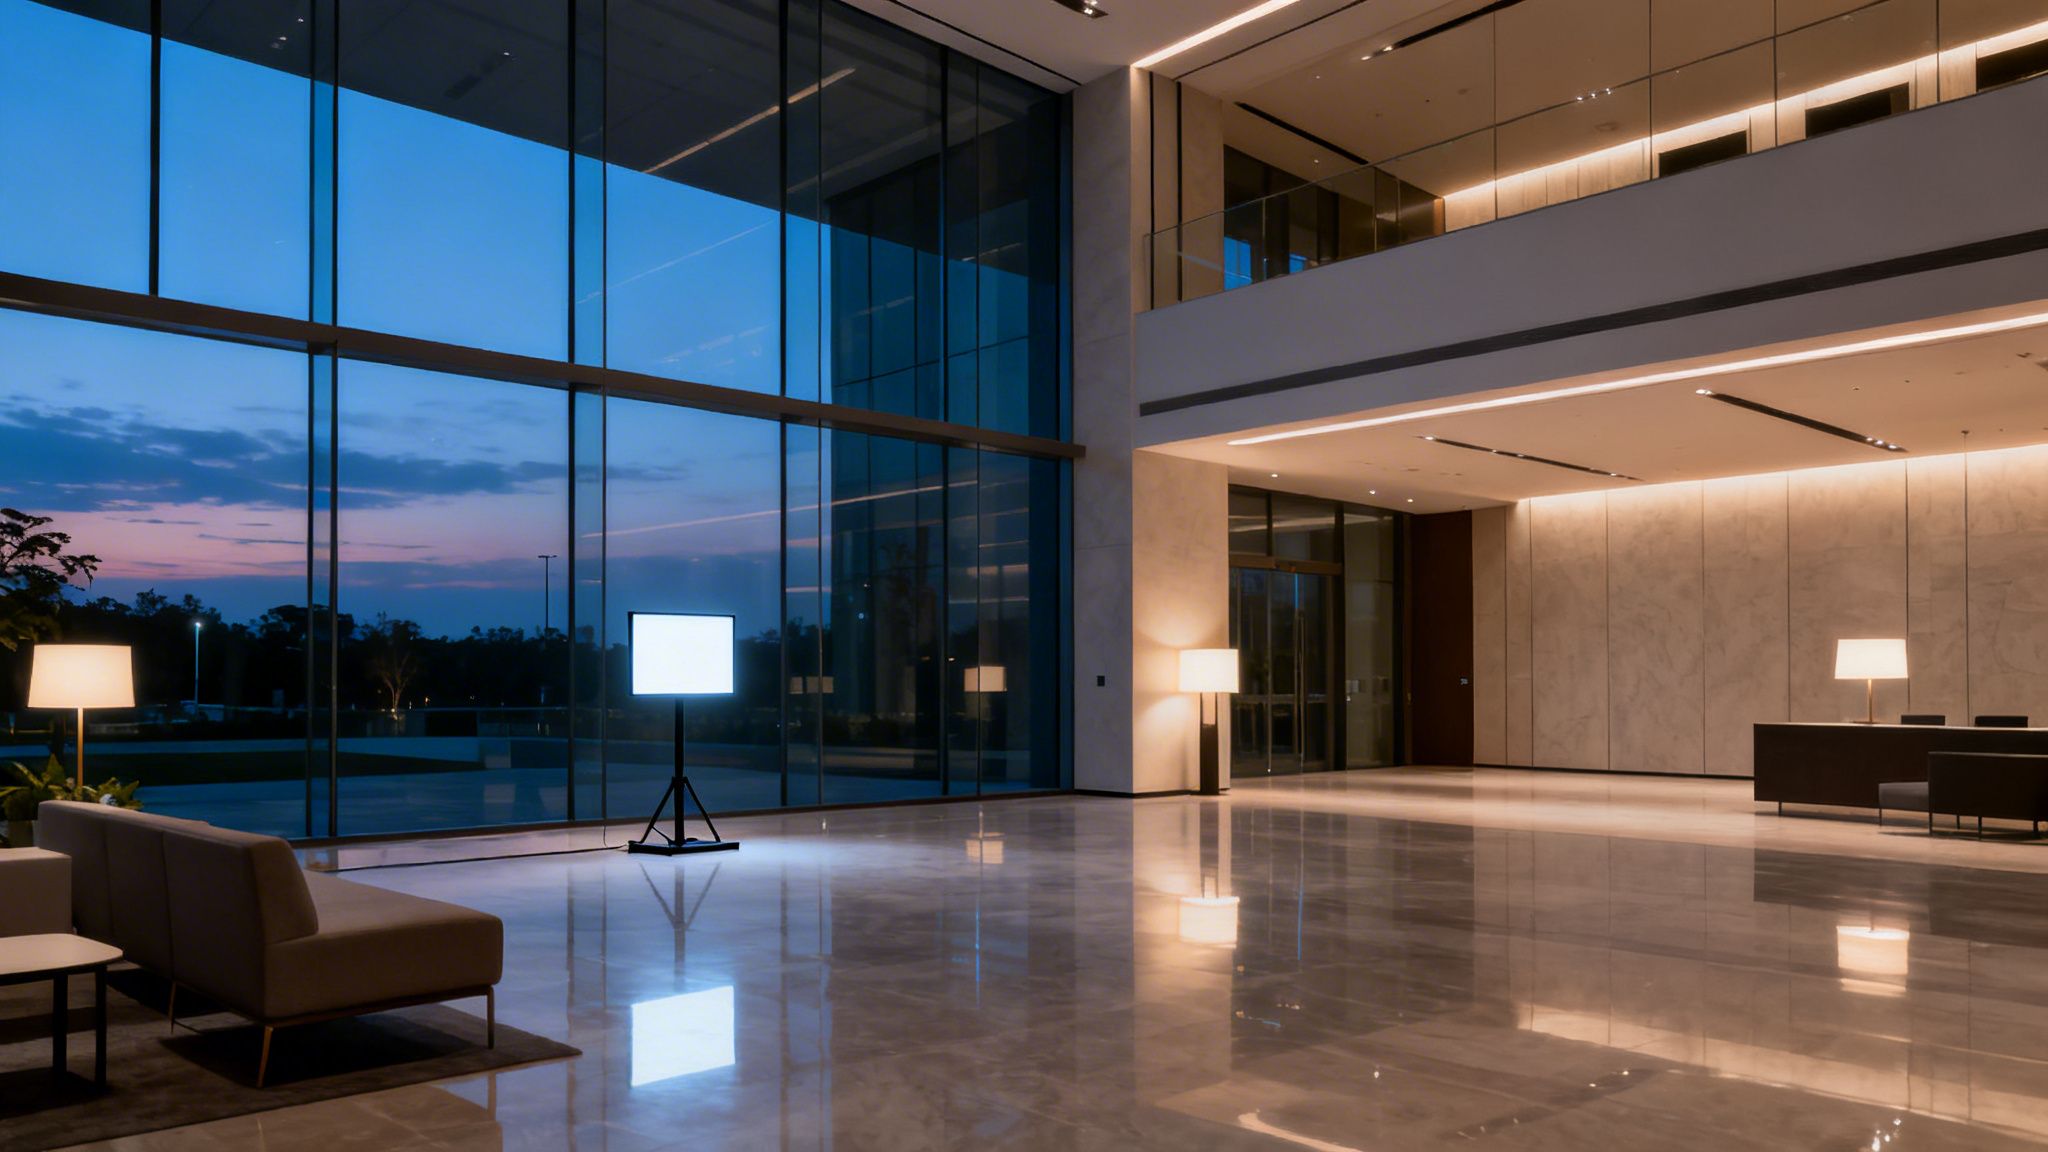
The Modern Corporate Lobby
My goal for this corporate lobby was to capture a clean, crisp, and expansive feeling. The space itself presented some immediate challenges: highly polished concrete floors, huge glass walls, and a wood-slat ceiling. All of these surfaces are notorious for creating unwanted reflections.
To get the look I wanted, my whole approach centered on creating one broad, soft light source that felt completely natural.
- Primary Light: I used a single, powerful 600Ws strobe that I positioned just out of the frame, camera-left.
- Modifier: The real key was firing that strobe through a massive seven-foot white shoot-through umbrella. This gave me a giant, soft source that wrapped beautifully around the furniture and filled the space without creating hard-edged shadows or specular highlights.
- Camera Settings: I had the camera locked down on a sturdy tripod at f/11 to keep everything sharp, from the chairs in the foreground to the reception desk way in the back. I dragged the shutter to 1/60s, letting just enough of the building’s ambient light mix in to keep it feeling real.
The secret here was all about placement. By getting that huge umbrella up high and off to the side, I pushed its reflection on the floor completely out of the camera's view. The result was a floor that looked clean and sleek, not like a mirror.
In architectural photography, light placement isn't just about illuminating a subject; it's about managing reflections. I spend as much time looking at where reflections will fall as I do looking at the light itself.
The Luxury Kitchen
When you’re shooting a high-end kitchen, the story is all about the materials. For this space, the client wanted to showcase the gorgeous veining in the marble countertops, the rich sheen of the custom cabinets, and the sparkle of the polished chrome fixtures. This job required a much more precise and layered approach than the lobby shot.
I ended up using a multi-light setup, knowing I would be compositing the frames in post to get that perfect, polished look. Each light had one very specific job.
- Countertop Light: I started with a strobe fitted with a gridded strip box. It was positioned high above the island, aimed down at a sharp angle to "rake" light across the marble. This technique is fantastic for pulling out texture, making those subtle veins in the stone pop without creating glare.
- Cabinet Fill: Next, I used a small bi-color LED panel on a low stand, placed way off to the side. I dialed its power way down to just kiss the cabinet faces with a hint of soft light, giving them separation from the background.
- Fixture Accent: To get the chrome faucet to really pop, I grabbed a handheld speedlight with a snoot attached. I fired off one quick frame with this tight beam of light aimed directly at the faucet to create a crisp, defined highlight that I could easily blend in later.
By building the final image in these layers, I had absolute control. This is a foundational technique for high-end real estate photography in Atlanta and elsewhere, ensuring every single feature is presented at its absolute best.
The Dramatic Twilight Exterior
The "dusk shot" is a classic that every client loves. It combines the warm, inviting glow of a building's interior with the deep, moody blue of the twilight sky. This shot is almost always a composite, blending a perfect "blue hour" sky with separate, lit frames of the building itself.
My process starts by getting the plate shot. With the camera locked down on a tripod, I’ll wait for that magic moment just after sunset when the sky hits a perfect, rich blue. I’ll take a long exposure—sometimes 10 seconds or more—to soak in all that color and capture the ambient light on the landscape.
Once I have my sky, the lighting work begins. For this modern home, I used two battery-powered strobes:
- Main Light: One 400Ws strobe with a standard reflector was placed off-camera to light up the main facade, keeping the light crisp and directional.
- Accent Light: I put a second, smaller strobe inside the house and aimed it up at a white ceiling. This fakes a natural-looking interior glow that pours out of the windows, making the home feel warm and lived-in.
I then took several more shots, moving that main light to "paint" different parts of the architecture. Back in Photoshop, I layered these lit frames onto my base twilight photo, carefully masking them in to create one seamless and incredibly dramatic final image. It’s a method that gives you ultimate creative control, turning a simple exterior into a true hero shot.
Answering Your On-Set Lighting Questions
Every shoot presents its own puzzle, but after years in the field, I’ve found that the same lighting questions come up time and time again. When you're on a tight schedule, you need answers that work. Here are the direct, no-fluff solutions I rely on to get the shot right.
How Many Lights Do I Really Need for an Architectural Shoot?
That's the million-dollar question, and the honest answer is, "it depends." You can absolutely create incredible images with just one powerful light, a tripod, and a lot of patience, building your final shot frame by frame in post.
But for efficiency on a professional job, my standard kit includes three lights. This gives me the flexibility I need.
- My workhorse is a key light, usually a powerful 400-600Ws strobe that does most of the heavy lifting to shape the main scene.
- I’ll bring a second, similar strobe to use as a fill, to light up an adjacent room, or to create specific highlights.
- Finally, a small accent light like a speedlight is perfect for tucking into tight corners to pop a detail or add a little kick where it's needed.
It's never about flooding a room. The goal is surgical precision. The best architectural shots are often composites of several frames, each with a single light placed perfectly for one specific part of the image.
What Is the Biggest Mistake When Lighting an Interior?
By far, the most common trap photographers fall into is trying to kill all the shadows. Shadows aren’t the enemy—they’re what give a room depth, define form, and add a touch of drama. A room without any shadows just looks flat, unnatural, and fake.
Instead of fighting shadows, learn to sculpt them. A beautiful photograph has a full tonal range, from clean, bright highlights all the way to rich, intentional shadows. That’s what gives an image dimension and life.
Use your main light to create soft, deliberate shadows that show off the texture of a sofa or the elegant shape of a chair. Then, you can use black cards—what we call negative fill—to deepen shadows where you need more contrast, stopping light from bouncing into areas you want to keep dark.
How Do I Deal with Light Reflections in Glass and Glossy Floors?
Ah, the eternal battle with reflective surfaces. The secret is to start thinking like a pool player and master your angles. Your whole objective is to position your light so its reflection bounces away from your lens, not directly into it.
This often means you have to move your light much farther to the side or raise it way higher than you might instinctively think. Using a large, diffused source like a softbox is a huge help here, as it turns a potential harsh, bright hotspot into a much softer, less distracting reflection.
When you can’t avoid a reflection, the pro move is to composite. First, take your main shot with the lighting set up perfectly for the room. Then, without touching your camera, turn that light off and take a second "clean plate" shot to capture the surface with no reflection at all. In Photoshop, you can blend the two, simply masking the reflection out of your primary image.
My Battery Strobes Always Seem to Die on Location. What Can I Do?
Power management is a skill you have to master for location work. Nothing kills the momentum of a shoot faster than a dead battery.
First off, show up with at least double the batteries you think you’ll need. Always. Second, shoot at the lowest power setting that gets the job done. Just dropping your strobe from full to half power can almost double the life of your battery.
And this is a big one: turn off your modeling lamps! They are a massive power drain and are rarely necessary once your light is positioned. For long days or particularly power-hungry shoots, I bring a portable power station. It lets me run my strobes all day without any anxiety about running out of juice.
Crafting intentional, high-quality images is at the core of what we do. At Jimmy Clemmons Photographer, we bring an editor's eye and technical precision to every project, ensuring your architecture and designs are presented with the clarity and impact they deserve. Let's discuss your next project.
Learn more at https://jimmyclemmons.com.
Made with Outrank app