
You're standing in a finished office with a brand lead, a project architect, and a careers-page mockup open on a laptop. The renovation is sharp, the materials are considered, and the daylight is doing exactly what the design team intended. Then the mockup stops the conversation. The employees look as though they've been cut from unrelated stock images and placed over the project after the fact.
That disconnect is the central problem employee photography needs to solve. A useful program should help a prospective hire recognize the people behind the work, give current employees a consistent visual presence, and show clients that the team belongs in the spaces it designs, builds, or operates. The best images don't treat people as interchangeable subjects. They treat them as part of the architecture, interiors, materials, and light.
Why Employee Photography Matters for Brand and Place
A quick phone-camera roster can solve an immediate administrative need. It can put a face beside every name in an internal directory, and that may be enough for a short period. The weakness appears later, when the careers page is redesigned, a leadership announcement needs a consistent portrait, or a proposal asks for team imagery that feels connected to the company's built work.
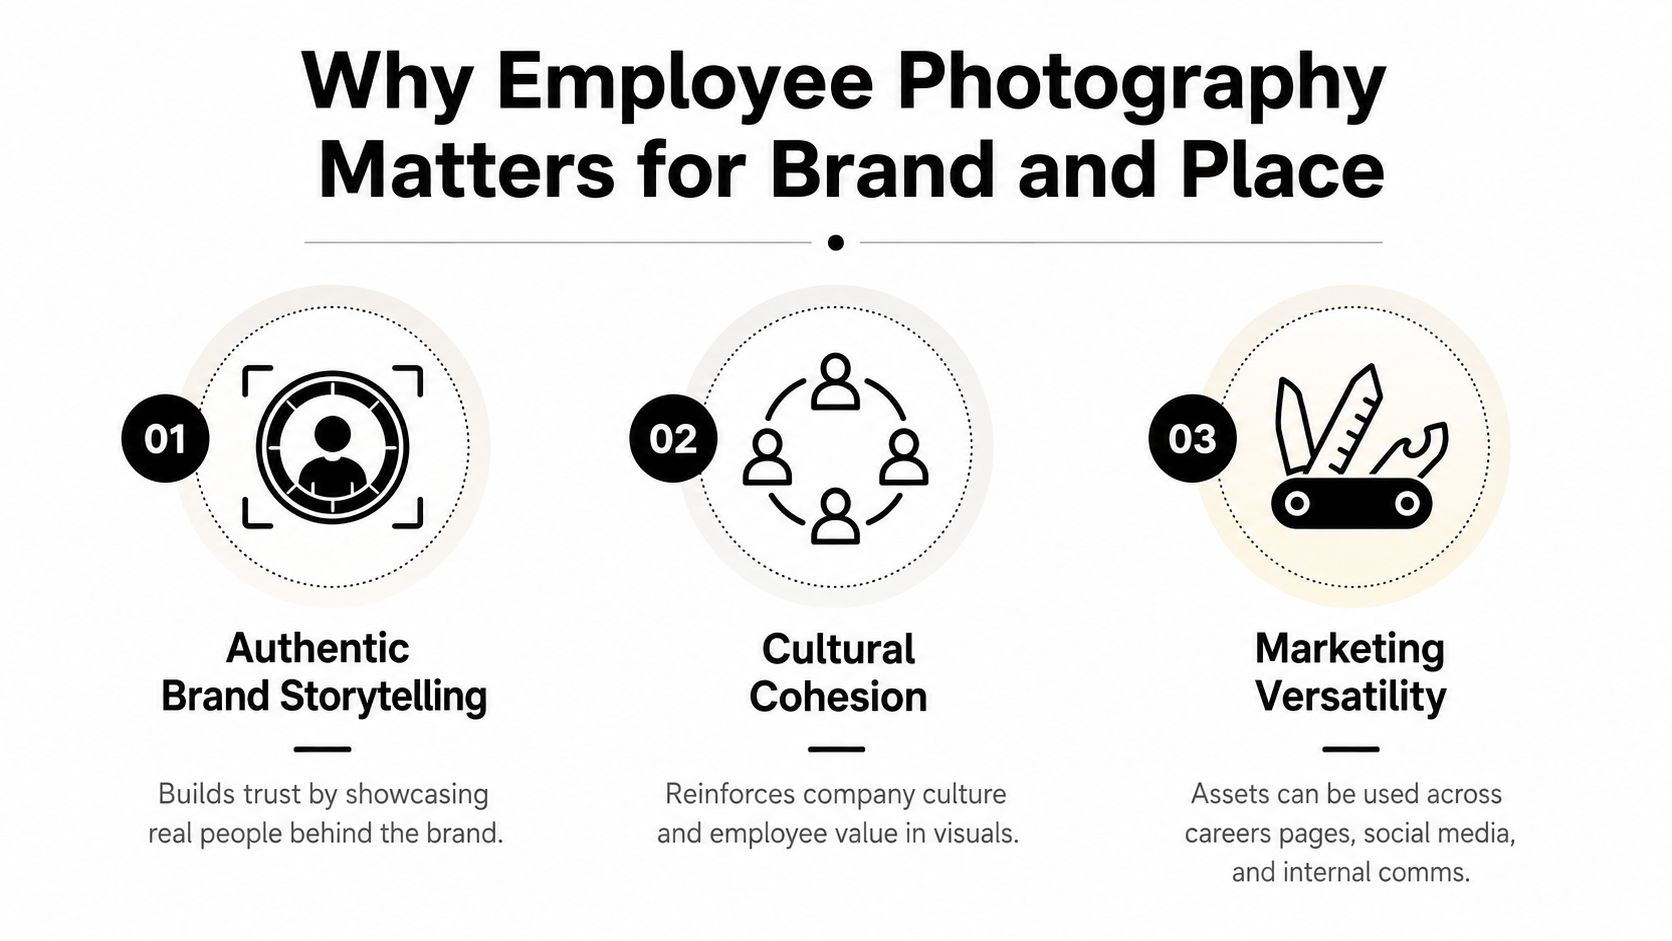
Employee photography carries more weight than a collection of profile pictures. It supports recruitment, because candidates can see the people and places they may encounter. It supports internal trust, because employees aren't represented by mismatched crops and inconsistent lighting. It supports client credibility, because the people presenting a project appear connected to the quality of the project itself.
That relationship becomes especially clear in architecture, construction, interiors, and hospitality. A person photographed against concrete, oak, brushed metal, or a wall of glass becomes part of the same visual language as the space. Wardrobe, posture, color, and light either reinforce that language or compete with it.
People belong in the composition
I've found that the strongest team portraits often begin with the room, not the subject. Before directing anyone, examine the sightlines, the dominant finishes, the direction of the available light, and the areas that communicate how the company works. A contractor may need images that show safety, coordination, and movement. An architectural firm may need restraint, geometry, and a clear relationship between designers and finished space. A hospitality group may need warmth without losing the structure of the interior.
This doesn't mean every frame should look staged. It means the staging should have a reason. A project manager reviewing drawings beside a completed wall can communicate more than a neutral gray backdrop if the image is composed with discipline.
Practical rule: If the people could be removed from the photograph without changing its meaning, the location probably isn't doing enough work.
A professional photography program also remains an ongoing business function. In the United States, photographers had a median annual wage of $42,520 in May 2024, equal to $20.44 per hour, and employment is projected to grow 2% from 2024 to 2034, with about 12,700 openings per year over that decade, according to the U.S. Bureau of Labor Statistics photographer outlook. Those figures describe the broader photography workforce, but they also reflect the continuing need for professional image-making across corporate communications, websites, recruitment, and brand work.
For a deeper business perspective, the ROI of professional photography is best understood through reuse, consistency, and the credibility an image adds to every place it appears. The central alignment is simple: people are part of the place, so photograph them with the same care given to the place.
Building the Creative Brief and Getting Buy-In
The creative brief and stakeholder conversation should operate as one workflow. If the marketing team approves a visual direction without HR confirming the consent process, or if HR clears subjects before the facilities team confirms which spaces are available, the production day inherits decisions that should have been settled earlier.
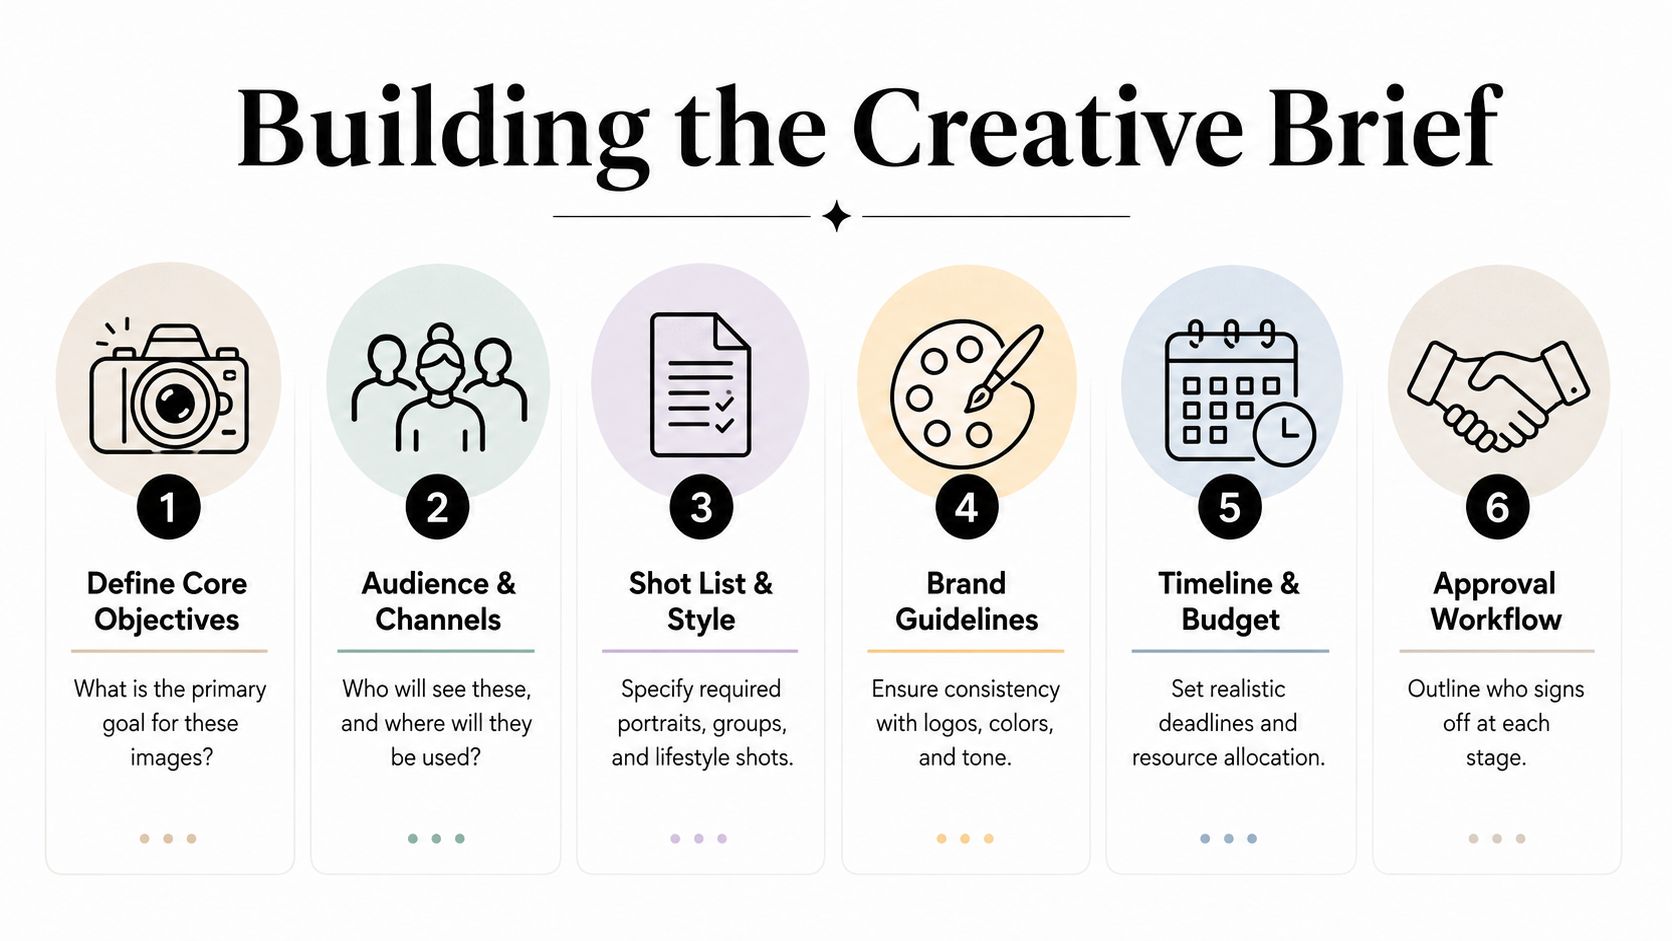
Start with the audience. List the people who'll see the images and the channels where the files may appear. A recruiting campaign, an About page, a proposal, LinkedIn, an internal directory, and a printed capabilities document may all need different crops or levels of environmental context. The brief should identify those uses before the photographer builds the shot list.
Collect the inputs that shape the frame
For an architecture or contractor audience, a useful brief includes more than a mood board. Gather:
- Primary objectives: Decide whether the priority is individual headshots, leadership presence, recruiting, project documentation, or a balanced library.
- Audience and channels: Separate internal uses from public marketing, social media, proposals, and editorial submissions.
- Brand attributes: Translate words such as precise, approachable, technical, durable, or warm into choices about distance, expression, light, and background.
- Space references: Provide drawings, finish schedules, material samples, and photographs of completed interiors. A photographer should understand how the space was designed, not where it looks attractive.
- Wardrobe direction: Establish whether the company needs formal, relaxed, technical, field-ready, or mixed styling. Tie the palette to the finishes rather than choosing colors in isolation.
- Consent posture: Record who approves the images, which uses are permitted, how long approval lasts, and what happens when a subject leaves or withdraws permission.
The last item needs a named owner. Marketing may control public use, HR may manage employee consent, legal may review language, and the facilities or project team may control access to the environment. Put those responsibilities in writing.
Build the approval sequence
Use one decision path. Marketing approves the visual direction and final selects. HR confirms participation and release language. Facilities, operations, or the project owner confirms access, safety rules, and areas that can be photographed. One person should have final creative authority, otherwise a large group can dilute the work into a safe but forgettable compromise.
The creative brief process for professional photography projects should result in a document the photographer can use on location. Include the date, locations, subject list, required frames, aspect-ratio needs, wardrobe notes, privacy restrictions, retouching expectations, delivery format, and approval milestones.
The brief earns buy-in when it makes trade-offs visible. If the team wants relaxed portraits, active workplace scenes, and a clean directory set in one session, the schedule must protect each type of image. Efficiency matters, but it shouldn't erase the visual distinctions that make the library useful.
Shot Lists and Lighting That Match Your Spaces
A shot list should describe the job the image needs to perform. “Headshot of each employee” is an administrative instruction, not a visual direction. A stronger list identifies the environment, the relationship between subject and background, the intended crop, and the lighting condition that supports the brand.
A modern office with controlled daylight calls for a different approach than an active job site. A hospitality interior may require the photographer to protect the mood of warm practical fixtures rather than overpowering them with flash.
Three useful environmental setups
Modern office with controlled daylight. Place the subject far enough from the background to create separation without losing the geometry of the room. A short telephoto lens, such as an 85mm equivalent, can preserve natural facial proportions while compressing distracting lines. Position the subject near side light from a window, then use a large, soft source from the opposite direction only if the face falls too far into shadow. If the architecture fights the exposure, expose for the windows first and add controlled fill rather than allowing the exterior to disappear into white.
Active job site. Safety equipment, dust, unfinished surfaces, and temporary conditions can carry useful meaning, but they need structure. Use a wider environmental lens, such as a 35mm equivalent, when the surroundings are essential, and keep enough distance to avoid exaggerated facial features. Work with the available direction of light where possible. A small bounced flash can help in a dark interior or beneath a hard hat, but it shouldn't flatten the texture that makes the site credible. Follow site rules, required protective equipment, and the project's access restrictions.
Hospitality interior. Warm practicals often define the atmosphere. A longer lens and greater subject-to-background distance can isolate a chef, manager, or front-of-house employee while retaining the glow of the room. Start with the ambient exposure, then add a restrained off-camera source only if the subject needs separation. Direct flash is usually the wrong call when it turns a layered interior into a flat snapshot. A longer exposure on a stable camera can preserve the room's tonal character, provided the subject can hold still.
| Environment | Framing | Lens and Distance | Lighting Approach |
|---|---|---|---|
| Modern office | Portrait with visible geometry and controlled negative space | 85mm equivalent, subject separated from background | Window side light with soft fill; protect exterior highlights |
| Active job site | Environmental portrait showing tools, materials, or structure | 35mm equivalent, photographer close enough for context but not distortion | Use directional site light; add restrained bounce only where needed |
| Hospitality interior | Portrait or small group with practical fixtures and layered depth | Longer lens, subject placed well forward of background | Preserve ambient warmth; use subtle off-camera light instead of direct flash |
Tie every setup back to the brief. A polished office with pale stone may need a quieter wardrobe and softer contrast. A concrete-heavy site may benefit from solid colors and directional light. The shot list photography guide is useful as a planning reference, but the final list should be written for your spaces, not borrowed unchanged from a generic corporate template.
Scheduling Logistics Wardrobe and On-Set Direction
Production problems usually begin before the camera arrives. A subject gets sent to the wrong floor, a parking note is missing, a department manager releases everyone at once, or a wardrobe pattern flickers against mixed daylight. Scheduling, logistics, wardrobe, and direction need to be planned as one system because each decision affects the others.
A practical pre-production call happens 72 hours before the shoot. Confirm access, parking, elevators, security, safety requirements, available rooms, weather exposure, and the final subject list. Send a named call sheet with arrival instructions, contact details, wardrobe guidance, and the order of departments or floors.
Keep the day moving without making it feel rushed
Group subjects by department, floor, or work area. A rolling schedule reduces unnecessary travel through the building and lets the photographer keep the same lighting setup for a useful run of portraits. If the shoot includes environmental scenes, protect those windows rather than filling every minute with individual headshots.
For larger rollouts, a practical benchmark is about 5 minutes per person for headshots. A 40-person office typically fits into one full day, while larger teams often work better with a two-day booking or a headshot station operating alongside broader coverage, according to the company photoshoot production guidance. Send wardrobe guidance a week ahead, ask subjects to bring a backup top, publish the schedule, and offer a quiet opt-out process. Those controls reduce delays without putting reluctant employees on display.
Direct people through the environment
Greet each subject before raising the camera. Let them see the space and explain what the image needs to communicate. Calibrate the ambient light first, then make small adjustments to the subject's stance, shoulders, hands, and gaze. A mirror card near the station gives people a chance to check hair, glasses, and clothing without turning the photographer into a last-minute styling department.
Wardrobe should support the room. Solid colors read cleanly against concrete, masonry, timber, and glass. Tiny patterns can become distracting under mixed daylight and LED sources. Accessories should sit comfortably within the brand palette, but the instruction should remain practical rather than prescriptive. Employees need to look like themselves.
| Station | Setup | Time per Subject |
|---|---|---|
| Headshot station | Consistent background, fixed camera position, soft key and controlled fill | About 5 minutes |
| Environmental portrait | Subject placed within a selected room or work zone, composition adjusted for context | Longer than a headshot station, depending on location and movement |
| Small team group | Coordinated spacing, layered depth, balanced expressions, clear background | Scheduled as a separate block |
| Field or site coverage | Safety review, location walk-through, active-work coordination | Flexible, based on site conditions |
The photographer should keep a visible schedule and a short list of people ready to step in when someone is delayed. Efficiency is valuable, but direction must still feel human. Subjects give better expressions when they understand why they're standing in a particular doorway, beside a material sample, or at the edge of a work floor.
Post-Production Deliverables and Usage Rights
Post-production begins with organization, not retouching. Cull for expression, focus, gesture, and environmental clarity before making aesthetic decisions. Use employee-safe identifiers in filenames rather than full names, especially when folders may move between the photographer, HR, marketing, and a web team.
A practical file structure might separate selects, retouched finals, crops, and usage documentation. Keep a master record that connects each identifier to the approved subject and permitted channels, but don't place unnecessary personal information in public-facing filenames.
Deliver files for the channels that need them
A tiered delivery makes the library easier to use. Web teams need manageable files, annual reports need high-resolution masters, and social platforms often need vertical crops that shouldn't be improvised after delivery.
| Channel | Format | Dimensions | Color Space |
|---|---|---|---|
| About or careers page | Web-optimized JPEG | 1600px on the long edge | sRGB |
| LinkedIn profile or post | JPEG with vertical crop prepared | Channel-specific crop | sRGB |
| Annual report | Print-ready TIFF | Original retouched dimensions | CMYK conversion handled for the printer |
| Internal directory | Compressed JPEG | Sized to the directory system | sRGB |
The exact export settings should be confirmed with the web developer or printer. The important principle is to deliver purpose-built crops, not one large file that every department must reinterpret.
Retouching should preserve natural skin texture. Remove temporary blemishes, lint, and distracting reflections when appropriate, but don't reshape faces or erase the details that make employees recognizable. Apply a consistent grade tied to the built environment. Over-retouching often makes a team look less trustworthy and can date the images quickly as visual preferences change.
Treat consent as an image lifecycle
Consent isn't finished when the release is signed. European privacy guidance emphasizes that consent can be withdrawn at any time, and organizations may need to remove images or video from use after withdrawal. Practical documentation should identify the purpose, duration, media channels, and deletion or revocation workflow, as described in the workplace visual-material guidance from the Dutch Data Protection Authority.
Decide who signs releases, which uses require explicit approval, how long those uses remain active, and who receives a departure or revocation notice. Build a retirement process for websites, LinkedIn posts, internal directories, printed collateral, and social media libraries. A photograph can be beautifully made and still become a liability if no one knows where it was published.
For broader commercial-use questions, review the guide to licensing a photo for commercial use. The contract should distinguish photographer copyright, client usage rights, employee permissions, archive retention, and any restrictions on third-party reuse.
Choosing the Right Photographer for the Job
The strongest predictor of a successful employee shoot isn't the size of a photographer's headshot reel. It's whether the photographer understands how people, light, and built space work together.
A photographer fluent in architecture and interiors can read a floor plan, anticipate reflective surfaces, recognize when a corridor needs to remain visually quiet, and adjust direction without disrupting a live workplace. That fluency matters when the assignment includes portraits, field coverage, leadership images, and room-scale scenes in one visual system.
Evaluate the working method
Shortlist three photographers whose portfolios show people integrated with architecture and interior light. Look for more than attractive faces. Examine whether the subject has a credible relationship to the room, whether the verticals and backgrounds are controlled, and whether the images feel consistent without becoming mechanical.
Ask each candidate for an unretouched proof set from a similar project. You're looking for judgment before polish. Ask how they'd light the darkest room in your office, what they'd do with a glass wall behind a subject, and how they'd photograph a contractor who needs to remain in required safety gear.
A strong photographer should also explain how they work around employees who aren't models. Direction should be clear and specific, not theatrical. The photographer needs to make people comfortable while still protecting the composition.
| Criterion | What to Look For | Weight |
|---|---|---|
| Built-environment fluency | Portfolio shows people, interiors, materials, and structure working together | Highest |
| Editorial discipline | Clear composition, controlled exposure, purposeful visual sequence | High |
| Subject direction | Calm, direct instruction for people without modeling experience | High |
| Workplace logistics | Ability to work around active teams, access limits, and safety requirements | High |
| Lighting judgment | Specific solutions for daylight, mixed sources, reflections, and practicals | High |
| Post-production consistency | Natural retouching and a grade that supports the environment | Medium |
| Commercial terms | Clear treatment of licensing, retouching, travel, postponement, and delivery | Medium |
Ask the commercial questions directly
Clarify day rate versus buyout, what retouching includes, how travel is billed, what happens if the shoot is postponed, and whether licensing transfers or remains limited. A lower initial fee may not be the lower total cost if the client must later pay for essential crops, expanded usage, or additional retouching.
Before selecting, ask the photographer to describe the proposed shoot in practical terms. They should be able to name the first location they'd scout, the subjects who need the most time, the likely lighting constraint, and the files the marketing team will receive. Choose the person whose process makes the assignment clearer, not merely the person whose portfolio looks most polished.
Bringing It All Together and What Comes Next
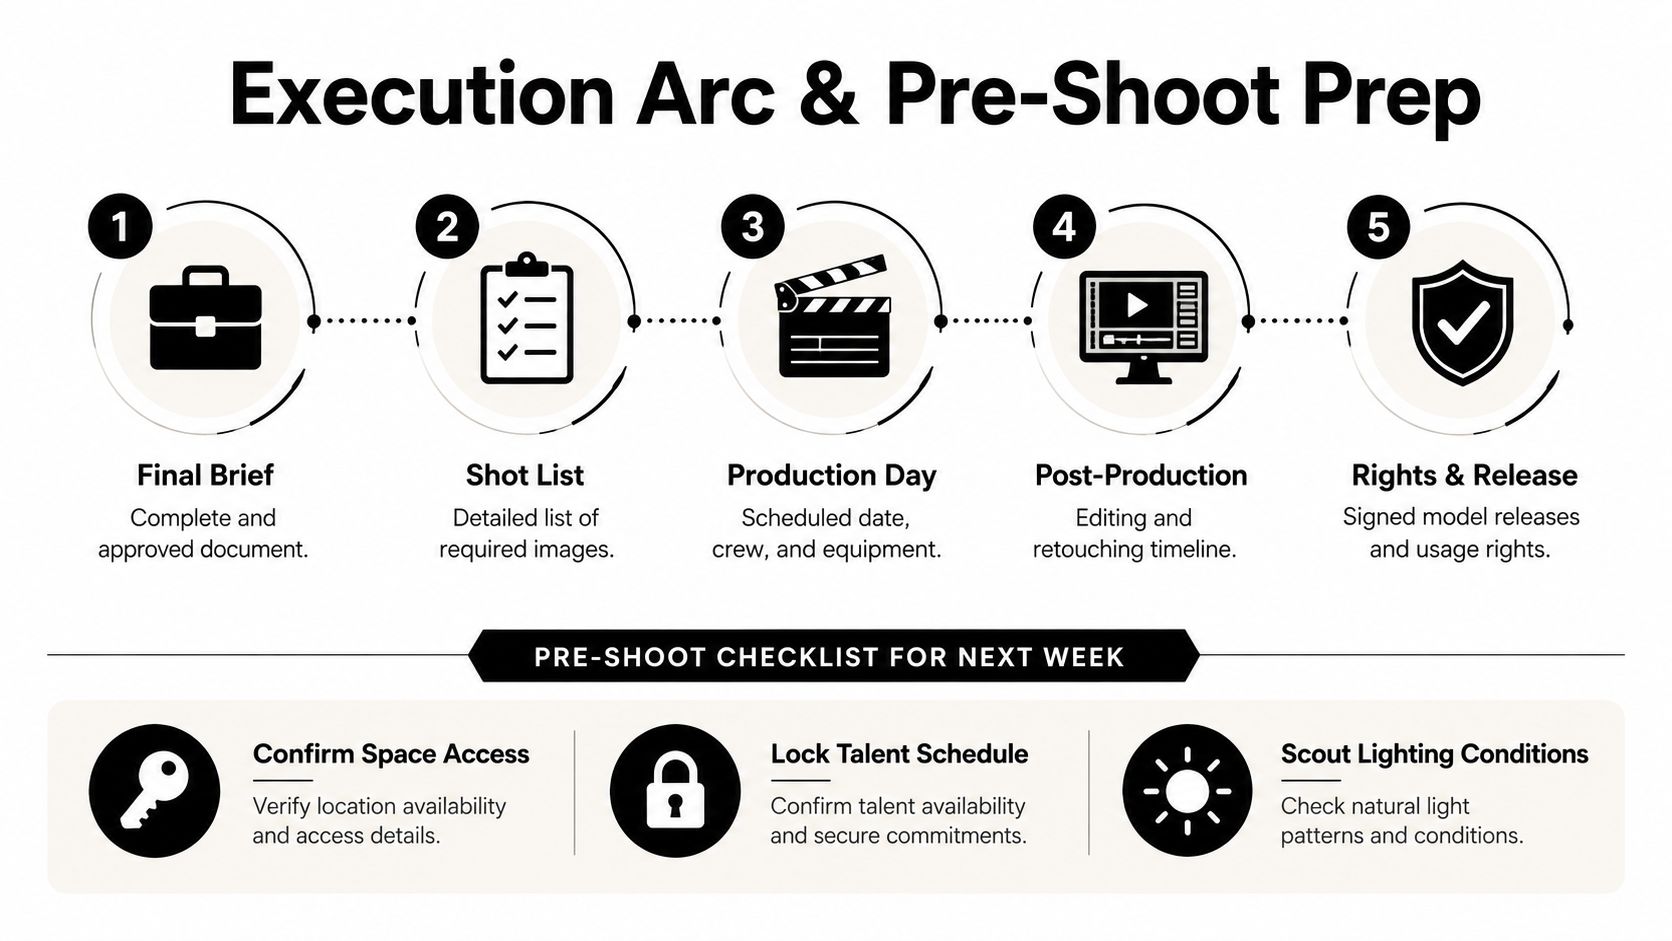
Employee photography works best as a connected execution arc. The brief defines the audience, channels, spaces, wardrobe, and approvals. The shot list translates those decisions into frames. Production protects time and access. Post-production creates usable files. Rights management keeps the library accurate after publication.
A short pre-shoot check can make the next assignment substantially cleaner:
- Confirm space access: Verify keys, security, parking, elevators, safety rules, and room availability.
- Lock the wardrobe palette: Compare clothing choices against concrete, masonry, glass, timber, paint, and upholstery.
- Name the creative approver: Give one person authority over selects and visual consistency.
- Schedule subjects in 20-minute windows: Keep people moving without pretending every portrait needs the same amount of attention.
- Reserve a half-day retouching block: Protect time for consistent finishing, crops, file naming, and delivery checks.
Build a living visual system
Treat the first shoot as a system rather than a one-off event. Maintain a shot library keyed to room, role, season, and intended channel. Future hires can then be photographed within the same visual grammar, while leadership, project, and recruiting needs draw from a coherent archive.
A commonly cited refresh cadence is every 18 to 24 months, or sooner when someone's appearance changes noticeably, according to corporate headshot lifecycle guidance. That same operational framework uses 85% or higher participation within 4 weeks, 70% or higher LinkedIn adoption, and 95% or higher team-page completeness as practical benchmarks for measuring rollout quality. These are management targets, not substitutes for judgment. A complete library still needs to look like the actual organization.
The direction of employee photography is moving toward relaxed expressions, candid workplace moments, natural light, less retouching, and editorial environmental portraits. At the same time, AI headshot generators are creating pressure for low-cost profile images, particularly for distributed teams and internal directories, as discussed in 2026 employee-portrait trend coverage. Synthetic portraits may suit limited, low-risk uses. They can't replace the trust and specificity of showing real people in the spaces where real work happens.
The differentiator is craft and truth. Start next week by confirming access, assigning approvals, and matching the wardrobe palette to the building. Then commission images that make the team and the place read as one designed story.
For architecture, contractor, hospitality, and brand teams, Jimmy Clemmons Photographer creates employee portraits and workplace imagery that connect people to the spaces they design, build, and operate. Visit the studio to discuss location scouting, lighting, on-set direction, professional editing, and a practical image library built for your next careers page, proposal, or brand campaign.