

When I walk onto a project site, my camera is the last tool I pick up. The real work—the planning that separates good photos from truly exceptional ones—happens weeks in advance. A flawless shoot isn't an accident; it's the direct result of a solid game plan.
Getting your site ready really boils down to four things: mapping out a strategic shot list, getting the space perfectly cleaned and staged, coordinating everyone who needs to be there, and sorting out the technical details like power and site access.
Crafting the Photoshoot Blueprint
The success of a shoot is almost always decided before I even arrive. It’s all in the planning. I think of it as creating a blueprint for the visual story we want to tell, ensuring every single shot has a purpose and serves your end goal.
This isn't just a simple checklist. It's a strategic document I build right alongside my clients, whether they're general contractors, architects, or brand managers. My job is to translate your project's best features into a concrete, actionable plan for shoot day.
From Your Goals to Our Shot List
A great shot list always starts with the story. Before we talk about angles or lighting, we need to be clear on the narrative. Are you a construction firm showing off your impeccable finish work? An architect highlighting an innovative use of materials? A developer selling a specific lifestyle?
Once we know the story, we can nail down the "hero shots" that will become the foundation of your marketing. These often include:
- Establishing Exteriors: Those big, wide shots that place the building in its environment. We’ll almost always schedule these for dawn or dusk to get that beautiful, dramatic light.
- Key Interior Spaces: The lobby, the main atrium, or a signature amenity space that really defines the experience of being there.
- Design Details: I love getting up close on unique architectural features, custom millwork, or high-end fixtures. These shots scream quality.
- Contextual Shots: Sometimes, we’ll bring in people to show how a space is meant to be used, adding a sense of life and scale.
A well-crafted shot list is our roadmap for the day. It makes sure we hit all the critical images and use our time wisely. It’s the best defense against a rushed, unfocused shoot that just won't deliver the results you need.
Mapping Out the Day: Timeline and Logistics
With our shot list locked in, we can build a realistic timeline. This is more than just picking a date; it’s about choreographing the flow of the entire day. I map out our schedule based on the sun's path across the property, planning to shoot east-facing exteriors in the morning and saving west-facing features for the afternoon glow.
This is also where we tackle the logistical hurdles. One of the most common snags is getting the right permits and insurance paperwork. Many commercial properties require a custom Certificate of Insurance (COI), and that process alone can take 3-5 business days. Dropping the ball here can bring the whole shoot to a screeching halt. With commercial photography budgets at stake, poor prep is an expensive mistake.
This simple timeline gives a great overview of how we break down the process.
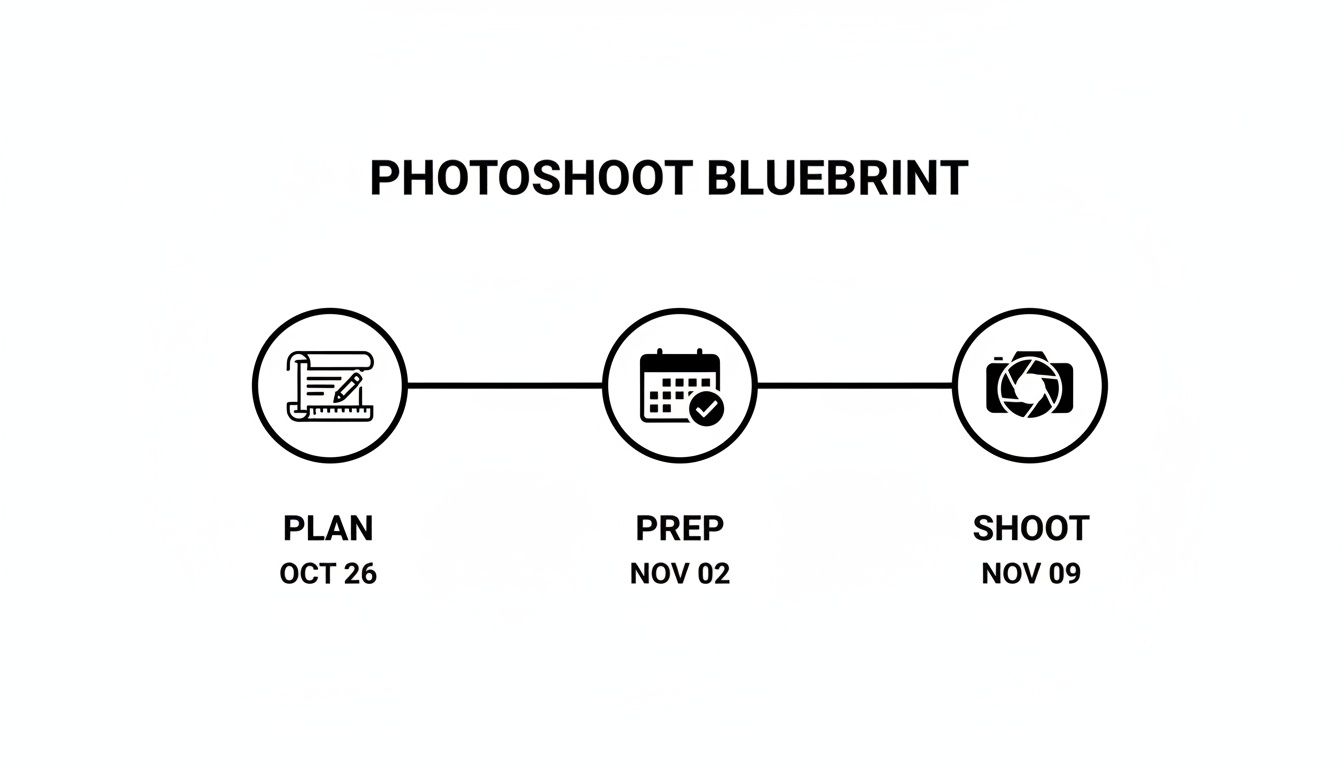
The following table provides a sample breakdown to help you visualize the key milestones.
Pre-Shoot Planning Timeline
This sample timeline outlines key preparation milestones leading up to shoot day to ensure your project site is ready.
| Timeframe | Key Task | Objective |
|---|---|---|
| 4 Weeks Out | Finalize Shot List & Goals | Define the "hero shots" and the story you want to tell. |
| 2-3 Weeks Out | Secure Permits & Insurance (COI) | Submit all necessary paperwork to property management for approval. |
| 1-2 Weeks Out | Schedule Site Cleaning & Staging | Coordinate with cleaning crews and any stylists or stagers. |
| 1 Week Out | Confirm Personnel & Site Access | Verify access times, key contacts, and any on-site escorts needed. |
| 2-3 Days Out | Final Weather Check & Logistics Review | Make any final adjustments to the schedule based on the forecast. |
| Shoot Day | Execute the Plan | Focus on creativity and capturing the planned shots efficiently. |
As you can see, the actual "Shoot" is the final, and often shortest, part of a much longer process. This is a core principle in professional architectural photography. By putting in the strategic work upfront, we turn shoot day from a logistical scramble into a focused, creative session that’s all about capturing your project at its absolute best.
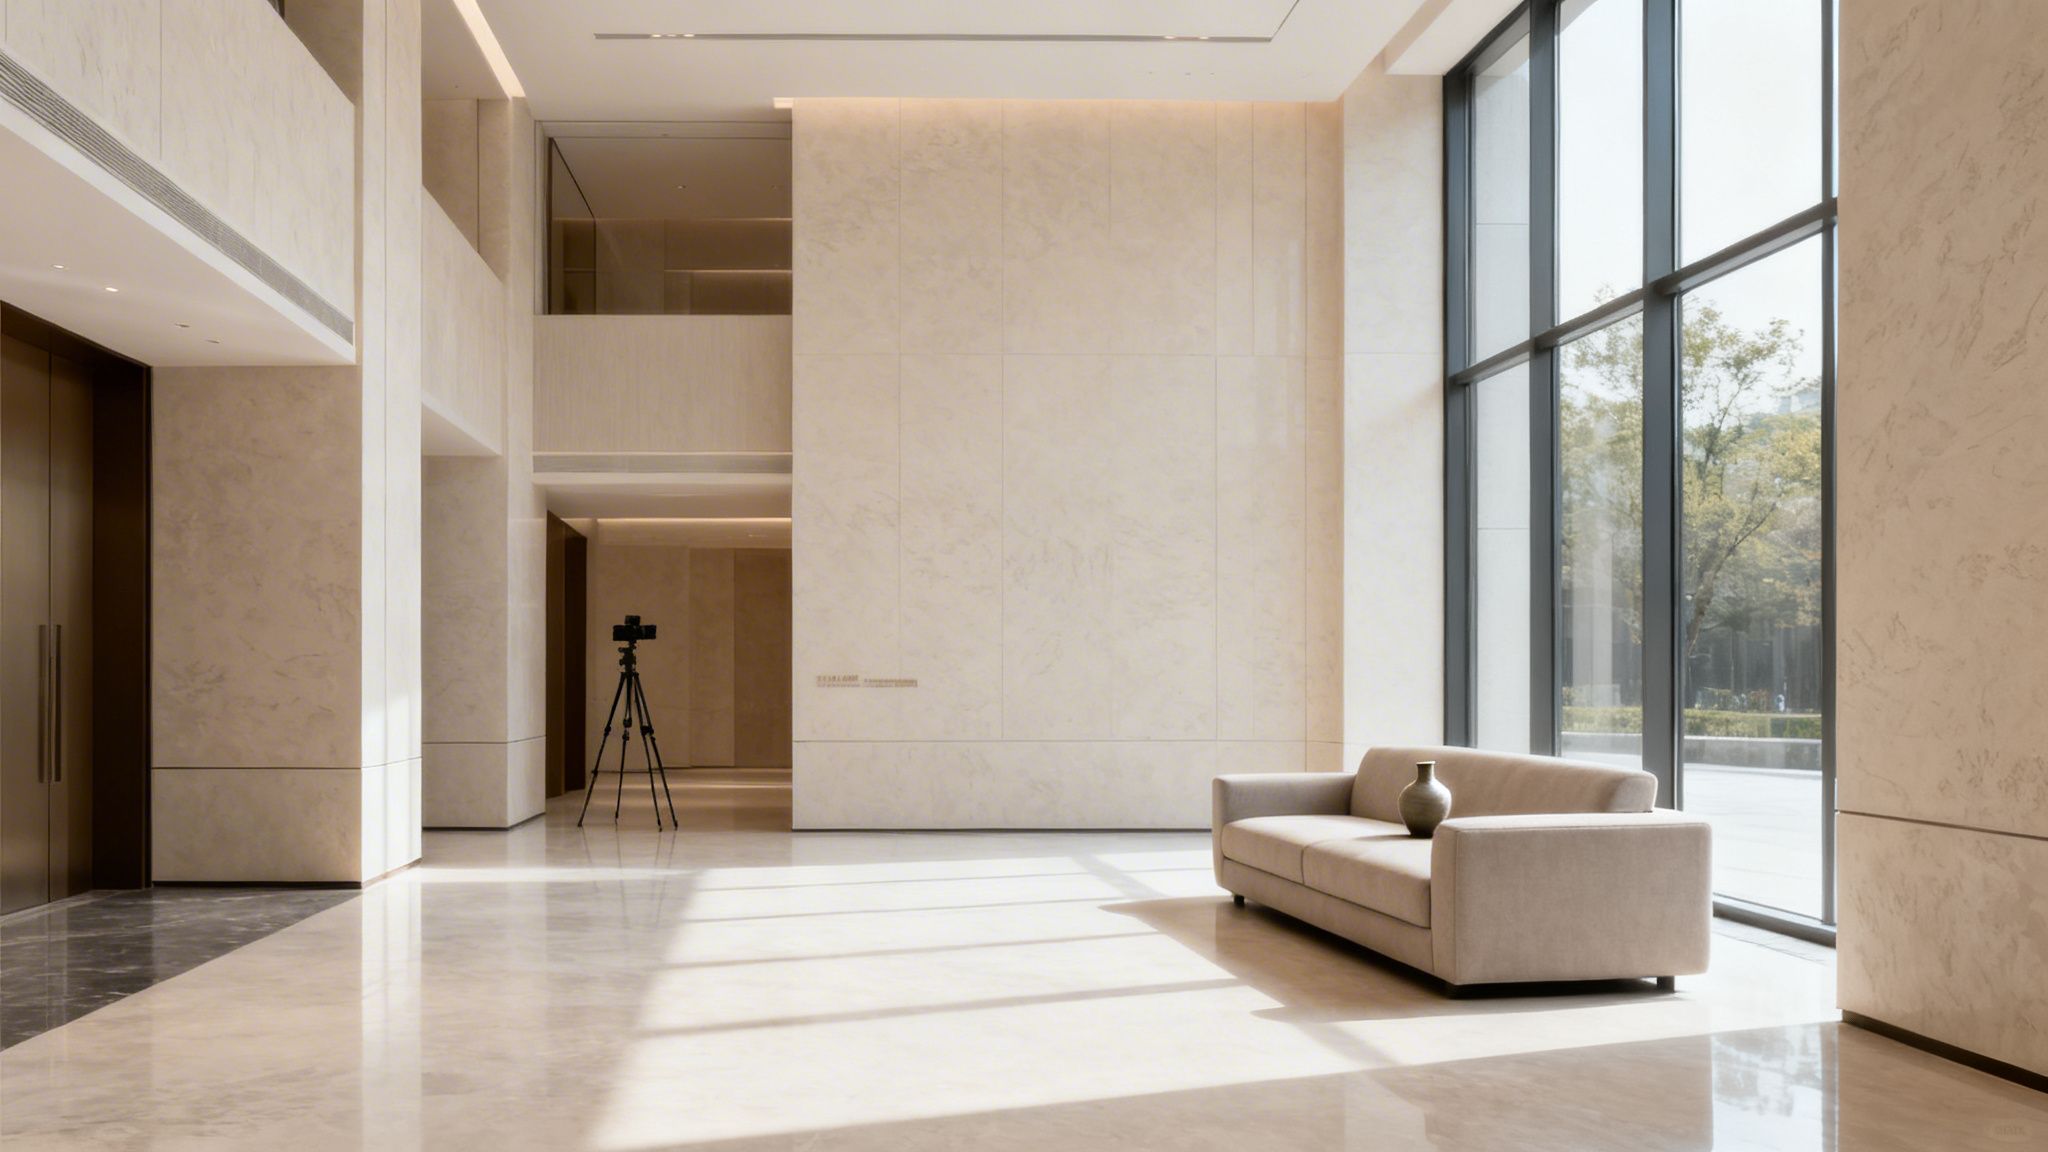
Staging Your Site for the Camera's Eye
Once we have the shot list nailed down, our attention turns to the space itself. This is where we bridge the gap between a site that looks clean to the naked eye and one that’s truly “camera-ready.” There's a big difference.
I tell my clients to think of it like preparing a film set. Every single object in the frame is either telling the right story or creating a distraction. Stray cords, personal photos, or a stack of mail on a desk instantly steal focus from the beautiful millwork or the stunning view we’re there to capture.
This isn’t just about tidying up. Proper staging is an exercise in subtraction and intention—clearing the visual noise so the architectural and design features become the undisputed heroes of every shot.
The Art of Subtraction
The most powerful part of staging is often deciding what needs to go. The goal is to create clean, uncluttered surfaces that allow the design to breathe. As a photographer, I see the world in frames, and every unnecessary item creates visual friction that weakens the final image.
Before I arrive, walk through each space on our shot list and ask yourself a few questions:
- Does this object serve the story? A sleek laptop and a coffee mug can hint at a productive workspace. A messy pile of mail just looks like clutter.
- Are there visible cords or cables? Unplug and hide everything you possibly can. We can sometimes tape down a necessary cord, but it's always better to remove it from the scene entirely.
- Is this item personal or branded? It's best to remove personal effects, family photos, and any third-party branding that isn’t yours. This is a critical step for creating timeless marketing assets you can use anywhere.
This process ensures my time on-site is spent composing beautiful shots, not tidying up. It’s a key part of preparing your project for a professional shoot.
The camera sees everything. A single fingerprint on a chrome faucet, a scuff mark on a baseboard, or a stray leaf on the patio—these tiny details become glaringly obvious under professional lighting. Investing in a deep clean is one of the highest-return activities you can do before a shoot.
The Final Polish
For contractors and builders, the final cleanup is your last chance to show off your firm's absolute commitment to quality. This needs to go far beyond a standard post-construction clean. High-resolution digital sensors are merciless and will highlight any leftover dust, smudges, or imperfections.
Your final cleanup should focus on the details a camera will pick up first.
Pre-Shoot Final Cleanup Checklist:
- Windows and Glass: All glass surfaces, inside and out, need to be perfectly clean and streak-free. This means windows, mirrors, shower doors, and glass railings.
- Reflective Surfaces: Wipe down every stainless steel appliance, chrome fixture, polished countertop, and high-gloss floor. Use the right cleaner to avoid leaving residue.
- Dust-Free Zone: Dust every single surface. Don't forget window sills, baseboards, light fixtures, and the tops of door frames. Dust particles catch the light and really show up in photos.
- Floors: The floors should be spotless. This means vacuuming carpets right before we start and mopping hard surfaces so they're free of footprints and scuffs.
- Landscaping: For exterior shots, make sure the landscaping is immaculate. Rake any leaves, mow the lawn, hide garbage cans, and neatly coil all visible garden hoses.
For residential or commercial interiors, staging might also involve adding props to set a scene. A great way to get ideas is to see how professionals use decor to tell a story in high-quality real estate photography in Atlanta.
When I walk onto a meticulously staged and cleaned site, it tells me that you're as serious about quality as I am. It allows us to move efficiently through the shot list and focus all our creative energy on lighting and composition, which is what delivers that final, powerful portfolio of images for your brand.
Coordinating People and On-Site Access
Even the most perfectly staged site can fall flat if we can’t get our crew and gear in the door efficiently. The human element—coordinating access, managing stakeholders, and directing people on set—is just as critical as the physical prep.
In my experience, almost every major delay or budget overrun on a shoot comes down to a breakdown in communication. A missed email about parking or a forgotten keycard can have a domino effect, costing valuable time we should be spending behind the camera. Smooth logistics aren't just a nice-to-have; they create the low-stress environment where we can really focus on crafting great images.
Nailing Down Access and Communication
A little planning goes a long way here. The single most effective thing you can do is designate one primary point of contact for the photography team. This person needs to be on-site (or at least a phone call away) for the entire shoot to handle any questions, grant approvals, or solve the inevitable surprises that pop up.
Think through the crew’s journey from the moment we arrive.
- Parking: Where, exactly, should we park? We’re not just showing up in a sedan; we’re hauling multiple vehicles loaded with heavy cases of camera, lighting, and grip equipment. A map with a clearly marked, convenient spot is a massive help.
- Keys and Credentials: Have all the necessary keys, fobs, or access cards ready for us the moment we arrive. If we need an escort for secure areas, make sure that person is booked and fully briefed on our schedule.
- Building Relations: Is the project in an occupied building? Let property management and security know we’re coming. A simple heads-up with the date, time, and a crew list ensures we start the day with a smooth check-in, not a delay at the front desk.
Nothing kills momentum like being locked out. I once spent over an hour on-site waiting for someone to find an elevator key. That delay completely threw off our natural light sequence for the day, a problem that could have been avoided with a simple key handover.
Bringing People into the Frame
If your shot list includes environmental portraits or people interacting with the space, that coordination becomes even more vital. These shots are fantastic for adding a human scale and a sense of life to a project, but they need to be choreographed.
Give anyone who will be in the photos—employees, stakeholders, or models—a clear schedule well in advance. Let them know when and where they’ll be needed and for how long. This respects their time and minimizes disruption to their own workday.
Guiding Wardrobe Choices
What people wear in a photo has a huge impact on the final image. The goal is for their clothing to complement the architecture and your brand, not compete with it.
I always suggest providing simple wardrobe guidelines to anyone being photographed. It makes a world of difference.
- Skip busy patterns and big logos. Solid colors or very subtle textures always work best on camera. Loud stripes, graphics, or logos from other brands are distracting and can quickly date a photo.
- Stick to your brand palette. Encourage clothing in colors that align with your brand’s identity. For a modern, minimalist office, that might mean neutrals like gray, navy, or black.
- Dress for the environment. Wardrobe should feel authentic to the space. Business casual is perfect for a high-end corporate interior, while clean, branded workwear is ideal on an active construction site.
- Keep it timeless. The focus should always be on the person and the architecture. Overly trendy or flashy outfits pull focus from what we’re there to capture.
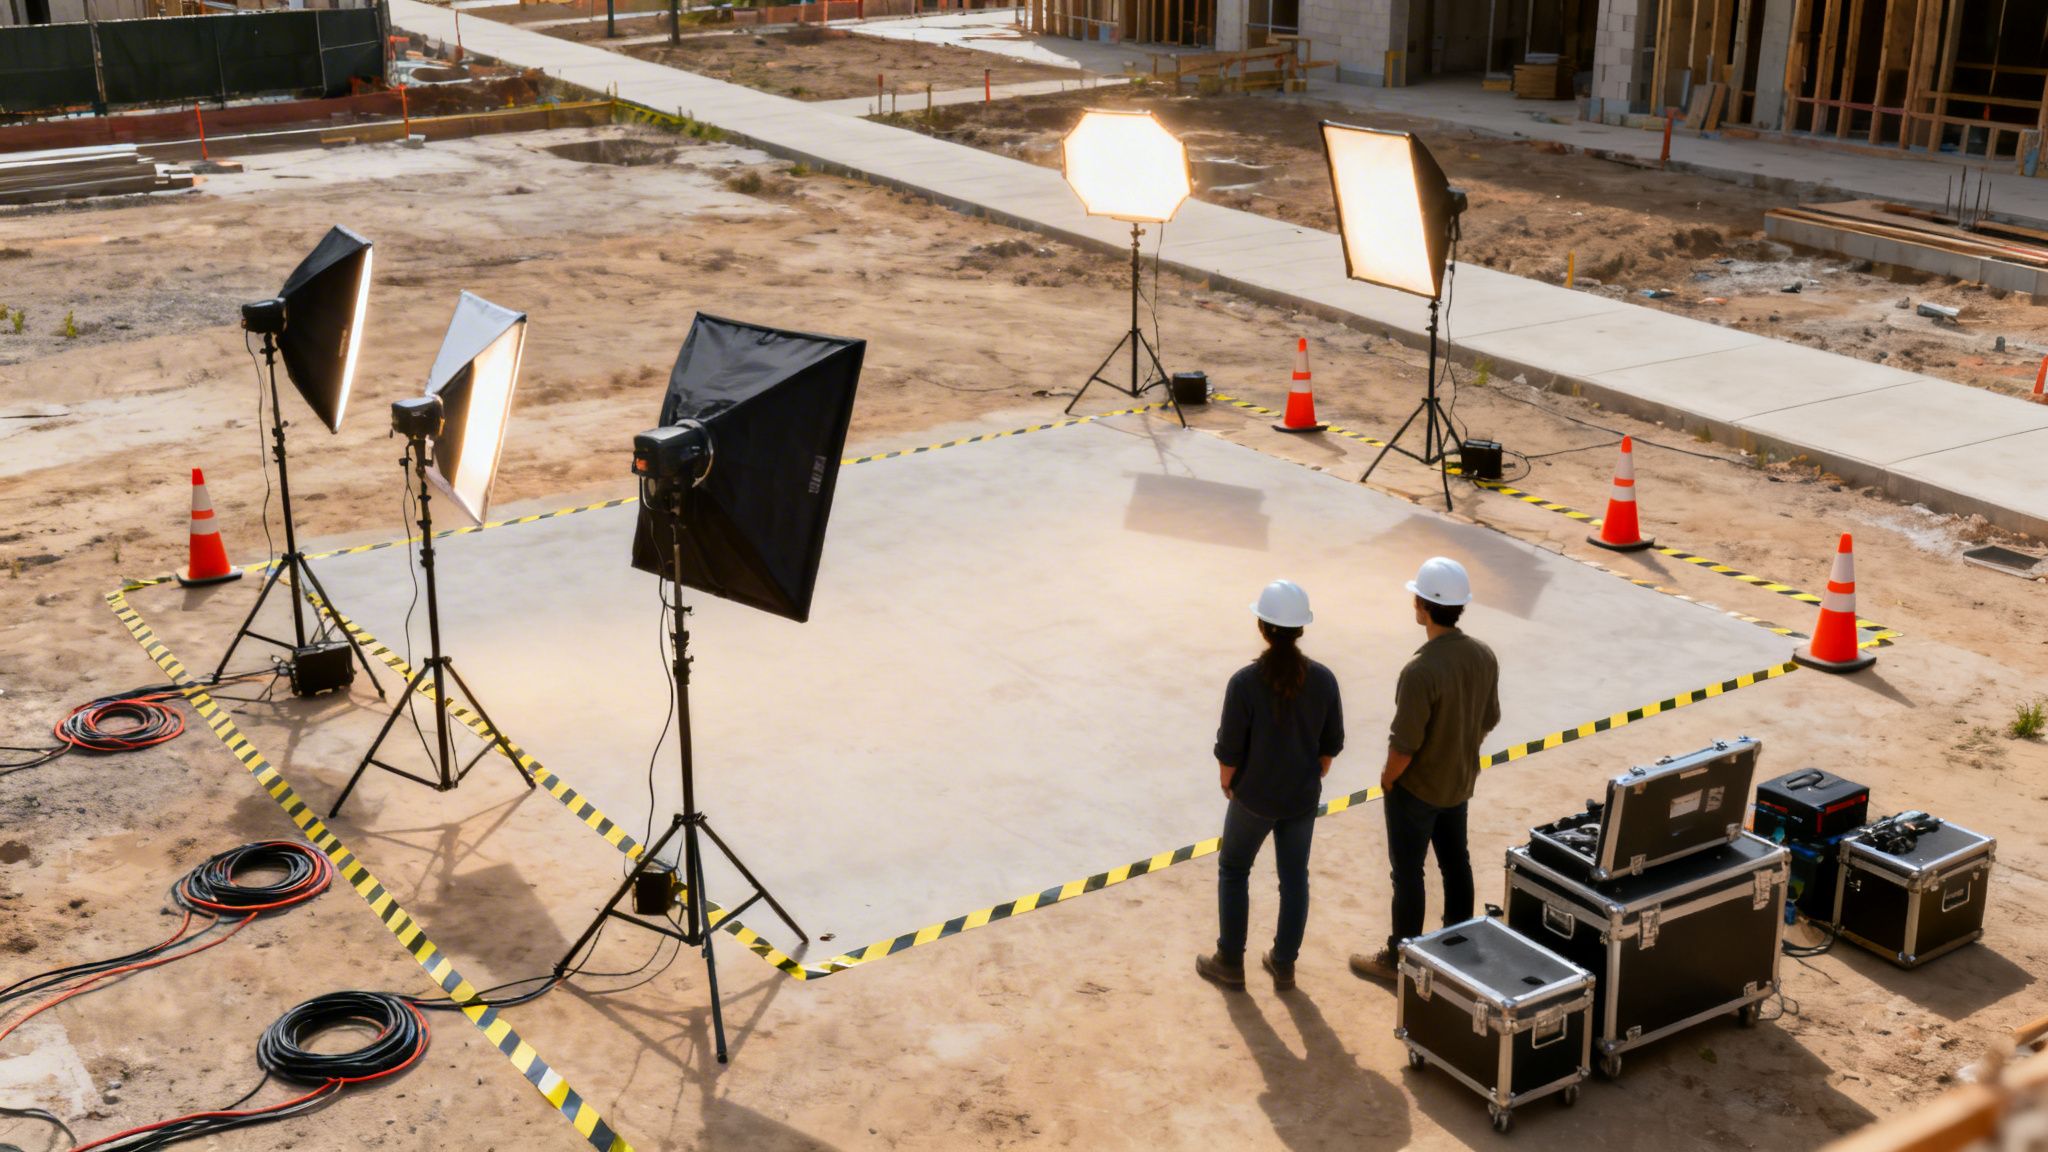
The Nuts and Bolts: Technical and Safety Logistics

With the space looking its best and everyone on the same page, we can turn to the final piece of the puzzle: the technical side of the shoot. A professional photography crew arrives with a surprising amount of gear, and thinking through its needs beforehand is what separates a smooth, efficient day from a frustrating one.
This is about much more than just finding an outlet. It's about understanding the specific power, space, and safety demands that high-end architectural photography requires. Getting these details sorted means my team can stay focused on creating incredible images, not troubleshooting logistics.
Powering the Vision
One of the first technical questions I’ll ask is about electrical access. Nothing brings a photoshoot to a screeching halt faster than a blown breaker. My team relies on powerful strobes and continuous lights that draw a significant amount of electricity—far more than a standard wall outlet can handle. These aren't just for brightness; they're essential for sculpting light, revealing texture, and guaranteeing perfect color.
More often than not, this means we need to find the building’s breaker panels. Simply knowing where they are and who has the key is a small detail that saves an immense amount of time. Having a facilities manager or on-site electrician available to help us safely tap into the necessary circuits is the gold standard, especially in large commercial buildings.
Don’t be surprised when your photographer asks for dedicated circuits. We often need to run multiple high-draw lights at once. Spreading them across separate circuits prevents us from tripping a breaker, which would shut down our entire setup and throw the timeline off track.
Creating Space for the Crew and Gear
Beyond power, a professional shoot requires a good bit of elbow room. We aren’t just bringing a camera on a tripod; we’re essentially setting up a mobile studio. This includes cases of gear, multiple light stands, large light modifiers, and a digital workstation for reviewing every image as it’s captured.
A clear, designated "staging area" is a lifesaver. This is our home base, where we can safely build our gear and set up the tech station. A space roughly 20x12 feet is a great rule of thumb, ideally close to the action but out of the frame. This keeps us from constantly shuffling equipment and allows us to work with precision.
Safety on Every Site
Safety is paramount and non-negotiable. This is especially true when we’re shooting on an active construction site or in a live industrial facility. A pre-shoot safety briefing isn’t just a formality; it’s essential for making sure my crew understands site-specific rules, potential hazards, and emergency procedures.
Clear communication here is everything.
- Spot the Hazards: Before we even arrive, do a walkthrough and identify any potential dangers. Think unfinished flooring, exposed wiring, overhead work, or forklift traffic.
- Confirm PPE: Let us know exactly what Personal Protective Equipment (PPE) is mandatory. We always have our own hard hats, steel-toed boots, and safety vests, but confirming your site's specific rules is crucial.
- Clear the Way: Ensure all walkways and access routes are completely clear of materials, tools, and debris. This is vital for our safety and for our ability to move heavy equipment carts around the site without issue.
Taking care of these technical and safety needs is a cornerstone of a well-prepared project. It protects everyone involved and creates the secure, predictable environment my team needs to produce exceptional work without compromise.
Collaborating on Shoot Day and Beyond
All the planning and prep work we’ve done comes together on shoot day, but your job isn’t quite finished. This is where our collaboration truly comes to life. Your presence on-site is what helps us transform a well-staged space into a dynamic, creative environment.
Think of it this way: a successful shoot is a fluid process. Having you there as the key decision-maker to approve compositions and make real-time adjustments is what turns a good shoot into a great one.
Navigating the On-Set Workflow
Shoot day is a carefully choreographed dance. While I’m dialed in on the lighting, angles, and composition, you become the keeper of the project’s story. Your most important job is simply to be the designated point person, ready to give immediate feedback and sign off on shots as we create them.
This back-and-forth is incredibly efficient. As I capture a key image, I’ll tether my camera to a high-resolution monitor so you can see exactly what I’m seeing. We can instantly confirm that it hits the mark we laid out in our plan.
- Review and Approve: We’ll move through our shot list, checking each hero image to ensure the angle highlights the right feature and the light brings out the best textures.
- Provide Context: You might spot a detail with a specific story behind it. Those little insights are gold—they help me capture the unique narrative of the space.
- Solve Problems Instantly: If a reflection is causing a distraction or an element looks out of place on camera, we can fix it right then and there. This avoids headaches in post-production or, worse, a costly reshoot.
Trust the process. My expertise lies in translating your project into a compelling visual language. Your role is to make sure that language speaks directly to your brand’s goals. It’s a true partnership.
Understanding Post-Production and Deliverables
Once we wrap on site, my work moves to the digital darkroom. This post-production phase is where the raw files are meticulously refined to achieve that polished, high-impact look you’re after. This isn't about altering reality; it’s about perfecting it.
Editing involves a lot of subtle but critical adjustments—correcting color casts, balancing brightness and contrast, and ensuring every vertical and horizontal line is perfectly straight. That last one is a non-negotiable hallmark of professional architectural photography. The timeline can vary depending on the scope of the project, but I’ll always give you a clear delivery estimate.
The return on this investment is significant. In a competitive market, professional images give you a serious edge. Listings with high-quality photos have been shown to spend 34 fewer days on the market, and edited pro photos can help deals close for $934 to $116,076 higher. While only 35% of agents use professionals, 68% of buyers say that great photos are the main reason they decide to visit a property.
Maximizing Your Investment with Image Licensing
The final piece of the puzzle is understanding how you can use your new collection of images. When you get the final files, you’re also getting a license that spells out their permitted use. This is a crucial part of our agreement that protects both of us.
Typically, a commercial license gives you broad rights to use the images for your own company’s marketing and promotion. This usually covers things like:
- Your website and social media
- Portfolios and marketing brochures
- Press releases and media outreach
- Award submissions and industry competitions
We’ll make sure the terms are crystal clear. For example, can a third party who also worked on the project—like a contractor or interior designer—use the photos? In most cases, they'll need to secure their own license directly from me. Clarifying this from the start prevents any confusion down the road and lets you use your powerful new assets with confidence.
To see how polished, professional images can shape a company's visual identity, you might find our guide to brand photography services helpful.
A Few Common Questions About Getting a Site Ready
Even after we’ve walked through the shot list and timeline, a few practical questions almost always come up. Over the years, I've found that architects, designers, and contractors often have the same "what ifs" on their minds. Let's clear those up now, because getting these details right is what separates a good shoot from a great one.
Think of this as the inside scoop—the little things that make a huge difference on the day and ensure we’re all working toward the same goal.
How Clean Does It Really Need to Be?
This is probably the most common question I get, and the answer is always: cleaner than you think. We’re not just talking about a quick tidy-up before a client walkthrough. We’re aiming for what I call "camera-ready," and it’s a whole different standard.
Modern high-resolution cameras, combined with the professional lighting I use to shape a space, are ruthlessly honest. They see everything. Every speck of dust on a countertop, every smudge on a window, every tiny scuff on a baseboard will pop out in the final image.
I always tell my clients to focus their cleaning crew’s attention on two main culprits:
- Glass and Windows: This is non-negotiable. Every window, mirror, shower door, and glass railing needs to be perfectly streak-free, inside and out.
- Reflective Surfaces: Polished concrete floors, glossy countertops, chrome fixtures, and lacquered cabinets will reflect light directly into the lens. They need to be wiped down immaculately just before we start shooting.
The bottom line is that the more pristine the site is when I arrive, the less time we have to spend on tedious digital cleanup later. That means you get more natural-looking images, and you get them faster.
Who’s in Charge of Moving Furniture?
As a rule, your team is responsible for all the heavy lifting. The space should be staged with all major furniture pieces—sofas, beds, conference tables—in their primary positions before my team and I arrive.
Of course, I’ll be making small adjustments on set. Nudging a chair a few inches to the left, turning a lamp to catch the light, or styling a few books on a shelf is all part of my process to perfect the composition. But my crew and I aren't movers. Our time and energy are focused on lighting, angles, and capturing the shot.
If your shot list calls for a space to be shown in multiple configurations—like a boardroom set for a meeting and then empty for an event—you’ll need to have people on-site dedicated to making those changes. Just let me know the plan ahead of time, and I can build my lighting and shooting schedule around it to keep things running smoothly.
What if We Get Bad Weather?
Weather is the one big variable nobody can control, so we plan for it from the very beginning. This is a conversation we'll have during our first planning call. Every professional photographer has an inclement weather policy, and we'll agree on one that works for your project.
If we're counting on sunshine for critical exterior shots and the forecast shows heavy rain or high winds, the standard approach is to reschedule for our backup date. We typically make that call 24-48 hours ahead of time to give everyone enough notice and avoid any fees.
But remember, "bad" weather isn't always bad for photos. A solid overcast sky can provide gorgeous, soft, diffused light that eliminates harsh shadows on building exteriors. Sometimes, it’s even better than a bright, sunny day. The key is to stay flexible and keep the lines of communication open.
How Far in Advance Should I Book the Photoshoot?
For a project of any significance, I’d recommend booking 4-6 weeks out. If you're planning for a shoot during a peak season like spring or fall, even more lead time is a good idea. That buffer isn't just about finding an open day on my calendar; it's about giving the project the time and attention it deserves.
This timeframe allows us to do things right:
- Work together to build a smart, strategic shot list that tells your project’s story.
- Scout the location to plan for ideal light and angles.
- Secure any site permits or provide necessary Certificates of Insurance (COI).
- Coordinate with your staging, cleaning, and landscaping teams so everyone is on the same page.
- Finalize access, security, and who needs to be on-site on shoot day.
Trying to rush this process almost always means cutting corners, and the final images will show it. Giving yourself plenty of time to prepare for a professional photoshoot is one of the best investments you can make in the project.
At Jimmy Clemmons Photographer, we bring an editorial eye and technical precision to every project, turning built environments into powerful brand assets. If you're ready to capture your project with clarity and purpose, visit our website to see our work and get in touch.
Published via the Outrank app